Spring Boot 2/Maven
Create Docker images for Spring/Maven
Spring Boot is quickly becoming a very popular choice for building Java back-end applications. Compared to traditional application servers,it is a bit different since it includes a servlet container in the final JAR file allowing for self-contained Java Archives (JAR files).
Codefresh can easily handle Spring Boot applications that are dockerized either in the traditional way or using multi-stage builds.
The example Java project
You can see the example project at https://github.com/codefresh-contrib/spring-boot-2-sample-app. The repository contains a Spring Boot 2 project built with Maven with the following goals:
mvn packagecreates a jar file that can be run on its own (exposes port 8080). It also runs unit tests.mvn verifyruns integration tests as well. The application is launched locally as part of the Maven lifecycle.
Once launched the application presents a simple message at localhost:8080 and also at the various /actuator/health endpoints. You can use the standard spring-boot:run command to run it locally (without Docker).
Spring Boot 2 and Docker (package only)
A Dockerfile is also provided at the same repository. It uses the base JRE image and just copies the JAR file inside the container.
Dockerfile.only-package
FROM java:8-jre-alpine

EXPOSE 8080

RUN mkdir /app
COPY target/*.jar /app/spring-boot-application.jar

ENTRYPOINT ["java","-Djava.security.egd=file:/dev/./urandom","-jar","/app/spring-boot-application.jar"]

HEALTHCHECK --interval=1m --timeout=3s CMD wget -q -T 3 -s http://localhost:8080/actuator/health/ || exit 1
This means that before building the Docker image, the compilation step (mvn package) is expected to be finished already. Therefore, in the codefresh.yml file we need at least two steps. The first one should prepare the JAR file and the second
one should create the Docker image.
Create a CI pipeline for Spring
The repository also contains a premade Codefresh YAML file that you can use as a starting point in your own Spring Boot 2 projects.
Here are the full contents of the file.
codefresh-package-only.yml
version: '1.0'
stages:
  - prepare
  - test
  - build
  - 'integration test'
steps:
  main_clone:
    title: Cloning main repository...
    stage: prepare
    type: git-clone
    repo: 'codefresh-contrib/spring-boot-2-sample-app'
    revision: master
    git: github
  run_unit_tests:
    title: Compile/Unit test
    stage: test
    image: 'maven:3.5.2-jdk-8-alpine'
    commands:
      - mvn -Dmaven.repo.local=/codefresh/volume/m2_repository package
  build_app_image:
    title: Building Docker Image
    type: build
    stage: build
    image_name: spring-boot-2-sample-app
    working_directory: ./
    tag: 'non-multi-stage'
    dockerfile: Dockerfile.only-package
  run_integration_tests:
    title: Integration test
    stage: 'integration test'
    image: maven:3.5.2-jdk-8-alpine
    commands:
     - mvn -Dmaven.repo.local=/codefresh/volume/m2_repository verify -Dserver.host=http://my-spring-app
    services:
      composition:
        my-spring-app:
          image: '${{build_app_image}}'
          ports:
            - 8080
      readiness:
        timeoutSeconds: 30
        periodSeconds: 15
        image: byrnedo/alpine-curl
        commands:
          - "curl http://my-spring-app:8080/"
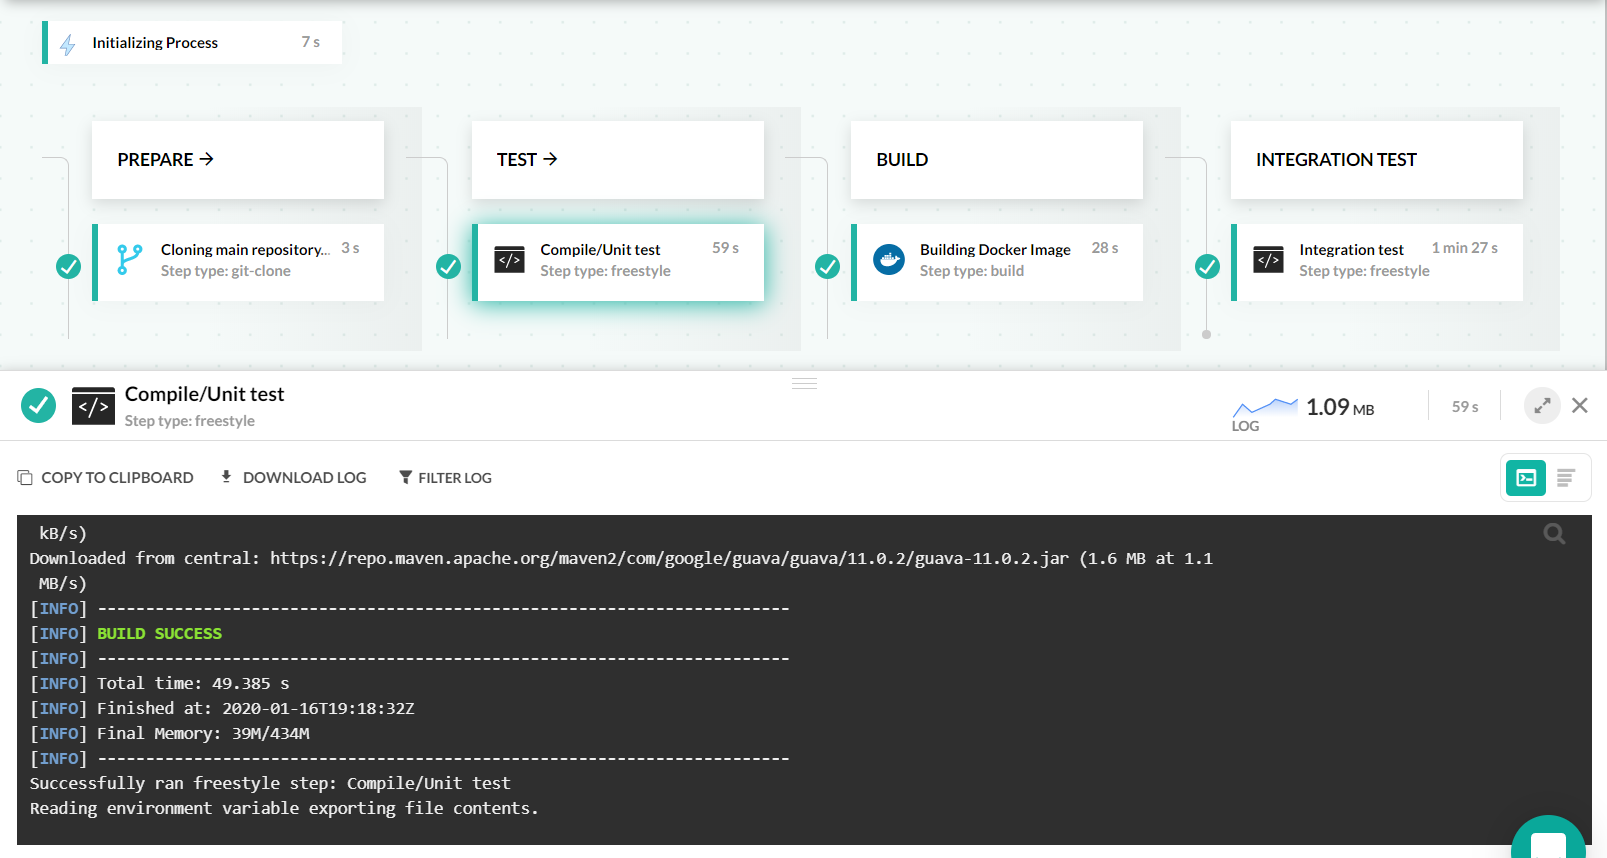
The pipeline starts by checking out the code using a git clone step. The next step is a freestyle one and packages the jar file. Next we have a build step that creates the docker image. Finally we have another freestyle step that uses service containers to run integration tests.
After checking out the code we use the standard Maven Docker image to compile the Spring Boot source code and create a JAR file. We also pass a parameter that changes the Maven cache location folder. The reason for this parameter is that the default Maven location is /root/.m2 which is defined as a volume (and thus discarded after each build).
Caching the Maven dependencies
Codefresh is smart enough that caches automatically for us the workspace of a build (/codefresh/volume). This works great for build tools that keep their cache in the project folder, but not for Maven/Gradle which keep their cache externally. By changing the location of the Maven repo on the project folder (the m2_repository name is arbitrary) we make sure that Codefresh will cache automatically the Maven libraries resulting in much faster builds.
The next step is a Docker build. We name our image spring-boot-2-sample-app and tag it with a string non-multi-stage but of course you can use any other tag name that you wish.
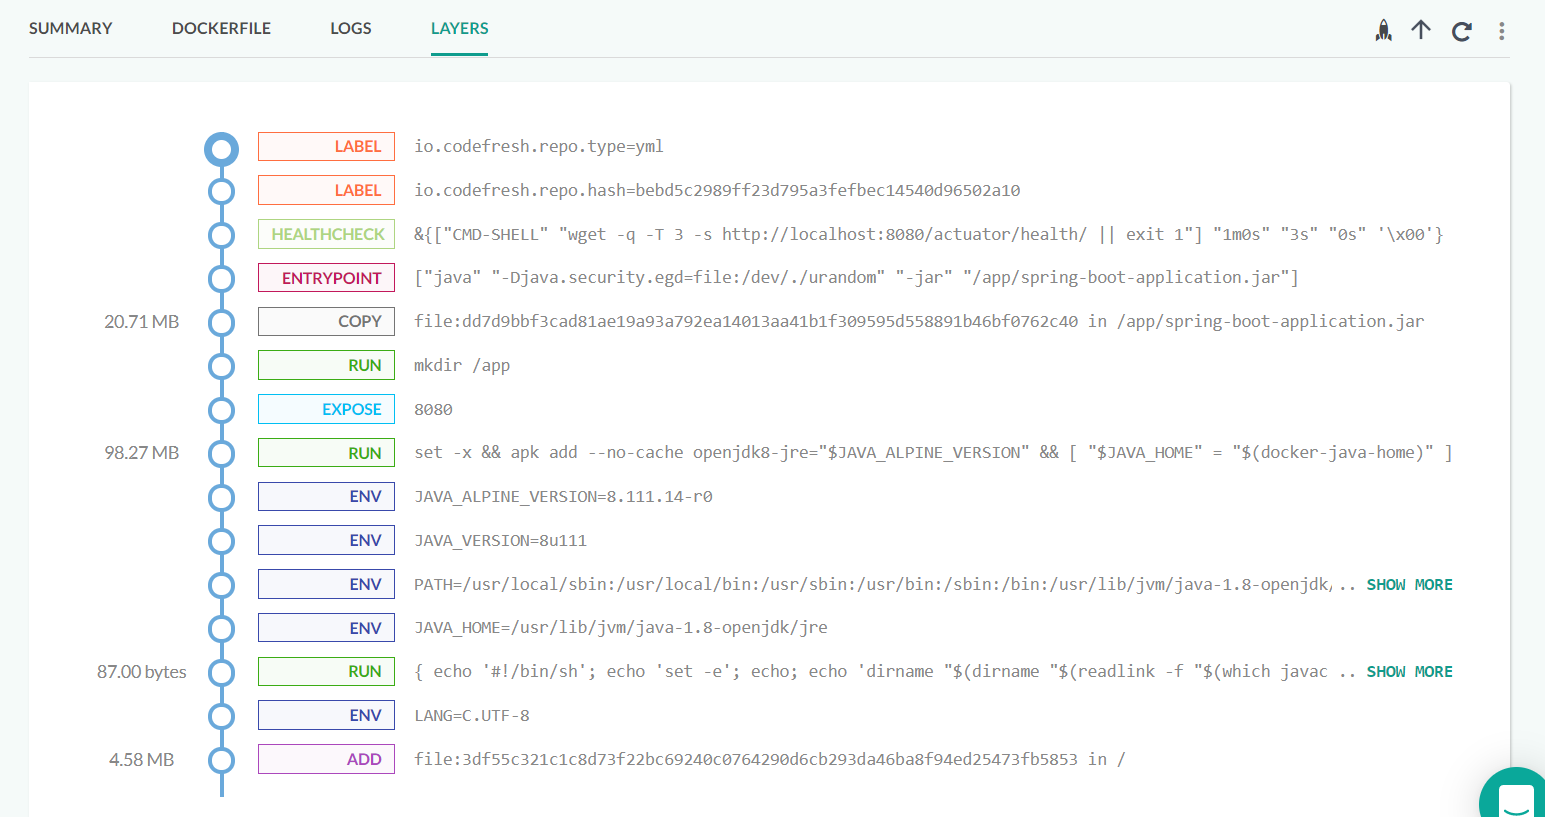
Once the pipeline is finished you will see the Spring Boot 2 Docker image your Docker image dashboard.
The last step is similar to the unit tests, but this time we run integration tests. We define again a custom cache folder so when you run the build you will see that Maven will automatically pick the cache from the previous step. All Codefresh steps in a pipeline run on the same workspace, so the build results from one step are visible to the next.
Notice that because the Maven lifecycle also executes the previous steps in a build, the
mvn verifycommand essentially will runmvn packageas well. In theory we could just have the Integration step in this pipeline on its own. That step would build the code, run unit and integration tests all in one stage. For demonstration purposes however, we include two steps so that you can see the correct usage of Maven cache.
Spring Boot 2 and Docker (multi-stage builds)
Docker added multi-stage builds at version 17.05. With multi-stage builds a Docker build can use one base image for compilation/packaging/unit tests and a different one that will hold the runtime of the application. This makes the final image more secure and smaller in size (as it does not contain any development/debugging tools).
In the case of Java, multistage builds allow for the compilation itself to happen during the build process, even though the final Docker image will not contain a full JDK.
Here is the multi-stage build definition:
Dockerfile
FROM maven:3.5.2-jdk-8-alpine AS MAVEN_TOOL_CHAIN
COPY pom.xml /tmp/
RUN mvn -B dependency:go-offline -f /tmp/pom.xml -s /usr/share/maven/ref/settings-docker.xml
COPY src /tmp/src/
WORKDIR /tmp/
RUN mvn -B -s /usr/share/maven/ref/settings-docker.xml package

FROM java:8-jre-alpine

EXPOSE 8080

RUN mkdir /app
COPY --from=MAVEN_TOOL_CHAIN /tmp/target/*.jar /app/spring-boot-application.jar

ENTRYPOINT ["java","-Djava.security.egd=file:/dev/./urandom","-jar","/app/spring-boot-application.jar"]
This docker build does the following:
- Starts from the standard Maven Docker image
- Copies only the
pom.xmlfile inside the container - Runs a mvn command to download all dependencies found in the
pom.xml - Copies the rest of the source code in the container
- Compiles the code and runs unit tests (with
mvn package) - Discards the Maven image with all the compiled classes/unit test results etc
- Starts again from the JRE image and copies only the JAR file created before
The order of the steps is tuned so that it takes advantage of the layer caching built-in to Docker.
If you change something in the source code Docker already has a layer with Maven dependencies so they
will not be re-downloaded again. Only if you change the pom.xml file itself, Docker will start again from the lowest layer.
Again, we define a custom location for the Maven cache (using the settings-docker.xml file). This way the Maven dependencies are placed inside the container and they will be cached automatically with the respective layer (Read more about this technique at the official documentation.
Create a CI pipeline for Spring (multi-stage Docker builds)
Because in multi-stage builds Docker itself handles most of the build process, moving the project to Codefresh is straightforward. We just need a single step that creates the Docker image after checking out the code. The integration test step is the same as before.
codefresh.yml
version: '1.0'
stages:
  - prepare
  - test
  - build
  - 'integration test'
steps:
  main_clone:
    title: Cloning main repository...
    stage: prepare
    type: git-clone
    repo: 'codefresh-contrib/spring-boot-2-sample-app'
    revision: master
    git: github
  build_app_image:
    title: Building Docker Image
    type: build
    stage: build
    image_name: spring-boot-2-sample-app
    working_directory: ./
    tag: 'multi-stage'
    dockerfile: Dockerfile
  run_integration_tests:
    title: Integration test
    stage: 'integration test'
    image: maven:3.5.2-jdk-8-alpine
    commands:
     - mvn -Dmaven.repo.local=/codefresh/volume/m2_repository verify -Dserver.host=http://my-spring-app
    services:
      composition:
        my-spring-app:
          image: '${{build_app_image}}'
          ports:
            - 8080
      readiness:
        timeoutSeconds: 30
        periodSeconds: 15
        image: byrnedo/alpine-curl
        commands:
          - "curl http://my-spring-app:8080/"
This will compile/test/package the Spring Boot application and create a Docker image. Codefresh is automatically caching Docker layers (it uses the Docker image of a previous build as a cache for the next) and therefore builds will become much faster after the first one finishes.
Related articles
Gradle example
Codefresh YAML for pipeline definitions
Steps in pipelines
Creating pipelines
How Codefresh pipelines work

