Common configuration for SSO providers
Set up team sync, default SSO provider for accounts
Once you create an SSO provider account in Codefresh, you can:
- Automatically or manually sync the teams created in your Identity Provider (IdP) with Codefresh
- Set a default SSO provider for your account
- Override the account-level SSO provider for specific users
Syncing teams in IdPs with Codefresh
Team sync synchronizes all users and teams provisioned in the SSO provider with Codefresh.
In Codefresh you can sync users and teams either automatically or manually:
- Automatically, in the Codefresh UI if the option is supported for your SSO provider
- Manually, either on-demand through the Codefresh CLI, or through a Codefresh pipeline
Team-sync support for SSO providers
The table lists the SSO providers supported and the team-sync option available for them.
| Protocol | SSO provider | Team-sync | |
|---|---|---|---|
| Automated | Manual | ||
| OIDC | Auth0 | - | - |
| Azure | ✅ | ✅ | |
| - | ✅ | ||
| Keycloak | - | ✅ | |
| Okta | ✅ | ✅ | |
| OneLogin | - | ✅ | |
| LDAP | - | ✅ | |
| SAML | GSuite | ✅ | ✅ |
| JumpCloud | - | - | |
| Okta | ✅ | ✅ | |
| OneLogin | - | - | |
| PingID | - | - |
Automated team-sync in Codefresh UI
The automated team-sync option is only available in the Codefresh UI.
Flow for automated team-sync
- Codefresh syncs users and groups through the SSO API, and grants SSO permissions for each invited user during sync.
- You set up the SSO provider in Codefresh, and select one or both options for automated team-sync:
- If only the Auto-sync users and teams option is selected, Codefresh automatically triggers a sync at the interval defined. On first-time sign-in, the invited user needs to enter additional information such as First Name, Last Name, Country.
- If the Activate user option is also selected (when available), on first-time sign-in, the invited user is automatically authenticated without having to enter additional information.
Manual team-sync via CLI
Manually synchronize users and teams provisioned in your SSO provider account, on-demand, through the Codefresh CLI with the synchronize teams command.
NOTE
Make sure that there are no domain restrictions on the email address.
As an example, you can sync your Azure teams with the CLI:
codefresh synchronize teams <my-client-name> -t azure
where:
<my-client-name> is the Client Name/Assertion URL/Callback URL that is automatically generated by Codefresh when you save the SSO configuration for your provider.
Manual team-sync with Codefresh pipelines
As an alternative to manually syncing teams on demand via the Codefresh CLI, you can manually sync teams using Codefresh pipelines.
NOTE
Make sure that there are no domain restrictions on the email address.
A pipeline makes it possible to run team-sync periodically as a job. You can use the CLI as a freestyle step, as in the example below. You can create a Git repository with a codefresh.yml file with the following content:
version: '1.0'
steps:
  syncMyTeams:
    title: syncTeams
    image: codefresh/cli
    commands:
      - 'codefresh synchronize teams my-client-name -t azure'
To fully automate the pipeline, you can set a Csron trigger for it. Depending on how you set up your Cron trigger, you can synchronize your teams every day/week/hour.
Sync GitHub organization teams to Codefresh
As an admin, you may want to sync your GitHub Organization Teams with your Codefresh account. At the same time, you do not want to set up an SSO provider and have the users use any login provider they choose.
The Personal Access Token (PAT) from a user will sync ALL Organizations and ALL Teams to which the user has access. It is recommended to use a “machine” account to access the one organization you need.
- Create a PAT that has access to read organizations and teams
-
Install and configure the Codefresh CLI
codefresh synchronize teams github -t github --tk $GHTOKEN - The sync will invite all users except for those that have private email settings turned on.
Once the initial sync happens, you can set up a cron trigger pipeline to run the command on a schedule.
Set a default SSO provider for account
If you have multiple SSO providers, you can set one of them as the default provider for your account. Setting a default provider assigns the selected SSO provider automatically to all new users in the account. The link in the email invitation takes them directly to the login page of that SSO provider.
- In the Codefresh UI, on the toolbar, click the Settings icon.
- From the sidebar, select Single Sign-On.
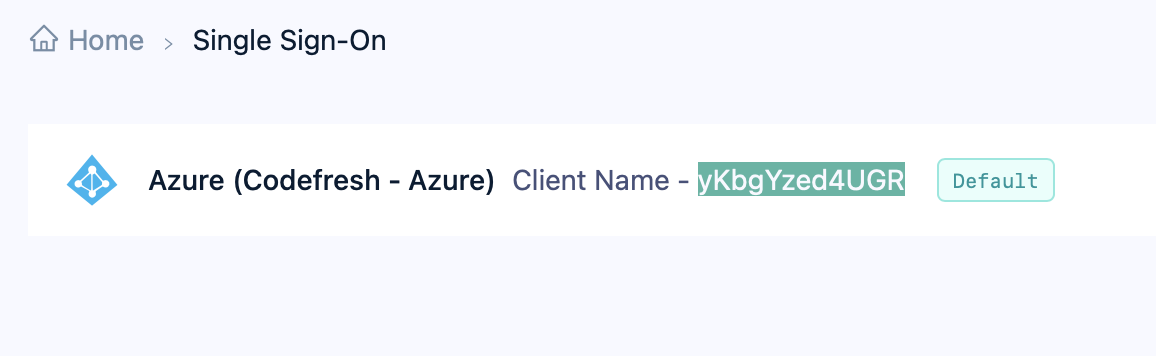
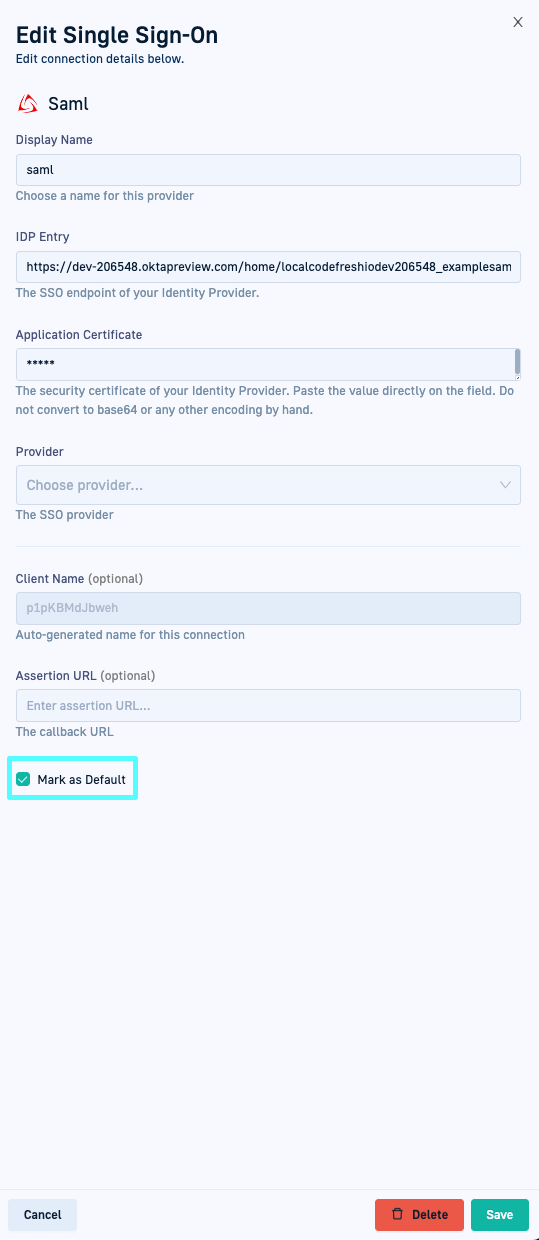
- From the list, select the SSO account to set as default and click the Edit icon on the right.
- Scroll down and select Set as default. The Single Sign-on page shows the SSO provider tagged as the default.

Select SSO provider for individual users
You can override the default SSO provider if set for the account, with a different SSO provider for specific users if so required.
-
New users
If you have an SSO provider selected as the default, that provider is automatically assigned to new users, added either manually or via team synchronization. You can change the SSO provider later. -
Existing users
SSO login is not configured by default for existing users. You must explicitly select the SSO provider for existing users.
If SSO login is already configured for an existing user, and you add a new identity provider, to change the SSO login to the new provider, you must select the new provider for the user.
How to
- In the Codefresh UI, on the toolbar, click the Settings icon.
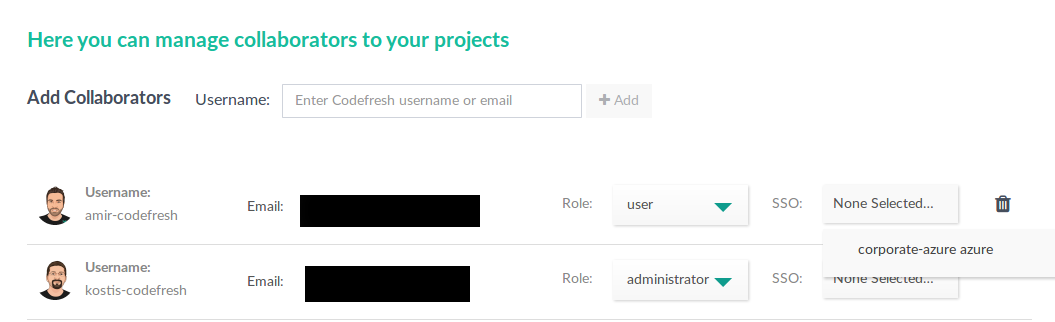
- From the sidebar, select Users & Teams.
- For the user, select the SSO provider from the SSO list.
Related articles
Setting up OIDC Federated SSO
Setting up SAML2 Federated SSO
LDAP Single Sign-On (SSO)