Setting up SAML2 Federated SSO
SAML2 Federated Single Sign-On (SSO) setup
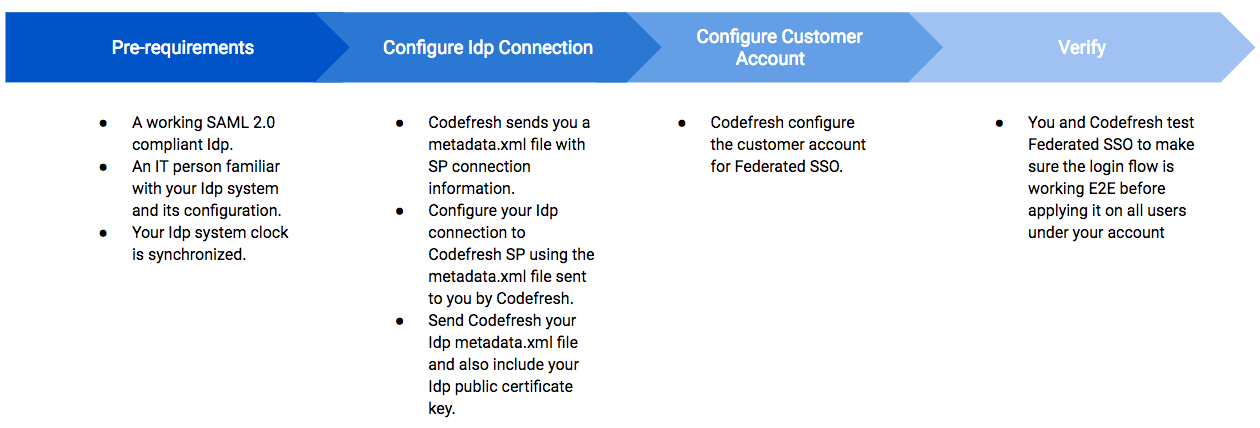
As Identity Providers (IdPs) come in all shapes and sizes, this topic discusses in general what you must do to configure Federated SSO for SAML. As you will see in the description below, the person in your organization responsible for managing your IdP will need to interact with Codefresh support to successfully set up a trust between your IdP and Codefresh as an SP.
Before you set up Federated SSO
- Have your account set up with Codefresh enterprise plan.
- Ensure you have a working SAML 2.0 compliant identity provider (IdP).
- Identify someone in your organization who is familiar with configuring and managing your organization’s IdP.
- Ensure that your IdP’s system clock is synchronized with a reliable time source. If it’s not, tokens generated will be unusable and SSO will fail.
Summary of Federated SSO setup
SAML attributes
Codefresh expects the following user attributes to be passed through SAML between your IdP and Codefresh SP:
- User email address
- User first name
- User last name
- User full name
- User unique ID that isn’t subject to change in your identity management environment
How does the connection process work?
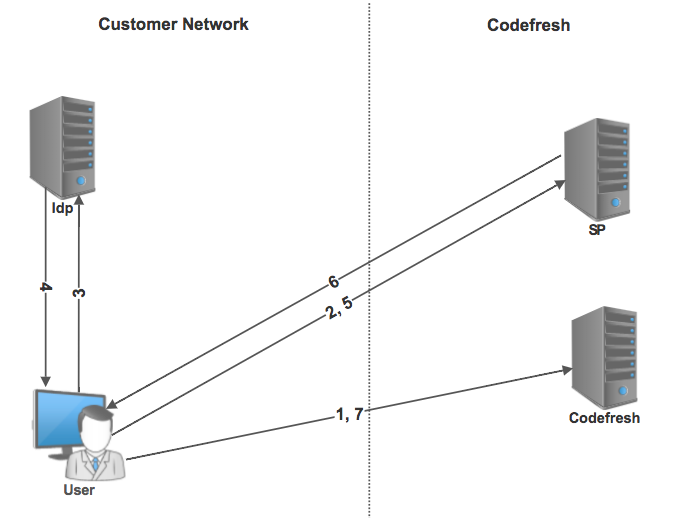
Once Federated SSO has been configured, the process works as follows:
NOTE
Steps 2 to 7 occur in the background and are transparent to the user.
- A user logs in to Codefresh and enters the email address.
- The user is redirected to the Codefresh Service Provider (SP) to initiate SSO.
- The user’s browser is then redirected to the customer IdP.
- Once authenticated by the corporate side, a SAML token is sent to the user’s browser.
- The SAML assertion is then forwarded to Codefresh SP.
- If you are a valid Codefresh user for this SSO connection, an SSO token is returned to the user’s browser.
- The user’s browser then returns a token to Codefresh and access is granted for your account.
SAML SSO configuration in Codefresh
Here’s what you need to do to configure SSO via SAML in Codefresh:
- Configure SSO settings for the IdP in Codefresh:
This generally includes defining settings both in Codefresh and in the IdP.
Codefresh supports SAML SSO for the following:- JumpCloud
- Okta
- OneLogin
- Assertion URL
The Assertion URL which is the Service Provider SSO endpoint, also referred to as the Callback URL or Client ID, is generated after you create the integration in Codefresh. - Provider
Currently, we support GSuite and Okta for SAML. If you are using a different provider, leave this field empty.
NOTE
These settings are for the SaaS version of Codefresh. For an on-premises setup, use the URLs that match your installation.
-
Test integration with the IdP:
NOTE
Before enabling SSO for users, you MUST make sure that it is working for the test user. If SSO is enabled for a user, Codefresh blocks logins through other IDPs for this user and only the enabled SSO is allowed. If the selected SSO method does not work for some reason, the user will be locked out of Codefresh.- In the Codefresh UI, on the toolbar, click the Settings icon and then select Account Settings.
- From the sidebar, below Access & Collaboration, select Users & Teams.
- Add an active user to be used for testing. We recommend you use your own user.
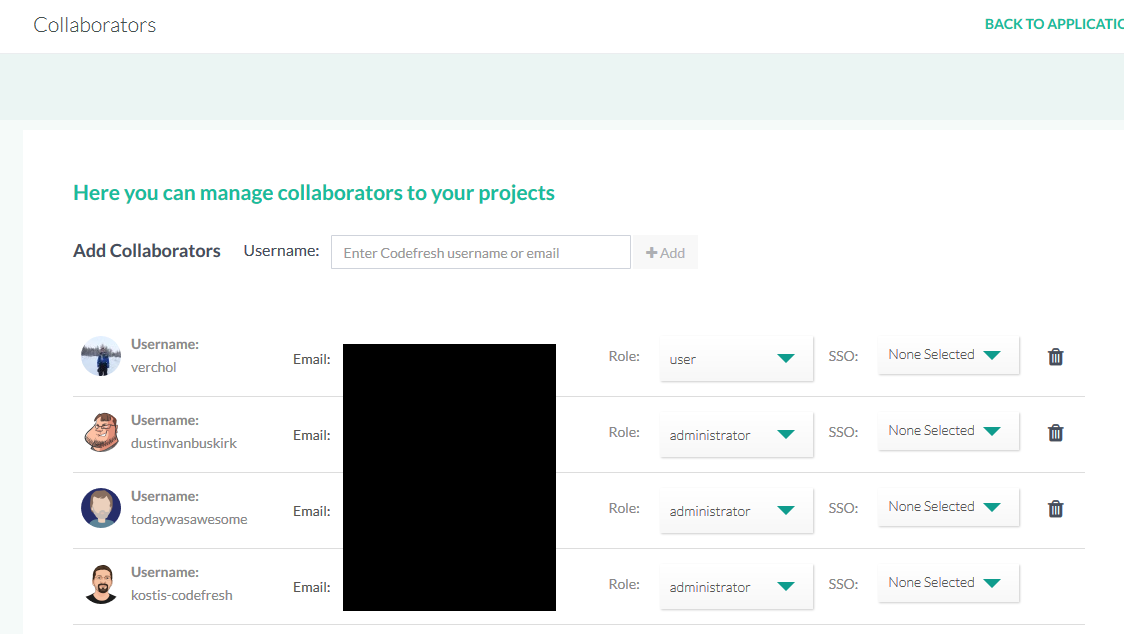
- Change Login method by selecting your Auth provider from the SSO drop-down.
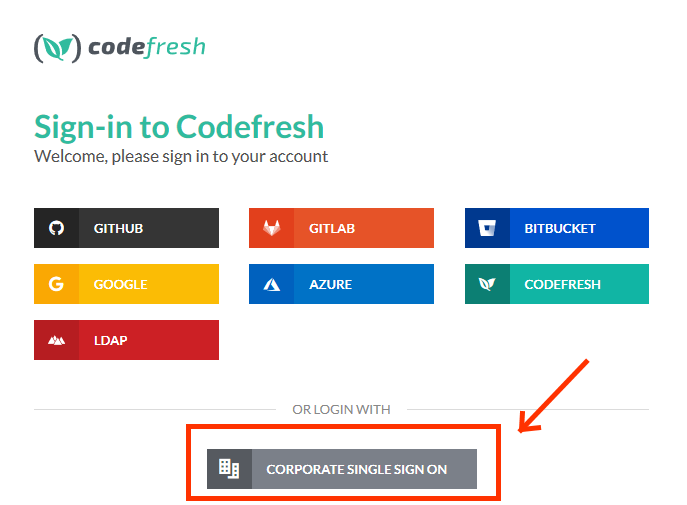
- Keep the current browser session open, and log in via Corporate SSO in an incognito tab (or another browser).
- (Optional) Set a default SSO provider for account
You can select an IdP as the default SSO provider for a Codefresh account. This means that all the new users added to that account will automatically use the selected IdP for signin. - (Optional) Select SSO method for individual users
You can also select if needed, a different SSO provider for every user or for specific users.
NOTE
Codefresh has an internal cache for SSO configuration, and it can take up to five minutes for your changes to take effect.
Related articles
Federated Single Sign-On (SSO) overview
Setting up OIDC Federated SSO


