Adding users and teams
Add users and teams to Codefresh accounts
Once you have created a Codefresh account, you can add any number of users to collaborate on repositories, entities, and processes.
For Codefresh on-premises, see On-premises account & user setup.
You can then create teams in Codefresh to group users who share a common denominator, such as the same permissions, access to the same functionality, or roles. Teams make it easy for administrators to both define and manage items shared by multiple users in an organization.
Users in Codefresh
Adding a user to an account requires assigning a role to define access to account resources, and optionally, selecting an SSO provider for the user:
- Role: Defines the user’s access level to the resources in the account.
- User: The default. With this role, users can work with repositories and entities, but cannot change configuration settings.
- Administrator: With this role, users have full access to accounts, and can change all settings, so make sure that they are trusted colleagues.
For guidelines on access control, see Access control for pipelines and Configuring access control for GitOps.
- SSO: By default, SSO is not enabled for users. If required, explicitly select the SSO provider. For an overview of SSO, see About Federated Single Sign-on.
Add a user to a Codefresh account
- In the Codefresh UI, on the toolbar, click the Settings icon and then select Account Settings.
- From the sidebar select Users & Teams.
- Select Users, and then select + [Add User].
- Type the User’s email address, and click Invite. The user receives an email invitation, and in the Users list, the username is set to Pending, and status to Resend.
- From the Role dropdown, select either User or Administrator.
- If SSO is configured for the account, Select SSO provider.
Manage users in a Codefresh account
Once you add a user to your Codefresh account, you can do the following to manage that user:
- Resend invitations that are pending acceptance: Select Resend.
- Edit the user’s email address: Select Edit.
- Change the role: From the Role dropdown, select the new role.
- Change SSO provider: From the SSO dropdown, select the new SSO provider.
- Remove the user account: Select Delete.
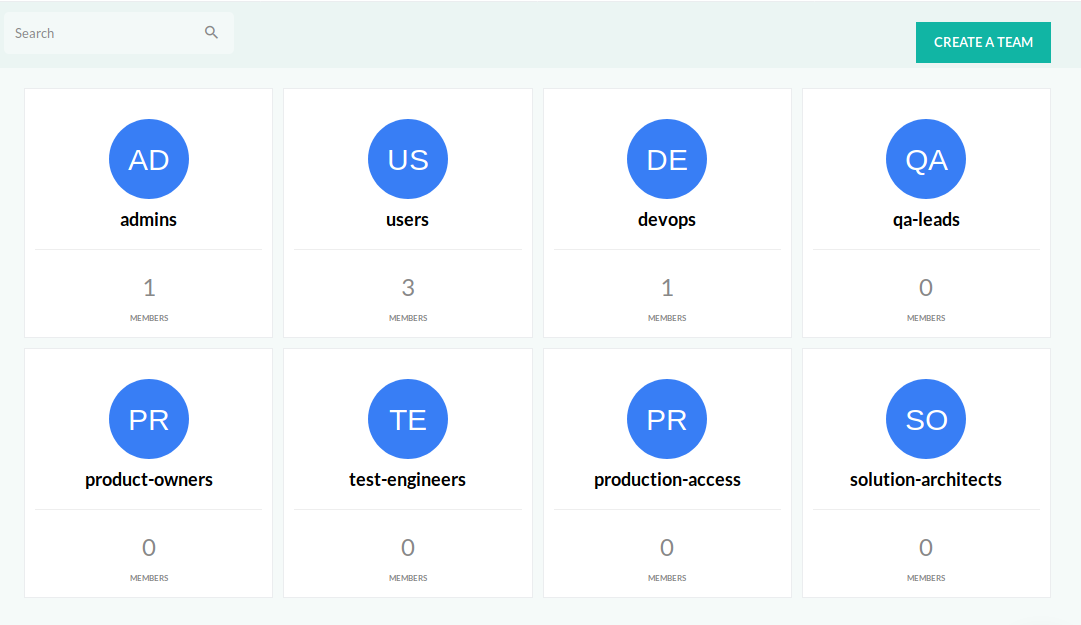
Teams in Codefresh
Teams are users who share the same permissions, roles, or requirements defined according to company processes. Teams allow you to enforce access control through ABAC (Attribute Based Access Control).
By default, there are two teams:
- Users
- Admins with users invited as collaborators
NOTE
Only Enterprise customers can add new teams. Other Codefresh plans can only use the predefined Users and Admin teams. Contact us to upgrade to an Enterprise plan.
Automatically creating projects for teams
As part of the global pipeline settings for an account, when creating a team, you can also automatically create a project and a project tag with the same name as that of the team. Enabling auto-create projects for teams (disabled by default), simplifies permissions setup for pipelines and projects, as it also creates a Read rule for the project. See Auto-create projects for teams.
Create a team in Codefresh
Create a team in Codefresh and then assign users to the team. You can assign the same user to multiple teams, as in most companies, users have overlapping roles.
- In the Codefresh UI, on the toolbar, click the Settings icon and then select User Management.
- From the sidebar, select Users & Teams.
- Select Teams, and then select Create a Team.
- Enter the Team Name.
NOTE
The team name can include only lower-case alphanumeric characters and hyphens, without spaces.
See the screenshot below for some sample team names.
Assign a user to a team
- To assign users to the team, do the following:
- Hover over the team name and click the Settings icon.
- Click Invite to team, type the email address of the user to invite, and then click Add.
- To change the name of the team, click Edit and type the new name.
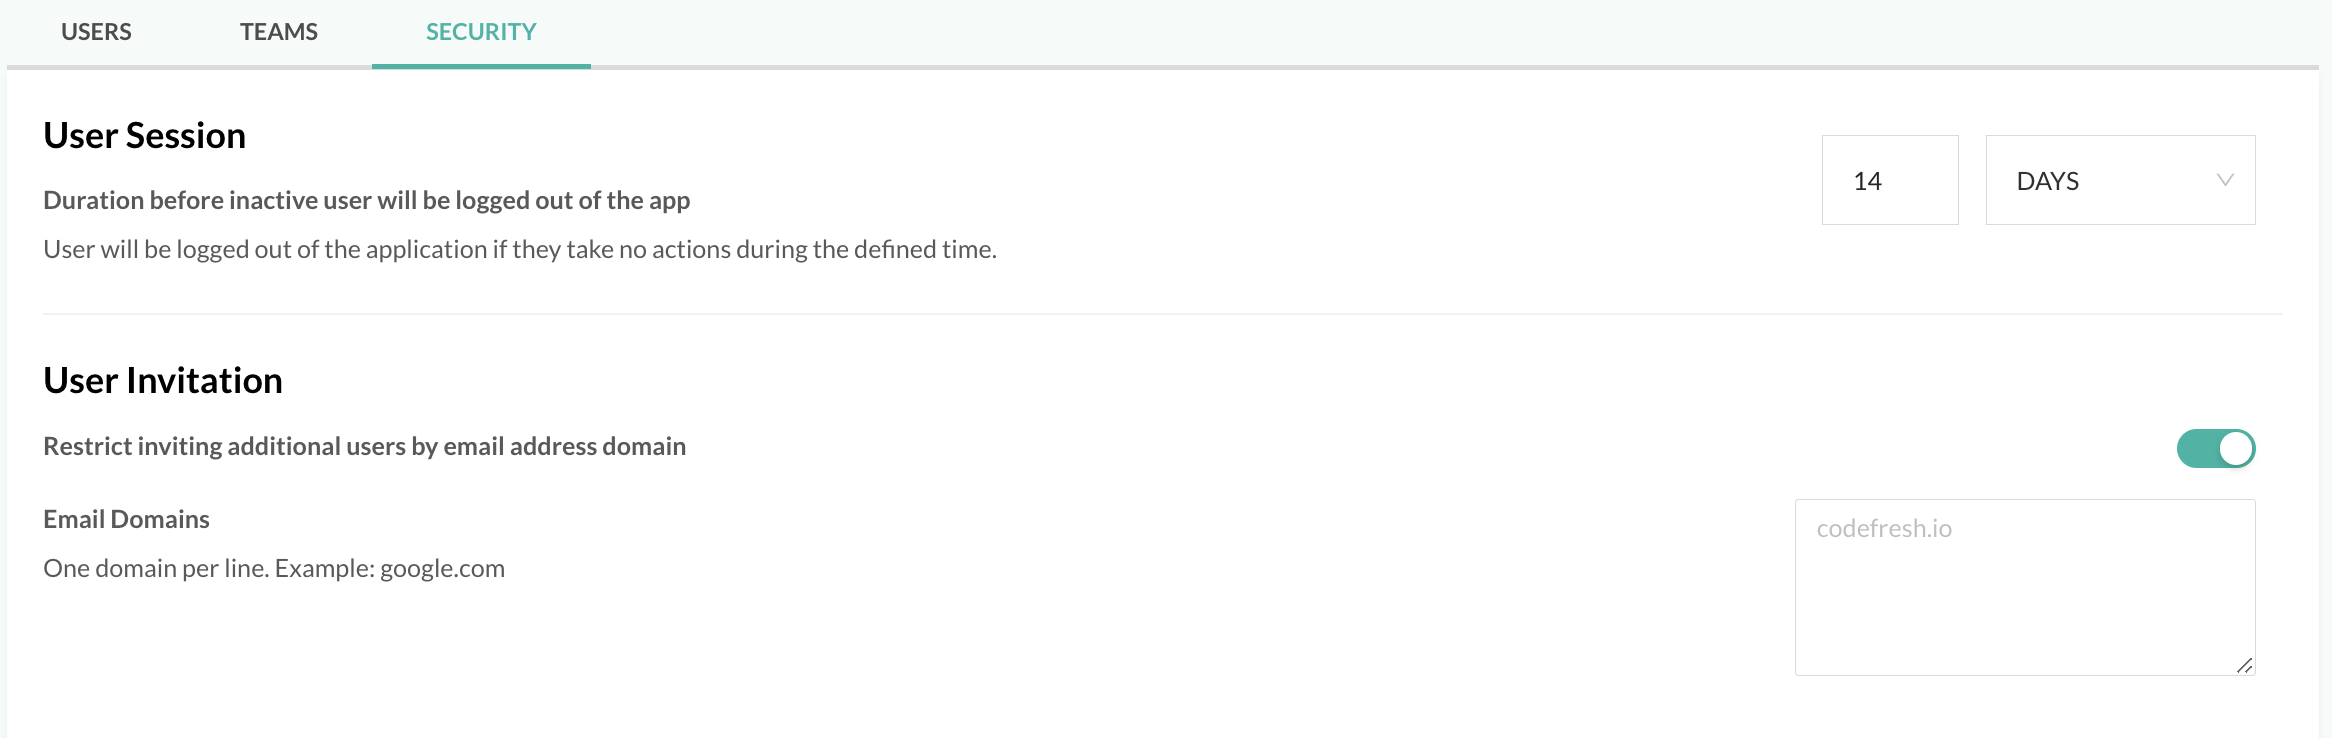
Define session timeouts and domain restrictions for user accounts
As an administrator, you can optionally define session timeouts to automatically log out users who have been inactive for the specified duration, and restrict invitations to specific email domains.
NOTE
The maximum duration for inactivity is 30 days. Inactive users are warned 15 minutes before they are logged out.
- In the Codefresh UI, on the toolbar, click the Settings icon, and then select Account Settings.
- From the sidebar, select Users & Teams.
- Select Security.
- For User Session, add the timeout duration in minutes/hours/days.
- To restrict invitations to specific email domains, below User Invitations, turn on Restrict inviting additional users.. and then in the Email domains, type in the domains to allow, one per line.
Troubleshoot user invites
- For your security and to ensure a smooth process, it’s crucial that the email account you’re logging in with is the same as the email address used for the invite.
- Log out of any previous sessions with the relevant identity provider and, if necessary, try a different browser or a private/incognito window.
- If you can log in but need help finding the inviting account, your user may be under multiple accounts. If this is the case, you can switch between available accounts via the user menu drop-down in the upper right-hand corner.
- If you are prompted to create an organization, you either logged in before you were invited to the account or logged in with a different email address than the invite.
- Finish the account setup by entering a unique organization name (this creates a personal account).
- Once logged in, click your username on the top right and see if you have access to the invited account.
- If this issue persists, please know that our support team is here for you. Contact them with as many details as you have, and they will assist you promptly.
Related articles
Single sign-on
Configuring access control for GitOps
Setting up OAuth authentication for Git providers
Configuring access control for pipelines