Deploy with Pulumi
Use Pulumi in a Codefresh pipeline with Docker
Pulumi is a platform for Infrastructure as Code. It works like Terraform but allows you to use a proper programming language (TypeScript, Python, Go) to describe your infrastructure (instead of a configuration language).
You can use Pulumi to deploy to Kubernetes or any other supported cloud platform. Because Pulumi itself is already offered in a Docker container, it is very easy to run Pulumi in a Codefresh pipeline.
The example Pulumi project
You can see the example project at https://github.com/codefresh-contrib/pulumi-sample-app. The repository contains a simple Pulumi stack based on Kubernetes and TypeScript.
You can play with it locally after installing the pulumi executable.
Prerequisites
You need to create a Codefresh account and a Pulumi account first. Then you need to create a Pulumi token which will allows Codefresh to communicate with Pulumi.
Add a Kubernetes cluster in your Codefresh account from any cloud provider.
Codefresh automatically creates a kubeconfig in any freestyle step with all your clusters. This is the same way that Pulumi communicated with Kubernetes, so the integration between Codefresh and Pulumi is ready out of the box.
Create a stack in Pulumi or use the one provided in the example.
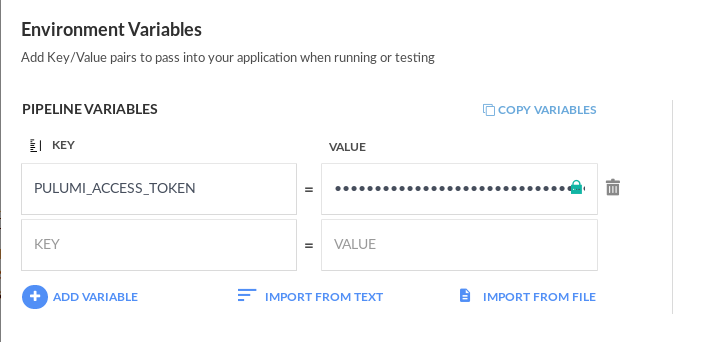
Finally add you Pulumi token as a pipeline variable called PULUMI_ACCESS_TOKEN. All freestyle steps have automatic access to all pipeline variables, and Pulumi will search for a token by default with this name when logging in.
Create a CI/CD pipeline for Pulumi
Here is the whole pipeline:
codefresh.yml
version: '1.0'
stages:
- prepare
- build
- deploy
steps:
main_clone:
title: Cloning main repository...
type: git-clone
repo: '${{CF_REPO_OWNER}}/${{CF_REPO_NAME}}'
revision: '${{CF_REVISION}}'
stage: prepare
git: github-1
BuildProject:
title: Build project
stage: build
image: pulumi/pulumi
commands:
- yarn install
SelectMyCluster:
title: Select K8s cluster
stage: deploy
image: codefresh/kubectl:1.13.3
commands:
- kubectl config get-contexts
- kubectl config use-context "kostis-demo@FirstKubernetes"
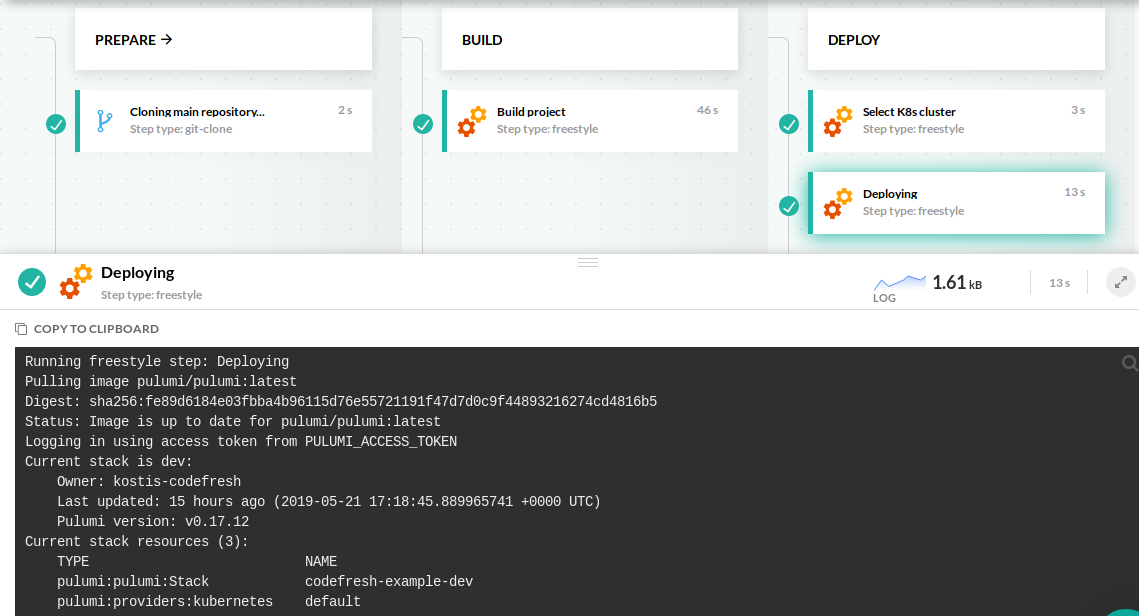
RunPulumi:
title: Deploying
stage: deploy
image: pulumi/pulumi
commands:
- pulumi stack select dev --non-interactive
- pulumi stack --non-interactive
- pulumi up --non-interactiveThis pipeline does the following:
- Clones the source code through a Git clone step.
- Runs
yarn installto download dependencies. In this example we use TypeScript, but Go and Python would work as well (or any other language supported by Pulumi). - Chooses the cluster that will be used for deployments, if you have more than one. Use your own cluster name as seen in the Kubernetes dashboard of Codefresh.
- Runs
pulumi upwith the same target cluster.
The pipeline needs a single environment variable that holds the content of your Pulumi Token.
Run the pipeline and see your deployment succeed.
Handling Pull requests
You can easily use the same pipeline or a different one for pull requests. In this case replace the pulumi up command with pulumi preview. Even better you can add an approval step to allows humans to inspect the pipeline first.
Related articles
CD pipeline examples
Codefresh YAML for pipeline definitions
Creating pipelines
How Codefresh pipelines work