Working with Docker registries
Push, pull, and tag Docker images in Codefresh pipelines
Codefresh contains first-class Docker registry support. This means that you don’t need to manually write docker login and docker pull/push commands within pipelines. You can use declarative YAML, and all credentials are configured in a central location once.
Viewing Docker images
To see all images from all connected registries:
- In the Codefresh UI, from Artifacts in the sidebar, select Images.
Each image displays basic details such as the Git branch, commit message, hash that created it, creation date, as well as all tags.
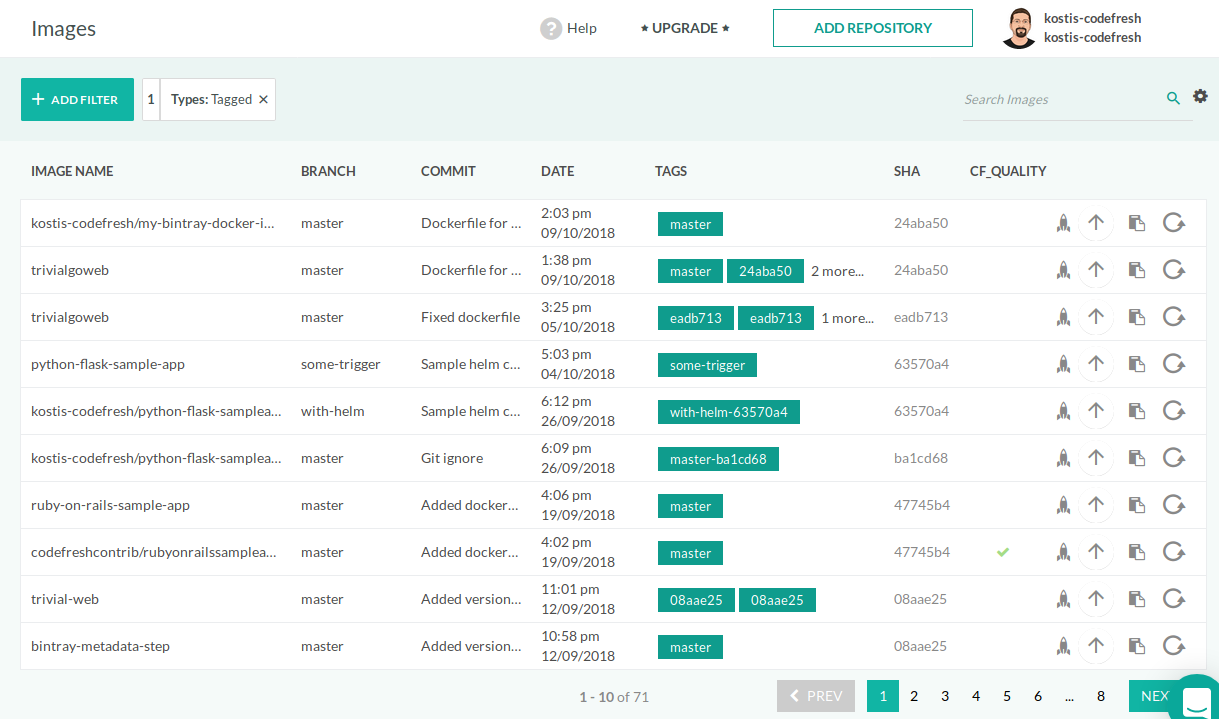
- To view image metadata, click on the image. For details, see Docker image metadata.
Filters for Docker images
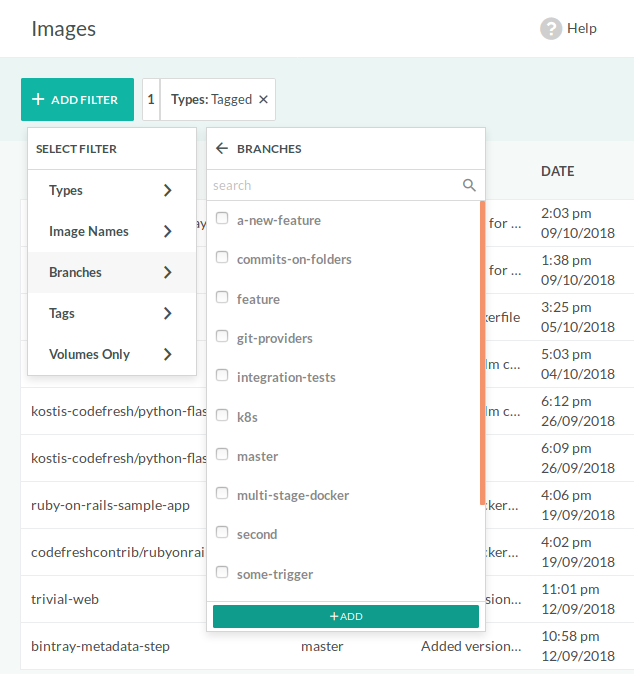
The top left of the Images page has several filters that allow you to search for a specific subset of Docker images.
Filters include:
- Tagged/untagged images
- Base image name
- Git branch
- Tag
- Pipeline volumes
Multiple filters work in an AND manner.
Actions for Docker images
On the right are the actions available foreach Docker image.
You can:
- Launch a Docker image as a test environment
- Promote a Docker image (explained in the following sections)
- Pull the image locally on your workstation with different commands
- Re-run the pipeline that created the image
Pulling Docker images
Pulling Docker images in Codefresh is completely automatic. You only need to mention a Docker image by name, and Codefresh automatically pulls it for you and uses it in a pipeline.
Pulling public images
To pull a public image from Docker Hub or other public registries:
- Specify the name of the image and tag that you want to use.
For example:
CollectAllMyDeps:
  title: Install dependencies
  image: python:3.6.4-alpine3.6
  commands:
    - pip install .
This freestyle step pulls the image python:3.6.4-alpine3.6 from Docker Hub, and then runs the command pip install . inside it.
You can see the images that get pulled in the Codefresh pipeline log.
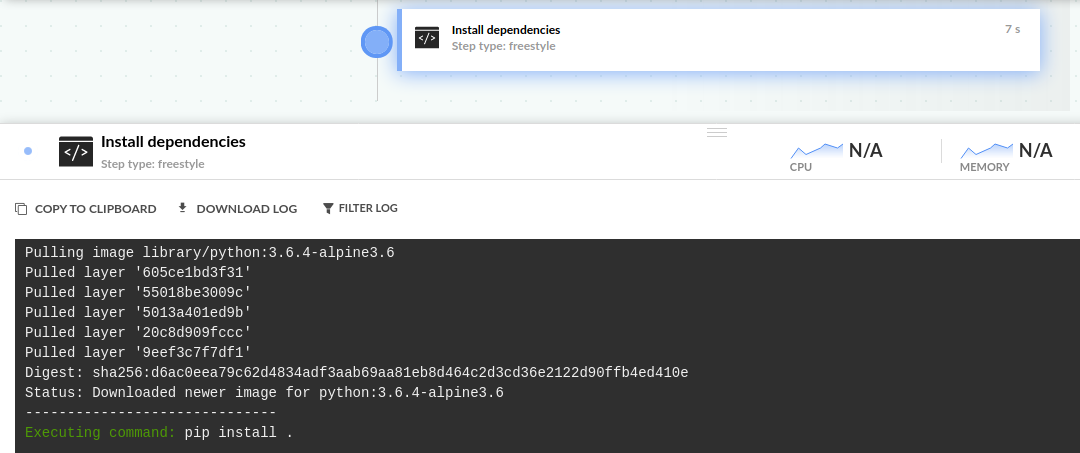
The image is also automatically cached in the image cache.
Codefresh also automatically pull for you any images mentioned in Dockerfiles (i.e. the FROM directive) as well as service containers.
Pulling private images
To pull a private image from one of your connected registries, in addition to specifying the image by name and tag, you must also prepend the appropriate prefix of the registry domain. The registry domain prefix is required for Codefresh to understand that it is a private image.
For example, in the case of ACR (Azure Container Registry):
registry-name.azurecr.io/my-docker-repo/my-image-name:tag
Get the full name of a Docker image:
- In the Codefresh UI, from Artifacts in the sidebar, select Images.
- Click on the image and copy the image name from the Activity column, Image promoted label.

The exact format of the image name depends on the type of registry you use. Codefresh uses the domain prefix of each image to understand which integration to use, and then takes care of all docker login and docker pull commands on its own behind the scenes.
For example, if you have connected Azure, AWS, and Google registries, you can pull three images for each in a pipeline like this:
codefresh.yml
version: '1.0'
steps:
  my_go_unit_tests:
    title: Running Go Unit tests
    image: 'us.gcr.io/project-k8s-sample-123454/my-golang-app:prod'
    commands:
      - go test -v
  my_mvn_unit_tests:
    title: Running Maven Unit tests
    image: '123456789012.dkr.ecr.us-west-2.amazonaws.com/my-java-app:latest'
    commands:
      - mvn test
  my_python_unit_tests:
    title: Running Python Unit tests
    image: 'my-azure-registry.azurecr.io/kostis-codefresh/my-python-app:master'
    commands:
      - python setup.py test
Codefresh automatically logs in to each registry using the credentials you have defined centrally, and pulls all the images. The same thing will happen with Dockerfiles that mention any valid Docker image in their FROM directive.
Pulling images created in the same pipeline
Codefresh allows you to create a Docker image on demand and use it in the same pipeline that created it. In several scenarios (such as unit tests), it is very common to use a Docker image right after it is built.
In that case, as a shortcut, Codefresh allows you to simply specify the name of the respective build step.
codefresh.yml
version: '1.0'
steps:
  main_clone:
    title: Cloning main repository...
    type: git-clone
    repo: 'codefresh-contrib/python-flask-sample-app'
    revision: 'master'
    git: github
  MyAppDockerImage:
    title: Building Docker Image
    type: build
    image_name: my-app-image
    working_directory: ./
    tag: 'master'
    dockerfile: Dockerfile
  MyUnitTests:
    title: Running Unit tests
    image: '${{MyAppDockerImage}}'
    commands:
      - python setup.py test
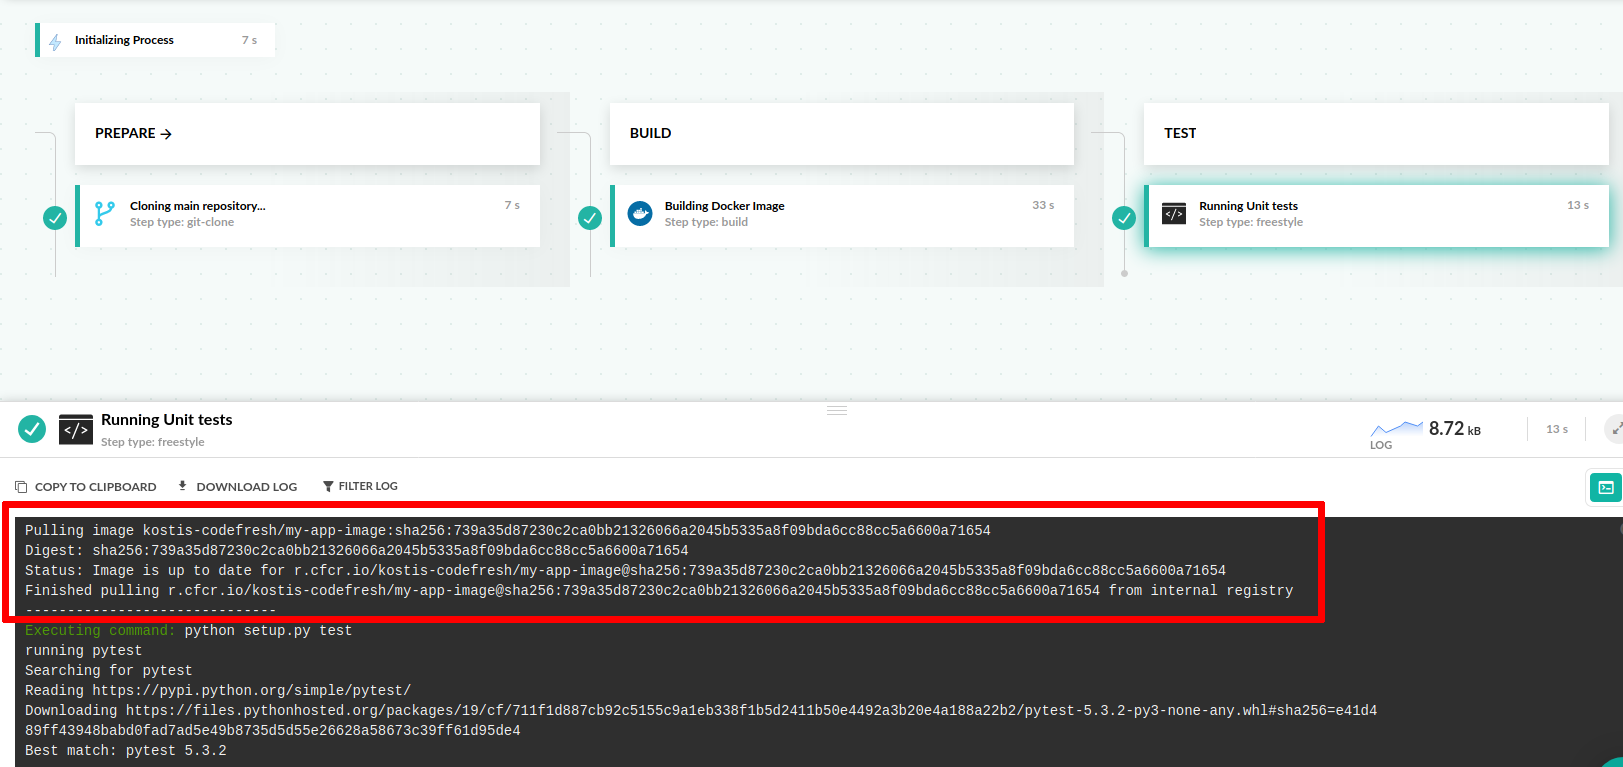
In the above pipeline, Codefresh:
- Checks out source code through a git-clone step.
- Builds a Docker image, named
my-app-image:master. Notice the lack ofdocker pushcommands. - In the next step, automatically uses that image and runs
python setup.py testinside it. Again, notice the lack ofdocker pullcommands.
The important line here is the following:
image: ${{MyAppDockerImage}}
This says to Codefresh “in this step please use the Docker image that was built in the step named MyAppDockerImage”.
You can see the automatic pull inside the Codefresh logs.
The image is still pushed to your default Docker registry. If you don’t want this behavior, add the disable_push property in the build step.
Pushing Docker images
Pushing to your default Docker registry is completely automatic. All successful build steps automatically push to the default Docker registry of your Codefresh account without any extra configuration.
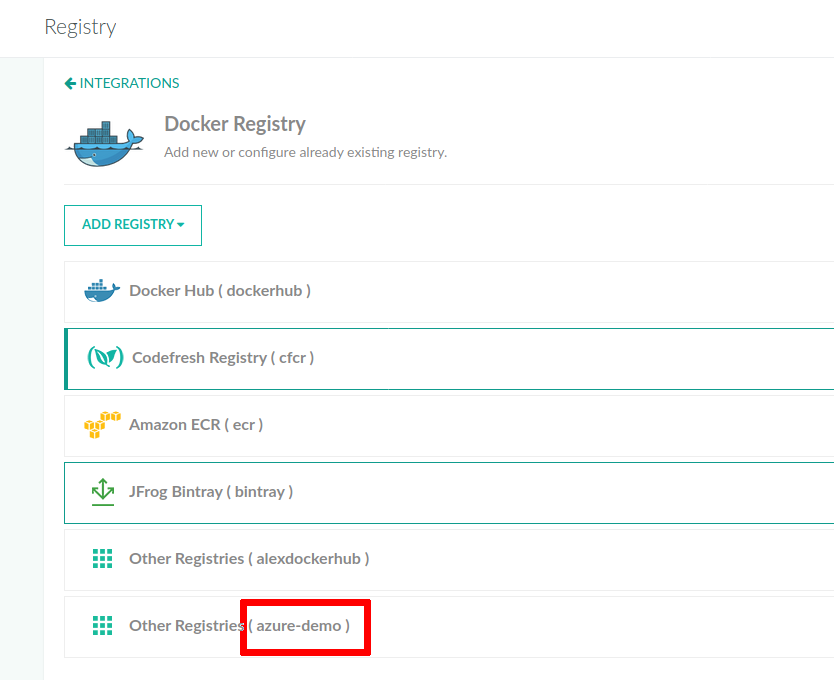
To push to another registry, you only need to know how this registry is connected to Codefresh, and more specifically, what is the unique name of the integration. You can see the name in the Codefresh UI, in Docker Registry integrations, or asking your Codefresh administrator.
Once you know the registry identifier, you can use it in any push step or build step by specifying the registry with that name:
codefresh.yml
  build_image:
    title: Building my app image
    type: build
    image_name: my-app-image
    dockerfile: Dockerfile
    tag: 'master'
  push_to_registry:
    title: Pushing to Docker Registry
    type: push
    #Name of the build step that is building the image
    candidate: '${{build_image}}'
    tag: '1.2.3'
    # Unique registry name
    registry: azure-demo
Notice that
- the
candidatefield of the push step mentions the name of the build step (build_image) that will be used for the image to be pushed. - The registry is only identified by name (
azure-demoin the example). The domain and credentials are not part of the pipeline as they are already known to Codefresh through the Docker registry integration.
You can also override the name of the image with any custom name. This way the push step can choose any image name regardless of what was used in the build step.
codefresh.yml
  build_image:
    title: Building my app image
    type: build
    image_name: my-app-image
    dockerfile: Dockerfile
    tag: 'master'
  push_to_registry:
    title: Pushing to Docker Registry
    type: push
    #Name of the build step that is building the image
    candidate: '${{build_image}}'
    tag: '1.2.3'
    # Unique registry name
    registry: azure-demo
    image_name: my-company/web-app
Here the build step creates an image named my-app-image:master, but the push step actually pushes it as my-company/web-app:1.2.3.
For more examples, such as using multiple tags, or pushing in parallel, see the push examples.
Pushing images with an optional prefix
There are some registry providers that require a specific prefix for all your Docker images. This is often the name of an organization, account, or other top-level construct defined by the registry.
codefresh.yml
  build:
    title: "Building Docker image"
    type: "build"
    image_name: "acme-company/trivial-go-web"
    working_directory: "${{clone}}"
    tag: "latest"
    dockerfile: "Dockerfile.multistage"
    stage: "build"
    registry: azure
The example above will push the final Docker image as kostisazureregistry.azurecr.io/acme-company/trivial-go-web:latest.
However, you can also set up the prefix globally once in the Docker registry integrations. This way you can simplify your pipelines and have them mention only the final image name.
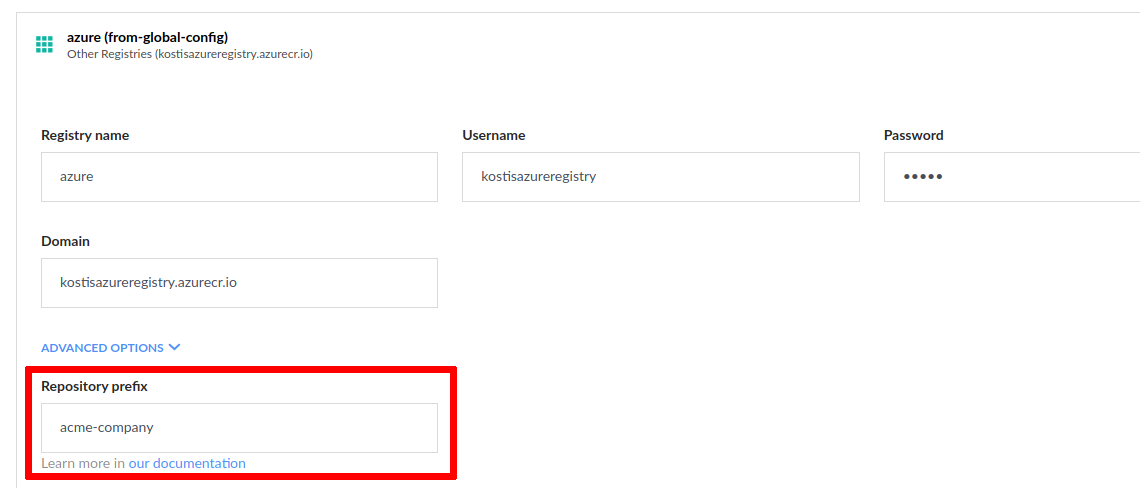
Using the repository prefix in the example above, automatically prefixes all your Docker images with acme-company.
Now you can simplify your build/push step as below:
codefresh.yml
  build:
    title: "Building Docker image"
    type: "build"
    image_name: "trivial-go-web"
    working_directory: "${{clone}}"
    tag: "latest"
    dockerfile: "Dockerfile.multistage"
    stage: "build"
    registry: azure
The final Docker image will still be kostisazureregistry.azurecr.io/acme-company/trivial-go-web:latest.
Working with multiple registries with the same domain
With Codefresh, you can connect multiple registries on a global level. This allows you to create pipelines that push/pull images to different registries without having to deal with Docker credentials within the pipeline itself.
However, there are several times where you have multiple registries that have the same domain. For example, you might have two Docker Hub accounts connected to Codefresh (so both of them can resolve images for the docker.io domain).
This means that when you reference an image by domain name, as in a freestyle step for example, Codefresh might not know which Docker registry account to use for the pull action.
NOTE
This is not a Codefresh limitation, but a Docker one. Even with vanilla Docker you cannot log in to multiple registries at the same time if they share the same domain.
To solve this problem, Codefresh automatically detects connected registries that have the same domain and allow you to designate the primary one. The primary registry is used for image resolution when pulling Docker images.
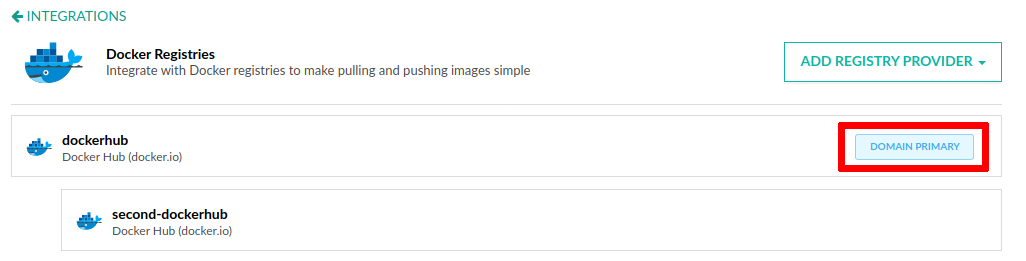
In the example above, even though two Docker Hub integrations are connected to Codefresh, only the primary one is used to pull images from the docker.io domain. You can still use the second one in push/build steps using the registry property.
You can override the default behavior in each pipeline, by adding the optional registry_context property to instruct Codefresh on how to use a specific registry for pulling Docker images (if you have more than one for the same domain).
You can use the registry_context property in build, push, freestyle, and composition steps.
The registry_context property takes as value the name of an external connected registry. Build and composition steps accept an array of values as registry_contexts. In all cases, by using this optional property you instruct Codefresh to use a specific registry for pulling images.
NOTE
The optionalregistry_contextandregistry_contextsproperties only affect the pulling of Docker images. The registry used for pushing images is still declared explicitly in build and push pipeline steps.
The syntax for the freestyle step is the following:
  test:
    title: "Running test"
    type: "freestyle"
    image: "gcr.io/my-google-project/my-image:latest"
    registry_context: my-second-gcr-registry # define what registry will be used for pulling the image
    working_directory: "${{clone}}"
    commands:
      - "ls"
The syntax for the build step is the following:
  build:
    title: "Building Docker image"
    type: "build"
    image_name: "trivial-go-web"
    working_directory: "${{clone}}"
    tag: "latest"
    dockerfile: "Dockerfile.multistage"
    stage: "build"
    registry_contexts: # define what registries will be used for pulling images
      - second-dockerhub
      - production-azure
    registry: azure
The syntax for the push step is the following:
  push:
    title: "Pushing 1st Docker image"
    type: push
    image_name: "kostiscodefresh/trivial-go-web"
    tag: "latest"
    stage: "push"
    registry: dockerhub # Docker registry to push to
    registry_context: second-dockerhub # Docker registry to pull images from
    candidate: ${{build}}
The syntax for the composition step is the following:
  my-composition:
    title: Running Composition
    type: composition
    registry_contexts:
      - first-gcr
      - second-gcr
    arguments:
      composition:
        version: '2'
        services:
          db:
            image: postgres
      composition_candidates:
        test_service:
          image: 'alpine:3.9'
          command: printenv
          working_dir: /app
          environment:
            - key=value
Let’s look at an example. We assume that we have two GCR integrations:

The first integration is the “production” one, and the second integration is the “staging” one. The production one is designated as primary. This means that by default even though both integrations work for the gcr.io domain, only the primary one is used in the Codefresh pipeline for pulling images.
Let’s say however that you want to build a Docker image that has a FROM statement from an image that exists in the staging registry. The image should be pushed to the production registry. You can use the registry_context property as shown below:
  build:
    title: "Building Docker image"
    type: "build"
    image_name: "gcr.io/production-project/my-image"
    working_directory: "${{clone}}"
    tag: "latest"
    dockerfile: "Dockerfile"
    stage: "build"
    registry: production-gcr
    registry_contexts: # define what registries will be used for pulling images
      - staging-gcr
Behind the scenes Codefresh will:
- First log in to the “staging” Docker registry using the “staging” credentials.
- Build the Docker image, by resolving the
FROMstatements with “staging” images, pulling them as needed using the staging credentials. - Tag the Docker image.
- Log in to the “production” Docker registry.
- Push the final Docker image to the “production” registry.
If your primary Docker registry is also the one that is used in your pipelines, you don’t need the registry_context property at all, as this is the default behavior. When searching for an image to pull Codefresh will look at all your Docker registries (if they manage only a single domain), plus your “primary” Docker registries in case you have multiple Docker registries for the same domain.
Promoting Docker images
Apart from building and pushing a brand new Docker image, you can also “promote” a Docker image by copying it from one registry to another. You can perform this action either from the Codefresh UI or automatically from pipelines.
Promoting images via the Codefresh UI
You have the capability to “promote” any image of your choosing and push it to an external registry you have integrated into Codefresh (such as Azure, Google, Bintray etc.).
- In the Codefresh UI, from Artifacts in the sidebar, select Images.
- To promote an image, in the row with the image, click the Promote Image icon on the right.
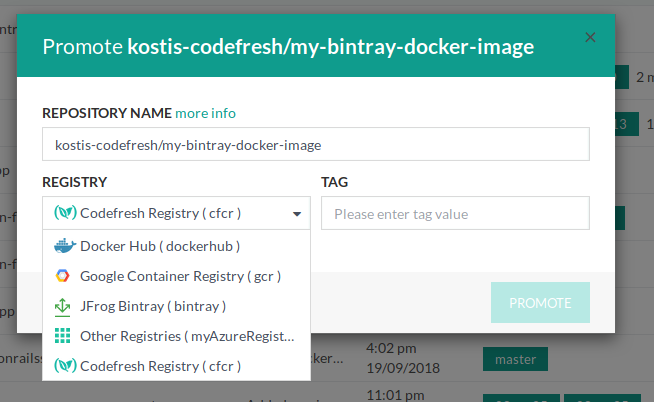
- From the list of connected registries, select the target registry, and define the tag that you want to push.
- To “copy” this image from the existing registry to the target registry, click Promote.
Promoting images in pipelines
You can also copy images from one registry to the other within a pipeline.
This is accomplished by specifying an existing image in the candidate field of the push step.
For example:
codefresh.yml
  promote_to_production_registry:
    title: Promoting to Azure registry
    type: push
    candidate: us.gcr.io/project-k8s-sample-123454/my-golang-app
    tag: '1.2.3'
    # Unique registry name
    registry: azure-demo
In the example above, we promote an image from GCR to ACR, which is already set up as azure-demo.
You can even “promote” Docker images within the same registry by simply creating new tags.
For example:
codefresh.yml
  promote_to_production:
    title: Marking image with prod tag
    type: push
    candidate: my-azure-registry.azurecr.io/kostis-codefresh/my-python-app:1.2.3
    tag: 'production'
    # Unique registry name
    registry: azure-demo
In the example above, the image my-azure-registry.azurecr.io/kostis-codefresh/my-python-app:1.2.3 is re-tagged as my-azure-registry.azurecr.io/kostis-codefresh/my-python-app:prod. A very common pattern is to mark images with a special tag such as prod after the image has been deployed successfully.
Related articles
Docker registry integrations for pipelines
Accessing a Docker registry from your Kubernetes cluster
Build and push an image example