Git provider pipeline integrations
Easily check out code in Codefresh CI pipelines
Creating an account with Codefresh for one of the supported Git providers (GitHub, GitLab, Bitbucket), gives you immediate access to the repositories of the linked provider.
You can also add repositories from other Git providers regardless of the one you used for sign-up. For example, you can use GitLab to sign up with Codefresh, but still build repositories that exist in Bitbucket.
You can even add multiple accounts for each Git provider (if you have more than one), allowing you to use Codefresh as a central CI/CD solution that can access all your Git repositories regardless of the backing Git provider.
Currently Codefresh supports:
- GitHub Cloud
- GitHub On-premises
- Bitbucket
- Bitbucket Data Center (new version of Bitbucket Server)
- GitLab Cloud
- GitLab On-premises
- Azure DevOps Git
- Gerrit
Atlassian Stash/Bitbucket Data Center, as well as the on-premises version of GitLab and GitHub, are only available to Codefresh enterprise customers.
Adding more Git providers to your Codefresh Account
By default, you have direct access to Git repositories that exist in the Git provider you used while signing up for Codefresh. You can easily create Codefresh projects that check out code from that Git provider without any extra configurations.
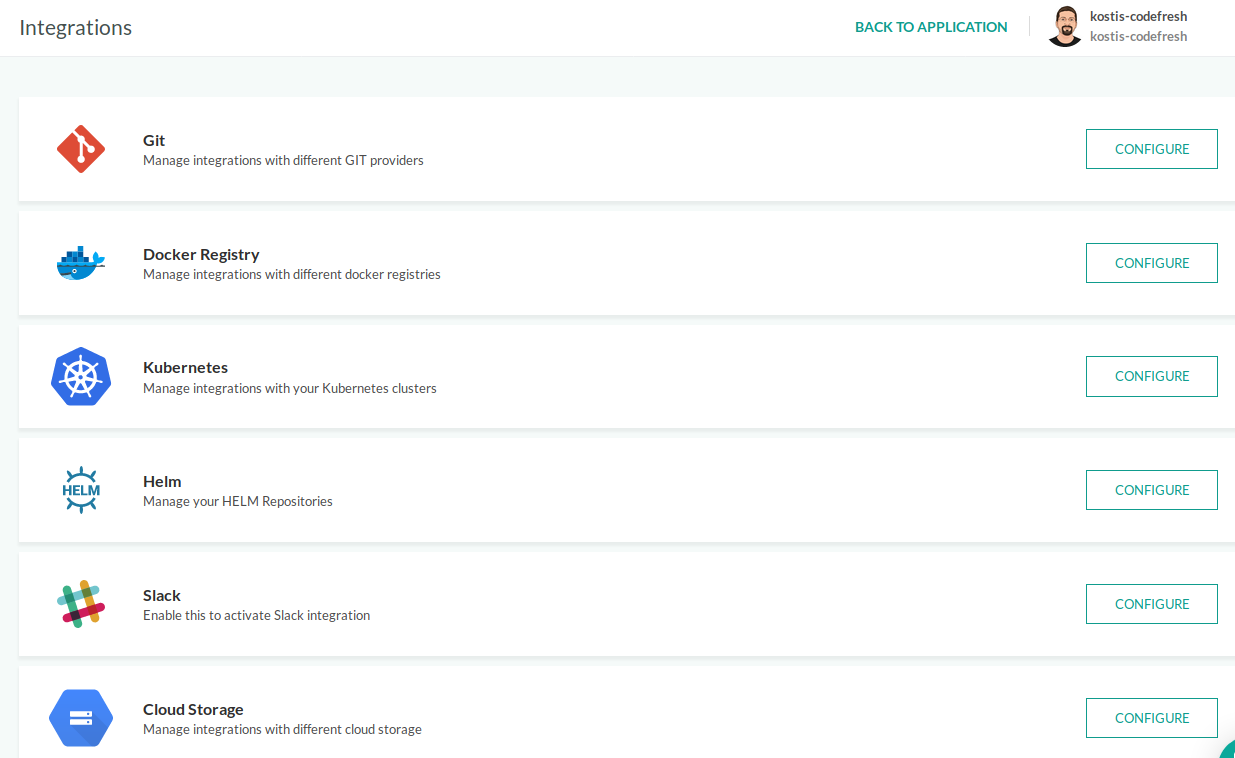
- In the Codefresh UI, on the toolbar, click the Settings icon.
- From Configuration in the sidebar, select Pipeline Integrations.
- Select Git and then click Configure.
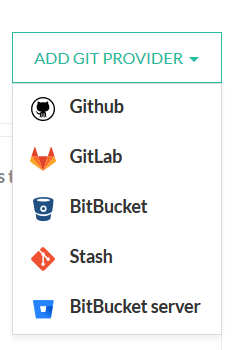
- From the Add Git Provider drop-down, select the Git provider to add.
- Define the settings as required.
IMPORTANT
The name assigned to the integration must be unique within the account. Using the same name for other integrations or Shared Configuration contexts within pipelines will result in conflicts.
For troubleshooting, see Error: context already exists.
For each Git provider you need to set up authentication, for Codefresh to get access to the public and private repositories of the respective provider.
The easiest way to set up authentication is with OAuth2 if supported by the Git provider. You only need to name your integration and Codefresh will automatically set it up once you accept the permissions required. If you have problems with OAuth2 or the provider does not support it, you need to manually create credentials by yourself in your git account and then enter them into Codefresh.
In the case of an on-premises Git provider, you also need to fill in the URL where the provider is installed.
SSH Keys
NOTE
To enable this feature, please contact Codefresh Support.
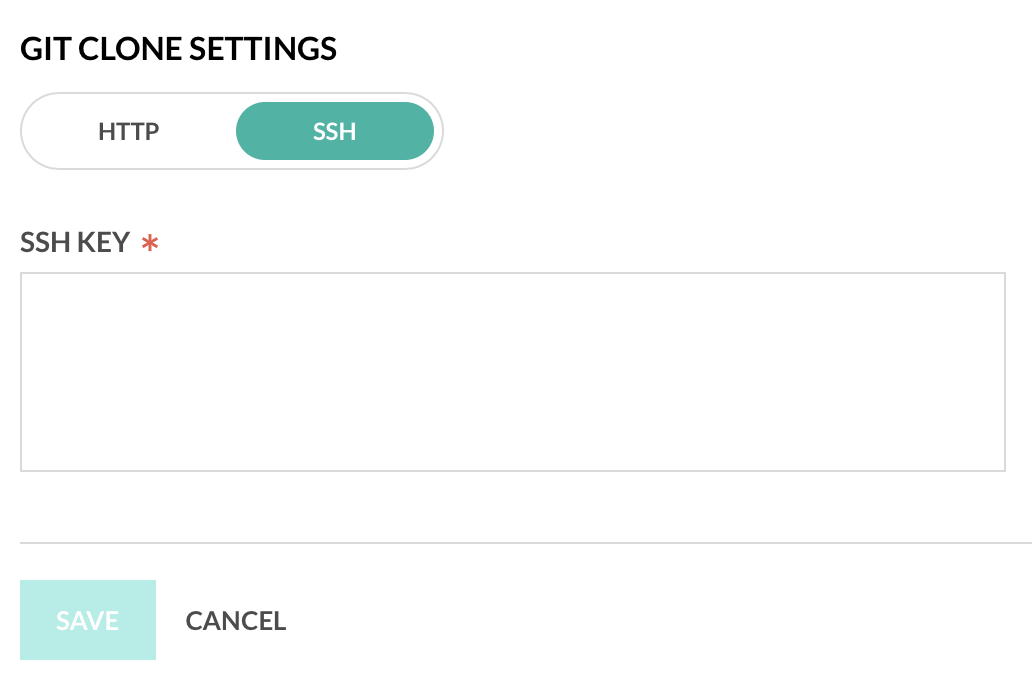
You have the ability to specify whether you want to clone via HTTPS or SSH.
- Select the required Git integration, and click Edit.
- Expand Advanced Options and toggle to HTTPS or SSH.
- For SSH, paste your raw, private key into the SSH Key text box and click Save.
For more information on generating SSH keys and adding your public key to your VCS provider, see its official documentation:
- GitHub documentation
- GitLab documentation
- Bitbucket documentation
- Azure documentation
- Gerrit documentation
GitHub
For the OAuth2 method you only need to decide on public/private repository access, enter a name for your connection and click Save. Then accept the permissions dialog. This is the easiest and recommended way to integrate GitHub. Notice that if you used GitHub when you created your Codefresh account, this integration is already setup for you.
For the Access Token method you need
- A friendly name for the Git context (it can be anything you want)
- An access token
NOTE
Make sure that the user who creates the access token for an organization also has the Owner role in addition to the Member role.
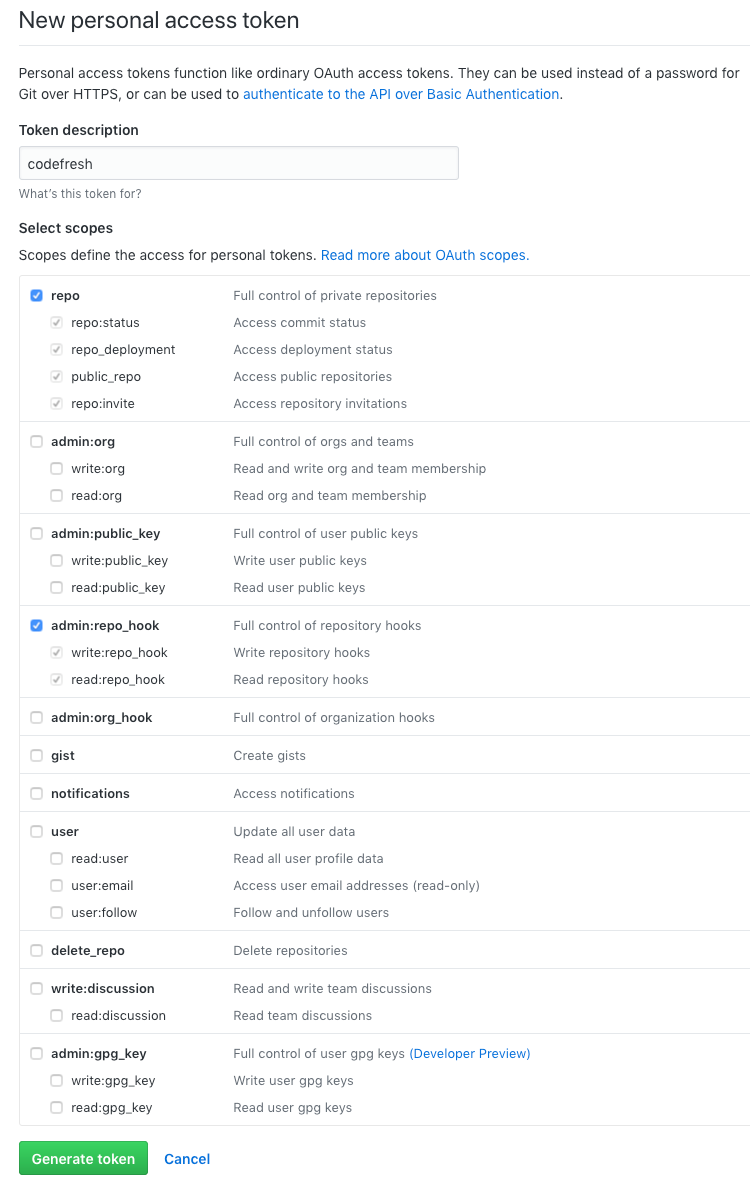
To create an access token, go to your GitHub settings and select the Developer settings option from the left sidebar. Then select Personal access tokens from the left menu. For more information see the GitHub Documentation page.
The “token description” you enter in your GitHub account in order to create the token is completely arbitrary (use “Codefresh” for an example). Once you have the token, paste it in the Codefresh UI and click Test connection. If everything is OK, you can now save the Git integration.
The minimum permissions for the token are:
repo.*admin:repo_hook.*
For GitHub on-premises you also need to provide the URL of the GitHub server in your organization. If enabled in your account you can setup Pipeline definition restrictions by expanding the YAML Options segment.
Using External Secrets for GitHub Token
If your GitHub installation is behind your firewall, you can also use any external secrets that you have defined (such as Kubernetes secrets) as values by entering a secrets value with the same syntax shown in pipelines.
For example if you already have a token on a resource call git-credentials you can put in the token field the expression ${{secrets.git-credentials.token}}.
Level of access
If Allow access to all users is cleared, another toggle appears: Allow these credentials to be shared within a pipeline for cloning a repository. This option has the following impact on pipelines:
- When selected, the user who runs a pipeline can clone the repo.
- When cleared, the user who runs a pipeline cannot use this integration. In both cases, the user cannot decrypt the token used in Git integration with CLI or API.
NOTE
The credentials will be shared only to clone repos using an officialgit-clonestep.
GitHub-App
An alternative way to authenticate with Github is via the App mechanism.
Codefresh Github App
NOTE
The Codefresh App has READ permissions to issues, metadata, and pull requests, and READ and WRITE permissions to code, commit statuses, and repository hooks.
If you need additional permission for your integration, use the Manual Creation steps.
- In the Codefresh UI, follow the steps to add a new Git provider.
- From the list of Git providers, select Codefresh Github App.
- Select Setup GitHub App integration via GitHub Marketplace.
- Follow the instructions on GitHub to install the application. Once completed, the fields are automatically populated with the information.
- To verify your integration, click Test connection.
- To apply your changes, click Save.
Manual creation
- Log in your GitHub account and visit https://github.com/settings/apps.
- Click New GitHub App.
- Do the following in the New GitHub App screen:
- Give an arbitrary name to your app, for example,
codefresh-integration. - Define the Homepage URL as
http://www.codefresh.io. - In the Webhook section, clear the Active checkbox.
- In the Permissions > Repository permissions section, select required access levels for the following:
- Contents: Read-only
- Issues: Read-only
- Metadata: Read-only
- Pull requests: Read-only
- Webhooks: Read and write
- Commit statuses: Read and write
- In the Account permissions > Email addresses section, select Read-only as the access level.
- Click Create GitHub app.
- Give an arbitrary name to your app, for example,
- In the next screen, do the following:
- Note down the App ID number under the About section.
- Click Generate a private key, and save the file locally.
- Click the Install App item from the left sidebar menu, and then click Install next to your codefresh app.
- Accept the permissions, and in the next screen, define the repositories that you need Codefresh to access.
From the URL of the browser, note the ending number which is your installation ID.
For example if the URL ishttps://github.com/settings/installations/10042353then your installation number is10042353. - In the Codefresh UI, follow the steps to add a new Git provider.
- From the Add Git Provider dropdown, select Github App.
- Define the settings:
- Installation ID which you noted down in step 5.
- App ID, which you noted down in step 4.
- Private key, which is the content of the file your created in step 4, converted to base64.
- To verify your integration, click Test connection.
- To apply your changes, click Save.
NOTE
If enabled in your account you can set up Pipeline definition restrictions by expanding the YAML Options segment.
GitLab
For the OAuth2 method:
You only need to enable private repository access, enter a name for your connection and click Save. Then accept the permissions dialog. This is the easiest and recommended way to integrate GitLab. Notice that if
you used GitLab when you created your Codefresh account, this integration is already setup for you.
For the Access Key method you need:
- A friendly name for the Git context (it can be anything you want)
- An access token/key
To create an access token, go to your GitLab settings and select the Access tokens options. For more information see the GitLab Documentation page
The name you enter in order to create the token in the GitLab UI is completely arbitrary (use “Codefresh” for an example)
Once you have the token, paste it in the Codefresh UI and click Test connection. If everything is OK can now save the Git integration.
For GitLab on-premises, you also need to provide the URL of the GitLab server in your organization. If enabled in your account you can set up Pipeline definition restrictions by expanding the YAML Options segment.
Using External Secrets for GitLab Token
If your GitLab installation is behind your firewall, you can also use any external secrets that you have defined (such as Kubernetes secrets) as values by entering a secrets value with the same syntax shown in pipelines.
For example if you already have a token on a resource call git-credentials you can put in the token field the expression ${{secrets.git-credentials@token}}.
Bitbucket
For the OAuth2 method you only need to enter a name for your connection and click Save. Then accept the permissions dialog. This is the easiest and recommended way to integrate Bitbucket. Notice that if you used Bitbucket when you created your Codefresh account, this integration is already setup for you.
WARNING!
Bitbucket App passwords will be deprecated on June 9th 2026. For details, see the official announcement from Bitbucket.
If you already use an App password for your Bitbucket integration in Codefresh, we recommend switching to the new API token method described below.
For the API token method you need:
- A friendly name for the Git context (It can be anything you want.)
- The email associated with your Bitbucket account
- A Bitbucket API token
You can find the email in your Bitbucket Account settings.
To create an API token, go to your Personal settings, select Atlassian account settings, then the Security tab at the top, and follow the Create and manage API tokens link. Click Create API token with scopes button to create one, give it a name and expiration date, and on the next view select Bitbucket. For more information, see the Bitbucket Documentation page.
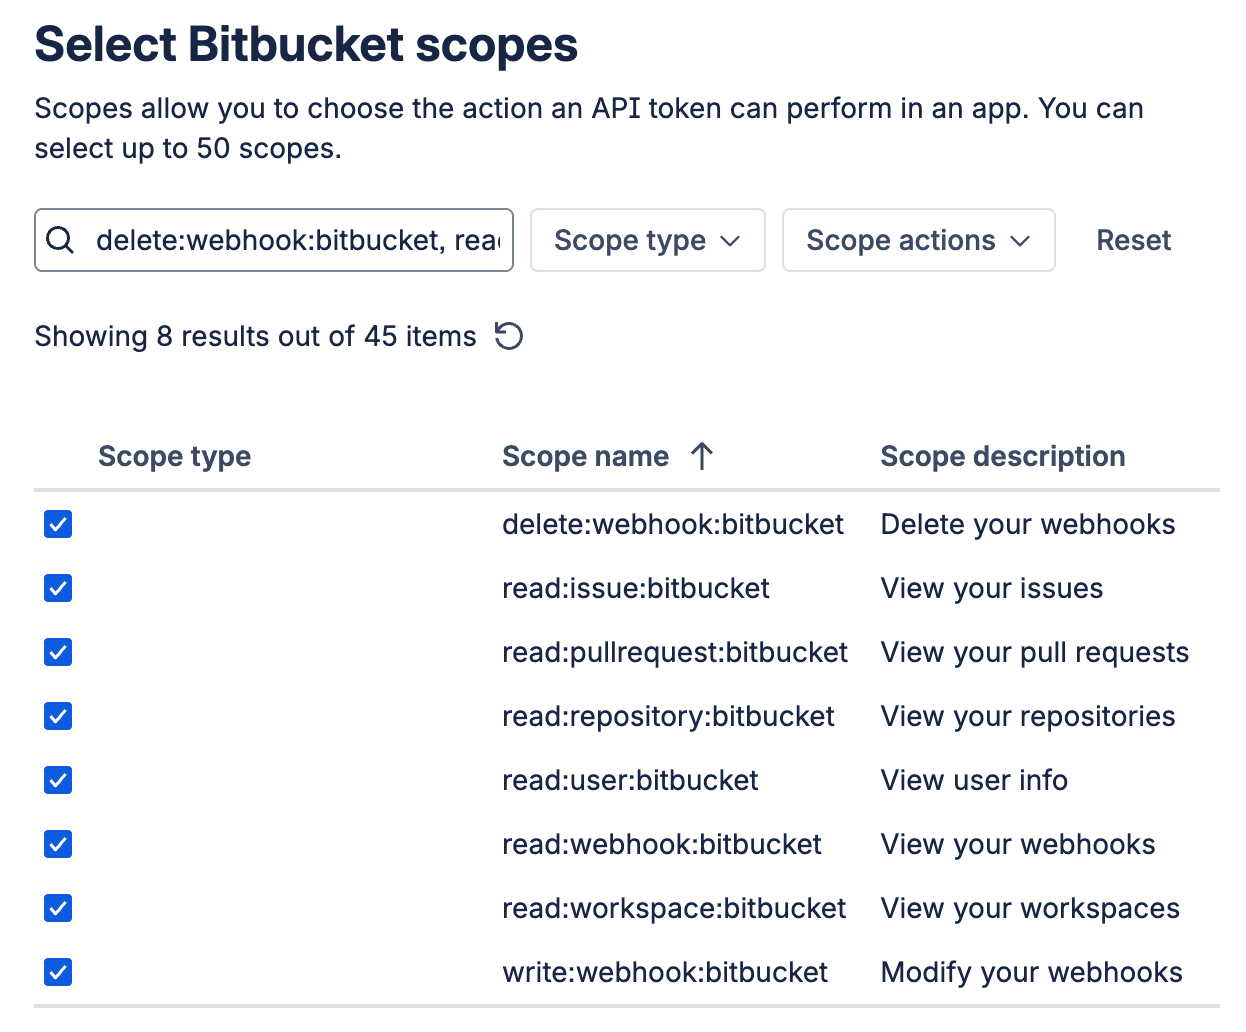
The mimimum scopes required for the token are:
delete:webhook:bitbucketread:issue:bitbucketread:pullrequest:bitbucketread:repository:bitbucketread:user:bitbucketread:webhook:bitbucketread:workspace:bitbucketwrite:repository:bitbucketwrite:webhook:bitbucket
TIP
To easily find all scopes needed by Codefresh, enter them in the search box separated by commas:
delete:webhook:bitbucket, read:issue:bitbucket, read:pullrequest:bitbucket, read:repository:bitbucket, read:user:bitbucket, read:webhook:bitbucket, read:workspace:bitbucket, write:repository:bitbucket, write:webhook:bitbucketYou will get a list of required scopes, please select them all.
Once you have the token, paste it in the Codefresh UI and click Test connection. If everything is OK you can now save the Git integration.
If enabled in your account you can setup Pipeline definition restrictions by expanding the YAML Options segment.
Azure DevOps
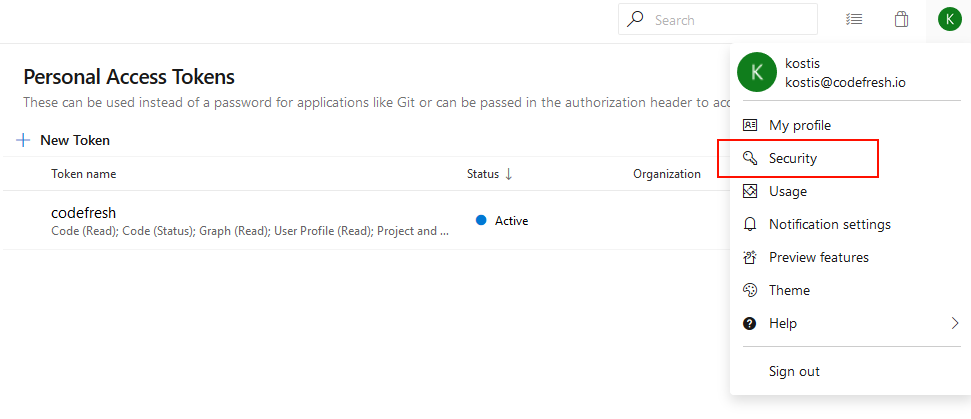
For Azure you need to create a personal access token. Sign in your Azure DevOps account and click on your profile icon on the top right corner. Then select Security:
On the screen that will appear click the New token Button. Enter an arbitrary name for the token and select the correct Organization from the drop-down menu. Remember your organization name as you will use it later in the Codefresh side. Select an expiration date for your token
NOTE
At the time of writing, Azure DevOps does not have the option to create a token without an expiration date. Choose a long time period and make sure that you have a policy in place for renewing your tokens so that Codefresh can continue to read your Git repo.
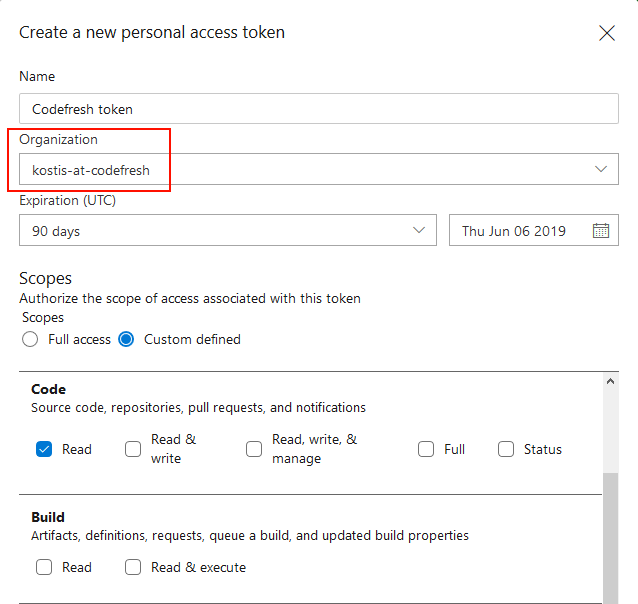
From the Scope section choose the option Show all scopes and choose the following:
- Code - read
- Code - status
- Graph - read
- Project and Team - read
- User profile - read
Finally click the Create button and copy your token (it will never be shown again).
Then at the Codefresh configuration enter your organization name and your token.
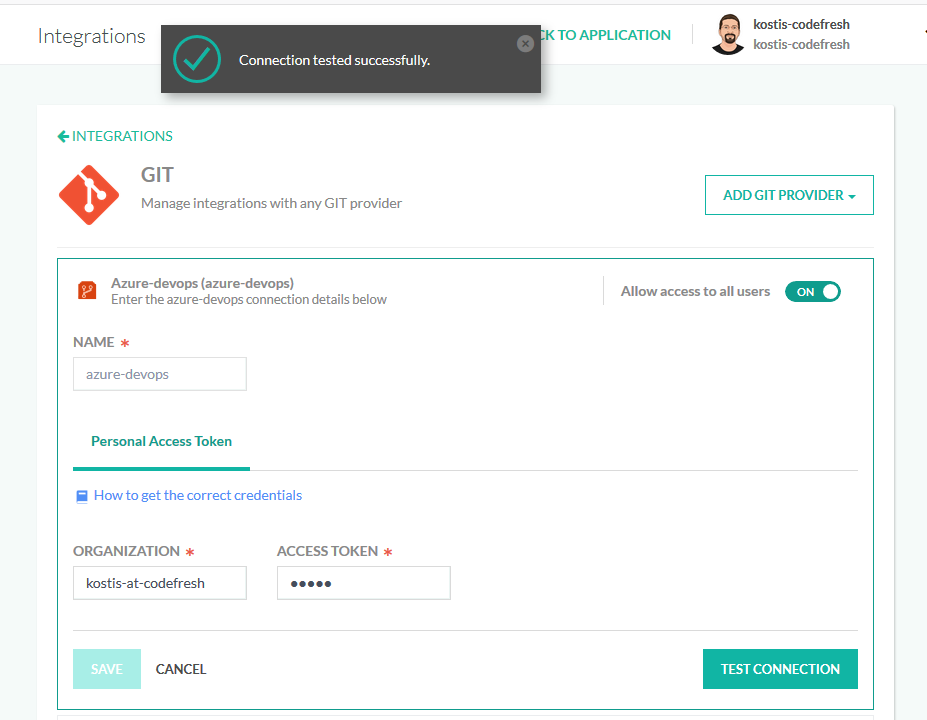
Click on Test connection to verify your settings and finally click save. Now you can create pipelines that use Azure DevOps Git repos.
Your Azure DevOps repositories will be available when creating a new project in Codefresh.
If enabled in your account you can setup Pipeline definition restrictions by expanding the YAML Options segment.
Atlassian Stash
Atlassian stash is only available for an on-premises connection. Follow the same instructions as Bitbucket. You also need to provide the URL of the Stash server in your organization.
This option is only for Atlassian stash until version 3.10 which is the old version. Bitbucket Data Center is the new name of Atlassian Stash.
Bitbucket Data Center
Bitbucket Data Center is the new and current name of Bitbucket Server and Atlassian Stash. Bitbucket Data Center is supported in both on-premises and Runner installations.
Codefresh supports Bitbucket Data Center versions 5.4.0+ since those expose the API used by the integration.
Using External Secrets for BitBucket Token
If your Bitbucket Data Center installation is behind your firewall, you can also use any external secrets that you have defined (such as Kubernetes secrets) as values by entering a secrets value with the same syntax shown in pipelines.
For example if you already have a token on a resource call git-credentials you can put in the token field the expression ${{secrets.git-credentials@token}}.
Gerrit
Codefresh supports integration with Gerrit, the open-source web-based code review tool for Git repositories. By integrating Gerrit in Codefresh, you can create pipelines to trigger builds and tests whenever a new change is pushed to Git repos hosted in Gerrit, and see the status of builds and tests within Gerrit.
Gerrit has no explicit concept of pull requests, as in other version control systems, to map trigger event payloads to builds.
Instead, Gerrit uses Changes which serves a similar purpose and functionality as pull requests.
You can achieve the same functionality in Codefresh with our CF_PULL_REQUEST group of environment variables. For the exact variables you can map to Gerrit Changes, see System variables and also Gerrit changeId & change message variables.
Step 1: Set up permissions for Codefresh user in Gerrit
Gerrit has a special Service Users access-group for CI systems and other bots. We recommend adding your Codefresh user in Gerrit to this group, and setting the required permissions.
- Create a profile in Gerrit’s web interface for your Codefresh user.
- Add the user to the predefined Service Users access group:
- Navigate to Browse > Groups, and select Service Users.
- Click the Members tab, and click Add Members.
- Type the email address of the Codefresh user, and select the user from the search results.
- Click Add.
- Browse to Repositories and select the repository for which to set permissions, and do the following:
- Select Access > Edit, and set the following permissions:
- Reference: Set to refs/*
-
Read: ALLOW for Service Users to read branches.
Note that you can also set this permission at the level of All projects. -
Owner: ALLOW for Service Users to create webhooks for pipeline triggers.
webhooks.configinrefs/meta/configrequires owner-level permissions.
Note that this permission must be set only at the repository-level. -
Label Verified: -1, +1 for Service Users.
Gives permission to apply theVerifiedlabel, which is the typical label for CI, with either a-1or+1value.
Note that you can also set this permission at the level of All projects.
-
- Reference: Set to refs/*
- Continue with Step 2: Generate password for user in Gerrit.
Step 2: Generate password for user in Gerrit
Generate an HTTP Password in Gerrit as an access token to authenticate HTTP requests.
NOTE
Regenerating the HTTP Password automatically revokes the current password.
- Log in to Gerrit with the Codefresh user you created in Step 1.
- In the toolbar, click the Settings icon.
- From the sidebar, select HTTP Credentials, and under HTTP Credentials on the right, click Generate New Password.
- Copy the generated password to a secure location as you will need it to set up the Gerrit integration in Codefresh.
- Continue with Step 3: Define pipeline integration settings for Gerrit in Codefresh.
Step 3: Define pipeline integration settings for Gerrit in Codefresh
As the final step to use Gerrit as your Git provider, define integration settings for Gerrit in Codefresh.
- In the Codefresh UI, follow the steps to add a new Git provider.
- From the Add Git Provider dropdown, select Gerrit.
- Define the settings:
- Name: The name for your Gerrit integration. This is the name that will be used in pipelines to reference the Gerrit integration.
- Host URL: The URL of your website with the Gerrit instance, for example,
https://git.company-name.io. - Username: The username of your Gerrit account.
- Password: The password you generated to use as the access token to authenticate HTTP requests to Gerrit.
- Click Save.
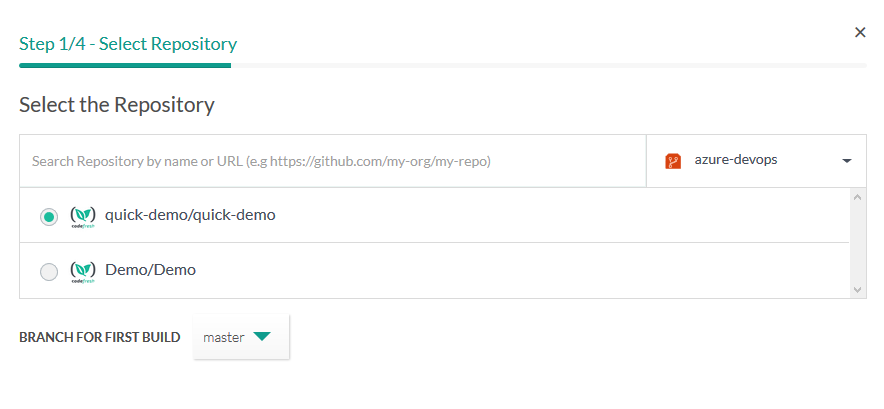
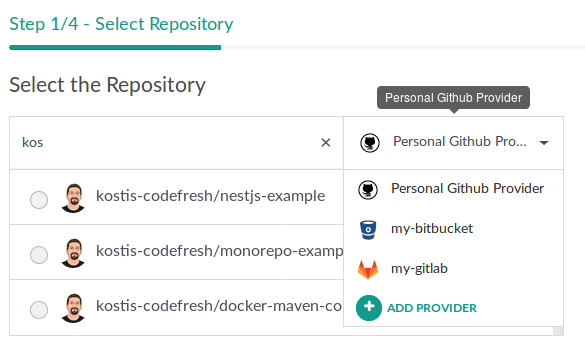
Using your Git provider
Once your provider is active, you can add a new project in Codefresh, and then during the repository selection screen you will have access to the additional Git providers.
NOTE
For all supported Git providers, Codefresh automatically creates all the webhooks needed for triggering pipelines when a commit (or another event) happens.
After adding the repository, Codefresh behavior is identical for all Git providers. You can create pipelines for different Git providers in exactly the same manner.
ABAC for Git Contexts
Account Level: Pro and above
NOTE
At this time, you will need to reach out to support to enable ABAC for Git Context and Pipeline Execution Context.
ABAC for Git Context gives the ability to restrict using and handling of Git Contexts. We use tags on the git context to limit Teams and Execution Contexts for access control. There are four actions controlled by ABAC: Creating, Updating, Deleting, and Using Git Contexts.
The Using means the following use cases:
- Creating trigger
- Getting YAML from a repository
- Using the Git Context in a pipeline (git clone step etc.) via Execution Context.
You will get an error of Permission Denied or Forbidden to a Git Context that you do not have the correct permissions for that action.
Assigning tags to Git Contexts
- In the Codefresh UI, on the toolbar, click the Settings icon, and then from Configuration in the sidebar, select Pipeline Integrations.
- Click Configure for Git to see the list of Git provider integrations (Git contexts).
- Select the row with the integration for which to add tags.
- On the right, click Edit Tags.
- Type in the tag or tags.
- Click Save.
Setting the Permissions
- Navigate to Account Settings > Permissions > Teams or Execution Context.
- Scroll to Git Contexts.
- Here, you can set permissions similar to other ABAC rules for Teams or Execution Context to Create or Use, Update, and Delete actions.
- Click Add Rule when done.
Related articles
Creating pipelines
Git triggers
Git clone step
Checking out source code