DigitalOcean Container Registry
Push Docker images to your DigitalOcean Container Registry with pipeline integration
You can configure DigitalOcean Container Registry as your Docker Registry, and use it in your Codefresh pipeline.
The DigitalOcean Container Registry is directly integrated into your DigitalOcean Dashboard. While it is optional to use the DigitalOcean Container registry with your DigitalOcean Kubernetes cluster, it allows for easier integration between resources.
The next sections will look at:
- Creating the DigitalOcean Container Registry
- Generating a DigitalOcean Access token
- Adding the DigitalOcean Container Registry to our Docker Registry in Codefresh
- Modifying the Build step in our Codefresh pipeline
- Viewing the built image in the DigitalOcean Container Registry
Building and pushing a container image with DigitalOcean and Codefresh
Building and pushing a container image with DigitalOcean and Codefresh, requires:
- A DigitalOcean account (your GitHub username)
- A DigitalOcean access token
- An application with a Dockerfile to build images
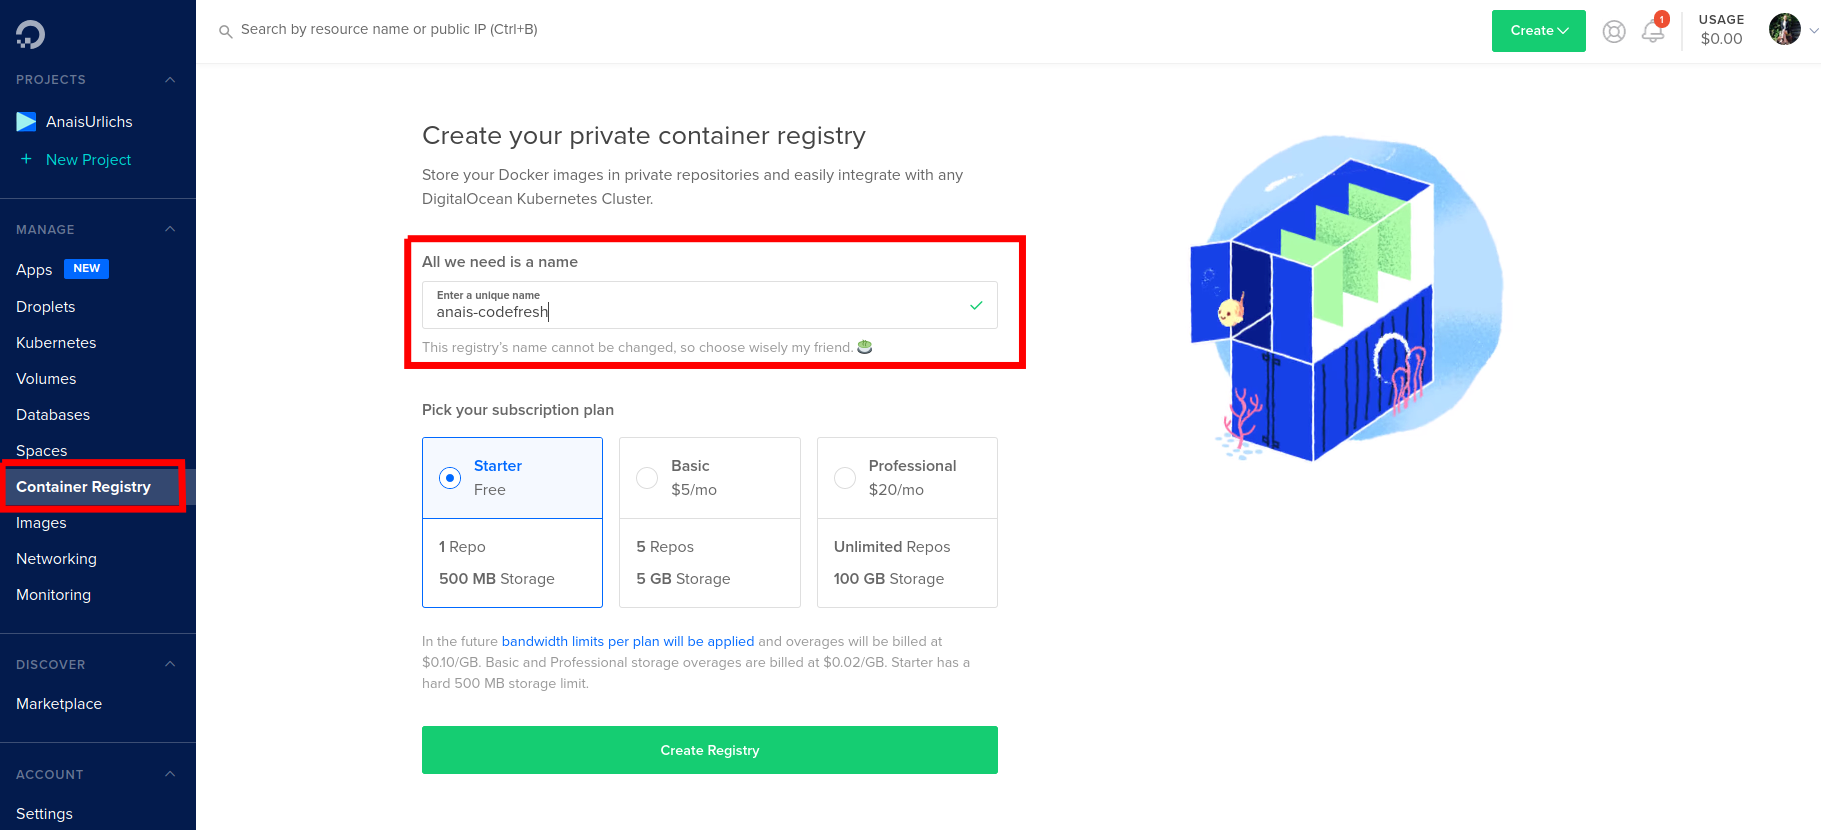
Creating the DigitalOcean Container Registry
Once you are logged into your DigitalOcean Account, open the Container Registry tap and provide the name of your registry. Note that the name has to be unique.
Creating an access token
Now that we are already in DigitalOcean, we have to create an access token. Note that it requires read and write access.
Select API at the bottom right of your left-side menu under Tokens/Keys.
Copy and paste the token somewhere secure and where you will find it again.
Set up DigitalOcean Container Registry integration
- In the Codefresh UI, on the toolbar, click the Settings icon, and then from the sidebar, select Pipeline Integrations.
- Select Docker Registries and then click Configure.
- From the Add Registry Provider dropdown, select Other Registries.
- Define the following:
- Registry name: A unique name for this configuration.
- Username: The DigitalOcean access token you created.
- Password: The DigitalOcean access token you created.
- Domain:
registry.digitalocean.com.
Optional, you can add your registry name to the advanced settings section. For instance, if you named it in Digital Ocean “anais-codefresh”, you can ensure that every time the registry is used, it is automatically referenced in the build step of your pipeline.
- To verify the connection details, click Test Connection.
- To apply the changes, click Save.
Modify your build step
Within your Codefresh YAML file, modify the build step to push to the DigitalOcean Container Registry. If you set the DigitalOcean Container Registry as default registry, note that you do not have to specify the Registry.
Add the following line to your build step:
registry: "digital-ocean"
This is an example of the complete build step:
version: "1.0"
stages:
  - "clone"
  - "build"

steps:
  clone:
    title: "Cloning repository"
    type: "git-clone"
    repo: "anais-codefresh/react-article-display"
    # CF_BRANCH value is auto set when pipeline is triggered
    # Learn more at codefresh.io/docs/docs/pipelinesvariables/
    revision: "${{CF_BRANCH}}"
    git: "github"
    stage: "clone"

  build:
    title: "Building Docker image"
    type: "build"
    image_name: "anais-codefresh/react-article-display-do-registry"
    tags:
      - "1.0.0"
    working_directory: "${{clone}}"
    dockerfile: "Dockerfile"
    stage: "build"
    registry: "digital-ocean"
Note that Codefresh builds AND pushes images both in the same step.
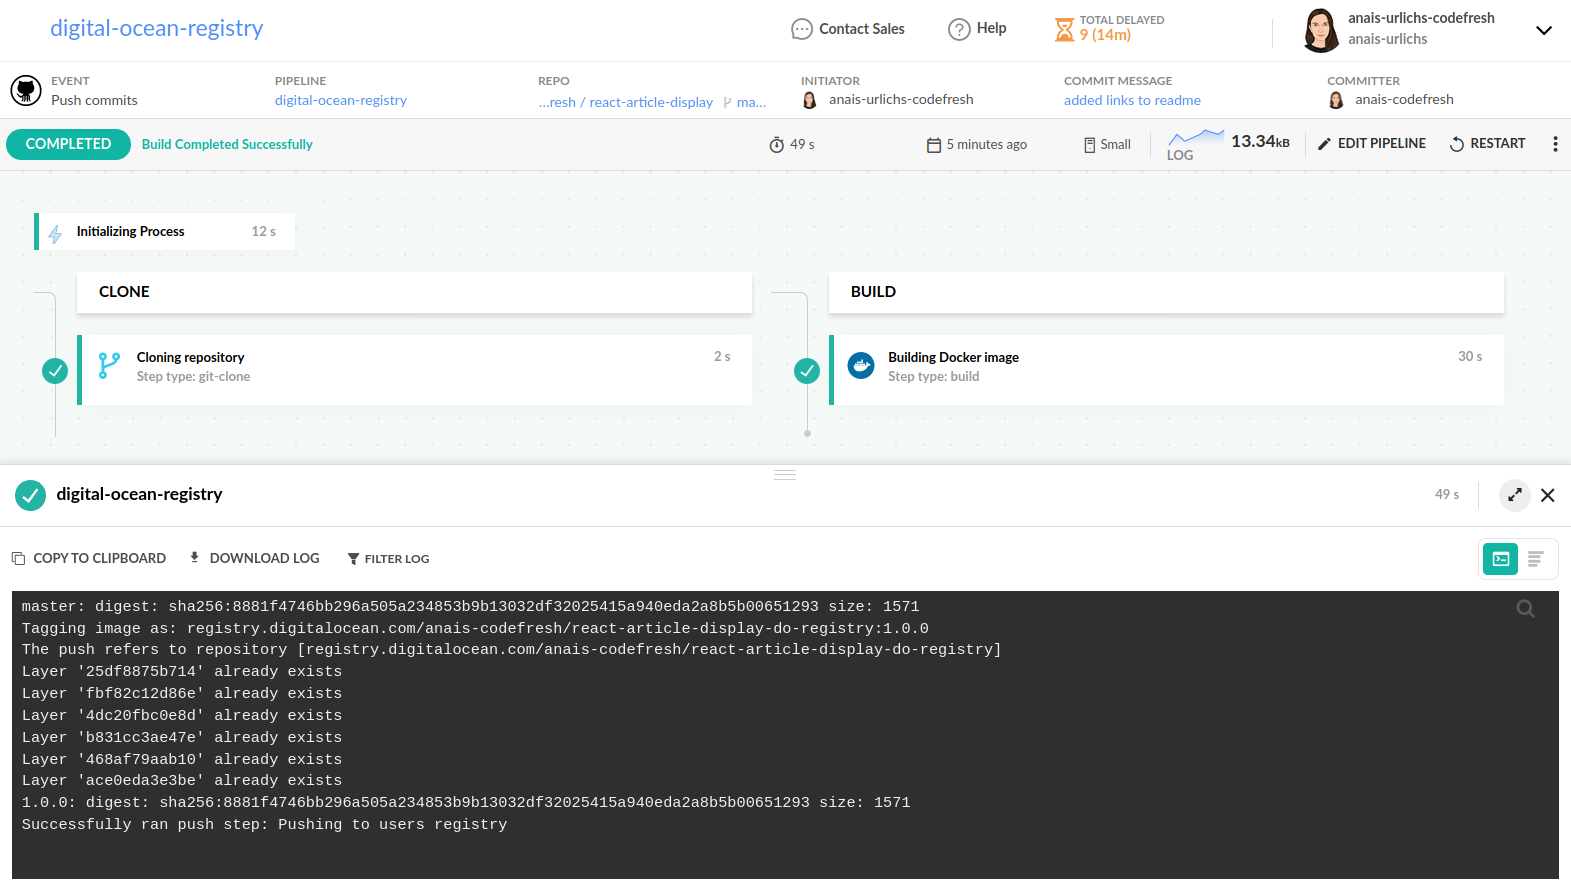
Running the pipeline and viewing the image in the DigitalOcean Container Registry
Once you have modified the step, save and run your pipeline. Below is an example of the pipeline in it’s simplest form.
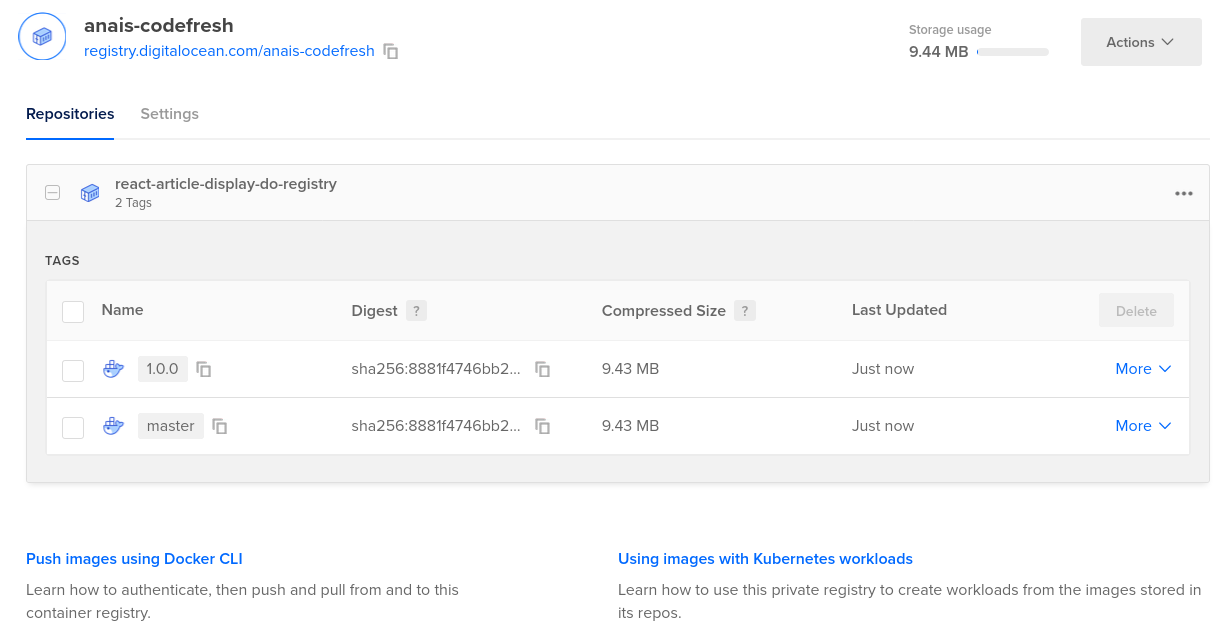
You can then view the image in the DigitalOcean Container Registry:
Related articles
Docker registries for pipeline integrations
Working with Docker Registries
Building Docker images
Push step
Building and pushing an image