Managing Kubernetes clusters
Use the graphical Kubernetes dashboard in Codefresh
Codefresh includes a built-in Kubernetes Dashboard that allows you to see the state of your clusters, and even make changes if you have the appropriate access privileges.
Accessing the Kubernetes Dashboard
After adding a cluster, you will be able to manage your Kubernetes assets via the Kubernetes tab on the left pane. Clicking on the Kubernetes icon will take you to your services dashboard.
With the graphical dashboard, it is very easy to locate problematic services or deploy new ones quickly. If there are clusters that are not accessible to your user, you can hide them by enabling the Hide inaccessible clusters option at the top right of the window in order to simplify the view.
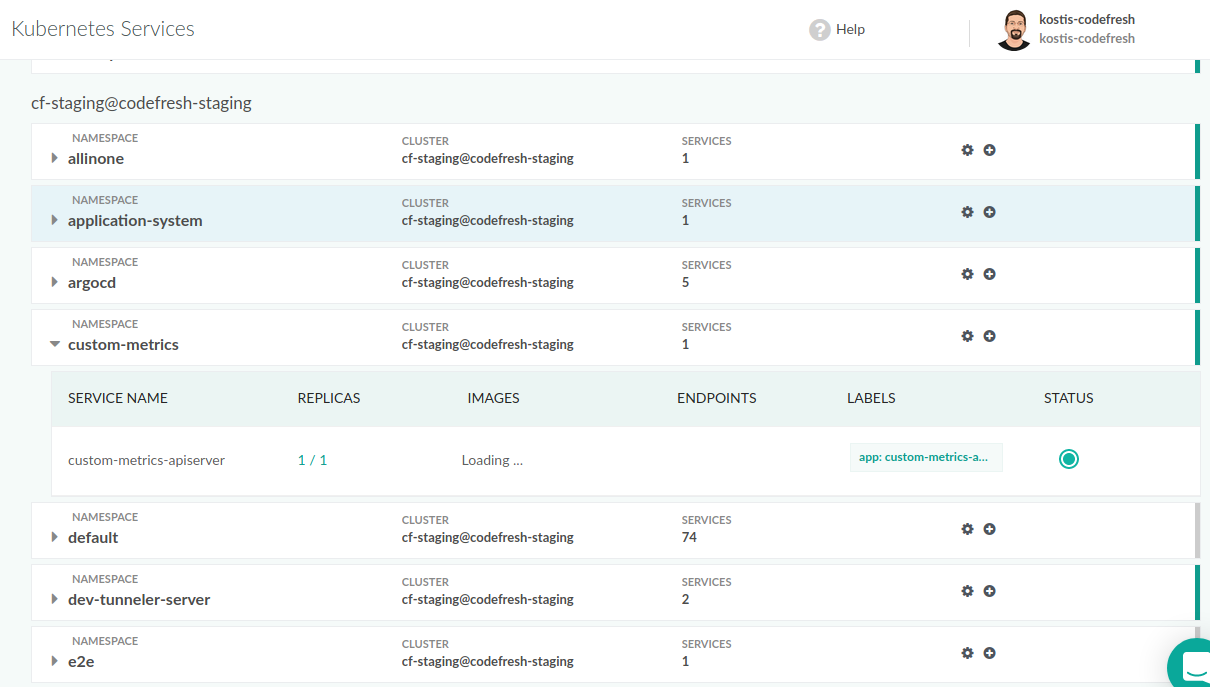
Viewing your Kubernetes services
If you have too many clusters you can choose the add filter button at the top of the window to hide specific clusters or namespaces.
You will be able to see the following parameters for each service:
- Name
- Cluster
- Namespace
- Replica count
- Docker image
- Selector
- A status check
You can also switch to a Grid view if you prefer that over the default List view:
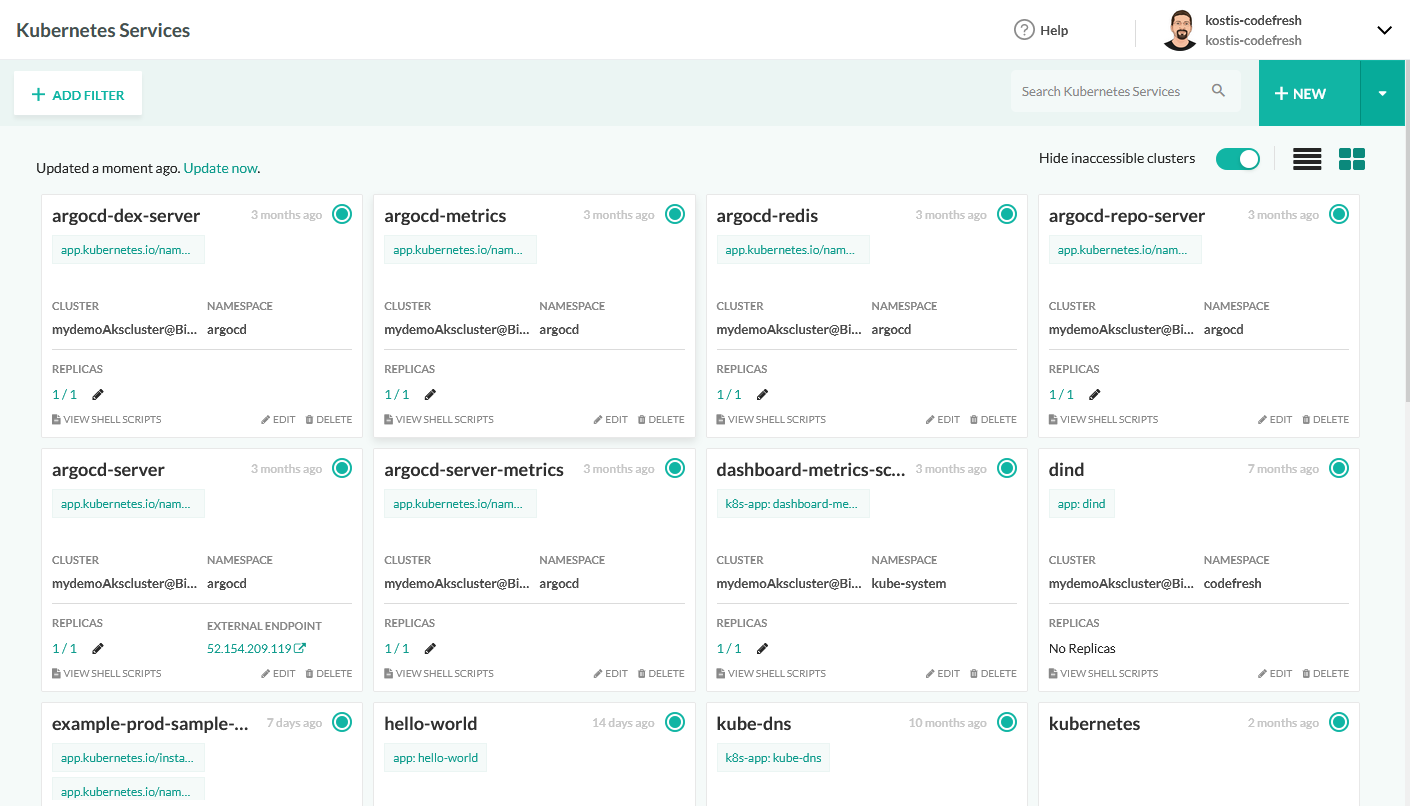
If there are clusters that are not accessible to your user you can hide them by enabling the Hide inaccessible clusters option at the top right of the window in order to simplify the view.
Work with your services
In this view, you will be able to perform the following actions:
- Add new service
- Edit/Update existing services
- Remove service
Deploying a new service
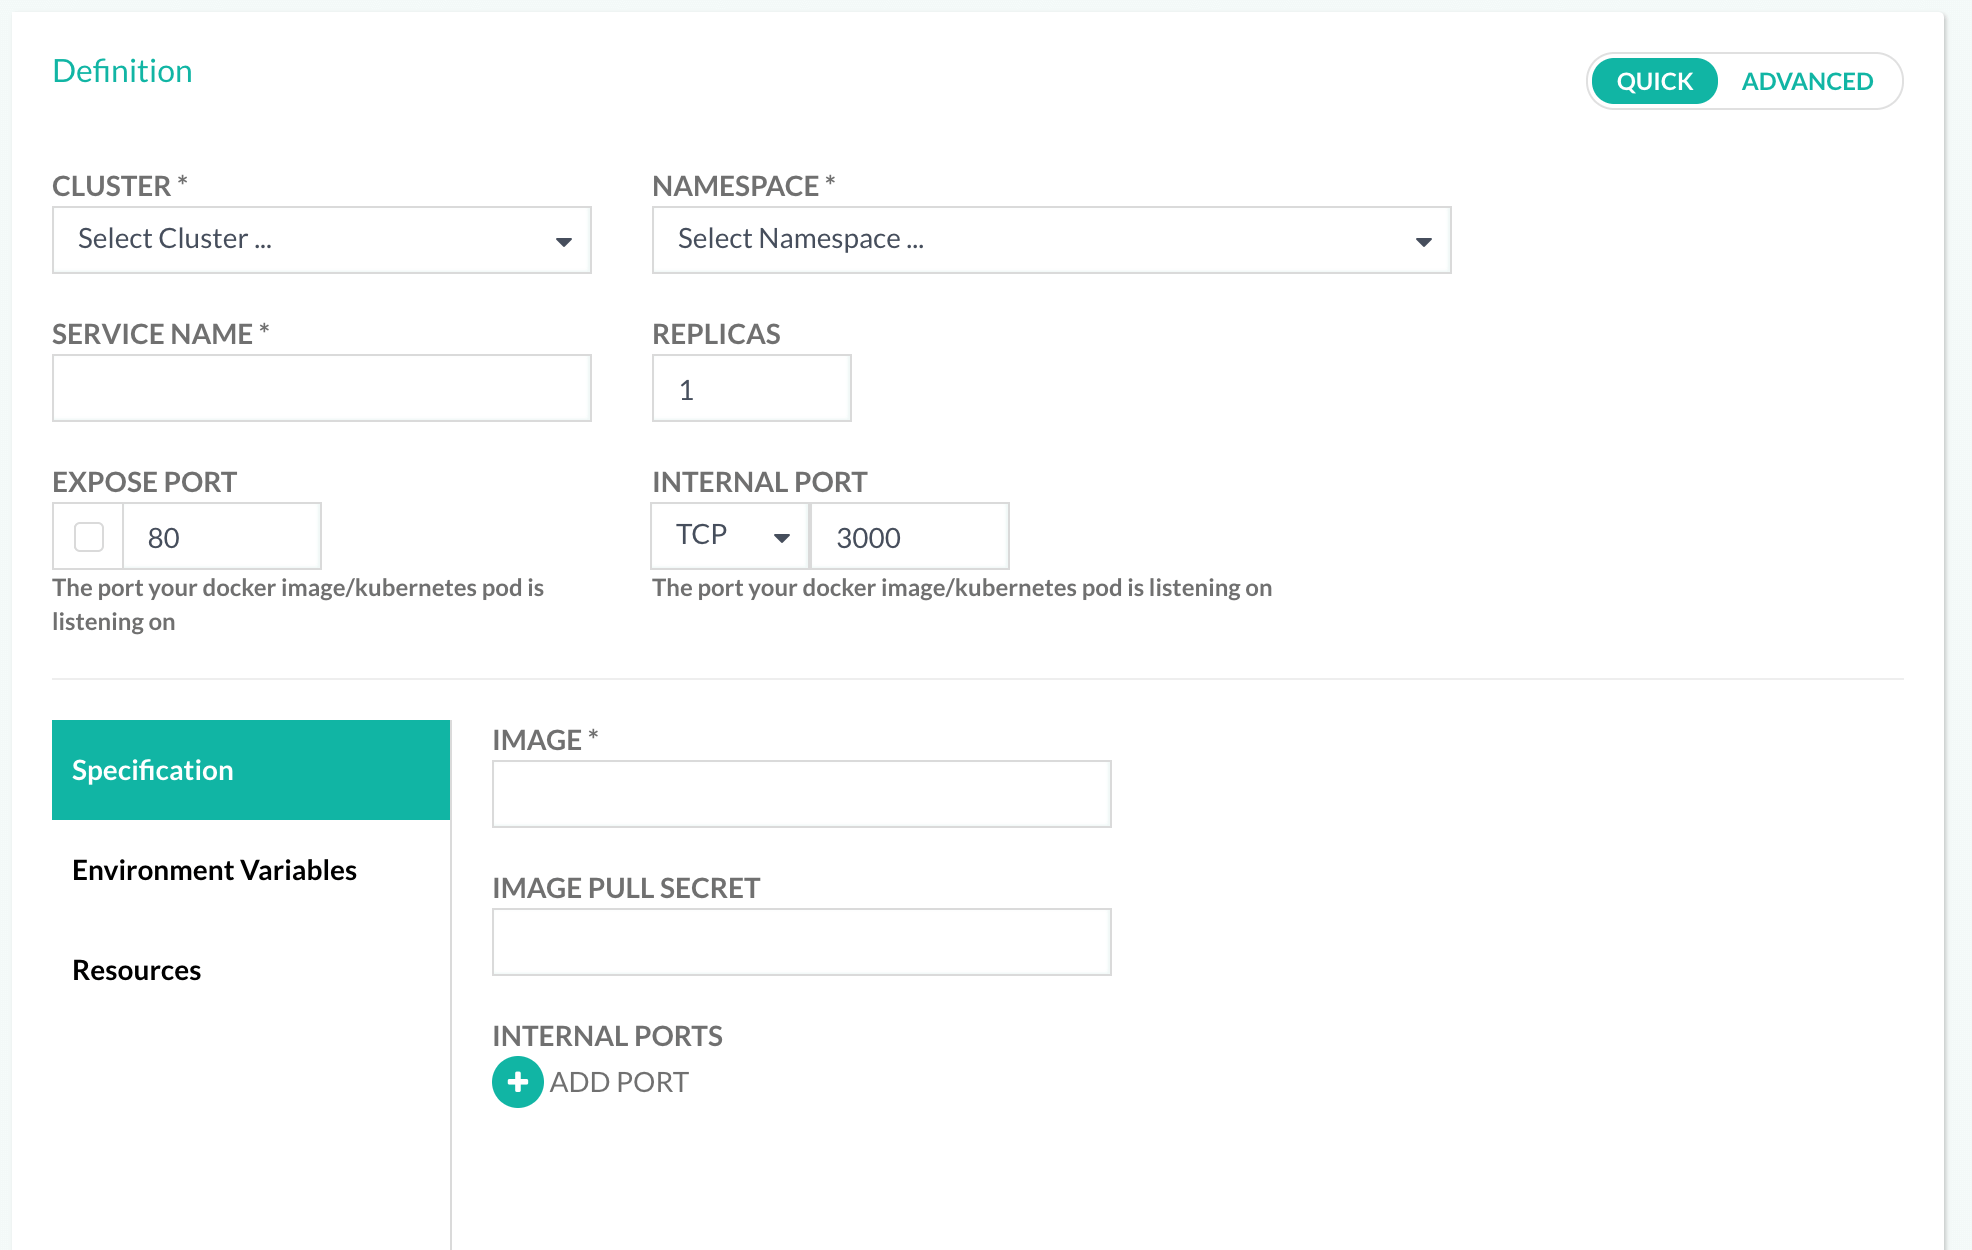
The Kubernetes dashboard provides a GUI dialog to quickly deploy new services in your cluster.
Choose a Docker image
To add a service, click the “Add Service” button on the top or the “plus” button on a specific namespace. Then fill in the details for your new service.
You can add images built in Codefresh which were pushed to Codefresh registry or provide a name for Docker image that will be pulled from an external Docker registry. Notice that images which are not from Dockerhub must be mentioned with their full domain name.
Use the following steps in order to add Image and pull secrets from the connected Docker Registry:
- Specify the image name in the format
<DOMAIN>/<ACCOUNT>/<IMAGE>:<TAG> - Provide and image pull secret - this will be done for each namespace
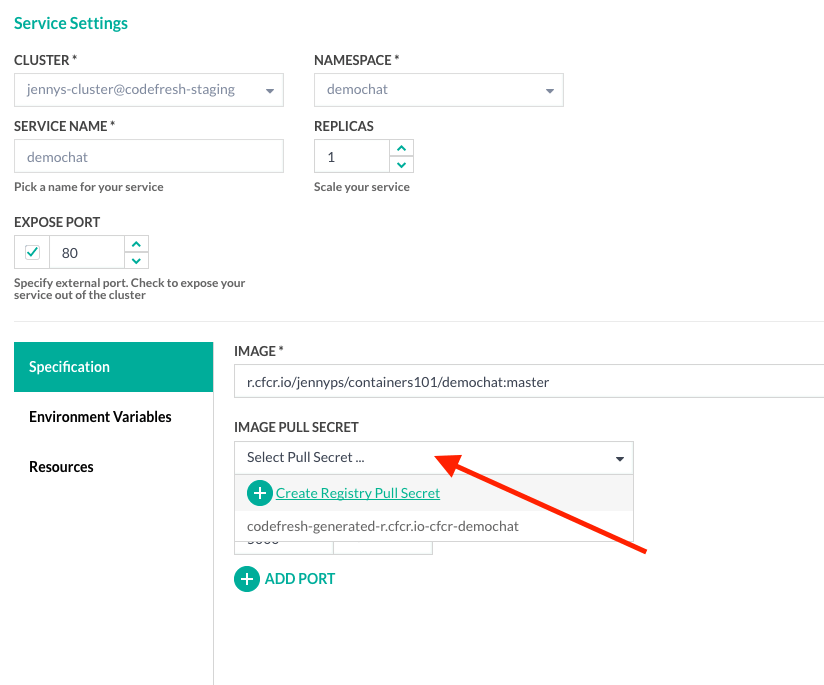
From this screen you can also create Kubernetes image secrets without actually deploying anything.
Set environment variables and resources
You can add extra environment variables that will passed to the deployment image.
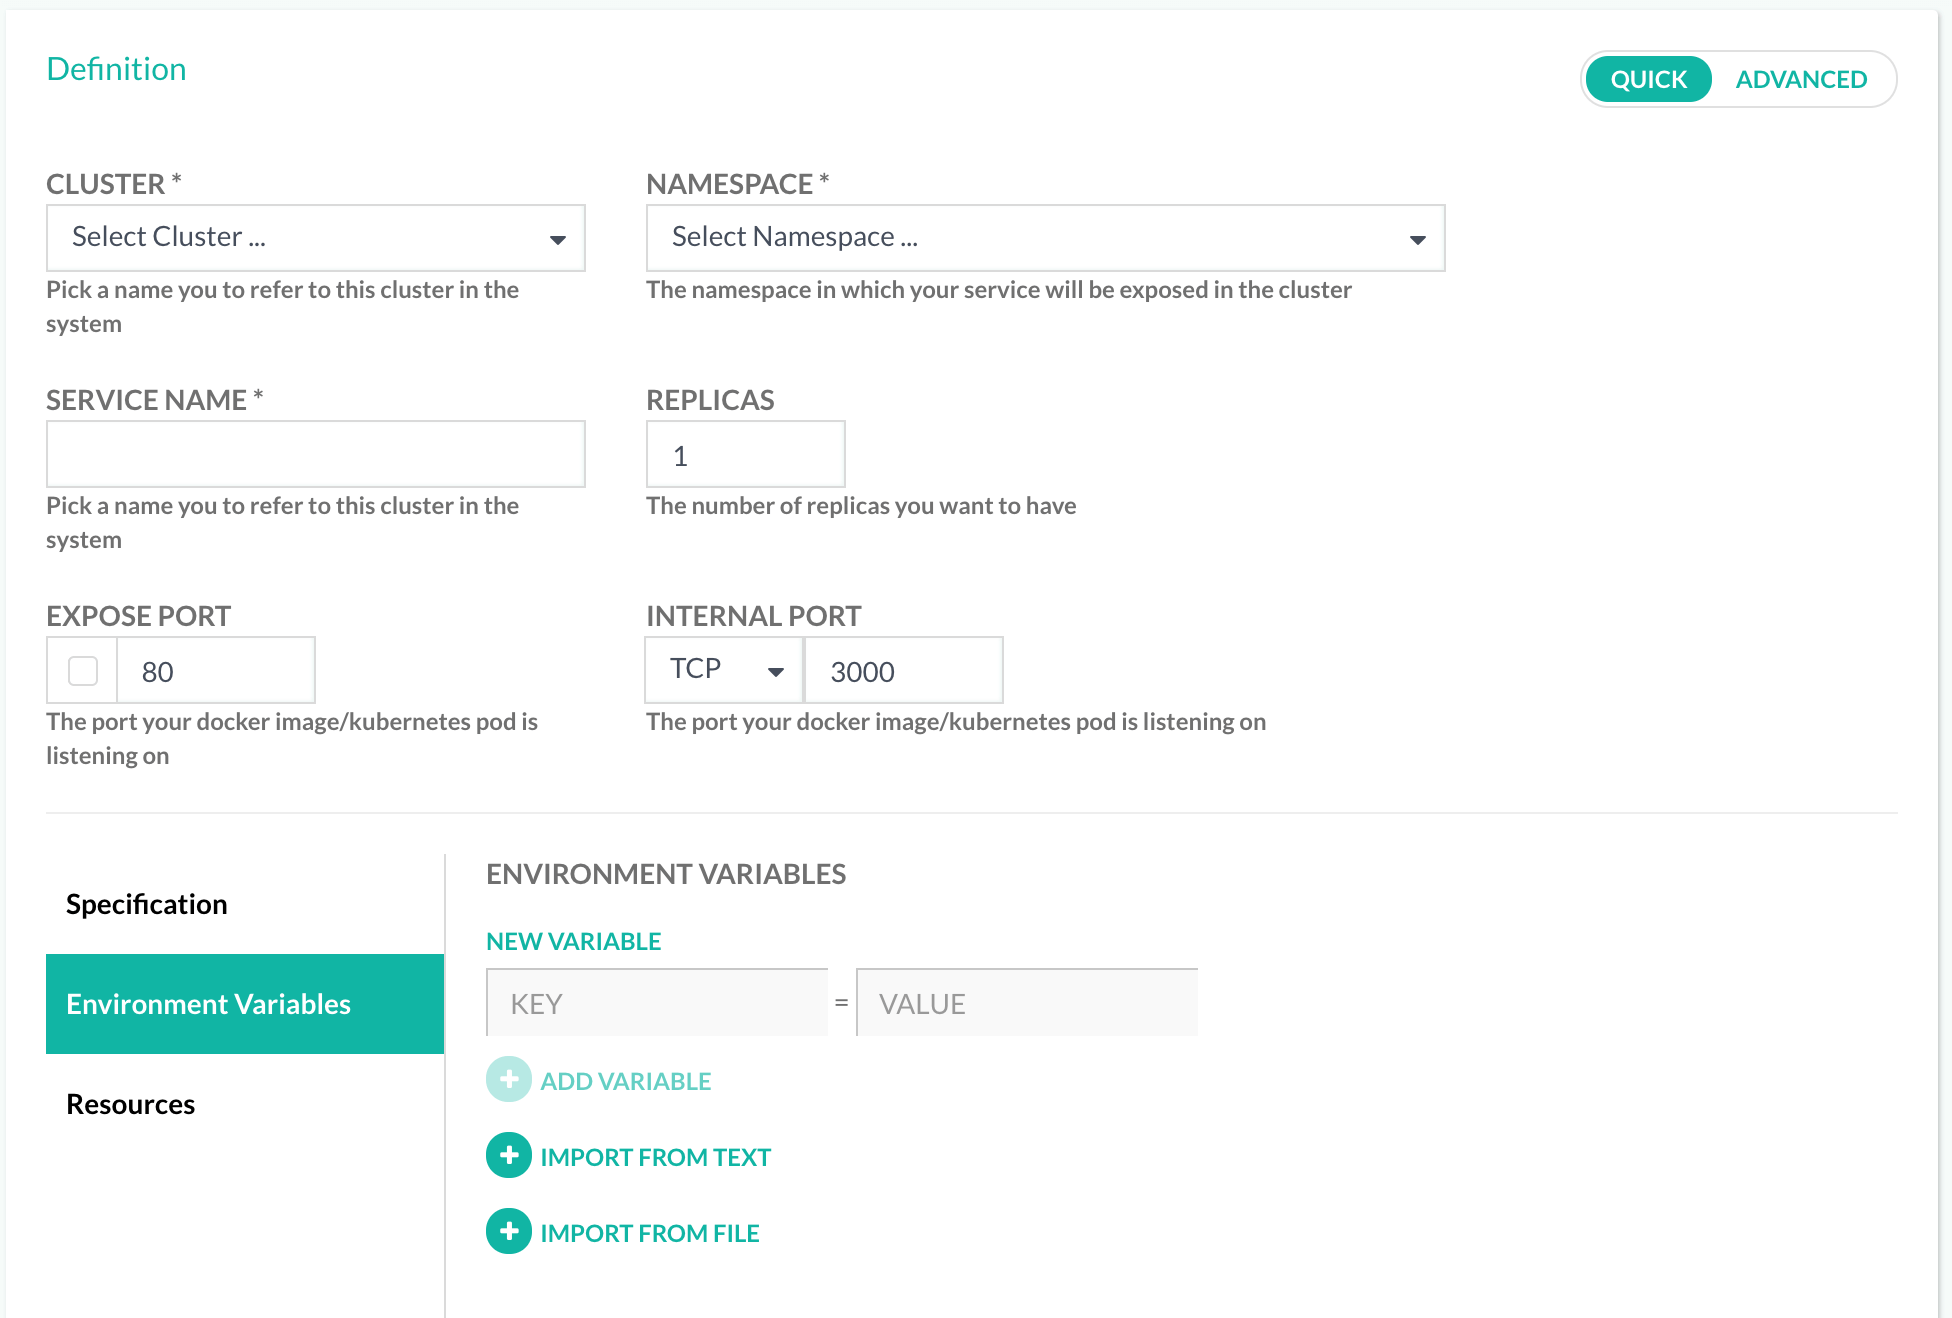
You can also define resource limits for your pods. It is a good practice to place maximum limits so that your services do not experience resource starvation.
Adding a service with a manifest file
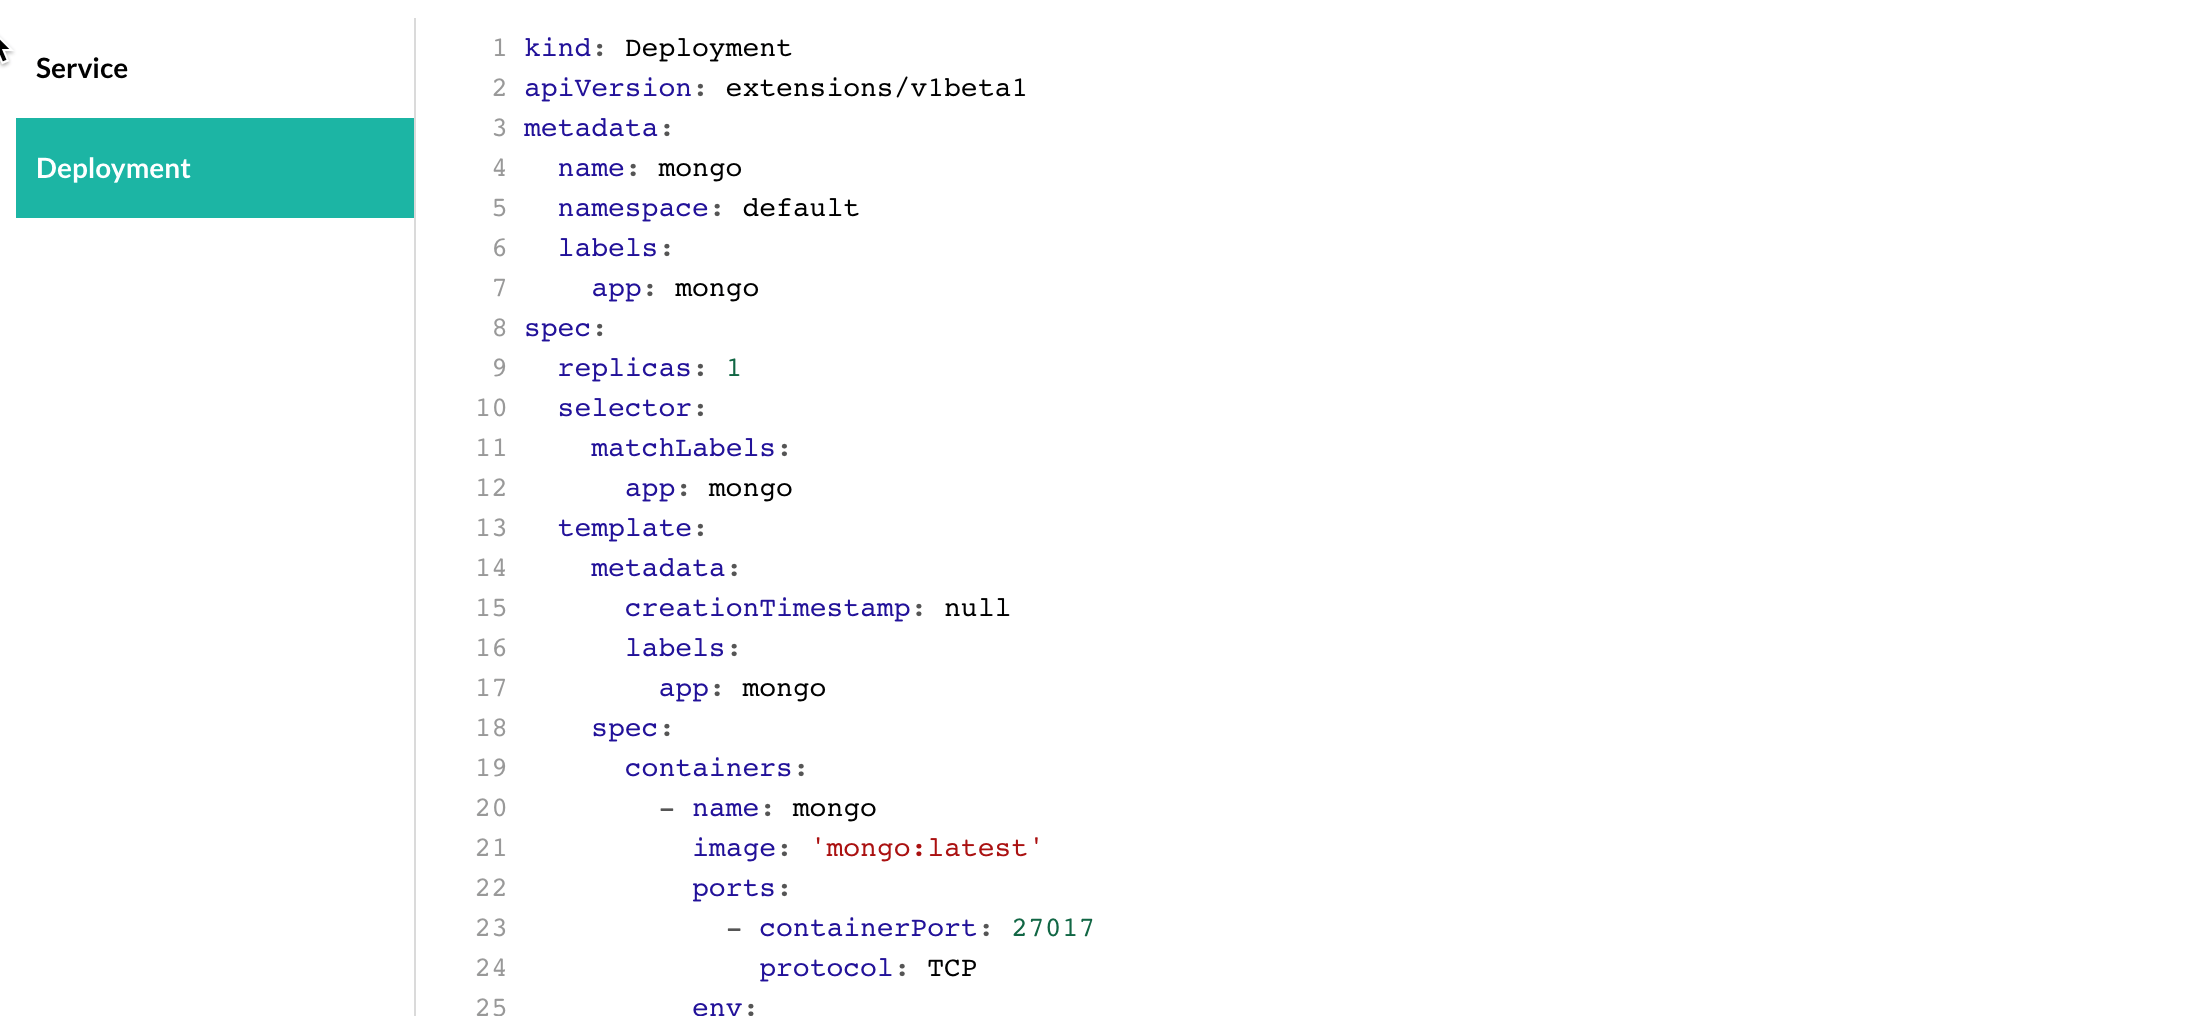
If you are an advanced Kubernetes user, toggle the Deployment option button to the YAML position on the top right corner of the screen.
In this mode you can define exactly the contents for the service and deployment Kubernetes resources.
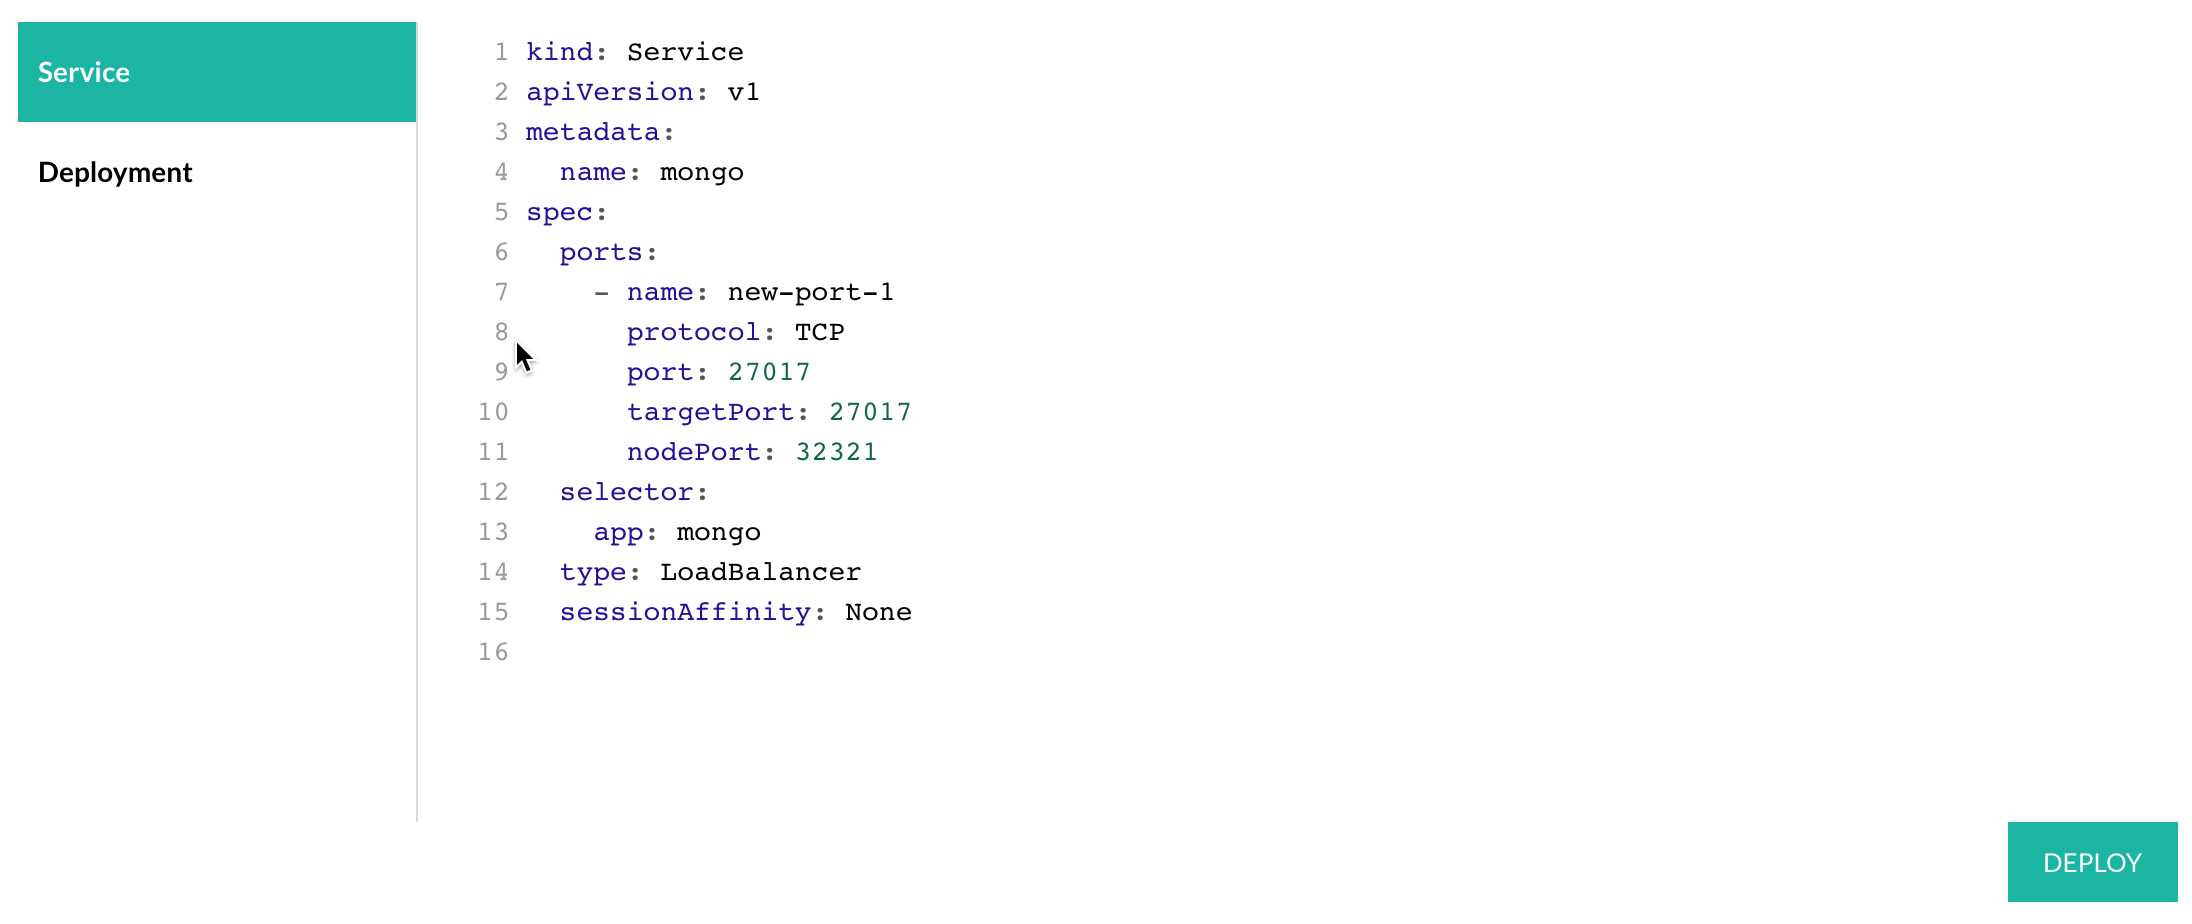
You can type directly in the browser window or paste content from a text editor.
Congratulations! Your service is now deployed to your Kubernetes cluster.
You can update an existing service in a similar manner from your Kubernetes services window - Just hit the “edit” icon and update your service using the same steps as in “Add new service” section.
Automate your deployment
After your service is deployed to your Kubernetes cluster, you can automate image deployment using Codefresh pipelines.
Some of the possible options are:
- The dedicated deploy step in a pipeline.
- The cf-deploy-kubernetes step in a pipeline. This can also perform simple templating on Kubernetes manifests.
Read more Deployment options for Kubernetes.
Related articles
Environment dashboard
Add Config Maps
Kubernetes deployment quick start