GitOps Environments dashboard

Create Environments to track SDLC for Argo CD applications

NOTE
This feature is currently in Beta.

The Environments dashboard introduces a new dimension to the developer and deployment experience with Argo CD applications in Codefresh.

Within Codefresh’s suite of dashboards, such as the GitOps Overview and GitOps Apps, you gain valuable insights into application deployments and configurations. These views focus on individual applications, lacking the broader context of their interconnections, if any.

The Environments dashboard fills this gap by providing a holistic perspective on applications based on their software development lifecycles. It offers a centralized view of applications as they progress through various promotions, placing them within the broader context of their development journey.

GitOps Environments

GitOps Environments

Read more on the world’s first dashboard for GitOps Environments and Products in this blog.

What is an Environment in Codefresh GitOps?

In Codefresh GitOps, an Environment is a custom entity defined by one or more pairs of K8s clusters and namespaces. It consolidates information for all Argo CD applications deployed to those clusters and namespaces, allowing you to easily track what’s deployed where at any given moment.

The diagram illustrates how Codefresh organizes different Argo CD applications within their deployment contexts in the Environments dashboard.

Argo CD applications organized in GitOps Environments

Argo CD applications organized in GitOps Environments
Benefits of Environments

Let’s review some of the key benefits of Environments:

  • Mirror your SDLC
    Codefresh Environments are designed to mirror your software development life cycle (SDLC). By aligning applications with their development and deployment stages, Environments offer a clear and contextual view of the entire application lifecycle, as it moves from development to production.

  • Effortless creation
    Creating an Environment in Codefresh is straightforward and intuitive. All you need is a unique name and the Kubernetes clusters and namespaces to associate with the Environment.

  • Contextual visibility
    Environments consolidate Kubernetes clusters and namespaces, providing a unified view of all Argo CD applications deployed within. This centralized perspective allows teams to effortlessly track application deployments across various clusters and namespaces, enhancing operational transparency.

  • Simple scalability and maintenance
    Environments are equally simple to scale and maintain as they are to create. Whether expanding infrastructure or adapting to evolving project requirements, scaling is as simple as adding more Environments, or adding more clusters or namespaces to existing Environments. For flexibility, Codefresh allows you to also add Environments without deploying any applications to them.

Create Environments by defining settings (see Create Environments), and explore how Codefresh pulls in all the information into an intuitive dashboard (see Environments dashboard).

Learn how to work with Environments, and work with Argo CD applications within Environments.

Products add another dimension to the experiences by bridging applications and Environments. Read about it in GitOps Products.

Create Environments

Create one or more Environments corresponding to any stage in your development and deployment lifecycle.
Define the configuration of the Environment through a unique name, it’s intended usage, and any number of clusters and namespaces. Review Key aspects when creating Environments.

  1. In the Codefresh UI, from the Ops in the sidebar, select Environments, and then click Add Environment.
  2. Define the following:
    1. Name: A unique name for your GitOps Environment, which is meaningful in the context of your development and deployment cycle.
    2. Kind: The purpose of this GitOps Environment, and can be either Production where the live versions of the applications are deployed, or Non-production where development, testing, staging versions are deployed.
    3. Tags: Any metadata providing additional context and information about the GitOps Environment, used for filtering and organization purposes.
    4. Clusters and Namespaces: Single or multiple clusters and namespaces in any combination to map to the GitOps Environment.
      To include all namespaces in a cluster, leave Namespaces empty. Adding a cluster with one or more namespaces populates the Environment with all the applications deployed in the namespaces.

Create a GitOps Environment

Create a GitOps Environment
  1. Click Add. The Environment is displayed in the Environments dashboard.

Environments dashboard

Here’s an example of the Environments dashboard.

GitOps Environment dashboard

GitOps Environment dashboard

The table describes the information displayed in the Environments dashboard.

Item Description
Filters Predefined filters to customize the Environment dashboard view by Product or Application.
Star an application to mark it as a favorite and easily locate applications of interest.
Select the to star as a favorite.

To filter by favorites, on the filters bar, click .
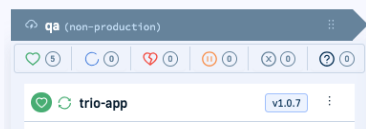
Detailed/Compact views Switch between views to get information on applications that populate an Environment.
  • Compact: Default view presenting a flat list of applications with the version, health, and sync status for each.
  • Detailed: Displays a record for each application including assigned Product, commit information, and cluster-namespace deployment details.
    If not assigned to a Product, the application name is used..
  • Application version: Available for Helm-based applications, indicating the specific release in different Environments. Clicking the version displays additional information and options.
    See Identify application versions in different Environments.
In both view modes, every application has a context-menu with quick access to frequently performed actions, such as Synchronize and Refresh. See Manage applications in Environments.
Environments Organized in color-coded columns to differentiate between non-production Environments (gray) and production Environments (blue).
  • The column title represents the name of the Environment. Mouse over displays the options available to manage Environments. See Working with Environments.
  • Quick filter for applications within Environment: The top row displays breakdown of applications by health statuses. Clicking a status filters the applications accordingly.
  • Each Environment is populated with the applications in the cluster-namespace pairs mapped to it.
    An empty Environment indicates that there are no applications in the cluster-namespaces mapped to it.
    **Unassigned Apps** show applications not assigned to any Product.

Working with Environments

Once you create an Environment, it is displayed in the Environments dashboard. The Environments dashboard consolidates in one location the Environments defined for the account along with the applications that belong to each Environment.

Reorder Environments with drag and drop

Change the order of the Environments displayed in the Environments dashboard to suit your requirements through simple drag and drop. By default, the Environments are displayed in the same order in which they are created.

For example, if you have two non-production and one production Environment for your e-commerce application, you can order them to display first the non-production and then the production Environments to reflect the corresponding stages.

  1. In the Codefresh UI, from the Ops in the sidebar, select Environments.
  2. Mouse over the column with the Environment to move.
  3. Click and drag the column to the required location.

Drag and drop to move Environments

Drag and drop to move Environments

Edit Environments

Update the Environment’s configuration settings when required. You can change all settings for an Environment, including the name.

You may need to edit an Environment when you add new infrastructure and deploy applications. In this case, you can add the new cluster and namespace or only the namespace to the Environment’s definition.

  1. In the Codefresh UI, from the Ops in the sidebar, select Environments.
  2. Mouse over the column with the Environment to edit, and click .
  3. Edit the settings as required.

Delete Environments

Delete unused or legacy Environments to avoid clutter. Deleting an Environment removes it from the Environments dashboards. The underlying resources or configuration, including the applications remain intact.

  1. In the Codefresh UI, from the Ops in the sidebar, select Environments.
  2. Mouse over the column with the Environment to delete.
  3. Click , type the name of the environment to confirm Delete.

Delete a GitOps Environment

Delete a GitOps Environment

Working with applications in Environments

In the Environments dashboard, you get both visibility into applications running in different Environments, detailed information on each application, and the ability to sync, refresh, and perform other actions for the application.

Filter applications in Environments by health status

Quickly filter applications within an Environment by health status. For health status descriptions, see Health status for application resources.

  1. In the Codefresh UI, from the Ops in the sidebar, select Environments.
  2. For any Environment, click the Health status or statuses by which to filter.
    The Environment displays those applications that match the selected status.

Filter applications in Environment by Health Status

Filter applications in Environment by Health Status

Trace applications across Environments

Trace the same application as it moves across different Environments in its development, testing, and deployment cycle. See the version of the application running in each Environment, the most recent commit indicating the change to the application, and the author of the commit.

Alternatively, track a set of applications deployed to multiple Environments of the same kind and at the same level. For example, track the billing application deployed to multiple production Environments based on regions. Here too, see which applications are running on each Environment, the most recent commit to the application, and the user who made the commit.

  1. In the Codefresh UI, from the Ops in the sidebar, select Environments.
  2. Switch to Detailed view.

Example: Tracing application progress across different GitOps Environments

Example: Tracing application progress across different GitOps Environments

You can then view the deployment history for a specific version of the application.

View and compare deployed versions for dependencies

View the dependencies included with each application, and compare versions of the application and dependencies deployed in different Environments. Track the progress of the applications, understand the changes made, and ensure that customers are using the latest or most appropriate release.

Table and YAML views

  • Table: Compare more than two applications.
  • YAML: Compare up to two applications.

Dependency chart versions

  • List the charts (dependencies) deployed with the application and the release version for each
  • Compare versions of dependencies in the different applications
How to
  1. In the Codefresh UI, from the Ops in the sidebar, select Environments.
  2. Click the version number of the application.

Helm chart version for application

Helm chart version for application
  1. To compare the versions of dependencies for the selected application across different Environments, enable Compare.
  2. Select the Environments to compare to.
  3. To compare the versions of the dependencies for the applications in the selected Environments, switch to Table view.

App dependencies and versions

App dependencies and versions
  1. To see the actual diffs between the applications, switch to YAML view, and then toggle between Full/Compact views.

Compare versions of dependencies in different Environments

Compare versions of dependencies in different Environments

View deployment (Timeline) history for applications

Review the deployments for a specific application in the Environments dashboard.

  1. In the Codefresh UI, from the Ops in the sidebar, select Environments.
  2. In the Environment column with the application you require, click the application name to view deployment history.

View deployment history for application from Environments dashboard

View deployment history for application from Environments dashboard
  1. To view all the application’s tabs, including the Current State, Configuration, and others, click the link to Full View at the top of the deployment view.

Manage applications from within Environments

Manage applications from within Environments through each application’s context menu, including manual sync, refresh, and other options.

  1. In the Codefresh UI, from the Ops in the sidebar, select Environments.
  2. In the Environment with the application for which to take action, click the context menu to the right of the application, and select the option:
    • Quick View: View deployment, definition, and event information for the selected application in the same location.
    • Synchronize: Manually synchronize the application to expedite Git-to-cluster sync.
    • Edit: Update General or Advanced configuration settings for the application.
    • Refresh/Hard Refresh: As an alternative to manually syncing an application, either sync the application with the desired state in Git (refresh), or sync the application with the desired state Git while removing the cache (hard refresh).
    • Delete: Delete the application from Codefresh.

Context menu with actions for Argo CD applications within GitOps Environments

Context menu with actions for Argo CD applications within GitOps Environments

GitOps Products dashboard
Monitoring Argo CD applications
Home dashboard
DORA metrics
Creating Argo CD applications