SonarQube scanning
Trigger a SonarQube Analysis from Codefresh
SonarQube is a popular platform for Code Quality. It can be used for static and dynamic analysis of a codebase to detect common code issues such as bugs and vulnerabilities.
![]()
There are many ways to perform an analysis with SonarQube, but the easiest way is to use one that matches the build system of your application.
This article shows how to use the SonarQube plugin on Codefresh from the plugin directory. Once it is set up, your code is automatically analysed everytime your pipeline runs.
Prerequisites for SonarQube scanning
Before starting an analysis, you need to have a:
- Simple Codefresh pipeline up and running
- SonarQube account (Developer, Enterprise, or on the SonarCloud)
Get a security token from SonarQube
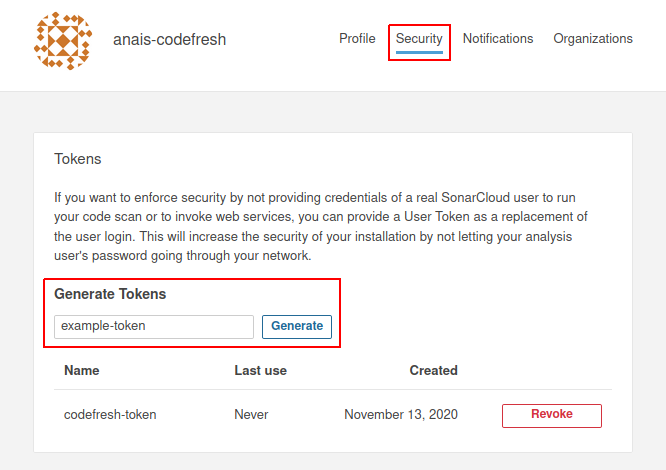
To use the SonarQube plugin, you need to provide your login credentials in your Codefresh pipeline or generate a security token. We recommend the latter. You can either create a new token or reuse an existing one. Security-wise, it is best if each project has its own token.
- Log in into your account in SonarQube.
- Navigate to USER > MY ACCOUNT, which is on the top-right corner of your profile.
- Select the Security tab, and generate the security token.
- Save the token where you can access it again easily.
Set up sonar-project.properties file
Set up a sonar-project.properties file in our root directry. This is needed as not all environment variables are currently automatically defined in the SonarScanner.
- Create a
sonar-project.propertiesfile. - Add the following values:
# must be unique in a given SonarQube instance
sonar.projectKey=a unique project key

# project name
sonar.projectName=your project's name
The file is needed to run the SonarQube plugin.
Language-specific settings
Note that projects using specific languages may require additional configuration. For more information, see the appropriate language page in the Sonarqube documentation.
Run an analysis from the Codefresh Plugin
If you are using the predefined Codefresh pipeline, you just need to look-up SonarQube under STEPS and you will find the custom plugin.
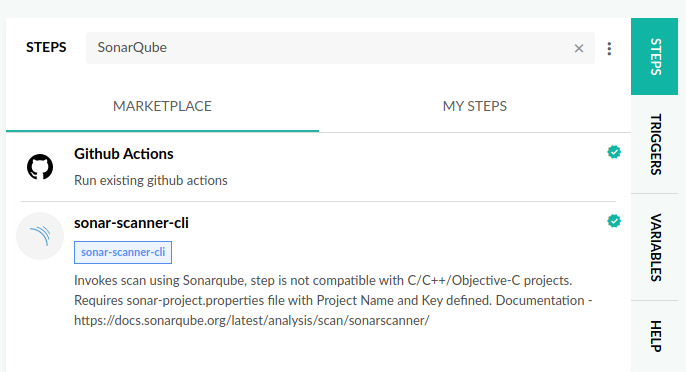
- Select the
sonar-scanner-cli - Copy and past the step to your pipeline
- Customise the values within the step as follows:
SONAR_HOST_URL: 'https://sonarcloud.io/'# this is the URL to SonarCloud, if applicable, please replace it with the Server URLSONAR_LOGIN: usernameor access token (generated above)SONAR_PASSWORD: passwordif username is usedSONAR_PROJECT_BASE_DIR: set working directory for analysisSONAR_SCANNER_CLI_VERSION: latest
- Save and run your pipeline.
Here is our example step:
 sonarqube:
    type: "sonar-scanner-cli"
    stage: "push"
    arguments:
      SONAR_HOST_URL: 'https://sonarcloud.io/' # replace with your host url
      SONAR_LOGIN: "insert access token" # replace with your access token
      SONAR_PROJECT_BASE_DIR: "/codefresh/volume/sonarqube-example" #r eplace with your working directory
      SONAR_SCANNER_CLI_VERSION: "latest"
View the SonarQube analysis
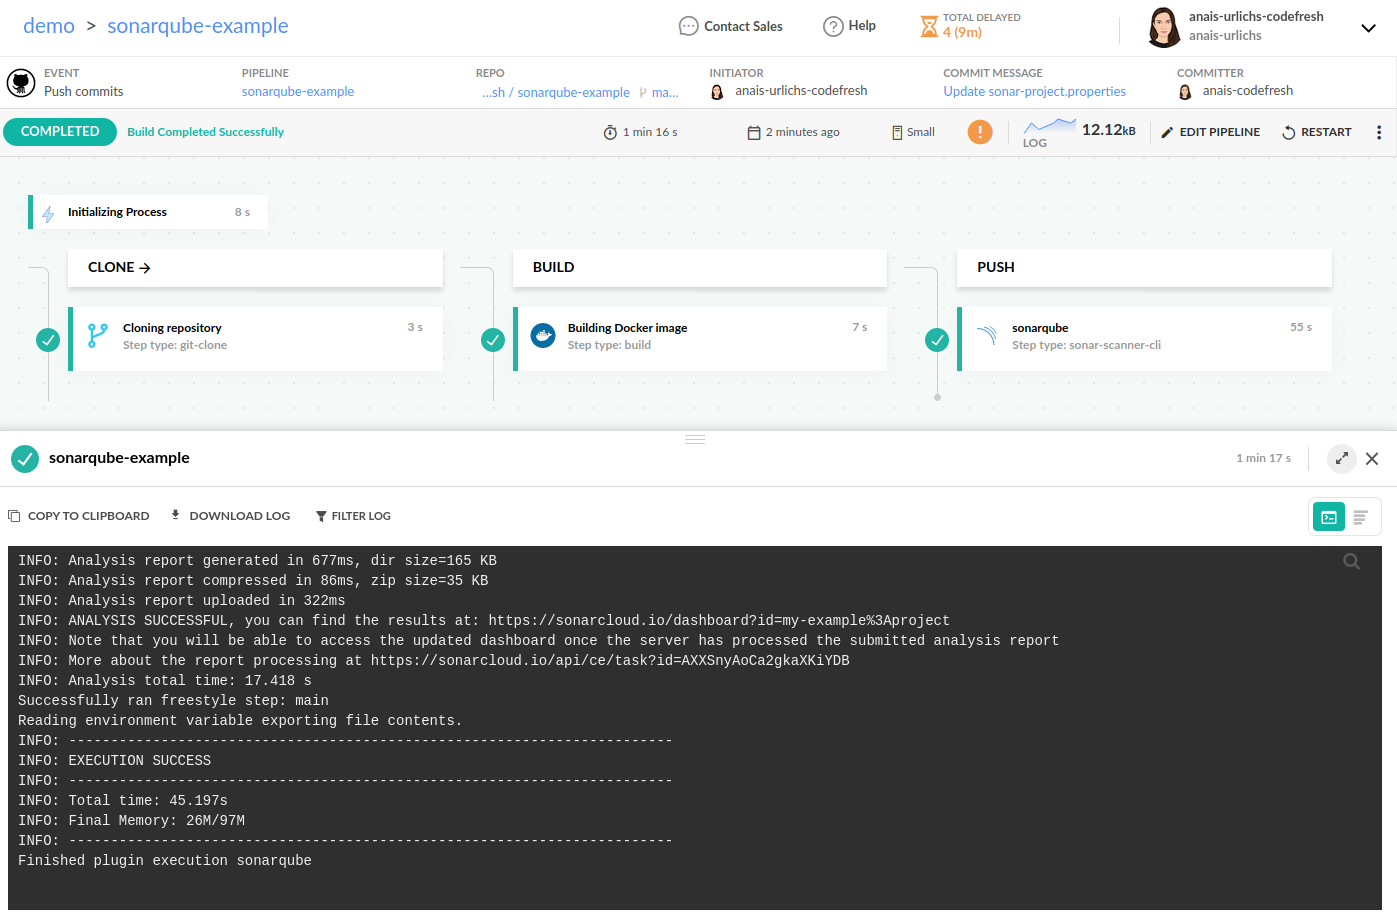
Once the Codefresh build starts, check the logs and monitor the progress of the analysis.
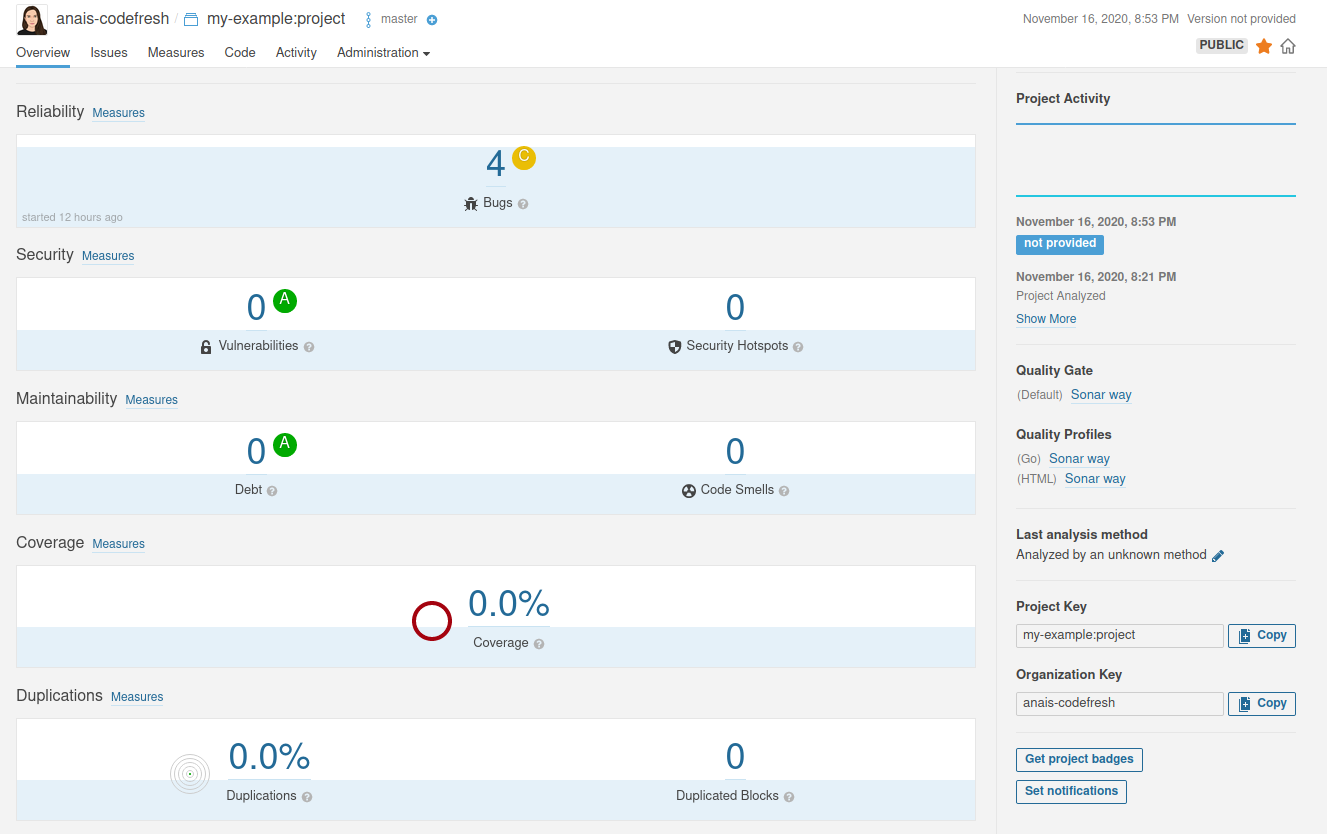
Once the analysis is complete, go to the SonarQube dashboard and see the recent analysis of the project.
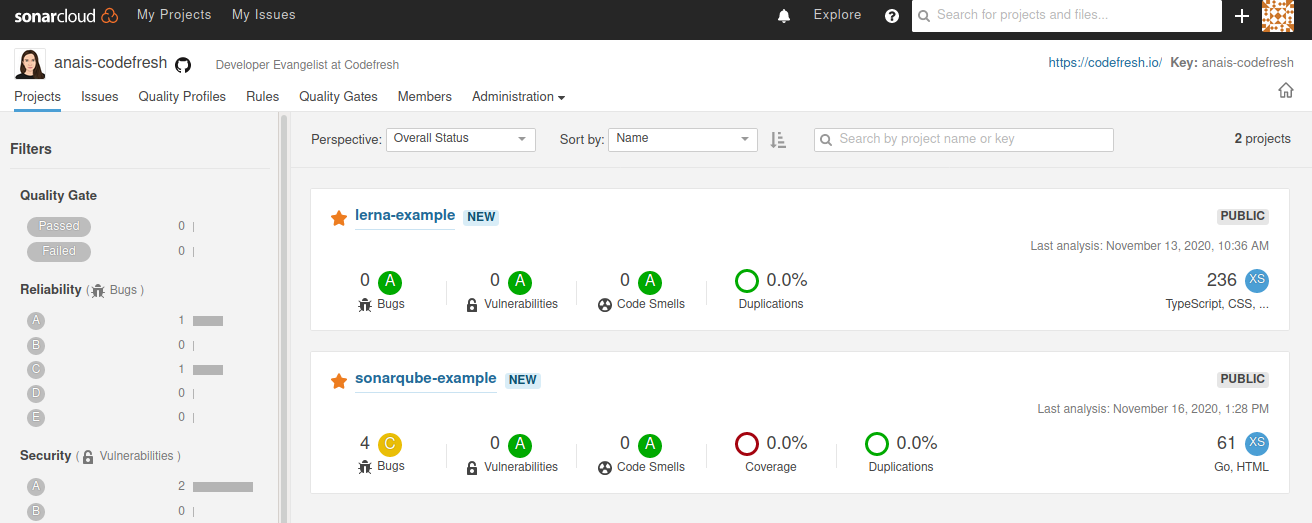
Then you can drill down and view the various statistics.
Related articles
Codefresh YAML for pipeline definitions
Steps in pipelines
Unit testing
Integration testing