Azure SSO via OIDC
Set up Azure SSO for OIDC
For a general overview of OIDC, see Setting up OIDC Federated SSO.
Set up OIDC SSO for Azure in Codefresh by:
- Registering the Codefresh application in Azure
- Configuring permissions for the Codefresh application in Azure
- Creating the Client secret in Azure
- Completing SSO configuration for Azure in Codefresh
- Configuring redirect URIs in Azure
Prerequisites
Make sure that your user in Azure who creates the application is assigned either of these roles:
- Application Administrator
- Global Administrator
If the user who creates the Azure application is not assigned to either of these roles, you cannot sync teams from Azure to Codefresh.
Step 1: Register the Codefresh application in Azure
To set up Microsoft Entra ID for SSO, first register a new application in Azure.
- Log in to the Azure Portal, and from the sidebar, select Microsoft Entra ID.

- From the sidebar, select App registrations, and then click + New registration on the top.
- Enter a name for the application, for example,
Codefresh, and retain the default values for all other settings.

- To apply your changes, click Register. The application is created and registered in Microsoft Entra ID.
Step 2: Configure permissions for the application in Azure
Once the application has been created and registered, configure the required permissions.
- Open the application, and from the sidebar, select API permissions
- Configure the following:
- Click + Add a permission.
- From Request API Permissions, in the Microsoft APIs tab, select Microsoft Graph.
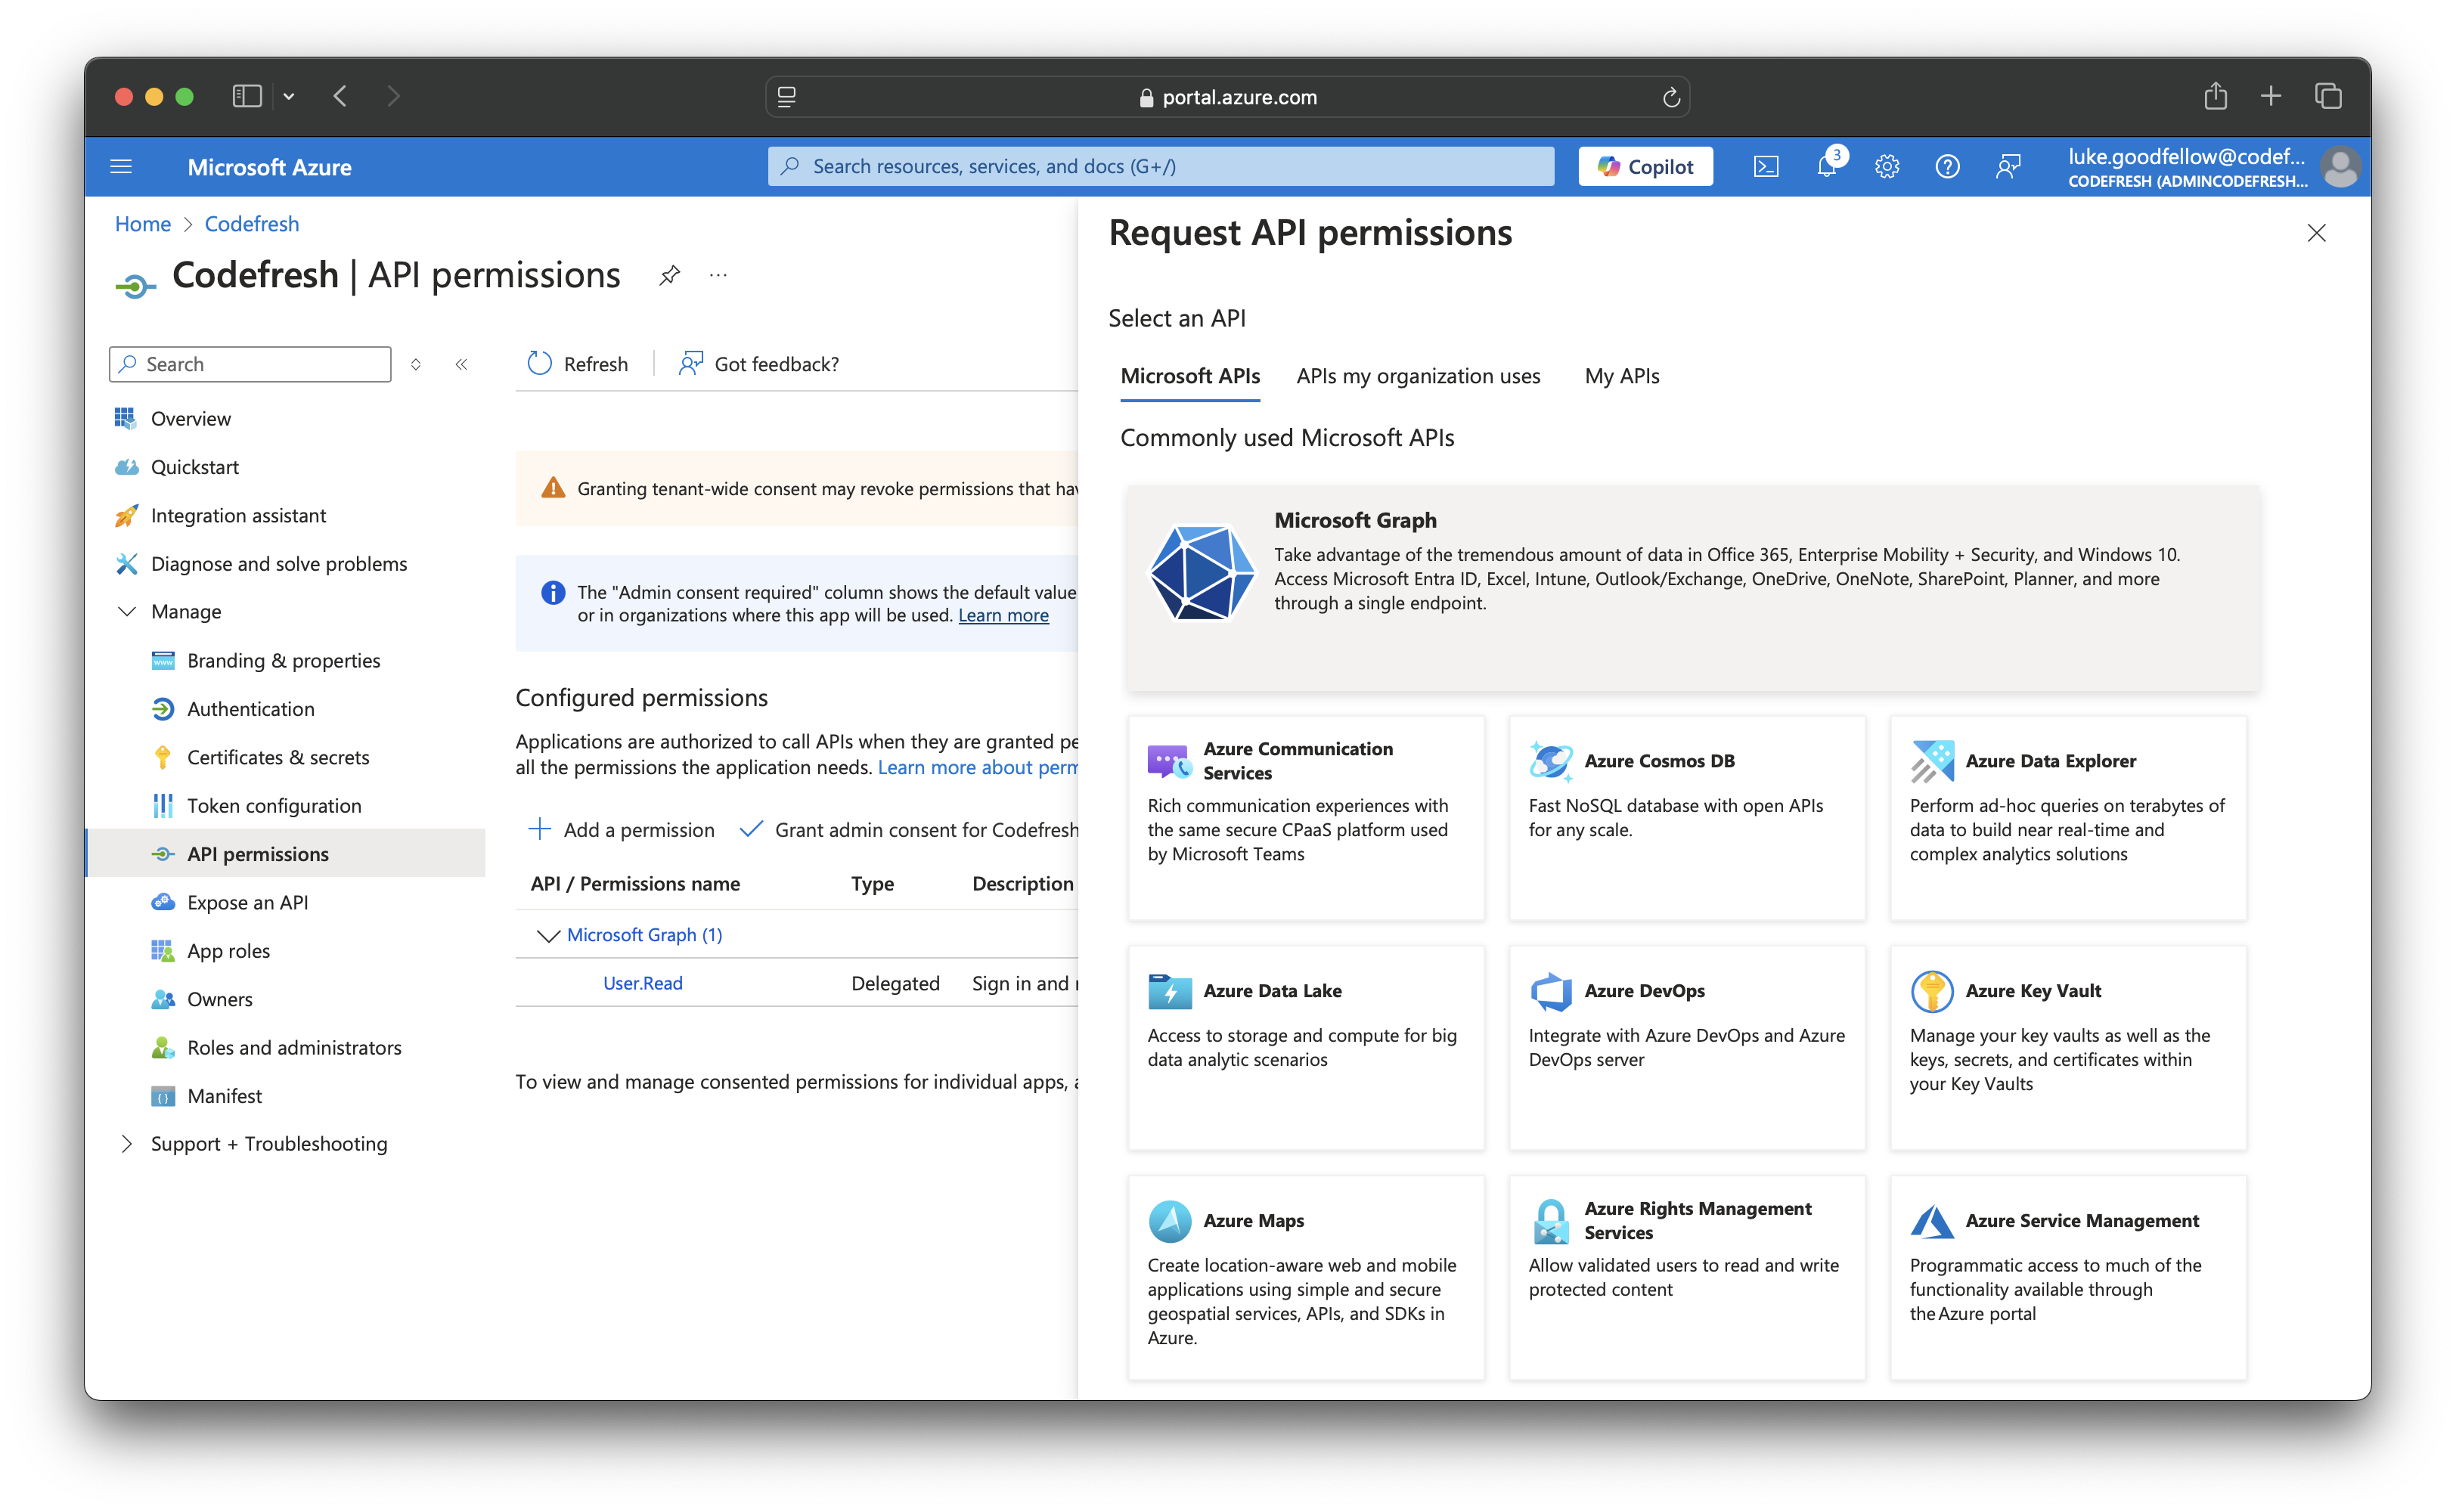
- Click Application permissions on the left.
- Add
Group > Read.All - Add
User > Read.All
- Add
- Next add Delegated permissions on the right
- Add
User > Read.All
NOTE
TheUser.Read (Delegated)permission is added by default. - Add
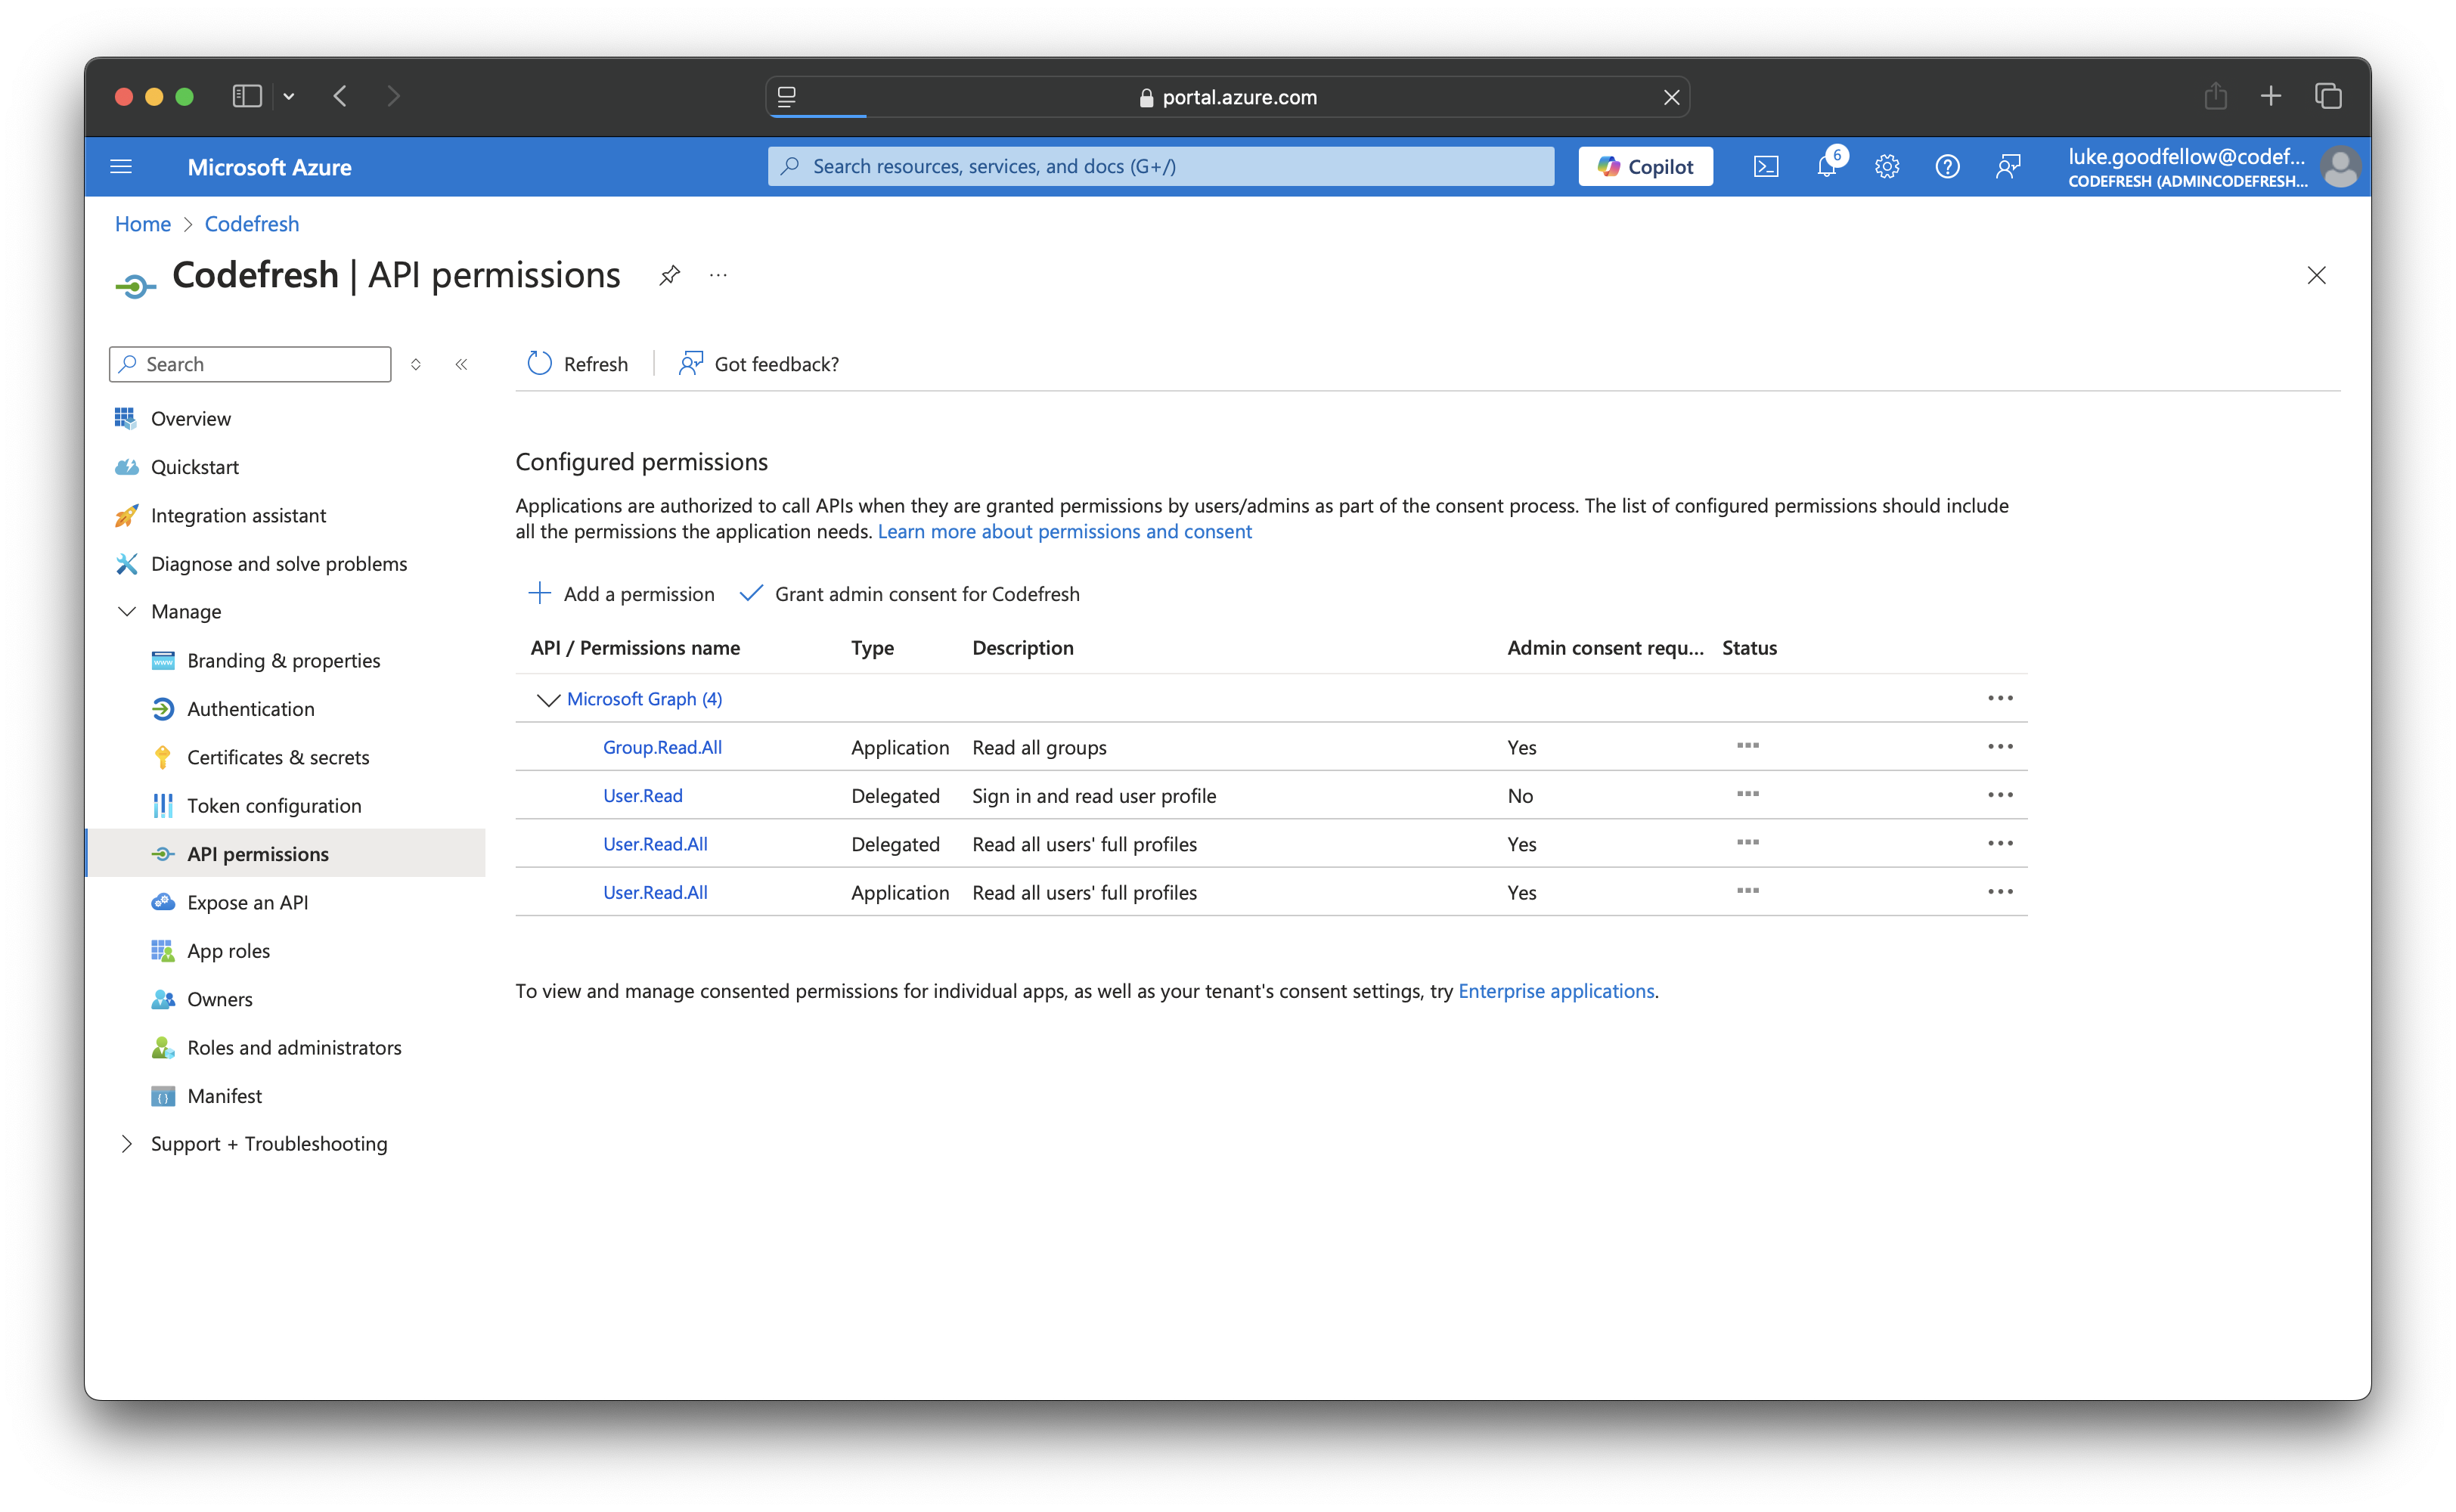
- Click Add Permissions.
- Click Grant admin consent for Default Directory on the bar.
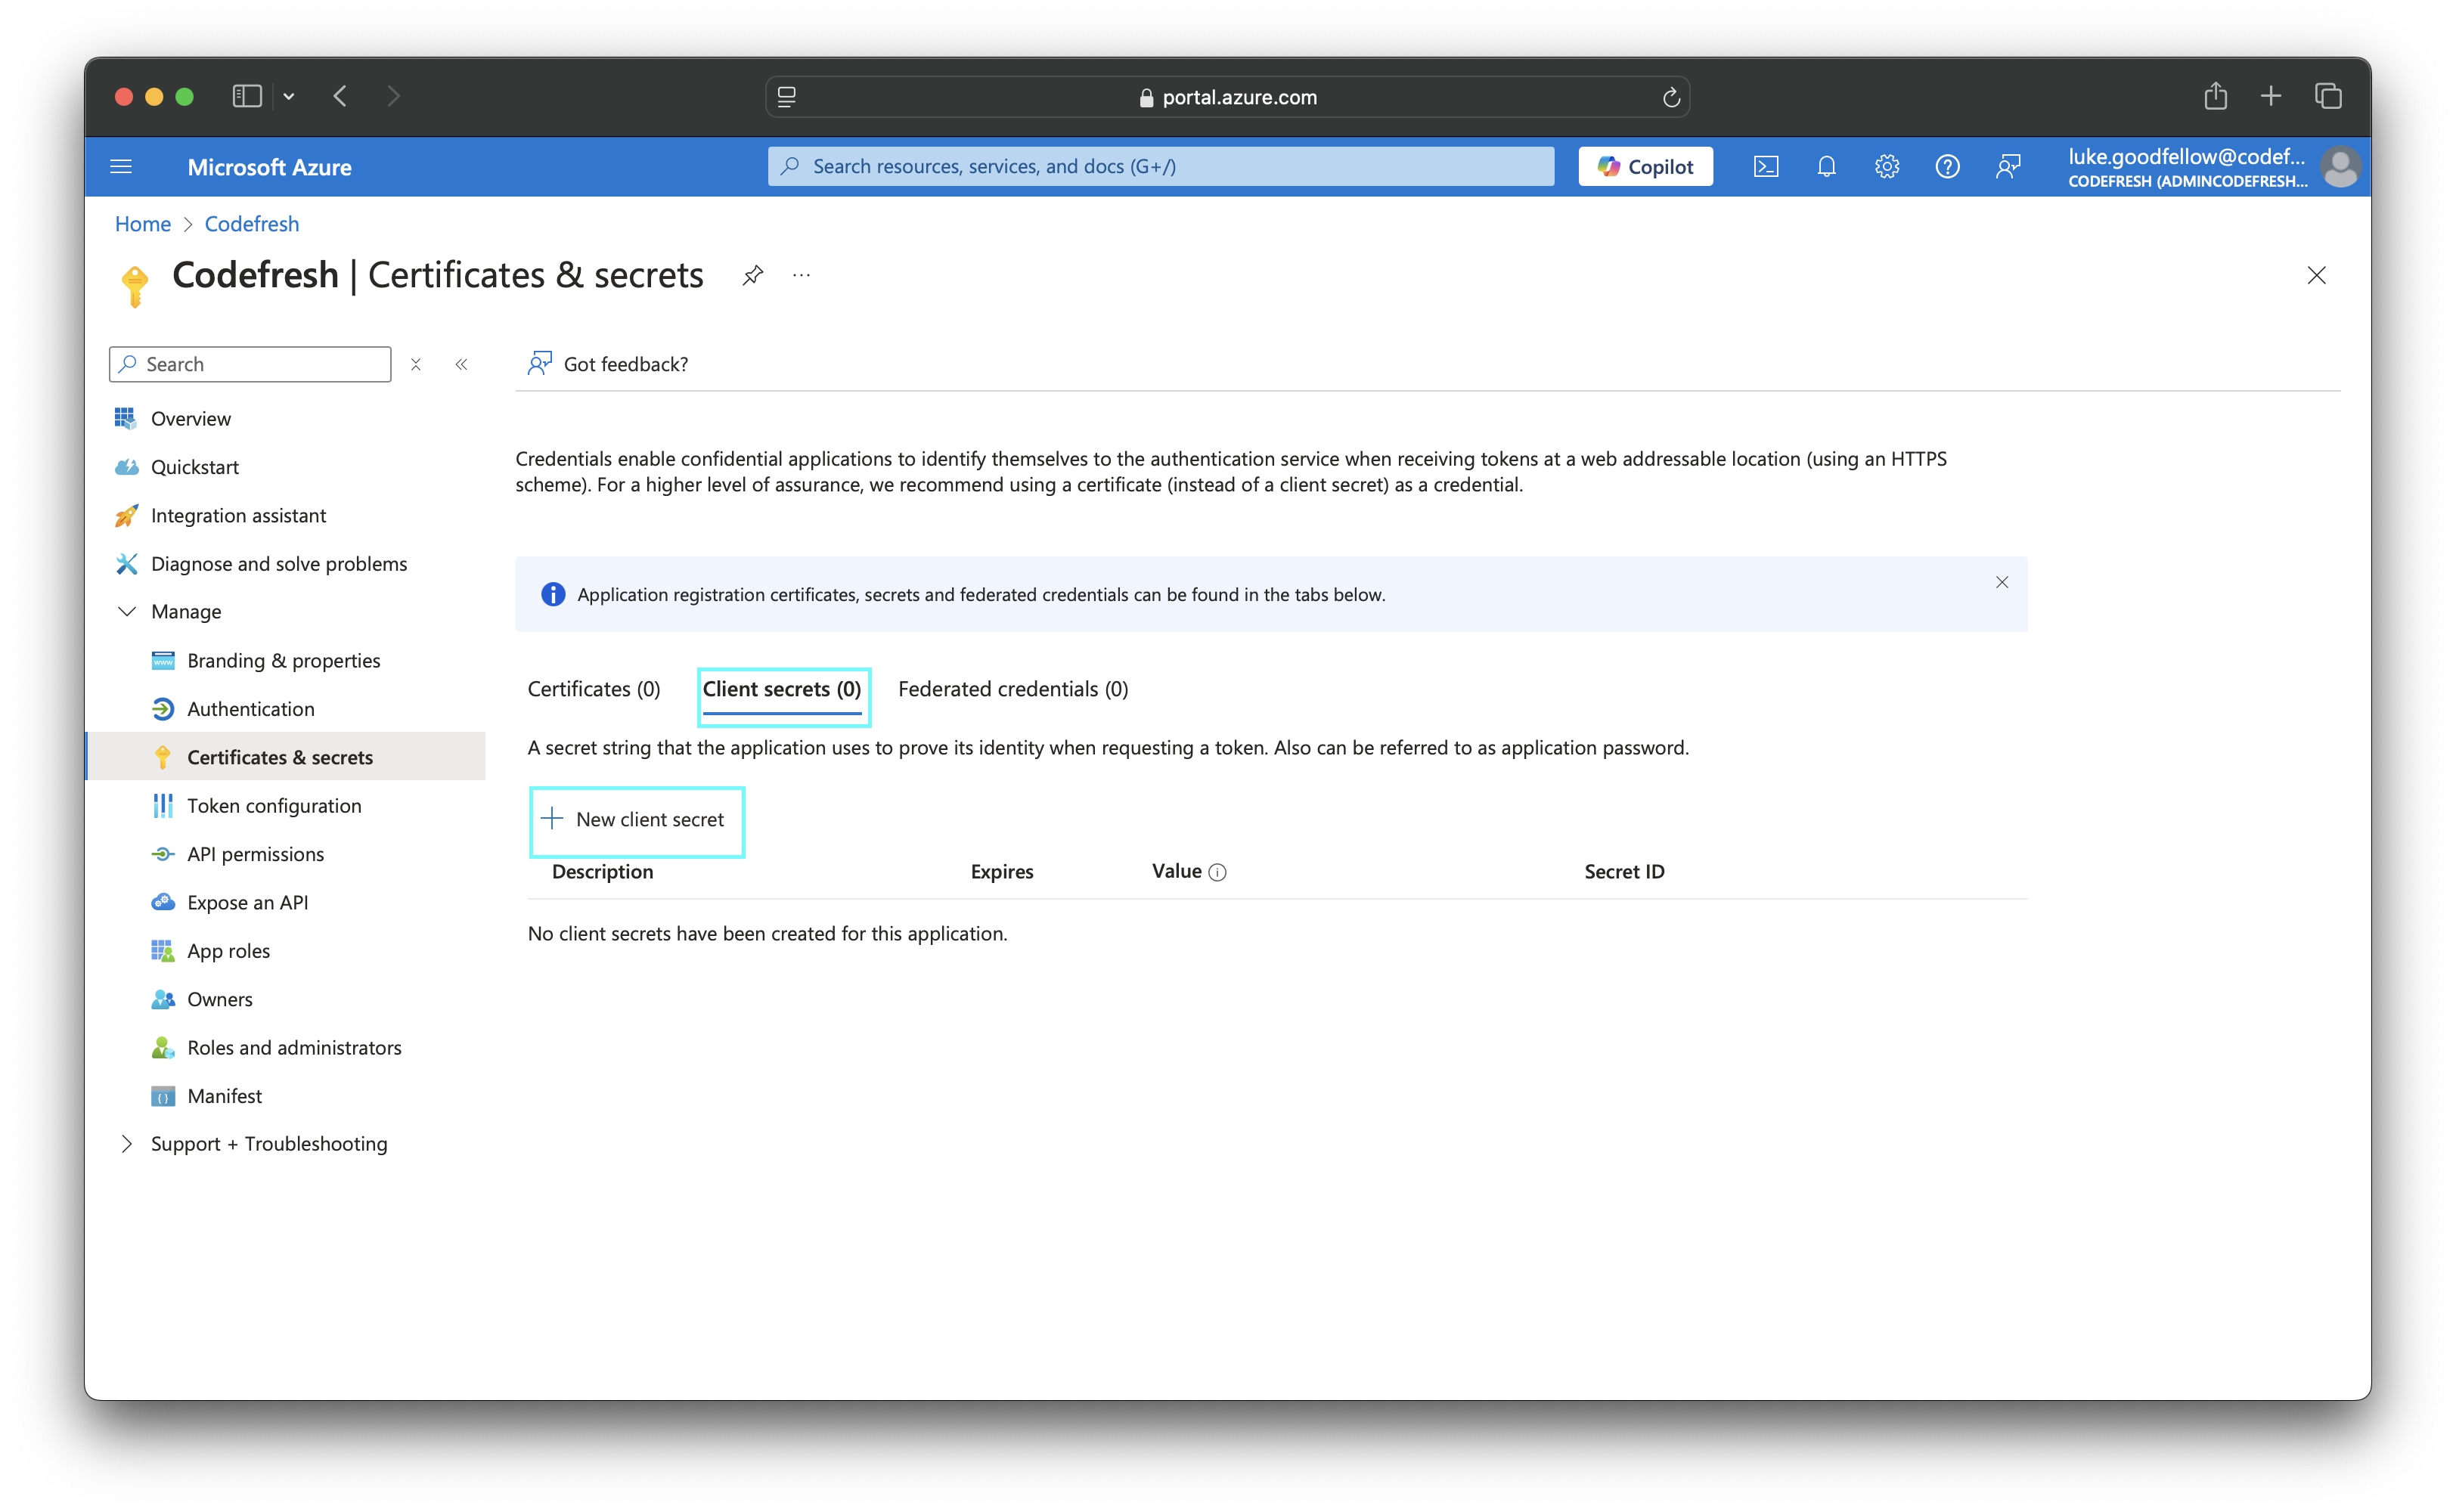
Step 3: Create client secret in Azure
Create a client secret for the application. You will need to provide it when you set up SSO for Azure in Codefresh.
- From the sidebar, select Certificates & secrets, and then click + New client secret.
- Optional. Add a meaningful description for the client secret, and either retain the default expiry date or define a custom one.
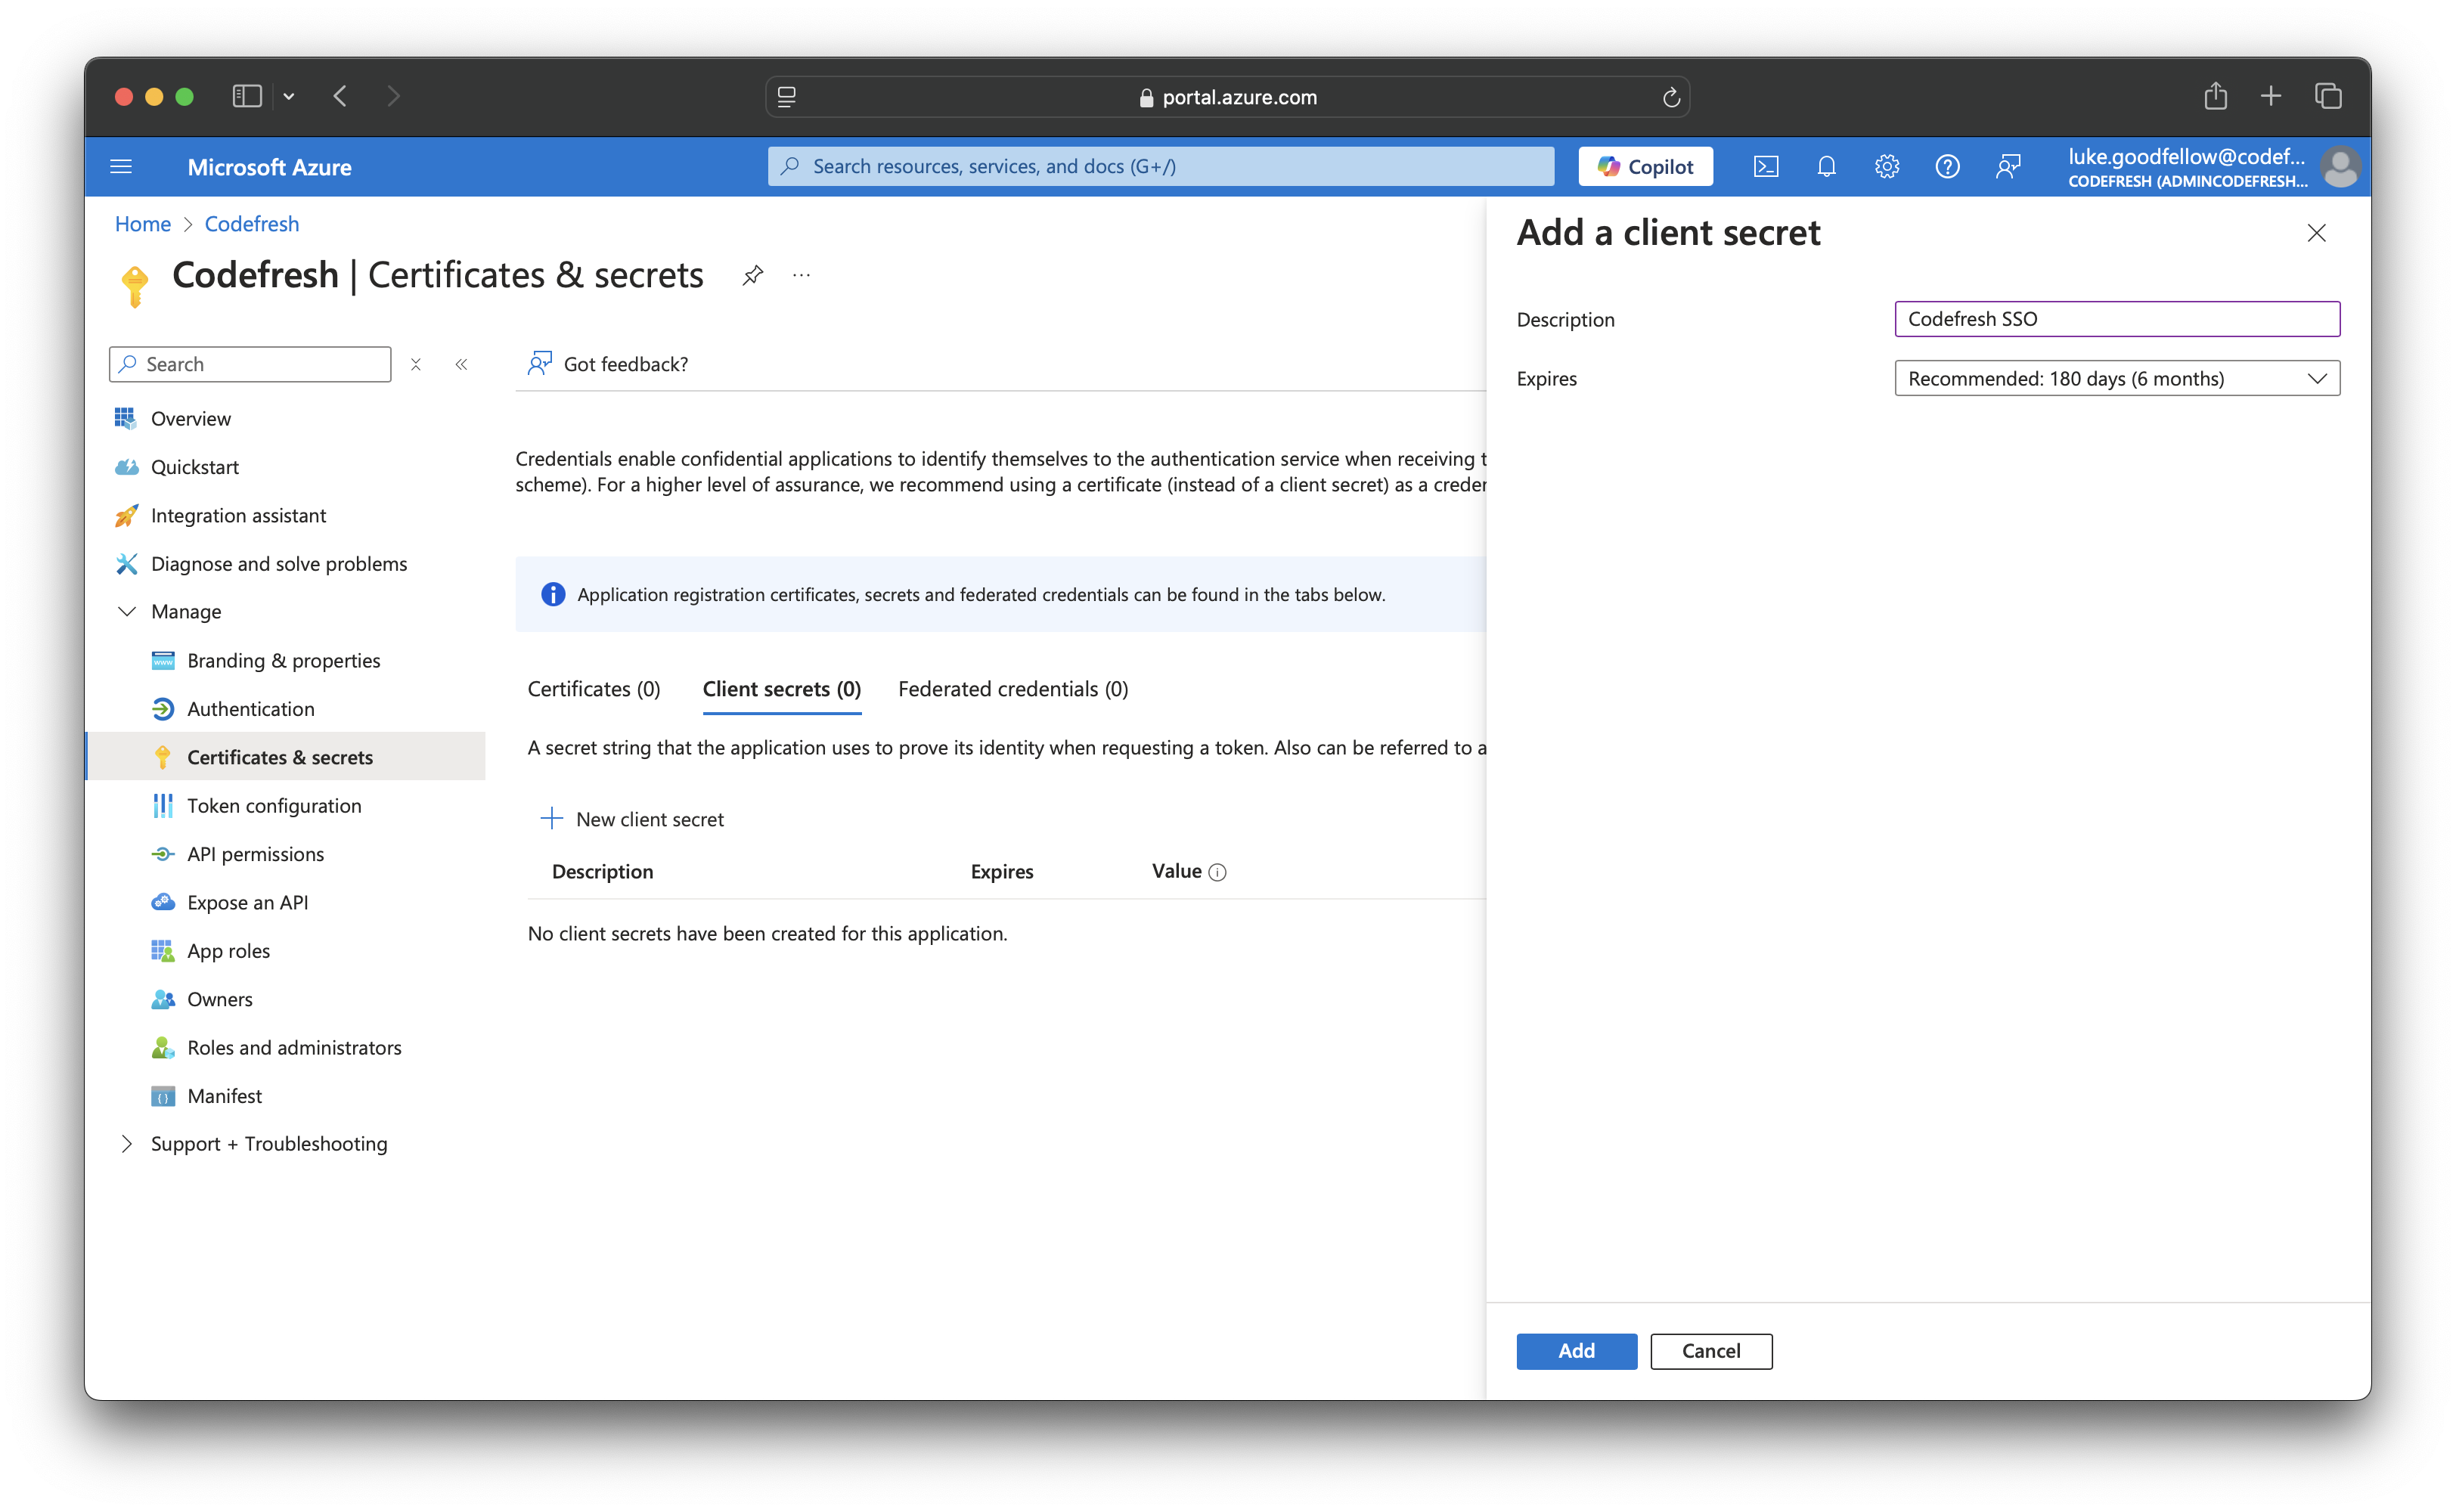
TIP
Make a note of the expiry date in your calendar to renew the key before the expiry date and prevent service interruptions.
- Click Add.
- Copy the secret Value, as you will need to provide it on setting up Azure SSO in Codefresh.
Step 4: Configure SSO settings for Azure in Codefresh
Configure SSO for Azure in the Codefresh UI. Depending on your configuration, you may need values for specific settings such as Tenant ID if you require team sync for example.
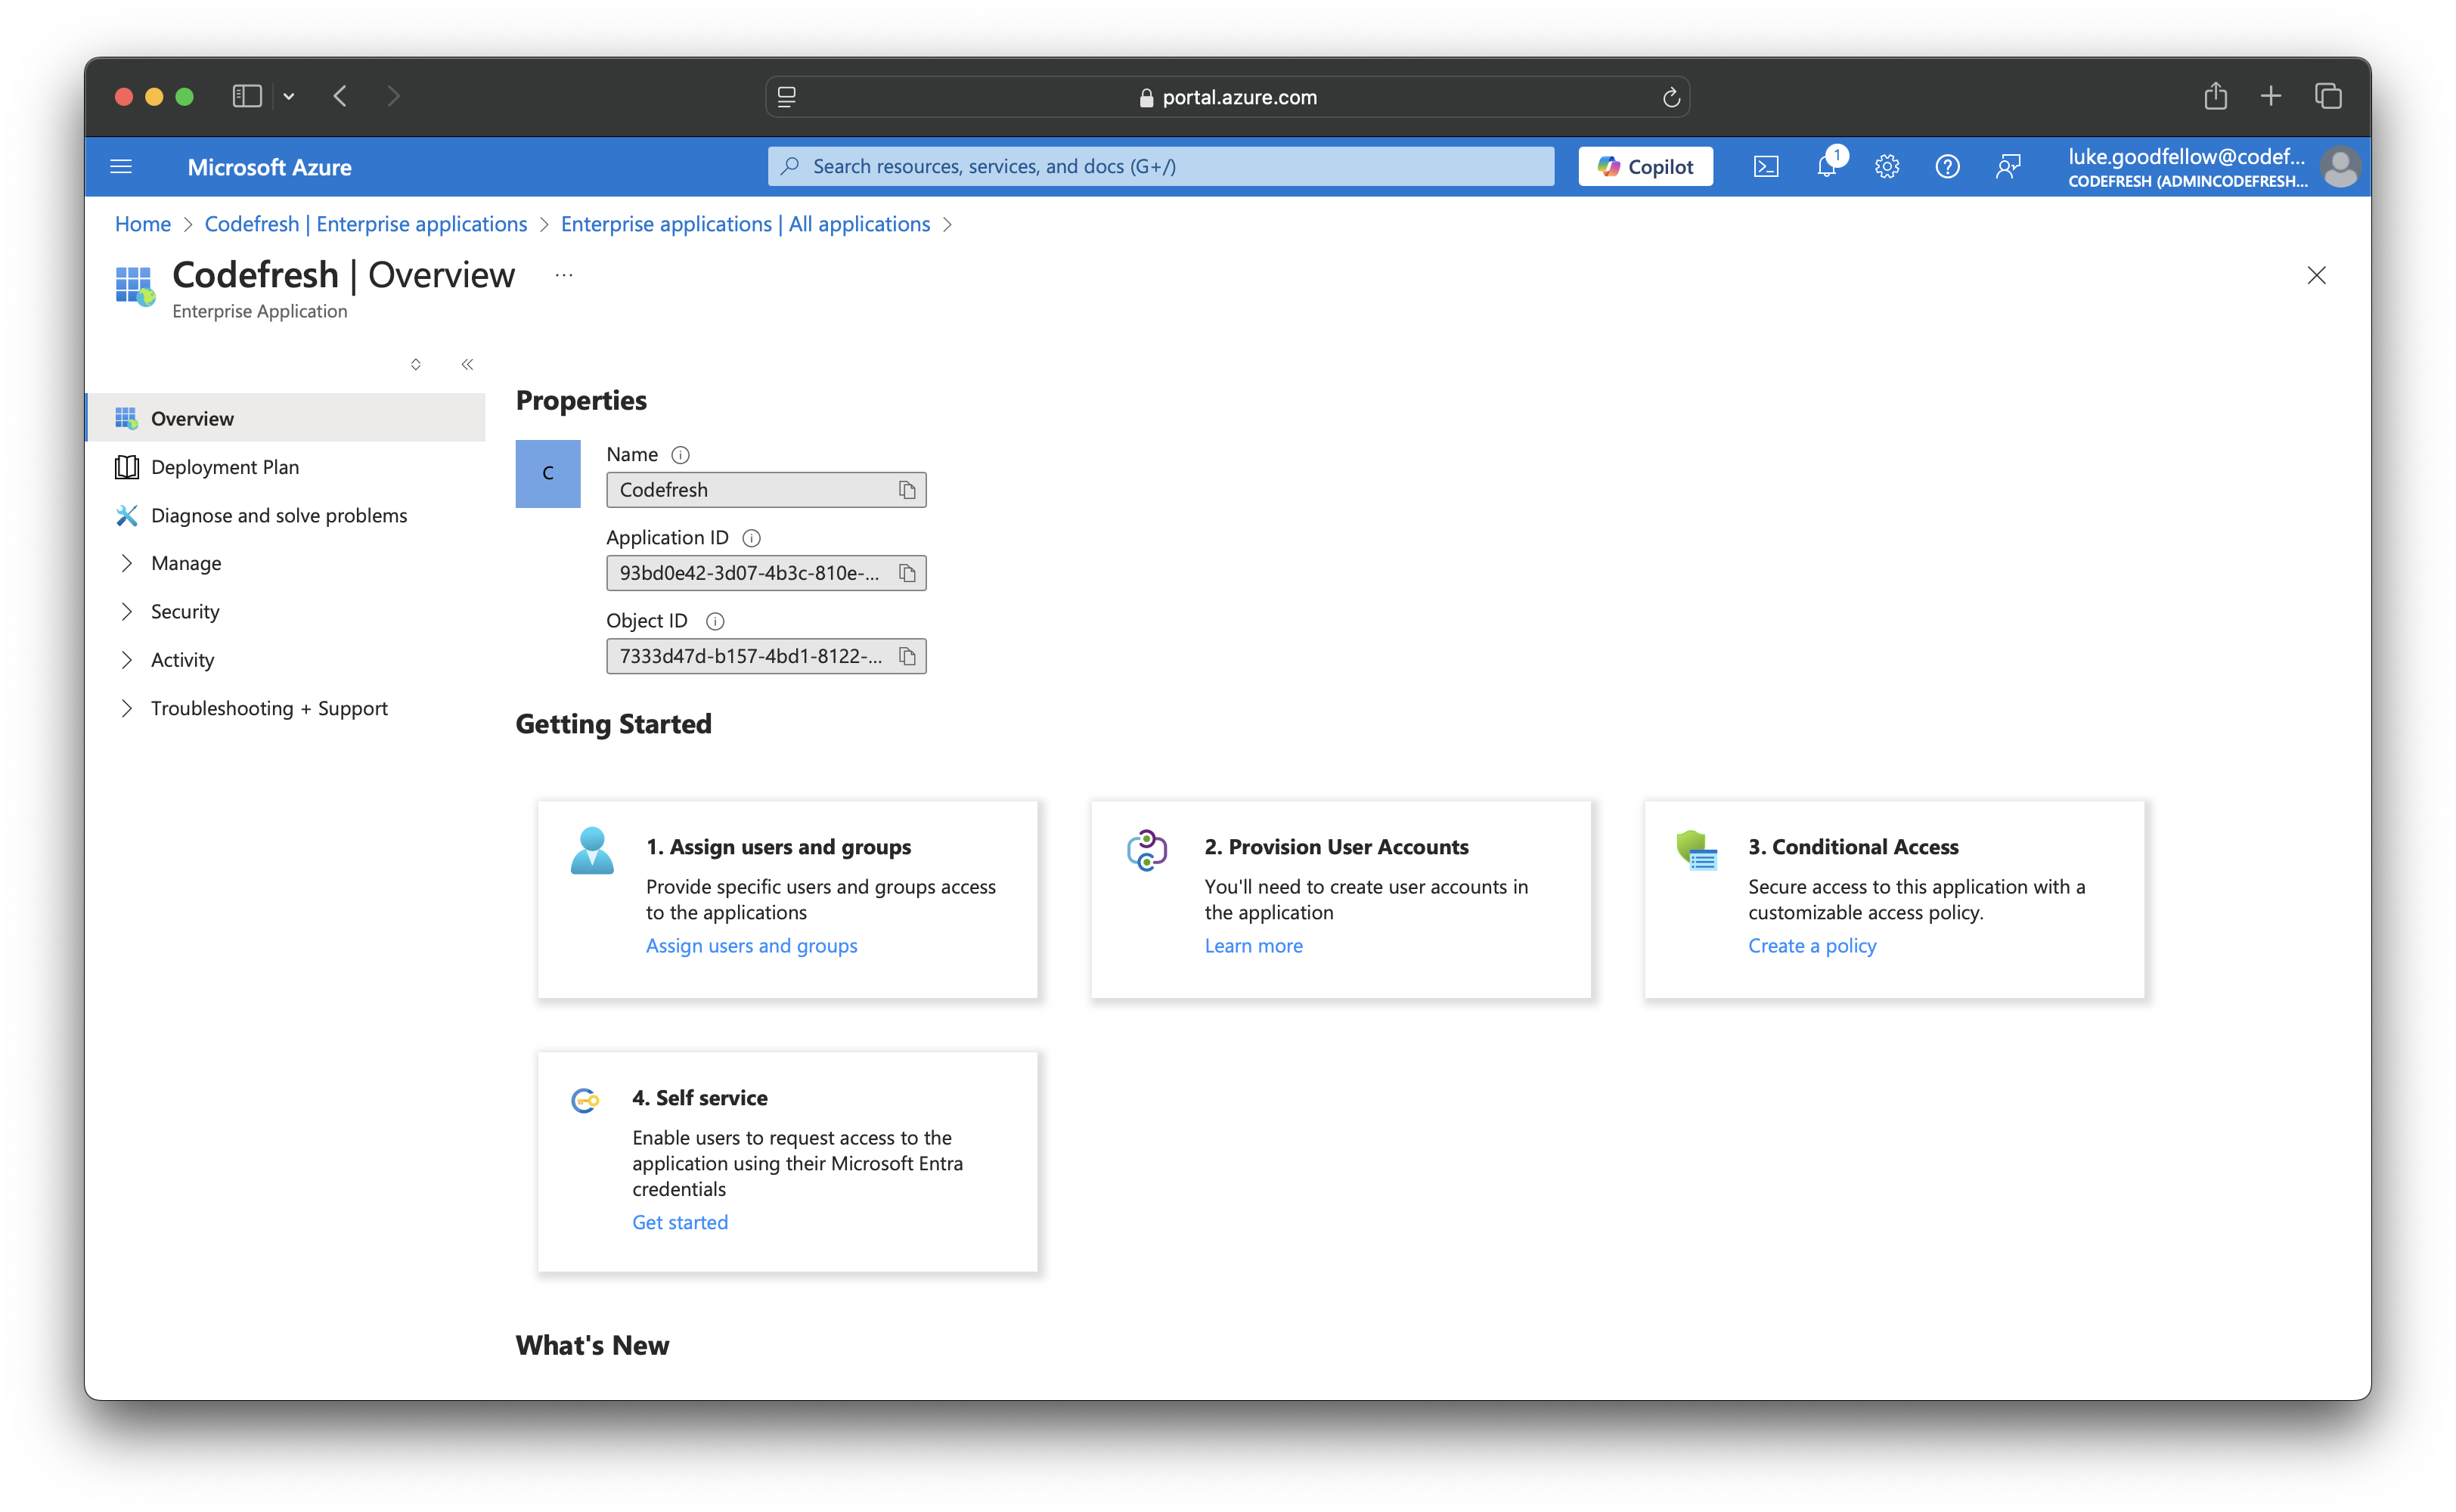
The Codefresh application settings you’ll require are available on log in to Microsoft Entra ID.
- Home: Tenant ID or Primary Domain (required for team sync)
- Enterprise Applications > Properties: Application ID and Object ID
Before You Begin
- Have your client secret handy
- From the Codefresh application in Azure:
- Tenant ID or Primary Domain for team sync
- Application ID and Object ID
How to
- In the Codefresh UI, click the Settings icon (gear) on the top right.
- In the sidebar, from Access & Collaboration, select Single Sign-On.
- Click Add Single Sign-On, and select Azure, and click Next.
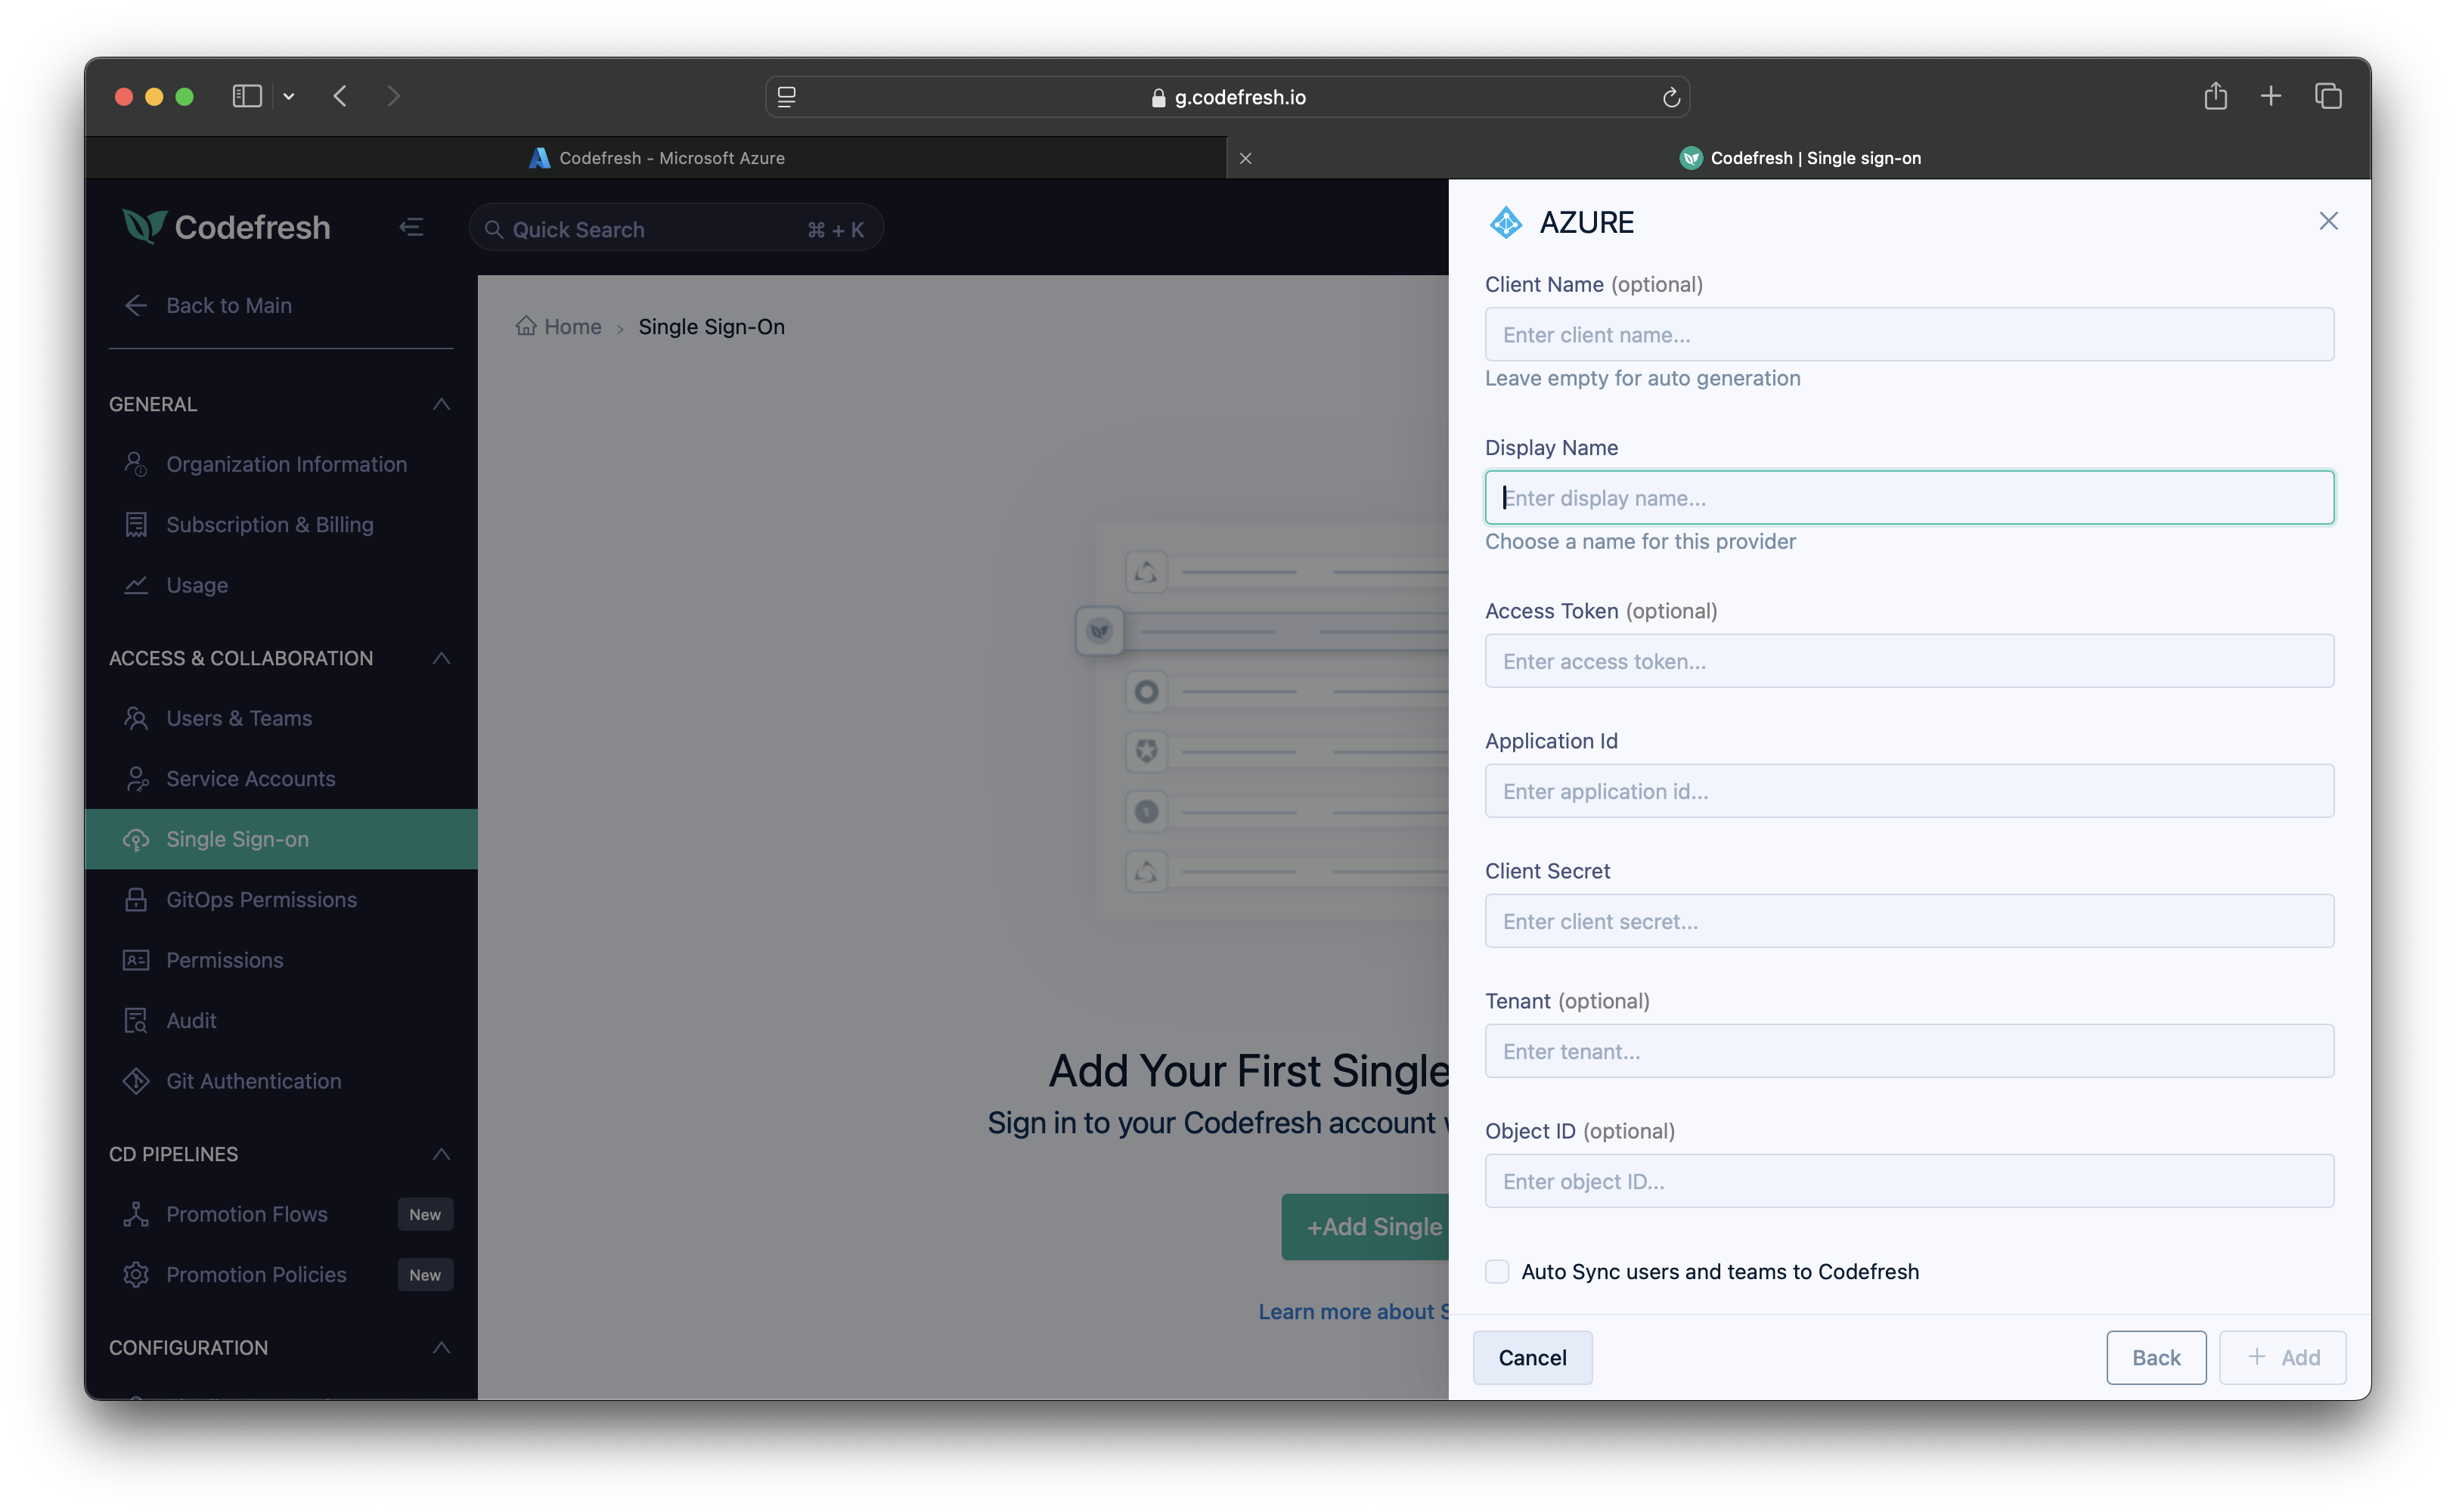
- Enter the following:
- Client Name: For auto-generation, leave empty. Codefresh generates the client name once you save the settings.
- Display Name: Meaningful name for the SSO provider. This can be the name shown in Azure.
- Application ID: Required for SSO. The Application ID from your Microsoft Entra ID > Enterprise Application Properties.
- Client Secret: The key value you copied when you created the client secret in Azure.
- Tenant: Optional. Required when Auto Sync users and teams to Codefresh is selected.
Can be either the Tenant ID, for example,0example1-0000-0aa0-a00a-1example0, or the Primary Domain, for example,mycompany.onmicrosoft.comfrom Microsoft Entra ID. - Object ID: Optional. Required when Auto Sync users and teams to Codefresh is selected.
The Object ID from your Microsoft Entra ID > Enterprise Application Properties. - Auto Sync users and teams to Codefresh: Select to automatically sync user accounts in Microsoft Entra ID to your Codefresh account. Optionally, define the time interval, in hours, at which to sync, from 1 to 24. If you don’t specify an interval, the sync is every 12 hours.
- Click Save.
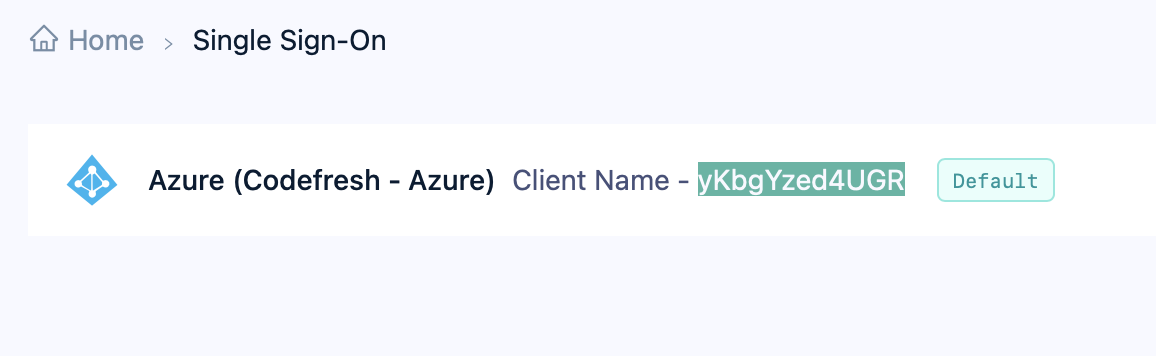
- Copy the Client Name that is displayed in the UI.
Step 5: Configure redirect URIs in Azure
As the final step, add the Codefresh callback URL to the allowed reply URLs for the created application in Azure.
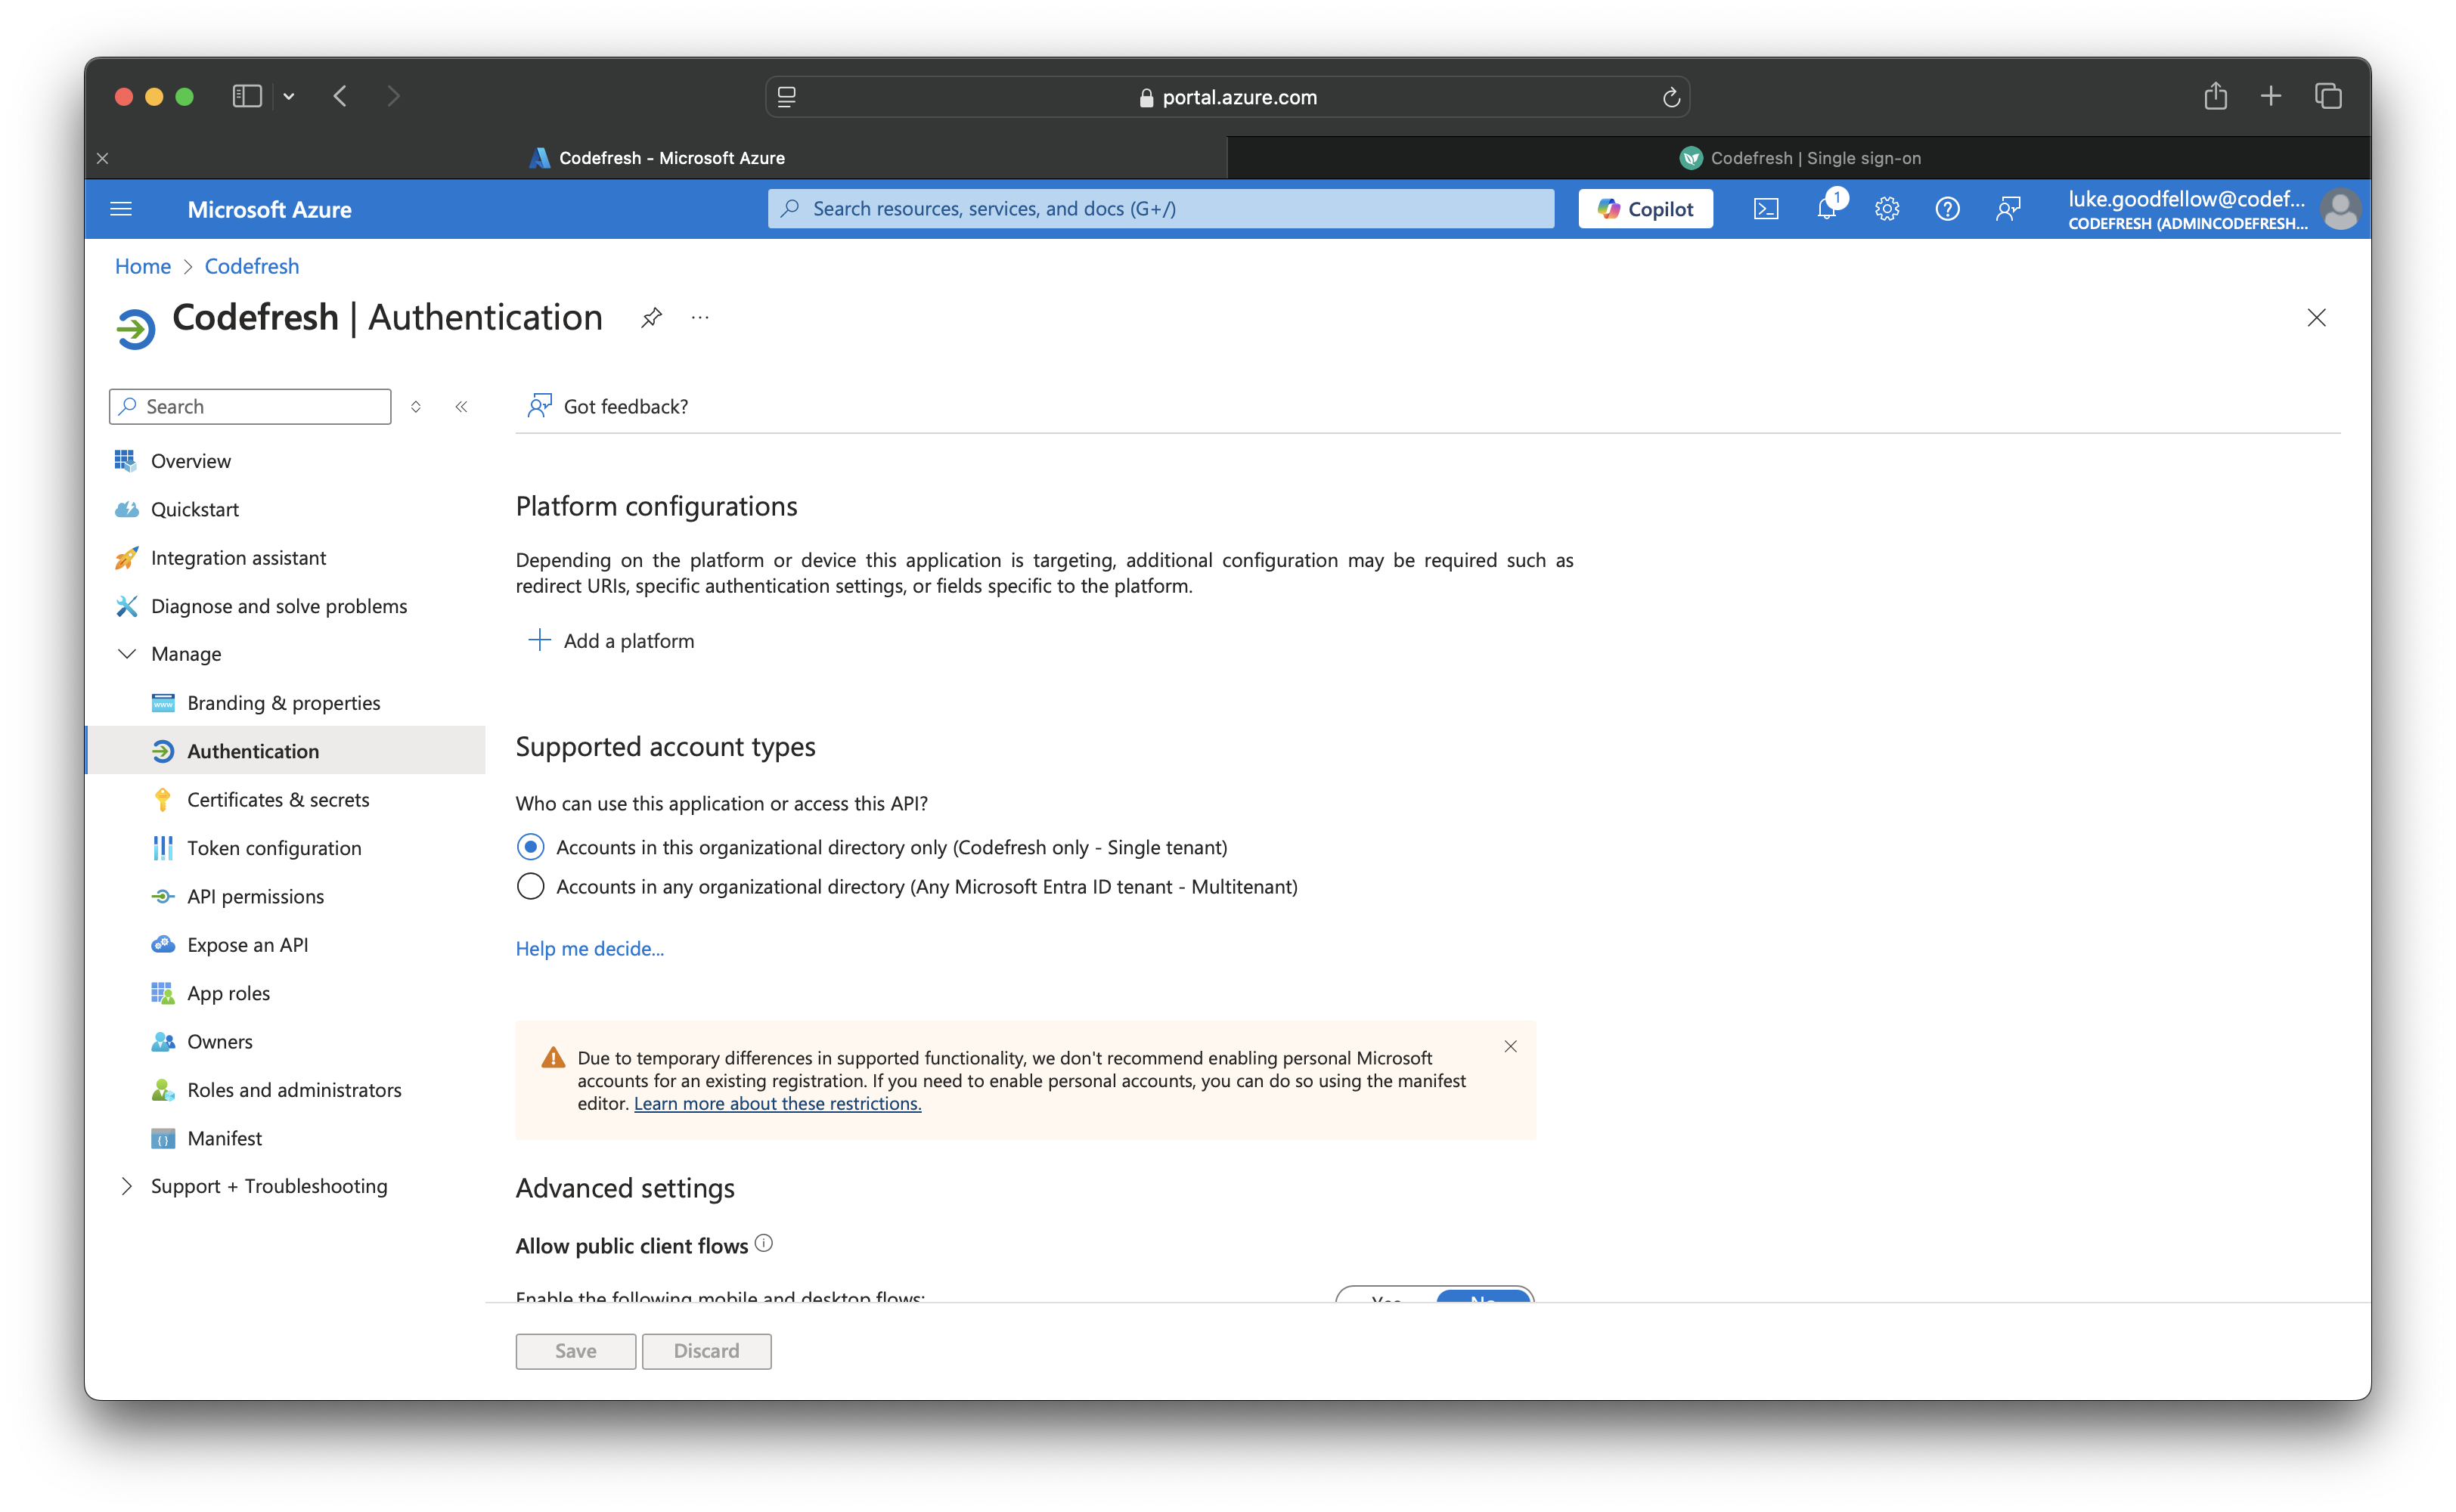
- Go to Microsoft Entra ID > Apps registrations, and select the application you registered for SSO.
- From the sidebar, select Authentication.
- Below Platform Configuration, click Add a platform and then select Web.
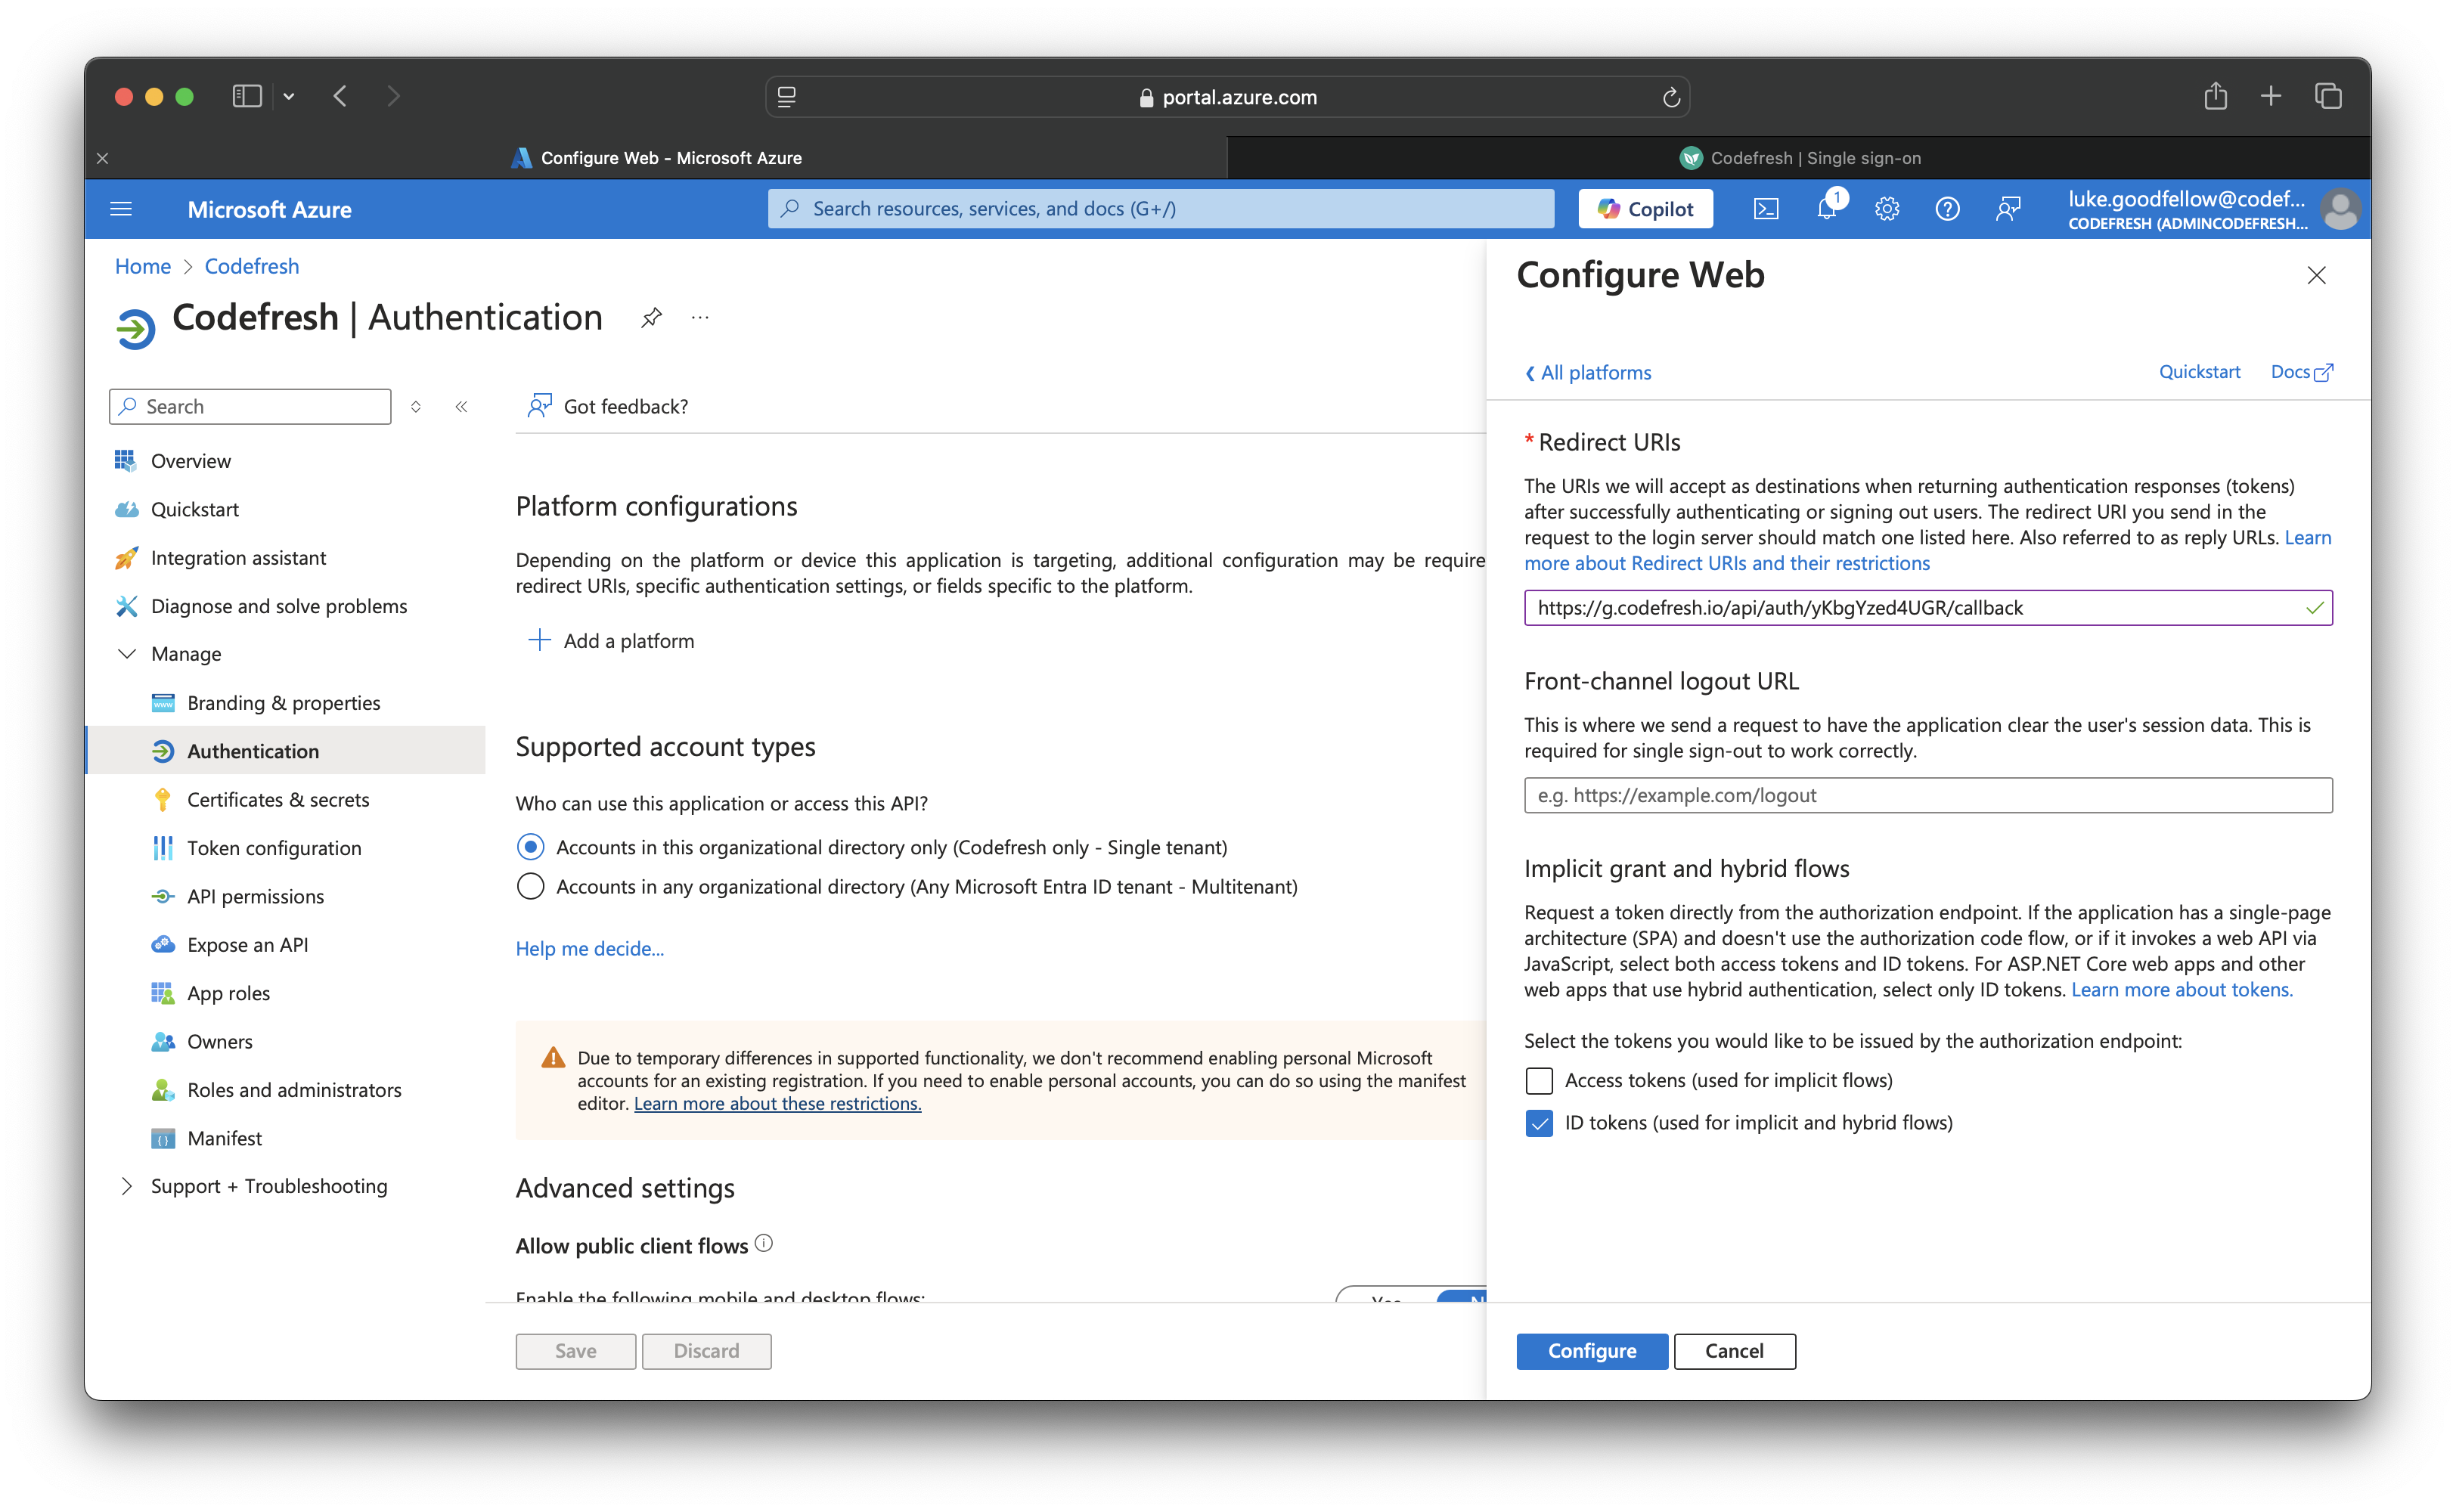
- In the Configure Web form, do the following:
- In the Redirect URIs field, enter the redirect URI in the format below:
https://g.codefresh.io/api/auth/<your_codefresh_sso_client_name>/callback
where:
<your_codefresh_sso_client_name>is the Client Name shown in the SSO configuration, either defined by you or created by Codefresh. - Select ID tokens.
- In the Redirect URIs field, enter the redirect URI in the format below:
Step 6: (Optional) Configure for Azure Initiated Login
- Go to Microsoft Entra ID > Apps registrations, and select the application you registered for SSO.
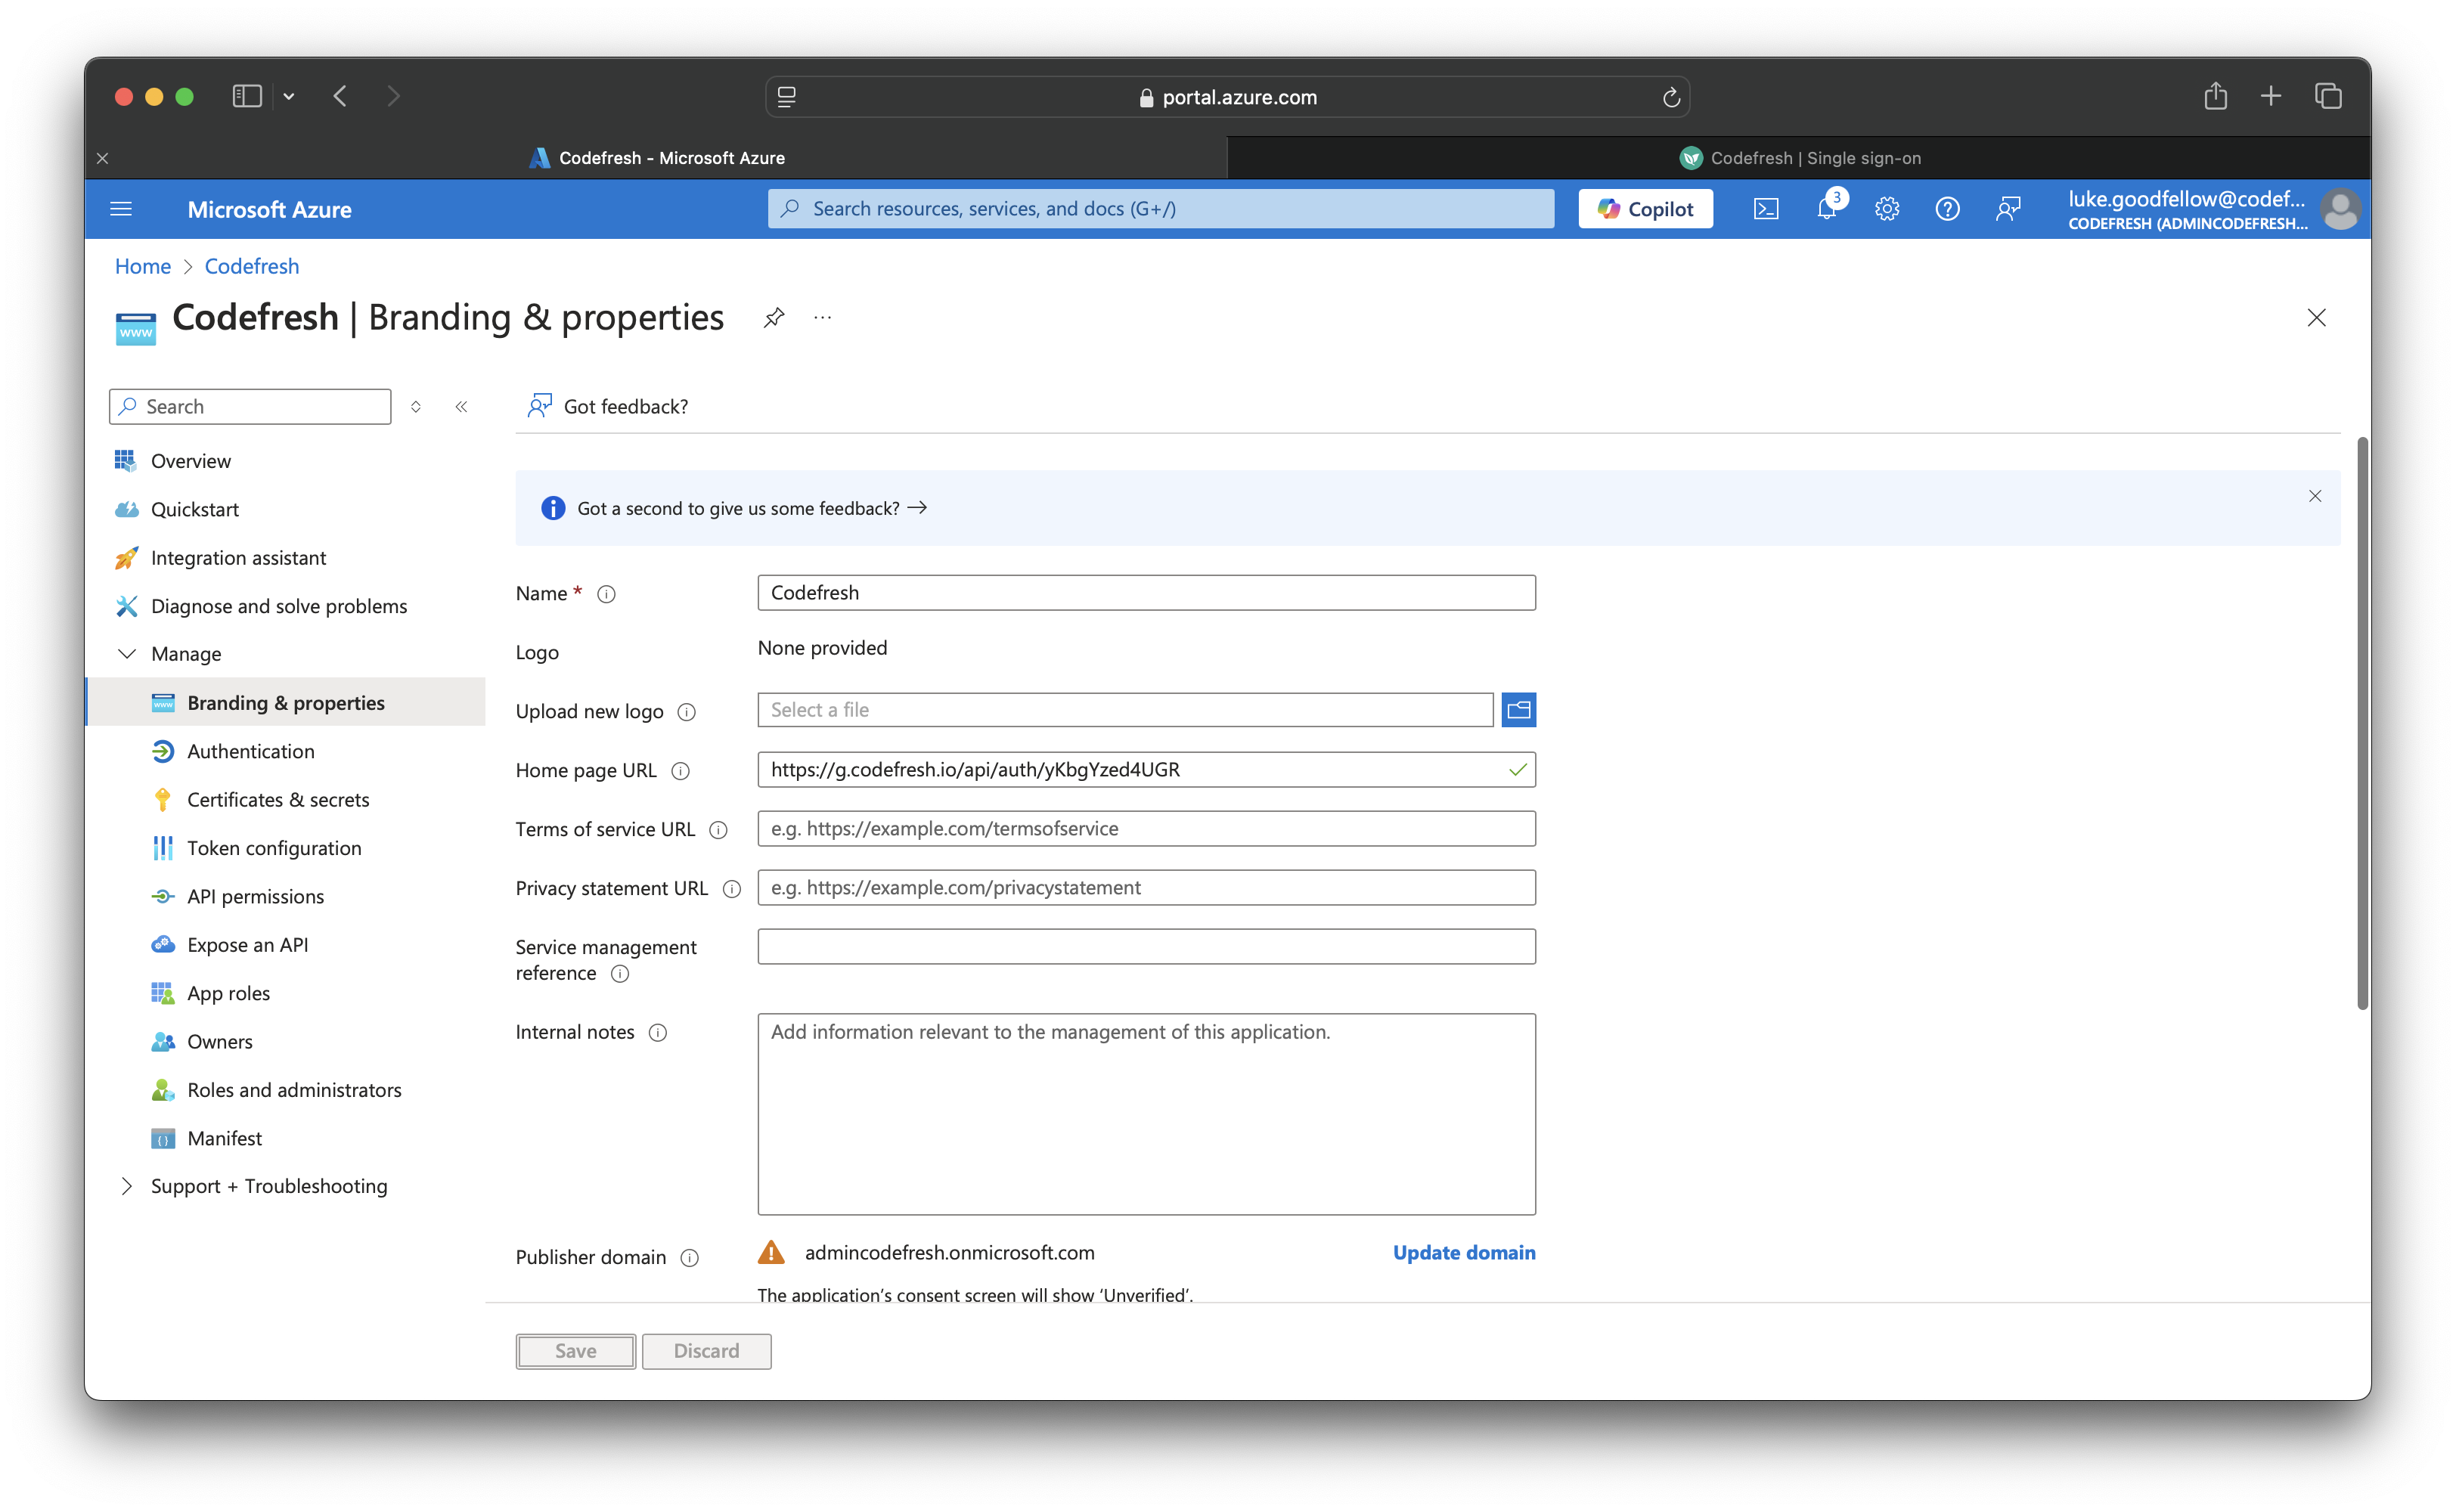
- From the sidebar, select Branding & properties
- In the Home page URL field, insert the following
https://g.codefresh.io/api/auth/<your_codefresh_sso_client_name>
- Go to Microsoft Entra ID > Enterprise Applications, and select the application you registered for SSO.
- Under Properties, toggle Visible to users to yes.
- Now the app can be added to a Collection for My Apps page for Azure Initiated Login.
Related articles
About Federated Single Sign-On (SSO)
Setting up OIDC Federated SSO
Common configuration for SSO providers