Amazon ECR Container Registry
Use the Amazon Docker Registry for pipeline integrations
Set up ECR integration for IAM user
- In the Codefresh UI, on the toolbar, click the Settings icon, and then from the sidebar, select Pipeline Integrations.
- Select Docker Registries and then click Configure.
- From the Add Registry Provider dropdown, select Amazon ECR.
- Define the following:
- Registry name: A unique name for this configuration.
- Region: AWS region.
- Access Key ID: Your AWS accessKeyId.
- Secret Access Key: Your AWS accessKeyId.
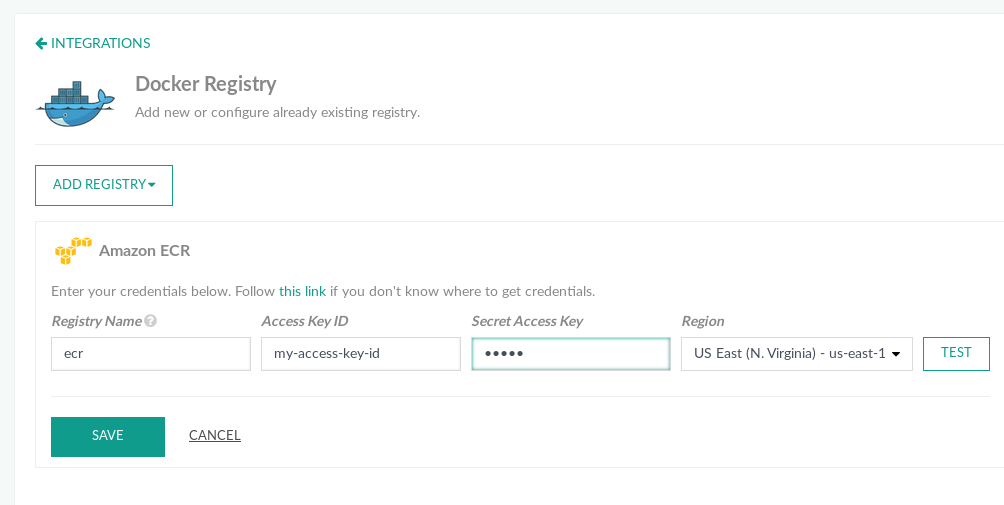
- To verify the connection details, click Test Connection.
- To apply the changes, click Save.
Codefresh makes sure to automatically refresh the AWS token for you.
For more information on how to obtain the needed tokens, read the AWS documentation.
NOTE
You must have an active registry set up in AWS.Amazon ECR push/pull operations are supported with two permission options: user-based and resource-based.
- Identity-based policies
User account must applyAmazonEC2ContainerRegistryPowerUserpolicy (or custom based on that policy).
For more information and examples, click here. - Resource-based policy
Users with resource-based policies must be allowed to call
ecr:GetAuthorizationTokenbefore they can authenticate to a registry, and push or pull any images from any Amazon ECR repository, than you need provide push/pull permissions to specific registry.
For more information and examples, click here.
Set up ECR integration for service account
Setting up ECR integration for a service account applies to accounts with the Codefresh Runner installation.
Kubernetes service account setup
To use an IAM role, you must set up a Kubernetes service account, as described in the AWS Documentation.
You can define the service account at four different levels, based on the required priority. The levels are listed below in ascending order of priority:
- Runtime
The runtime level has the lowest priority. Define it in the Runtime Specification underruntimeScheduler > Cluster(same level asnamespace), and specify the service account. The key isserviceAccount. Use the default, and make sure you have the correct annotation added to the service account. Another option is to create a new service account with the proper permissions and annotations.
runtimeScheduler:
  cluster:
    namespace: codefresh
    clusterProvider:
      accountId: 5c1658d1736122ee1114c842
      selector: docker-desktop
    serviceAccount: codefresh-engine
-
Account
The Account-level service account has higher priority than the runtime-level service account. To define the service account at the account level, turn on the setting as part of the integration as described below. -
Pipeline
The Pipeline-level service account has higher priority than the account-level service account. Define the service account as part of the pipeline’s runtime settings (Pipeline > Settings > Runtime). -
Trigger
The Trigger-level service account has the highest priority. Define the service account as part of the trigger settings for the specific pipeline (Workflow > Triggers (modify or add) > Advanced Options).
How to
Before you begin
- Define a Kubernetes service account for the runtime, account, pipeline, or pipeline-trigger
Steps
- In the Codefresh UI, on the toolbar, click the Settings icon, and then from the sidebar, select Pipeline Integrations.
- Select Docker Registries and then click Configure.
- From the Add Registry Provider dropdown, select Amazon ECR.
- Do the following:
- Registry name: Enter a unique name for this configuration.
- Region: Select the AWS region.
- Select Resolve credentials from servce account.
- The Access Key ID and Secret Access Key fields are disabled.
- To verify the connection details, click Test Connection.
- To apply the changes, click Save.
Public ECR registry integration
You can use Other Registries option in the Docker integration page to add a Public ECR integration.
- You will need to pass username and password to create the integration. You can get these values from the AWS console:
- Navigate to “Amazon ECR/Repositories/Public/$REPO”.
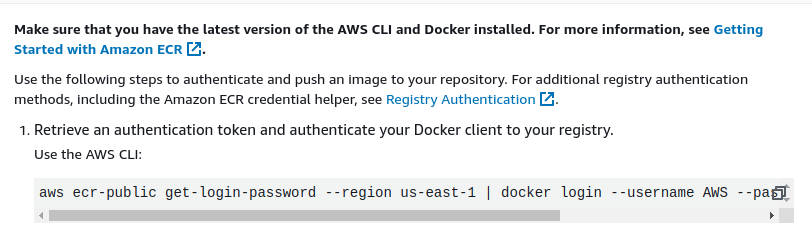
- Click the “View push commands” button at the upper right.
- In the next window note the first command that will print out the password.
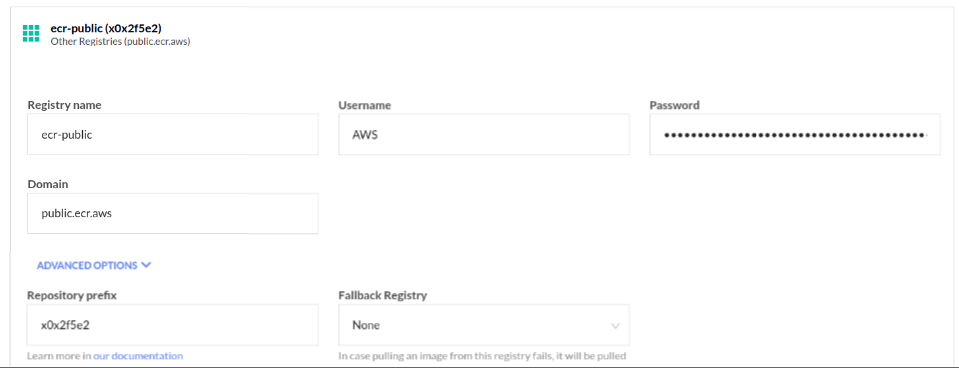
- In the Codefresh integration page select ‘Add Registry Provider > Other Registries’
- Enter any Registry name
- Put “AWS” in the Username field
-
Run the following command from the AWS Console:
aws ecr-public get-login-password --region us-east-1 - Put the output in the Password field
- Fill in the prefix field in advanced options too.
- Test the connection if needed and save the changes.
Pushing Docker images to Amazon ECR
There are two ways to push images:
- (Recommended) Using the YAML push step.
- Manually promoting manually an image (described below)
For more details on how to push a Docker image in a pipeline see the build and push example.
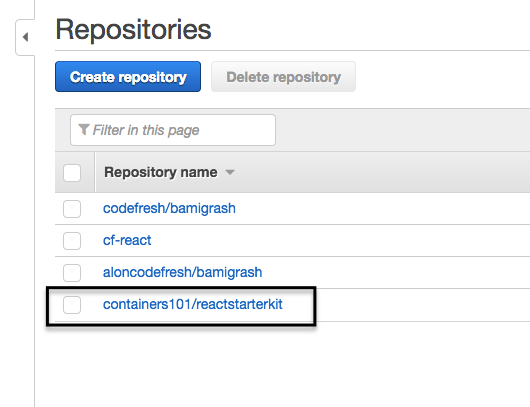
Manually promoting an image
The Images view has an option to manually push images to a registry. You need to specify the repository name as the name of your repository as set in ECR, as in the example below.
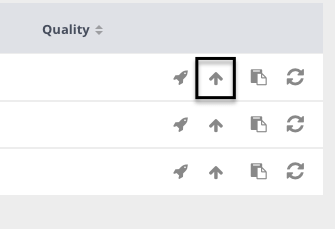
- In the Codefresh UI, from Artifacts in the sidebar, select Images.
- Click Promote.
- Do the following:
- Enter the Repository Name.
- Enter the Tag. Copy and paste the text after the
:in the Repository Name. For example,repository-name:tag. - From the Registry dropdown, select your ECR configuration.
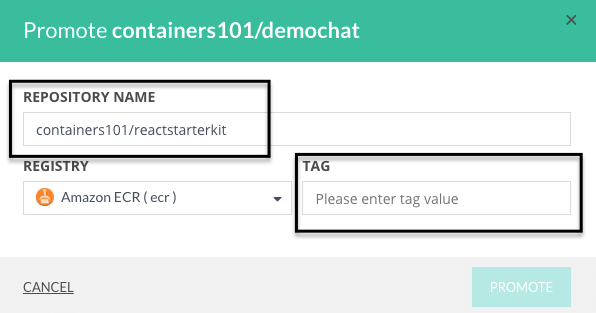
- Click Promote.
NOTE You can change the image name if you want, but make sure that the new name exists as a repository in ECR.
Related articles
Docker registries for pipeline integrations
Working with Docker Registries
Push step
Building and pushing an image