Pipeline quick start
Quick start to set up a continuous integration (CI) pipeline
This quick start guides you through setting up a CI (continuous integration) pipeline in Codefresh to create the Docker image of a sample application, run the pipeline, view results, and optionally upload the Docker image to a public registry.
This quick start describes the following tasks:
- Create and run pipeline
- Run unit tests on the Docker image
- (Optional) Upload Docker images to Docker Hub
CI process overview
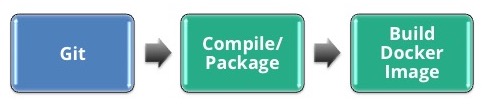
The diagram illustrates the CI (Continuous Integration) process. Read more on Continuous Integration.

- Connects to GitHub and checks out the source code of the sample application
- Uses the Dockerfile of the application to create a Docker image
- Runs unit tests in the same Docker image to verify the validity of the code
- Stores the Docker image in your private Registry
- (Optional) Pushes the Docker image to Docker Hub
Note on the sample application
For the pipeline, we’ll use a sample application, the Python/Flask project, that has:
- Its own Dockerfile in the root of the repository.
- Unit tests.
You can either use the sample application to follow along, or create your own Docker based example (don’t forget to write unit tests).
NOTE
With Codefresh you can create a Docker image from without any local Docker installation (Docker building as a service).
Pipeline quick start prerequisites
- Codefresh account
- Free GitHub account
- Docker registry service account, such as GitHub
- Source code of the sample application
- (Optional) Docker Hub account if you also want to make your image public
Download source code of the sample application
We use an example application located in GitHub.
NOTE
Codefresh supports GitLab, Bitbucket and Azure GIT repositories apart from GitHub. The same principles presented in this tutorial apply for all Git providers.
- Go to the GitHub repo with the Python Flask sample application.
- At the top-right, click Fork to bring the source code to your own account.
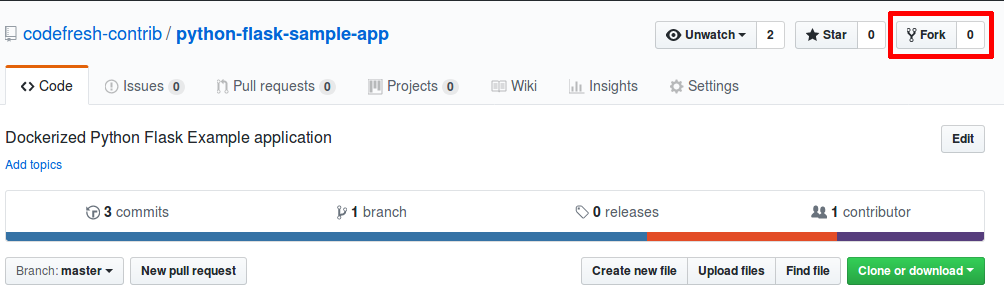
After a few minutes, you should see the repo in your Git account.
Create and run pipeline
We’ll start by focusing on the first part of the CI pipeline, creating a Docker image.
Docker images play a central role in Codefresh pipelines. They are the basic building blocks that serve as the link between what your source code generates and what gets deployed.
The example application already comes with its own Dockerfile. If your own application is not “dockerized” yet, first create a Dockerfile for it, and then move it into the Codefresh infrastructure.
Creating a Docker image through a Codefresh pipeline includes these tasks:
- Connect a Docker registry to Codefresh
- Create a project for CI pipeline
- Create and run CI pipeline
- View and monitor CI pipeline build
- View the Docker image stored in Codefresh
Connect a Docker registry to Codefresh
Connect your Docker regsitry to Codefresh to store the Docker image of the sample application. Codefresh supports all the popular Docker registries. If you don’t already have a registry, we recommend starting with the GitHub Registry for this quick start.
Before you begin
Make sure you have completed all the prerequsites for the CI pipeline quick start
How to
- In the Codefresh UI, on the toolbar, click the Settings icon, and then from Configuration, select Pipeline Integrations.
- Select Docker Registries and then click Configure.
- From the Add Registry Provider dropdown, select Other Registries.
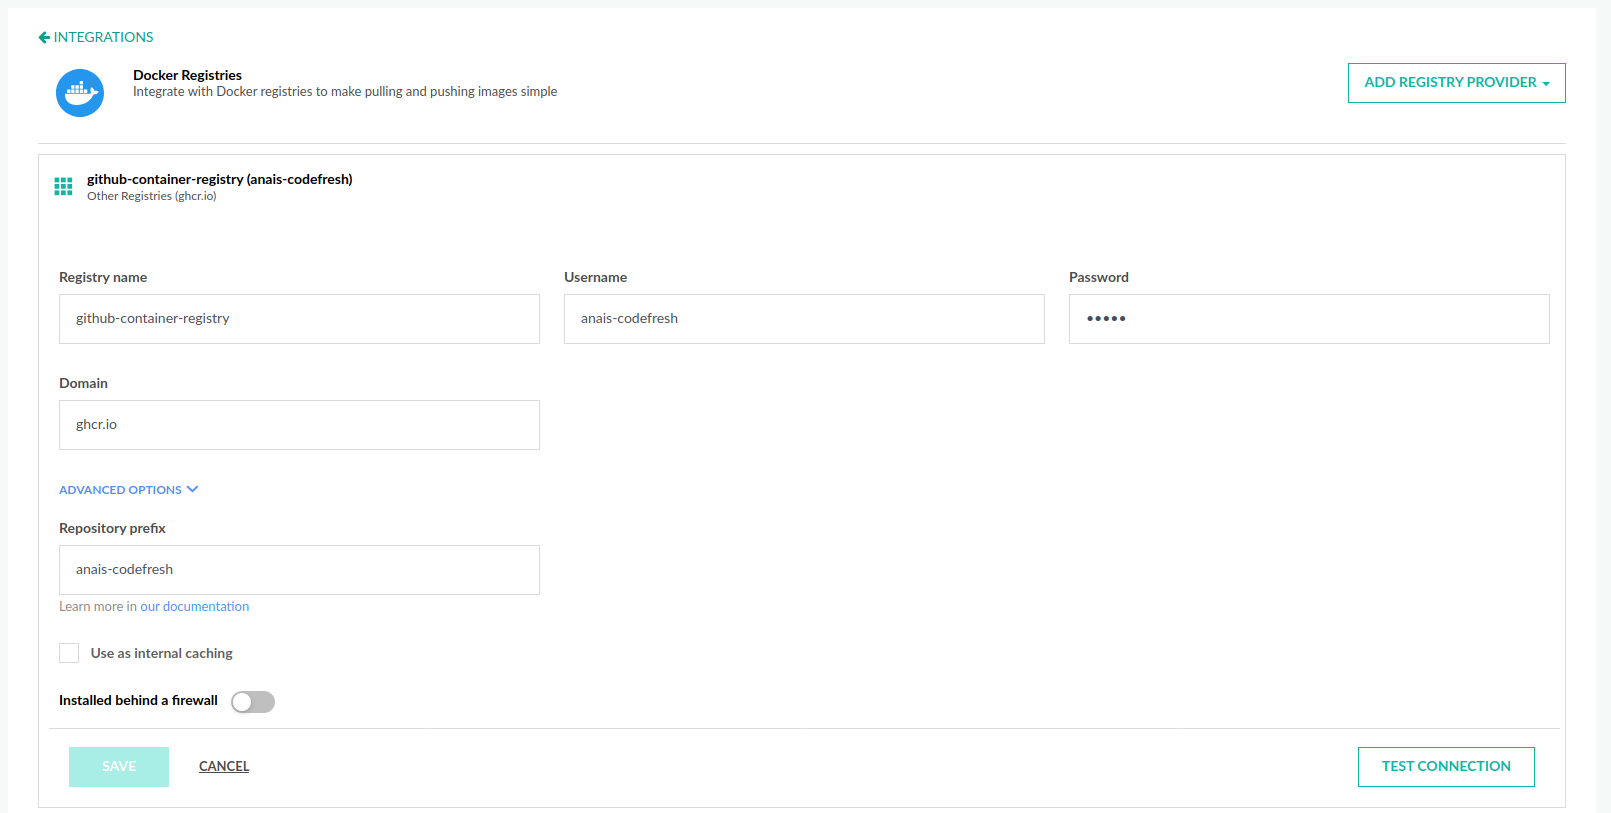
- Define the following:
- Registry name: A unique name for this configuration.
- Username: Your GitHub username.
- Password: Your GitHub personal token.
- Domain:
ghcr.io. - Expand Advanced Options and define the Repository Prefix as your GitHub username.
- To verify the connection details, click Test Connection.
- To apply the changes, click Save.
- Continue with Create a project for CI pipeline
Create a project for pipeline
Codefresh pipelines are grouped within projects. Think of a project as a folder or directory that groups related pipelines. For example, all pipleines that package/deploy the different microservices for an application. You can define any name for the project, the most common example being the name of the application that the pipelines build and deploy.
Before you begin
How to
- In the Codefresh UI, expand Pipelines in the sidebar, and select Projects.
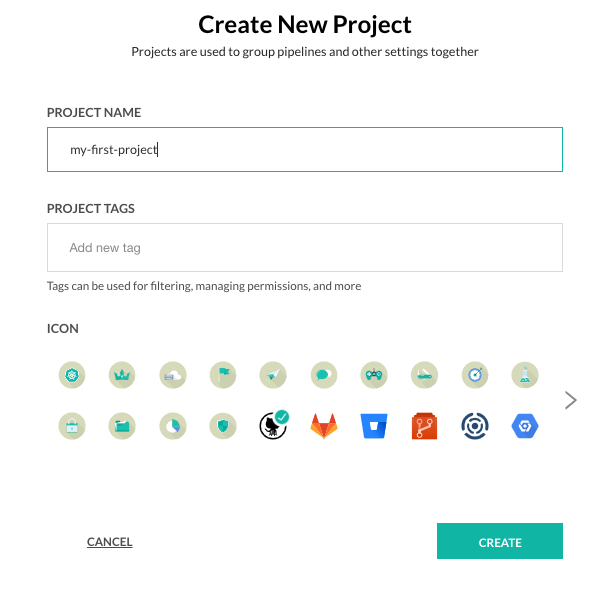
- On the top-right, click New Project.
- Enter the Project Name. For example,
my-first-project. - Leave the Project Tags empty for the quick start.
- Select any Icon you want. The icon is prefixed to the project name in the Projects page.
- Click Create.
You now have a new project and can create your CI first pipeline within the project.
- Continue with Create and run CI pipeline.
Create and run CI pipeline
Create a CI pipeline to clone the Git repo and build the Docker image.
The pipeline includes two steps:
- A git-clone step to check out the code. The clone step also uses built-in variables that ensures that the pipeline checks out the exact code described in the commit of the trigger. Don’t worry if the exact details are not clear to you yet.
- A build step to build the docker image AND push it to the connected Docker registry.
The build step uses a Dockerfile that is located at the root folder of the project and creates a Docker image with tag
v1.0.0.
Before you begin
How to
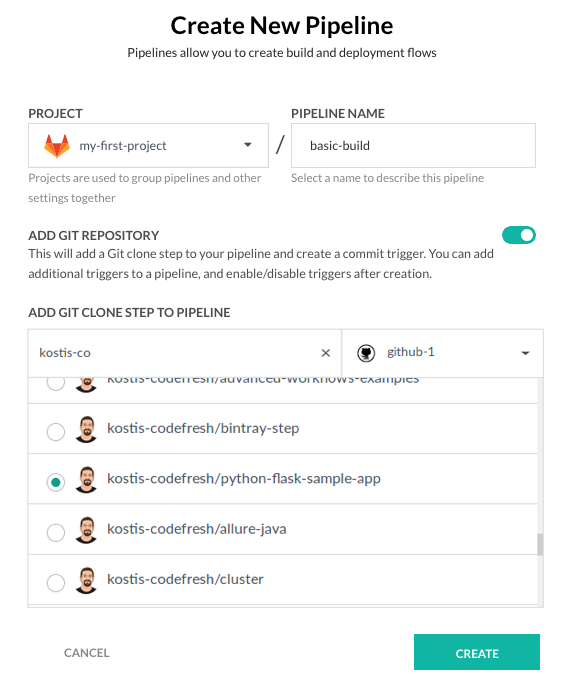
- From the Project page, select the project you created.
- Click Create Pipeline.
- Define the following:
- Project: The project is already selected.
- Pipeline Name: Enter a name for the pipeline.
- Add Git repository: Toggle to on. This setting launches the pipeline when there is a commit to the Git repository.
- Add Git clone step to pipeline: Select the repository with the sample application you forked from the list.
- Click Create.
In the Workflow tab of the pipeline creation workspace, you’ll see that the Inline YAML editor already has a sample YAML.
- Copy and paste the
codefresh.yamlbelow into the Inline editor to replace the existing content.
codefresh.yml
version: '1.0'
stages:
  - checkout
  - package
steps:
  main_clone:
    title: Cloning main repository...
    type: git-clone
    repo: '${{CF_REPO_OWNER}}/${{CF_REPO_NAME}}'
    revision: '${{CF_REVISION}}'
    stage: checkout
  MyAppDockerImage:
    title: Building Docker Image
    type: build
    stage: package
    image_name: my-app-image
    working_directory: ./
    tag: v1.0.0
    dockerfile: Dockerfile
- To apply your changes, click Save.
- To start the pipeline, click Run.
- Retain the default settings, and click Run once again.
- Continue with View and monitor CI pipeline build.
View and monitor CI pipeline build
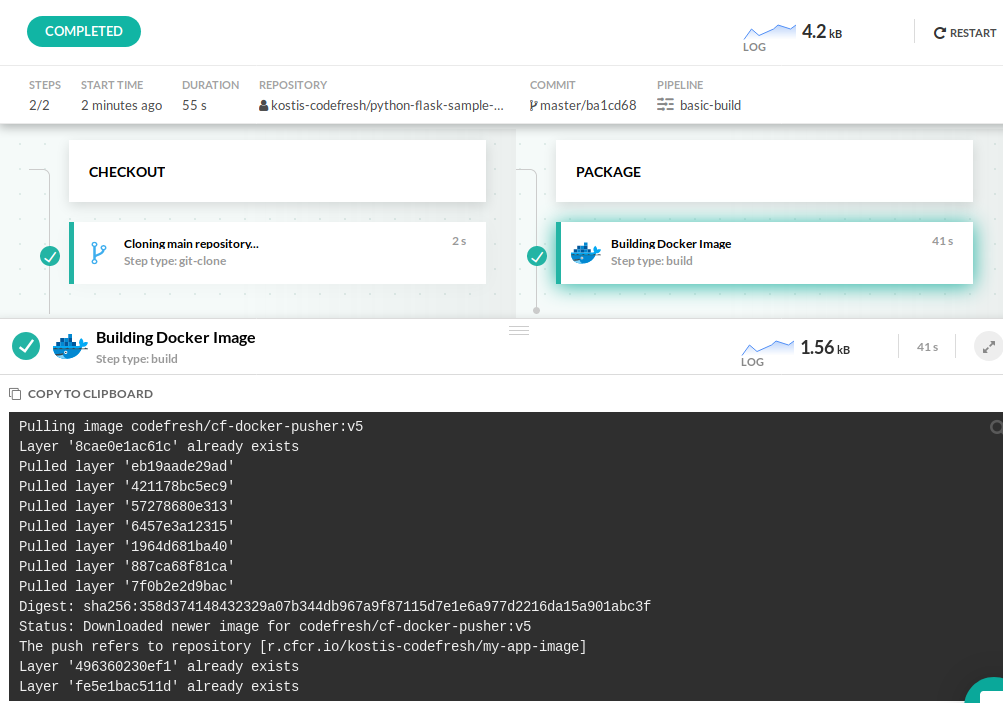
When you run the pipeline, Codefresh takes you to the Builds page where you can monitor the build progress of the sample application.
Before you begin
How to
- Click on the step Building Docker Image, and view the logs in the Output tab. You can download the logs in HTML or text formats if you want to review them offline.
The build should complete successfully.
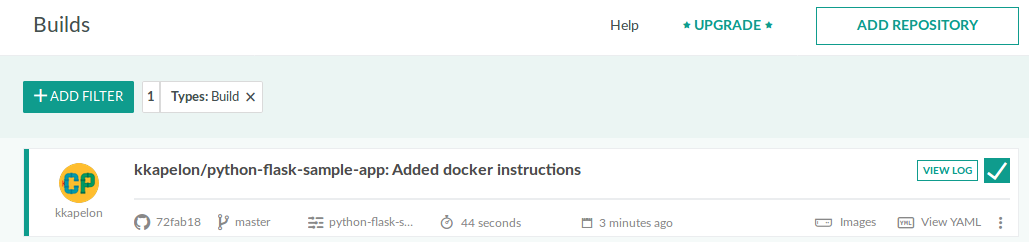
All previous runs are displayed in the Builds page.
- Continue with View Docker image stored in Codefresh.
View Docker image stored in Codefresh
The build logs show that a Docker image is created after each successful build. Where does this image go?
Codefresh has the unique feature where the build step that creates the Docker image, also automatically pushes the image to your default Docker registry! All the images that we have created so far, are stored in the registry you connected at the beginning of the quick start.

Before you begin
View and monitor CI pipeline build
How to
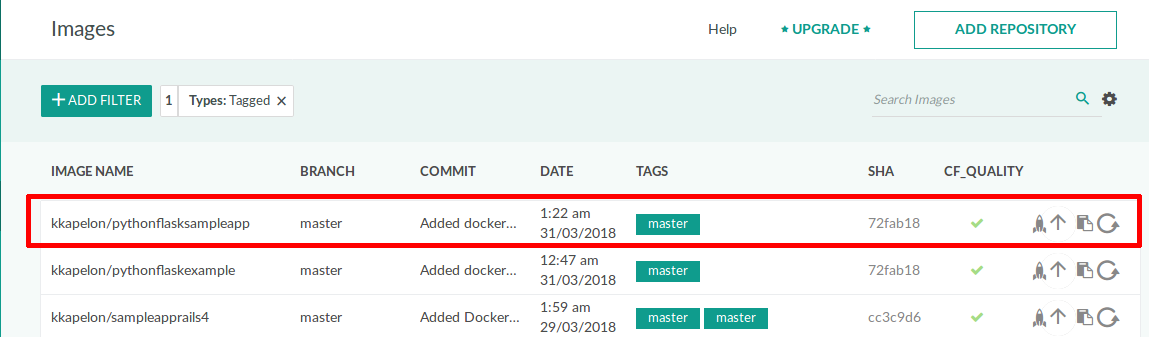
- In the Codefresh UI, expand Artifacts in the sidebar, and click Images.
A list of Docker images are displayed, sorted by the most recently added images. This dashboard is populated in real-time with updates from your Docker registry.
Run unit tests on the Docker image
Run unit tests to validate the Docker image and confirm that it satisfies the requested functionality. Unit tests must be an integral part of the build process.
We will add a new freestyle step to the pipeline’s YAML, that runs unit tests. Freestyle steps run custom commands within Docker containers.
For the quick start, we run the python command within the docker image, created from the previous step MyAppDockerImage defined by the image property.

Before you begin
- Verify you have a Docker image in Codefresh
How to
- In the Builds page, click the YAML tab and then click Edit Pipeline.
The Inline YAML editor in the Workflow tab is displayed. - Paste the following YAML that includes the new step to run unit tests into the Inline editor:
codefresh.yml
version: '1.0'
stages:
  - checkout
  - package
  - test
steps:
  main_clone:
    title: Cloning main repository...
    type: git-clone
    repo: '${{CF_REPO_OWNER}}/${{CF_REPO_NAME}}'
    revision: '${{CF_REVISION}}'
    stage: checkout
  MyAppDockerImage:
    title: Building Docker Image
    type: build
    stage: package
    image_name: my-app-image #Change to your image name
    working_directory: ./
    tag: v1.0.1
    dockerfile: Dockerfile
  MyUnitTests:
    title: Running Unit tests
    image: '${{MyAppDockerImage}}'
    stage: test
    commands:
      - pip install pytest
      - pytest
- Click Run and then click Run again to relaunch the build.
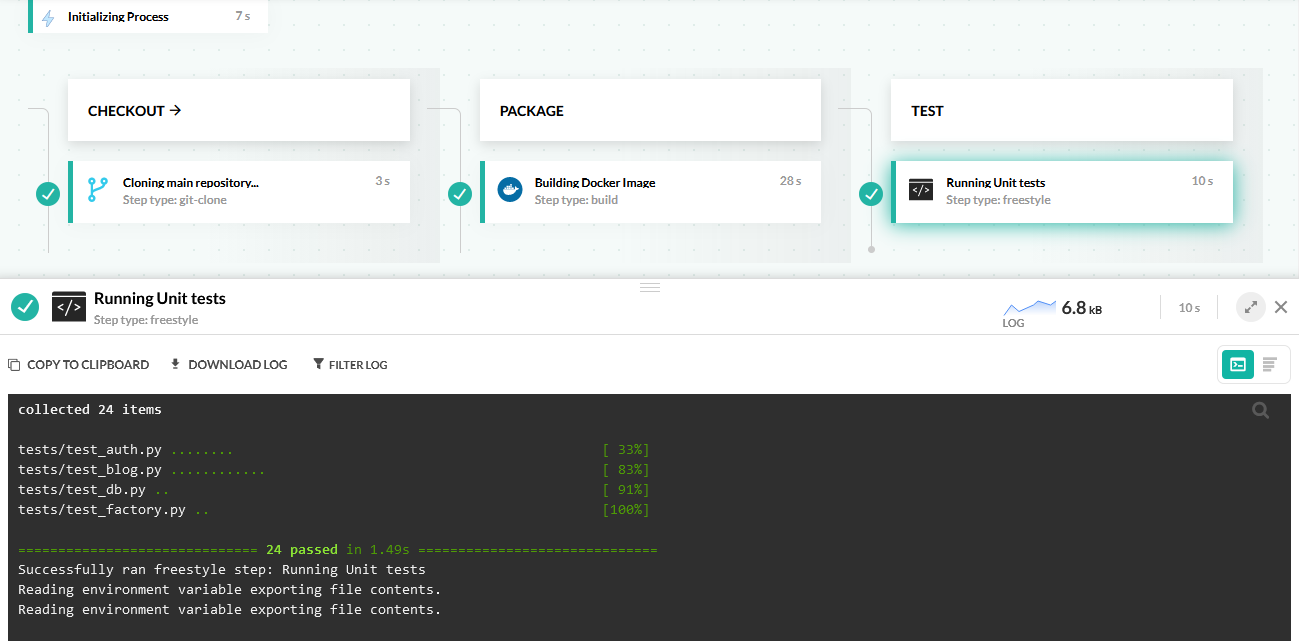
- In the Builds page, you can see a new stage with the step labeled Running unit tests.
- Click the step name to see the test output of the application.
- Continue with (Optional) Upload Docker images to Docker Hub.
Tip:
Codefresh can also run integration tests, and report test results.
Therefore, regardless of the type of tests you employ, Codefresh can accommodate your testing process in a fully automated manner as part of the main build.
(Optional) Upload Docker images to Docker Hub
As we saw in the previous task, Codefresh automatically pushes the Docker image to the default Docker registry. You can also upload the same Docker image to a different external registry or make it public in Docker Hub.
The push pipeline step does exactly that. It pushes an existing Docker image to the registry you define.

As the last task in the CI pipeline quick start, we will push our sample application to Docker Hub, the free public hosting registry of Docker Inc. To do so, you will first need to create a free account in Docker Hub and then connect Docker Hub to Codefresh.
Before you begin
- Verify you have a Docker image in Codefresh
How to
- Create a free account in Docker Hub.
- Note down your username and password. In your own projects, you can use any other external registry.
Docker.io allows you to only push images tagged with your username.
If you can do so, create a Docker Hub account with the same username that you have in Codefresh.
If not, you need to change the Docker image created to match your username in your Docker Hub account.
- In the Codefresh UI, on the toolbar, click the Settings icon, and then from Configuration, select Pipeline Integrations.
- Select Docker Registries and then click Configure.
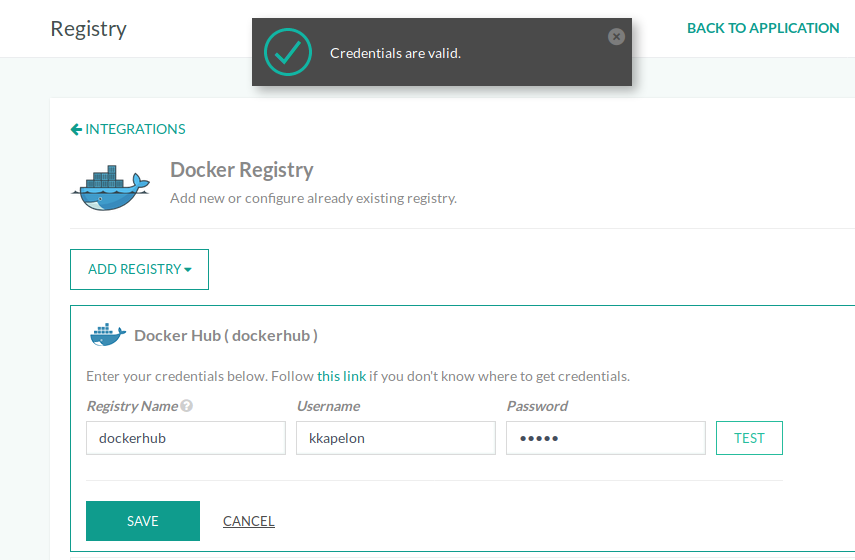
- From the Add Registry Provider dropdown, select Docker Hub.
- Define the following:
- Registry name: Enter a unique name for this configuration. Note down the regsitry name. You will need it to define it in the pipeline.
- Username: Your Docker Hub username.
- Password: Your Docker Hub password.
- To verify the connection details, click Test Connection. You should see a success message.
- To apply the changes, click Save. You have now connected your Docker Hub account to your Codefresh account.
- Go back to the Builds page, and click the pipeline to return to the Inline editor.
- Paste the following YAML to replace the existing content. We added a push step at the end of the pipeline. The image is tagged with the name of the branch.
version: '1.0'
stages:
  - checkout
  - package
  - test
  - upload
steps:
  main_clone:
    title: Cloning main repository...
    type: git-clone
    repo: '${{CF_REPO_OWNER}}/${{CF_REPO_NAME}}'
    revision: '${{CF_REVISION}}'
    stage: checkout
  MyAppDockerImage:
    title: Building Docker Image
    type: build
    stage: package
    image_name: my-app-image
    working_directory: ./
    tag: v1.0.1
    dockerfile: Dockerfile
  MyUnitTests:
    title: Running Unit tests
    image: '${{MyAppDockerImage}}'
    stage: test
    commands:
      - pip install pytest
      - pytest
  MyPushStep:
    title: Pushing to Docker Registry
    type: push
    stage: upload
    tag: '${{CF_BRANCH}}'
    candidate: '${{MyAppDockerImage}}'
    image_name: kkapelon/pythonflasksampleapp #Change kkapelon to your dockerhub username
    registry: dockerhub # Name of your integration as was defined in the Registry screen
- Replace the
registryname in the push step with the name you specified in the Docker Hub integration settings. - To apply your changes, click Save, and then click Run to start the pipeline again.
- Click the Pushing to Docker registry step to view the log and monitor the progress of the push step.
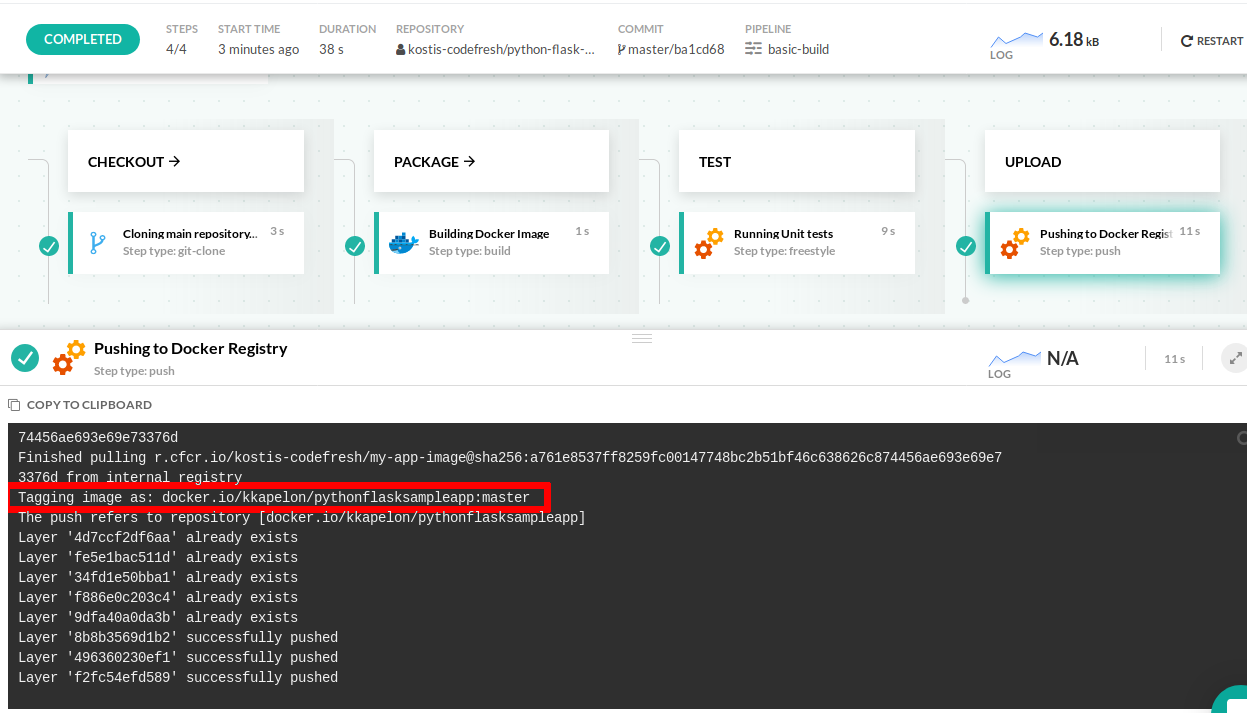
NOTE
Now you have two Docker registries connected to Codefresh. After the build completes execution, the Docker image of the sample application is stored both in the default Docker registry and in Docker Hub.
To verify the latter, visit your profile in Docker Hub and look at the image details:

You have now completed the final task in the CI pipeline quick start.
Continue with:
Kubernetes deployment quick start
OR
Helm deployment to Kubernetes quick start
Read more on pipelines & Docker registries
Introduction to Codefresh pipelines
Codefresh pipeline definitions YAML
Working with Docker registries