Helm charts and repositories
Use external Helm charts and repositories in Codefresh pipelines
Codefresh allows you to integrate with external Helm repositories and Helm charts in the Helm Charts page.
It is optional to use external Helm repositories as all Codefresh accounts already include a built-in Helm repository.
Add an external Helm repository
Easily add your own Helm charts.
By default, we show charts from the official Helm repository.
- In the Codefresh UI, from Artifacts in the sidebar, select Helm Charts.
- On the top right, click Add Existing Helm Repository. You are taken to Pipeline Integrations.
- In the Integrations page, click Add Helm Repository, and then select the type of Helm repo to add from the list.
- Enter the Helm repository name and URL.
Do not include the specific path toindex.yamlin the URL.
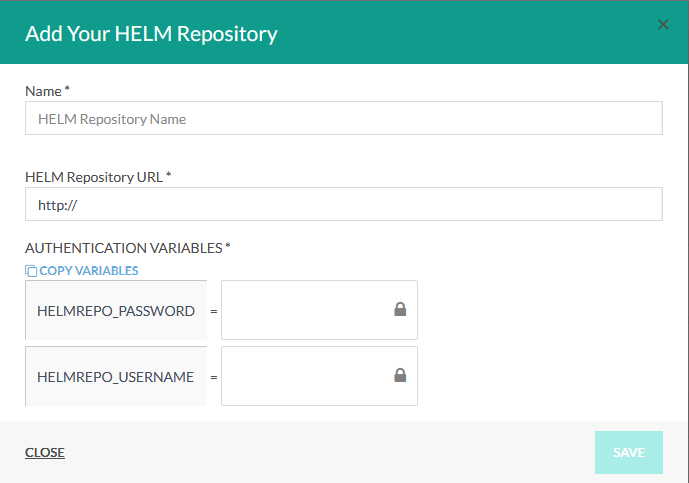
- If your repository doesn’t require authentication, to complete the process, click Save.
For more details on adding Helm repositories, see Helm integrations.
Use a Helm repository in a Codefresh pipeline
Once you have set up Helm integrations in Codefresh, you can import single or multiple Helm repository contexts into your pipelines.
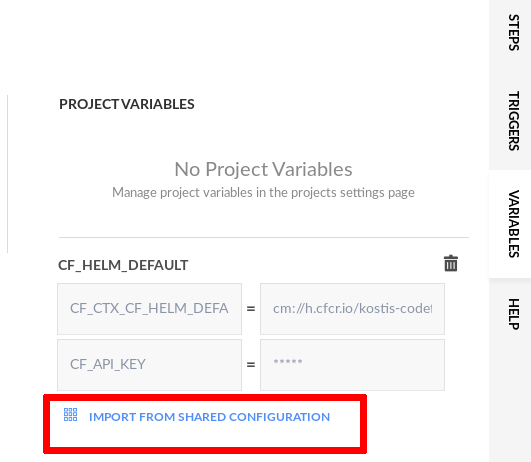
Select the Import from shared configuration option in the “Environment Variables” section, and then select the Helm repository or Helm repositories to import into the pipeline.
The repository settings are imported as environment variables into the pipeline, to use as needed.
- From the Pipelines page, select the pipeline into which to import the Helm repository contexts.
- In the Workflows tab, do one of the following:
- Click Variables on the right, and then click the Settings (gear) icon.
- Click the context menu next to the settings icon.
- Click Import from/Add shared configuration, and select the name of the repository.
- To import more Helm registry contexts, repeat step 3. The settings for the Helm registry contexts are injected as environment variables into the pipeline.
- If you are using the Helm step, the step uses these settings to connect to your authenticated repository automatically. For details, see Using Helm in Codefresh pipelines.
Install a chart from your Helm repository
Install a chart from a Helm repository to your cluster.
- Values in the Chart Install wizard are provided in the following order:
- Chart Default Values (implicitly part of the chart).
- Overridden default values (provided as values file, provided only if edited by the user).
- Supplied values files from Yaml Shared Configuration.
- Override variables are provided as
--setarguments.
- Variables available for custom pipelines:
If you select a custom pipeline, the following variables are available:CF_HELM_RELEASE- name of releaseCF_HELM_KUBE_CONTEXT- kubectl context name of target cluster (cluster name from dashboard)CF_HELM_INSTALLATION_NAMESPACE- desired namespace for the releaseCF_HELM_CHART_VERSION- Chart Version,CF_HELM_CHART_NAME- Chart NameCF_HELM_CONTEXTS- values from shared configurationCF_HELM_VALUES- extra valuesCF_HELM_SET- extra values,CF_HELM_CHART_REPO_URL- URL of Chart repositoryCF_HELM_COMMIT_MESSAGE- Message to show in Helm GUI,
Before you begin
- Make sure that you have a Kubernetes integration with the cluster and namespace, as described here
How to
- In the Codefresh UI, from Artifacts in the sidebar, select Helm Charts.
- In the row with the chart to install, click Install.
- Enter the Release name for the chart, and select the Chart version to install.
- From Cluster Information, select a Kubernetes Cluster and the Namespace to install to.
- Select the Pipeline to install to.
- If required, edit the Default Chart Values to view and override them.
When the default values yaml is changed, it is provided to Helm install as a values file. You can revert to the original values cby clicking Revert. - To provide additional values files, do the following:
- From the Import from configuration list, select Add new context of type: YAML.
- Enter the Context name.
- Insert your values YAML, and click Save. The YAML is saved and added to the list of configuration files that you can import from.
- To override variable values, click +Add variable, and then enter the Key and Value.
TIP
The order of value configurations matter for Helm: most recently provided values override earlier ones. - Click Install. You can observe the newly installed release in Helm Releases.
You can also install Helm releases from any Helm environment board.
Related articles
Using Helm in a Codefresh pipeline
Helm integrations
Helm Dashboard
Promoting Hlem environments
Helm best practices