Cloud Storage pipeline integrations
How to use Codefresh with Cloud Storage providers
Codefresh integrations with cloud storage providers provide a convenient solution for storing test reports. With Codefresh, you can easily configure your pipelines to store test reports in your preferred Cloud Storage provider, such as Amazon S3, Google Cloud Storage, Azure, and MinIO.
For every cloud storage provider, you need to first create a storage bucket in your storage provider account, connect the account with Codefresh to create an integration, and configure your pipelines to create and upload test reports.
Connecting your storage account to Codefresh
When you connect your storage provider account to Codefresh, Codefresh creates subfolders in the storage bucket for every build, with the build IDs as folder names. Test reports generated for a build are uploaded to the respective folder. The same bucket can store test reports from multiple pipeline builds.
IMPORTANT
The name assigned to the integration must be unique within the account. Using the same name for other integrations or Shared Configuration contexts within pipelines will result in conflicts.
For troubleshooting, see Error: context already exists.
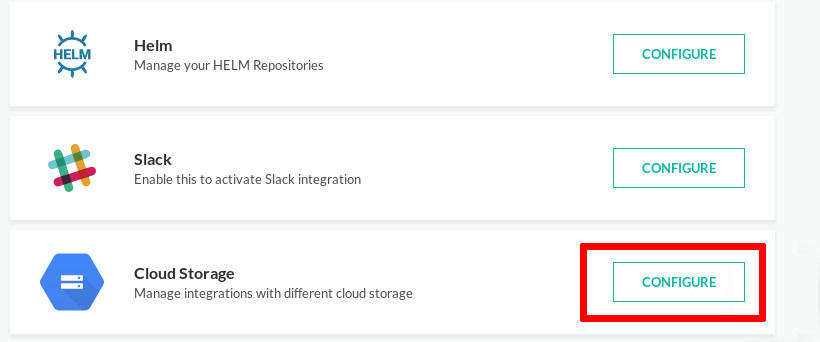
- In the Codefresh UI, on the toolbar, click the Settings icon, and then from the sidebar select Pipeline Integrations.
- Scroll down to Cloud Storage, and click Configure.
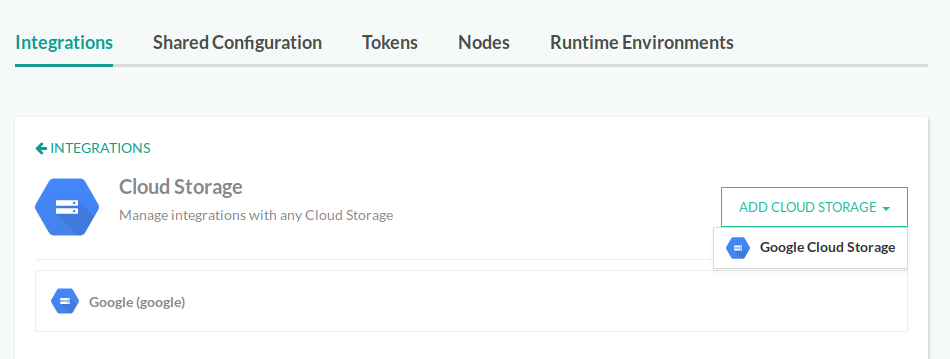
- Click Add Cloud Storage, and select your cloud provider for test report storage.
- Define settings for your cloud storage provider, as described in the sections that follow.
Connecting a Google bucket
In Google
- Create a bucket either from the Google cloud console or the
gsutilcommand line tool.
See the official documentation for the exact details.
In Codefresh
- Connect your storage account and select Google Cloud Storage.
- Define the settings:
- Select OAuth2 as the connection method, which is the easiest way.
- Enter an arbitrary name for your integration.
- Select Allow access to read and write into storage as Codefresh needs to both write to and read from the bucket.
- Click Save.
- When Codefresh asks for extra permissions from your Google account, accept the permissions.
The integration is ready. You will use the name of the integration as an environment variable in your Codefresh pipeline.
NOTE
An alternative authentication method is to use JSON Config with a Google service account key.
In that case, download the JSON file locally and paste its contents in the JSON config field. For more information, see the official documentation.
Connecting an Amazon S3 bucket
Create an S3 bucket in AWS (Amazon Web Services)
- Create an S3 bucket in AWS.
See the official documentation, or use the AWS CLI. - Define the necessary IAM (Identity and Access Management) policy settings.
Here’s an example IAM policy that you can use as a reference:{ "Version": "2012-10-17", "Statement": [ { "Effect": "Allow", "Action": [ "s3:ListBucket" ], "Resource": [ "arn:aws:s3:::cf-backup*" ] }, { "Effect": "Allow", "Action": [ "s3:PutObject", "s3:GetObject", "s3:DeleteObject" ], "Resource": [ "arn:aws:s3:::cf-backup*/*" ] } ] }
Define S3 settings in Codefresh
- Select Amazon Cloud Storage as your Cloud Storage provider.
- Define the settings:
- Enter an arbitrary name for your integration.
- Paste the AWS Access Key ID and AWS Secret Access Key.
- Click Save.
For more information on how to obtain the Access Key and Secret Access Key, check the AWS documentation.

After setting up and verifying the S3 bucket integration, you can use:
- The name of the integration as an environment variable in your Codefresh pipeline.
- Any external secrets that you have defined (such as Kubernetes secrets), as values, by clicking on the lock icon that appears next to field:
- If you have already specified the resource field during secret definition, just enter the name of the secret directly in the text field, for example,
my-secret-key. - If you didn’t include a resource name during secret creation, enter the full name in the field, for example,
my-secret-resource@my-secret-key.
- If you have already specified the resource field during secret definition, just enter the name of the secret directly in the text field, for example,
Connecting Azure Blob/File storage
Create a storage account in Azure
- For Azure, create a storage account.
See the official documentation. - Find one of the two access keys already created.
- Note down the Account Name and Access key for the account.
Define Azure settings in Codefresh
- Select Azure File/Blob Storage as your Cloud Storage provider.
- Define the settings:
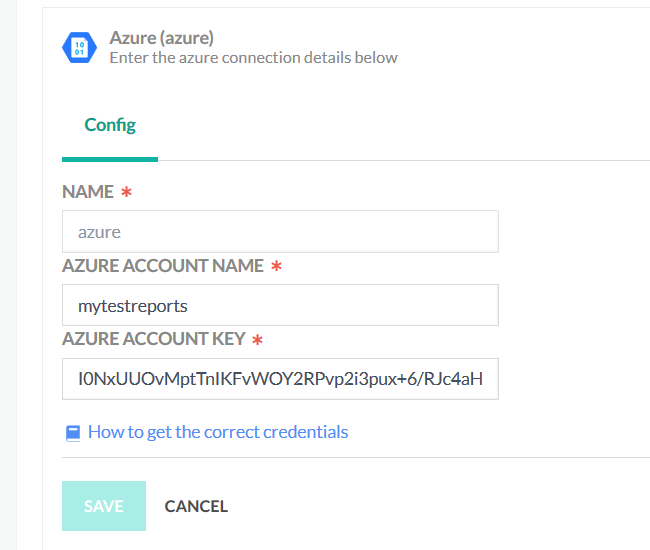
- Enter an arbitrary name for your integration.
- Paste the Azure Account Name and Azure Account Key.
- Click Save.
After setting up and verifying the Azure File/Blob integration, you can use:
- The name of the integration as an environment variable in your Codefresh pipeline.
- Any external secrets that you have defined (such as Kubernetes secrets), as values, by clicking on the lock icon that appears next to field:
- If you have already specified the resource field during secret definition, just enter the name of the secret directly in the text field, for example,
my-secret-key. - If you didn’t include a resource name during secret creation, enter the full name in the field, for example,
my-secret-resource@my-secret-key.
- If you have already specified the resource field during secret definition, just enter the name of the secret directly in the text field, for example,
Connecting MinIO storage
Create a storage account in MinIO
- Configure the MinIO server. See the official documentation.
- Copy the Access and Secret keys.
Set up a MinIO integration in Codefresh
- Select MinIO Cloud Storage as your Cloud Storage provider.
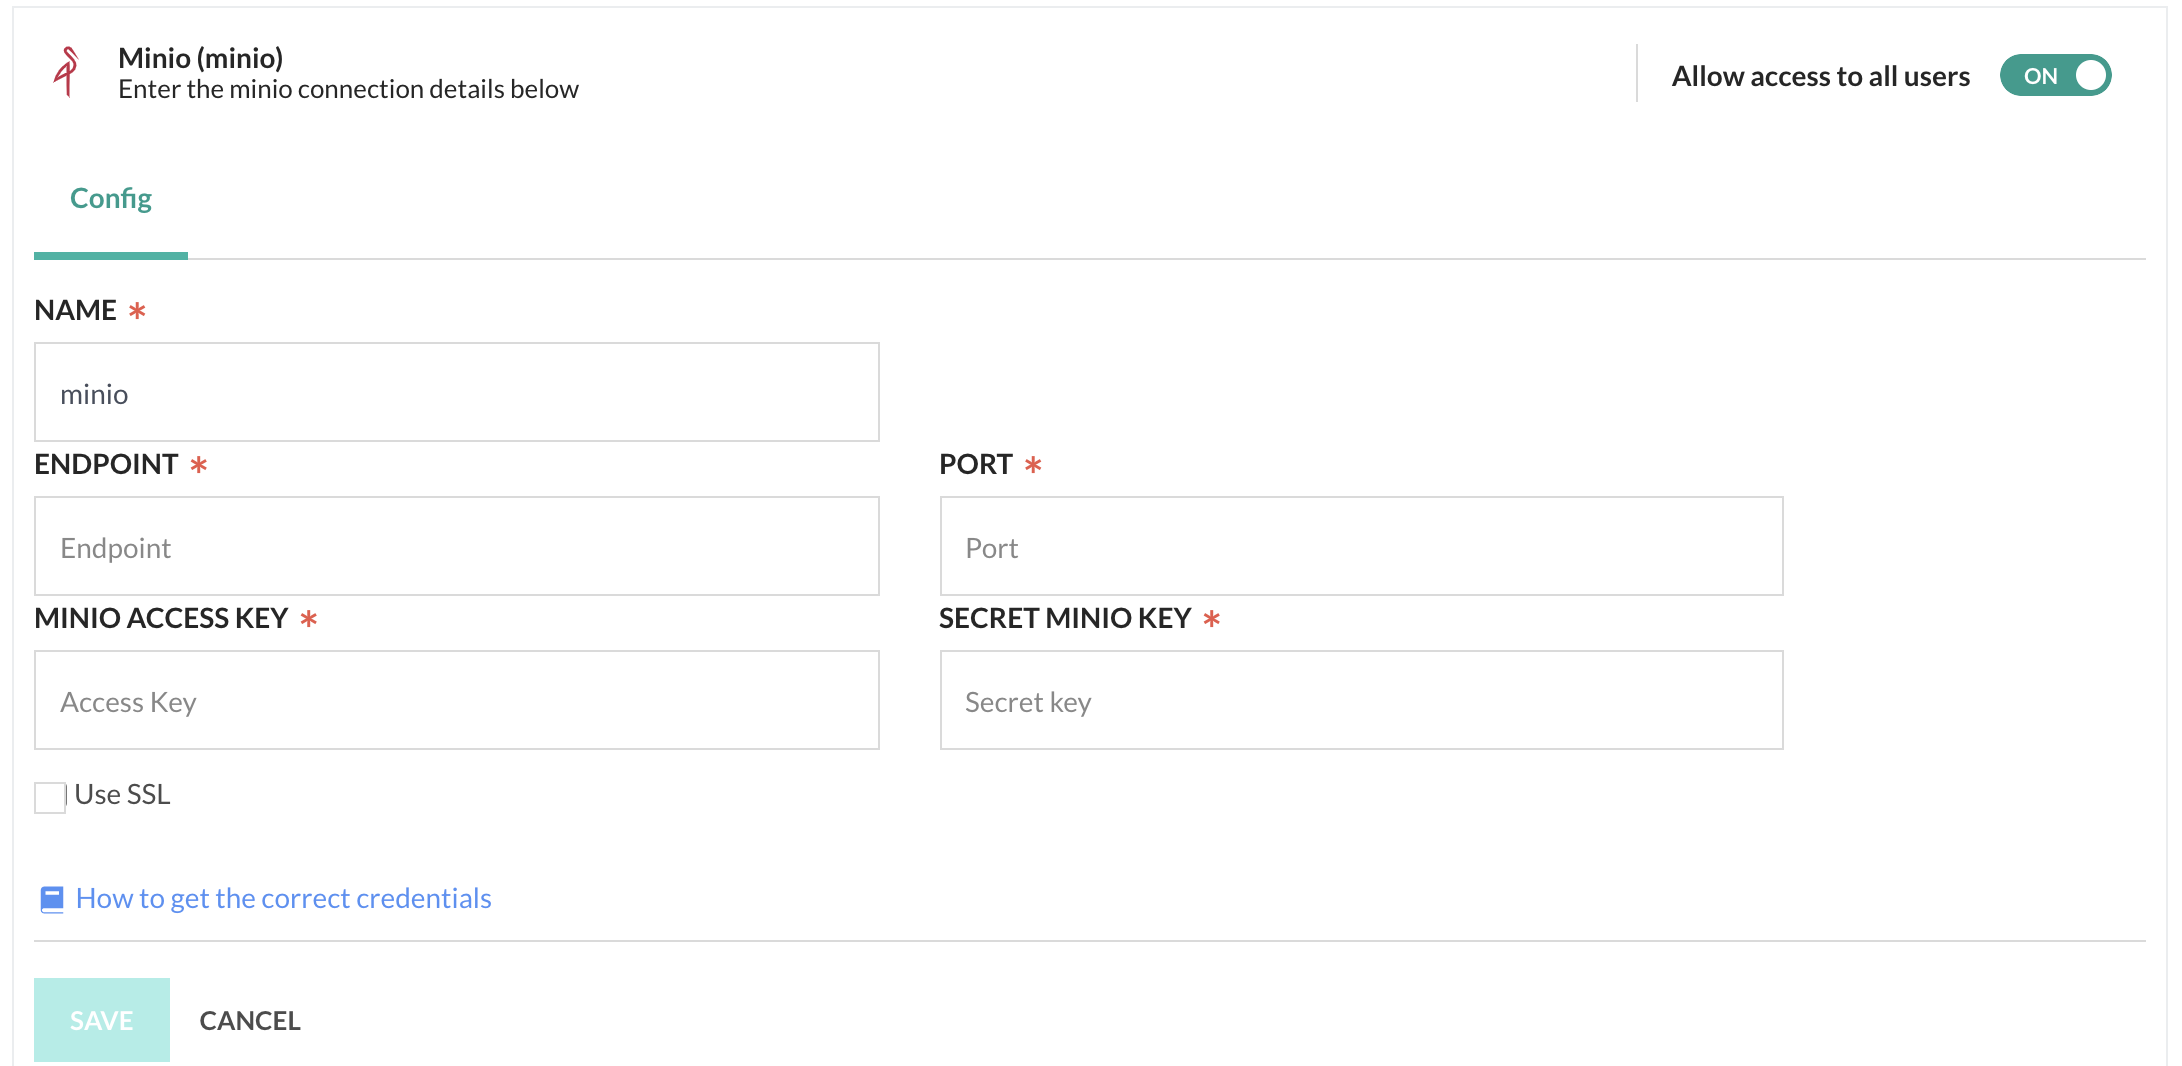
- Define the settings:
- NAME: The name of the MinIO storage. Any name that is meaningful to you.
- ENDPOINT: The URL to the storage service object.
- PORT: Optional. The TCP/IP port number. If not defined, defaults to port
80for HTTP, and443for HTTPS. - Minio Access Key: The ID that uniquely identifies your account, similar to a user ID.
- Secret Minio Key: The password of your account.
- Use SSL: Select to enable secure HTTPS access. Not selected by default.
- Click Save.
Related articles
Amazon Web Services (AWS) pipeline integration
Microsoft Azure pipeline integration
Google Cloud pipeline integration
Creating test reports
Codefresh YAML for pipeline definitions
Steps in pipelines