Jenkins pipeline integration/migration
Migration from Jenkins to Codefresh pipelines
Codefresh offers a superset of the capabilities offered by Jenkins, and therefore you can fully replace a Jenkins solution using only Codefresh on its own.
During the migration period, it is very easy to make both solutions work together. This allows you to move gradually new CI/CD tasks to Codefresh and still keep the existing functionality in Jenkins jobs.
Calling Codefresh pipelines from Jenkins Jobs
This is the most common scenario during the migration period. The CI part (code packaging) is still in Jenkins, while the CD part (actual deployments) happen with Codefresh.
- For Jenkins to connect to your Codefresh account, create a Codefresh API token.
- Enter the token in Jenkins as a global Credential.
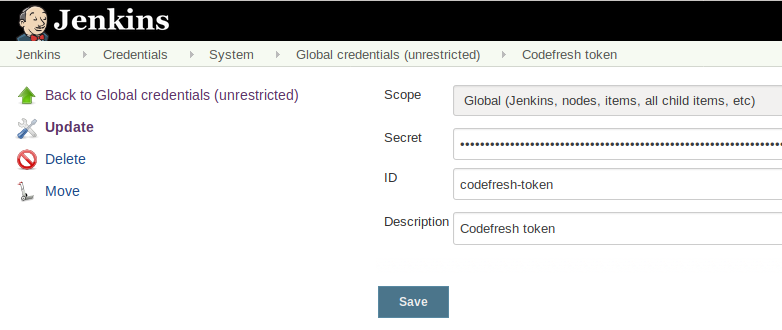
Now you can create any declarative or scripted Jenkins pipeline that uses the token and the Codefresh CLI to call Codefresh pipelines from Jenkins.
Here is a very simple example:
Jenkinsfile
pipeline {
agent {
docker {
image 'codefresh/cli:latest'
args '--entrypoint=""'
}
}
environment {
CODEFRESH_API_TOKEN= credentials('codefresh-token')
}
stages {
stage('Calling Codefresh pipeline') {
steps {
sh 'codefresh auth create-context --api-key $CODEFRESH_API_TOKEN'
sh 'codefresh run my-first-project/basic-build -t my-trigger -b master'
}
}
}
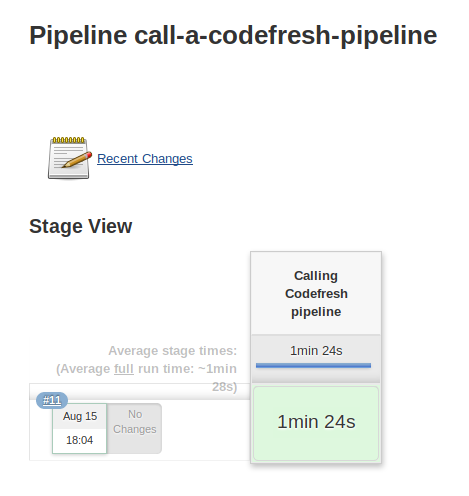
}Run the Jenkins job, and it also triggers a Codefresh pipeline:
In the logs of the Jenkins job, you will see the Codefresh logs (the Codefresh CLI automatically shows logs in standard output).
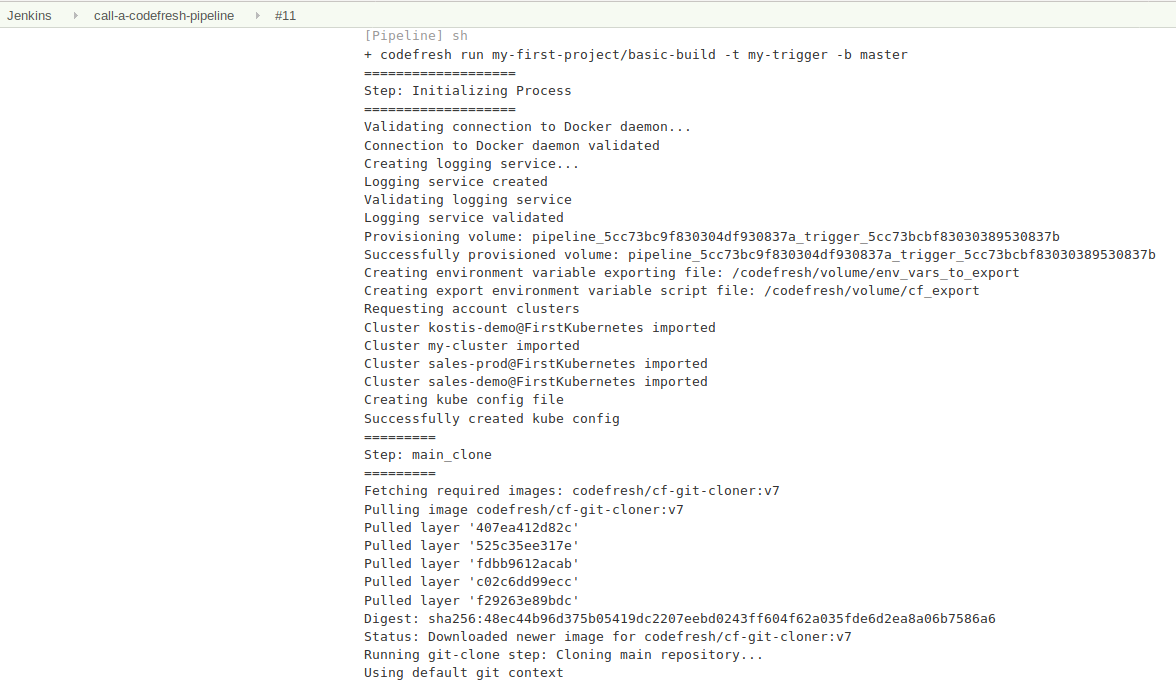
Of course, if you visit the Codefresh UI you will also see the running pipeline. With this kind of integration, it is very easy to create Jenkins Jobs that compile/package code and add a step in the jobs that calls Codefresh for deployment.
Calling Jenkins jobs from Codefresh pipelines
This is the opposite scenario. As you move more functionality into Codefresh, it might make sense to have a Codefresh pipeline that actually calls Jenkins jobs for tasks that are not migrated yet.
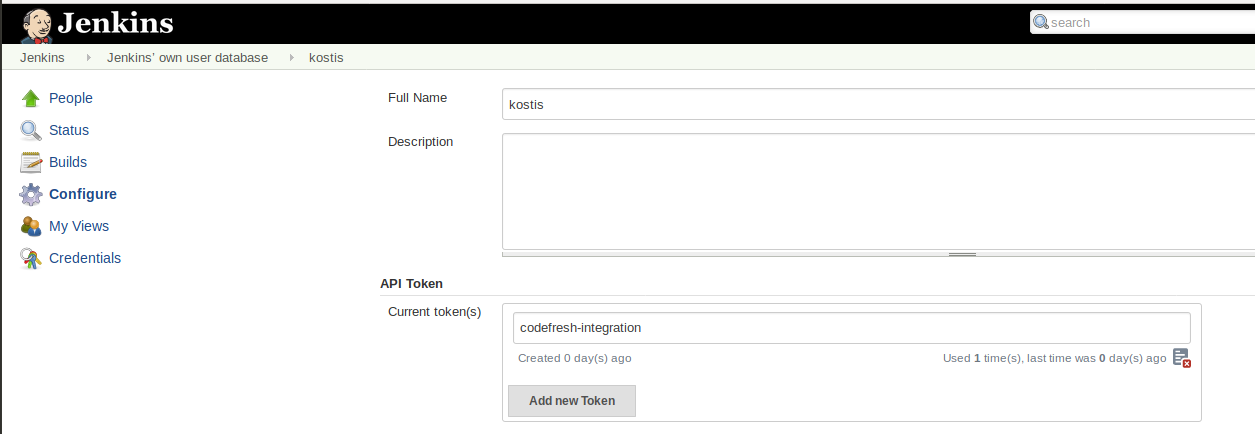
- For Codefresh to authenticate to your Jenkins instance, from User Settings in the Jenkins UI, create a Jenkins API token.
Give your token any name that reminds you of its purpose. The name itself is arbitrary.
Once you have the token, you can use the Codefresh plugin for triggering Jenkins Jobs in any pipeline like this:
codefresh.yml
version: '1.0'
steps:
RunJenkins:
title: Triggering Jenkins Job
image: codefresh/cf-run-jenkins-job
environment:
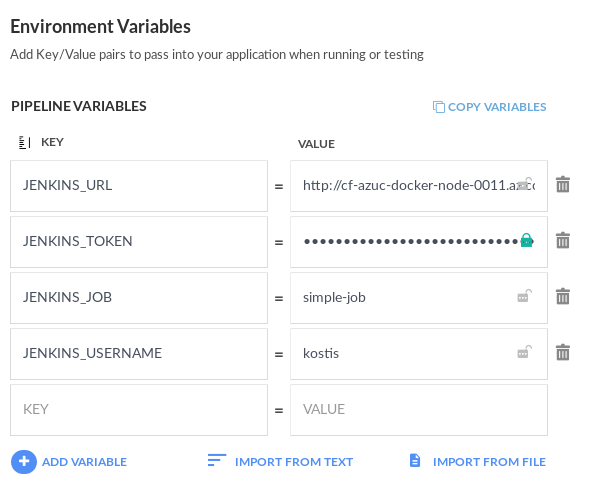
- JENKINS_URL=${{JENKINS_URL}}
- JENKINS_USER=${{JENKINS_USERNAME}}
- JENKINS_TOKEN=${{JENKINS_TOKEN}}
- JENKINS_JOB=${{JENKINS_JOB}}The value of the variables can be stored either in your Codefresh shared configuration or directly in the pipeline:
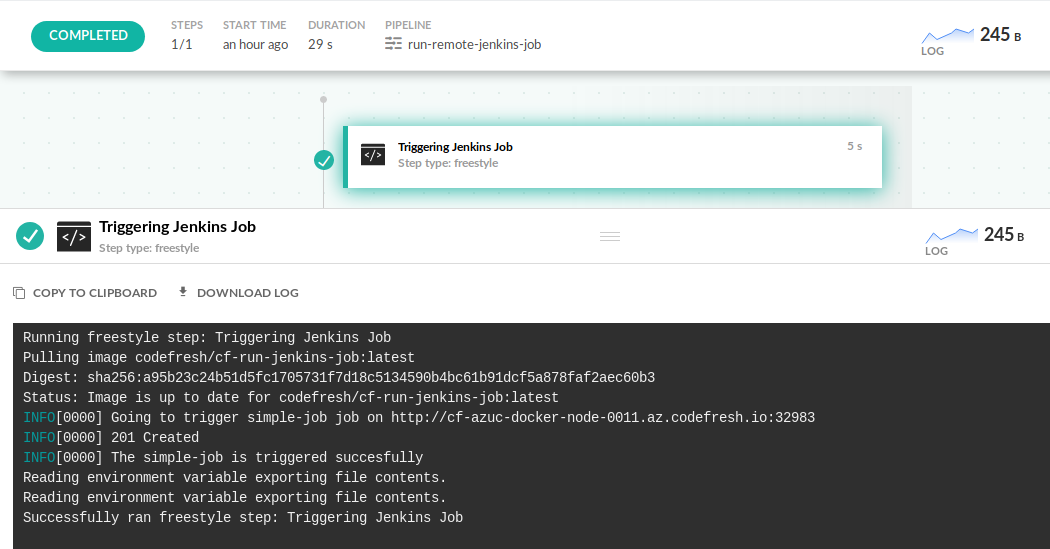
Launching the Codefresh pipeline also triggers the remote Jenkins Job.
It is possible to mix both scenarios at the same time (Codefresh pipelines that call Jenkins Jobs and vice-versa).
Migrating from Jenkins to Codefresh
Now that you know how to mix pipelines from both platforms, it is helpful to understand how you can migrate all your Jenkins Jobs to Codefresh. In most cases, several actions that require custom scripts in Jenkins (or plugins/shared libraries) are already integrated into the core Codefresh platform. Here are some high-level differences between the two platforms:
| Feature | Jenkins | Codefresh |
|---|---|---|
| Architecture | VM based | container-based |
| Pipeline definition | Groovy | YAML |
| Tool installation | Installed on build node | dynamically launched |
| Plugin mechanism | Java/Groovy using Jenkins API | Docker image (any programming language) |
| Plugin installation | Central (requires admin access) | Per pipeline (no admin access needed) |
| Docker agent builds | Extra plugin | Built-in |
| Kubernetes agent builds | Extra plugin | Built-in |
| Docker commands | Manually run in pipelines | Built-in pipeline steps |
| Access to Kubectl | External plugin | Built-in |
| Kubernetes deployments | External plugin | Built-in |
It is important to understand that when you are switching to Codefresh you get a set of higher level abstraction for your builds:
- Unlike Jenkins, Codefresh automatically has a distributed fleet of build nodes and manages all builds on its own.
- With Codefresh you don’t need to install anything on the build nodes (in fact you don’t even have SSH access on them). All build tools are automatically launched in pipelines as Docker images.
- In Codefresh, you can use the same tools with different versions in the same pipeline, without any special configuration (for example, use Java 5 and Java 8 in the same pipeline).
- Codefresh plugins are used per pipeline by simply defining them. There is nothing to install centrally (such as Jenkins plugins or shared libraries). Different teams can use different tools on their pipeline without affecting each other.
- Codefresh plugins are just Docker images with predefined inputs/outputs. They can be programmed in any programming language (not just Java/Groovy) and are not tied to Codefresh in any way (i.e. there is no need to know the Codefresh API for writing a Codefresh plugin).
- Jenkins pipelines can be free-style (VM based), scripted (VM/container-based) or declarative (VM/container based) meaning that there are at least 5 ways on how you can write your pipeline. In Codefresh there is only way (declarative/container-based).
- Jenkins pipelines are connected to a single git repository. Codefresh pipelines can be connected to multiple Git triggers which themselves are connected to git repositories. Therefore a Codefresh pipeline can be reused for multiple projects.
- Specifically for building Docker images, Codefresh can automatically connect to any external Docker registry.
- Specifically for Kubernetes deployments, Codefresh automatically sets up
kubectlaccess in pipelines from connected clusters. There is no configuration needed to achieve this behavior. Codefresh also has several built-in ways for Kubernetes deployments and a dedicated dashboard to see what your cluster is doing. - Specifically for Helm deployments, Codefresh includes a private Helm repository and several Helm dashboards.
Migrating Jenkins freestyle jobs
If you have freestyle Jenkins Jobs (or are still using Jenkins 1.x), it is very easy to migrate your builds to Codefresh.
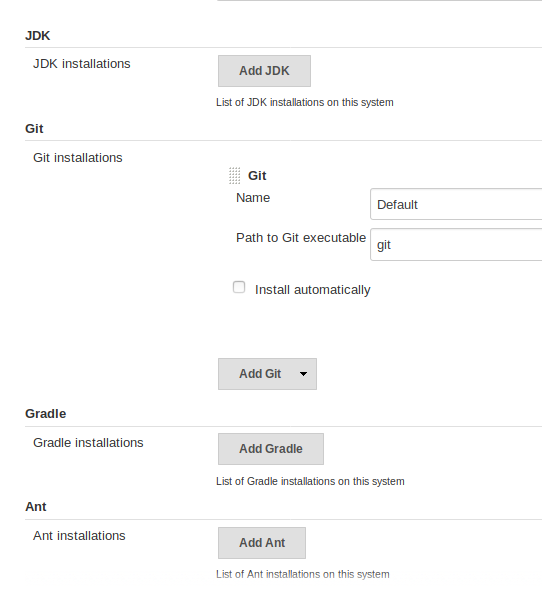
In Jenkins, you are accustomed to:
- Installing a programming tool on the Jenkins node.
- Calling it directly in a build step.
In Codefresh, a similar process would be the following:
- Find a Docker image in Docker Hub or create one by yourself that has the tools that you need.
- Use a freestyle step, and run the exact same command in a Codefresh pipeline.
For example this Jenkins job…
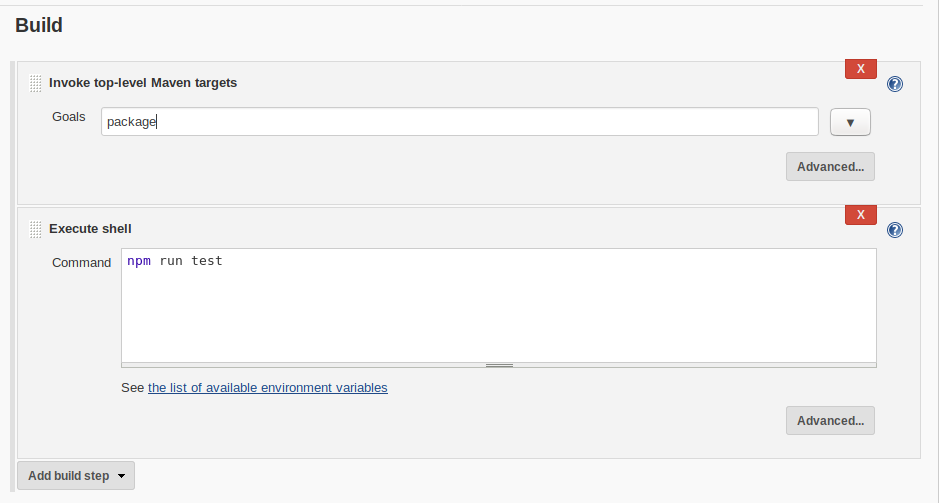
…can be easily converted to a Codefresh pipeline like this:
codefresh.yml
version: '1.0'
steps:
  my_jar_compilation:
    title: Compile/Unit test
    image: maven:3.5.2-jdk-8-alpine
    commands:
     - mvn package
  my_node_app:
    title: Running unit tests
    image: node:11
    commands:
     - npm run test
Unlike Jenkins, Codefresh does not need any global installation of tools beforehand.
In Codefresh, you can just use one or more Docker images in your pipeline. The tool versions will be launched only while the pipeline is active. Once the pipeline is finished, all Docker images that took part in it are discarded. The Codefresh build node has only Docker installed and nothing else. This means that you can easily mix and match tool versions.
Here is a Codefresh pipeline that uses multiple versions of Java and Node.
codefresh.yml
version: '1.0'
steps:
  PackageMyNode1App:
    title: Packaging Node application 1
    stage: packaging
    image: node:11.1
    working_directory: ./dashboard
    commands:
      - echo "My Node version is"
      - node --version
      - npm install
  PackageMyNode2App:
    title: Packaging Node application 2
    stage: packaging
    image: node:9.3.0-slim
    working_directory: ./website
    commands:
      - echo "My Node version is"
      - node --version
      - npm install
  RunUnitTests:
    title: Running Unit tests
    image: maven:3.6.1-jdk-11
    working_directory: ./backend
    commands:
     - java -version
     - mvn test
  PackageBackend:
    title: Compile/Unit test
    image: maven:3.5.2-jdk-8-alpine
    working_directory: ./backend
    commands:
     - java -version
     - mvn package -Dmaven.test.skip
Meanwhile, another team might have a different pipeline using different versions of Maven and/or Java. Each team can decide on the exact version needed just by changing the Codefresh YAML.
It should be easy to see now that by migrating from Jenkins to Codefresh, several problems in Jenkins are simply eliminated:
- You do not need to be an admin to install programming tools anymore,
- Tools are defined per pipeline instead of being preloaded centrally,
- Multiple versions of the same tool can be used on the same pipeline (or different pipelines),
- Upgrading a tool to a new version is trivial (just change the docker tag in the freestyle step),
- You don’t need to label build nodes anymore with specific labels that show which tools they contain,
- All public Dockerhub images can be used with zero changes in a Codefresh step.
Notice that for several popular tools, Dockerhub already contains several images.
Of course, you can create your own Docker image with the exact tools that you want and then use it from the any Docker registry or any other registry in your pipeline.
Migrating Jenkins pipelines
In the case of Jenkins pipelines, things are a bit more complicated because there is not a single way anymore on how to structure your pipelines.
First of all, the best-case scenario is when you have declarative Jenkins pipelines that already use Docker images for stage execution.
Jenkinsfile
pipeline {
    agent none
    stages {
        stage('Example Build') {
            agent { docker 'maven:3-alpine' }
            steps {
                echo 'Hello, Maven'
                sh 'mvn --version'
            }
        }
        stage('Example Test') {
            agent { docker 'openjdk:8-jre' }
            steps {
                echo 'Hello, JDK'
                sh 'java -version'
            }
        }
    }
}
In this case, there is a 1-1 mapping between Jenkins stages and Codefresh steps as you can simply convert each stage into a Codefresh step using the respective Docker image.
The Jenkins pipeline above can be converted to a Codefresh pipeline with a series of freestyle steps:
codefresh.yml
version: '1.0'
steps:
my_first_step:
title: Example Build
image: maven:3-alpine
commands:
- echo 'Hello, Maven'
- mvn --version
my_second_step:
title: Example Test
image: openjdk:8-jre
commands:
- echo 'Hello, JDK'
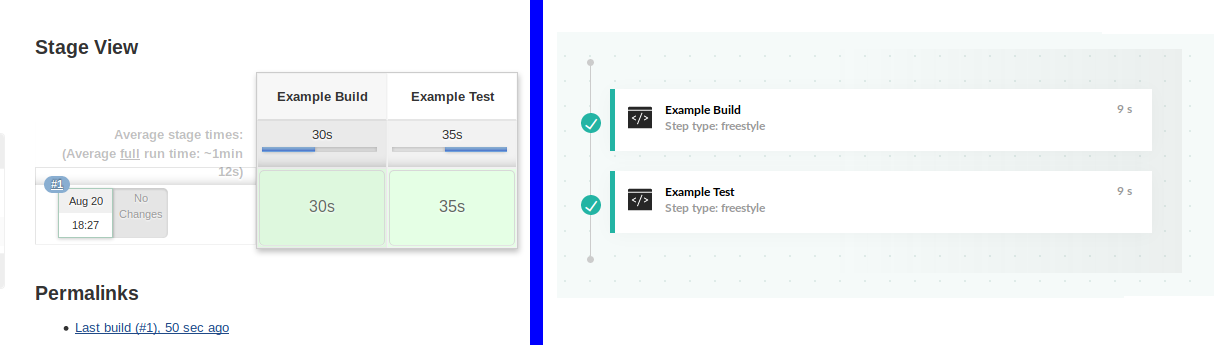
- java -versionThe final Codefresh pipeline will even look like the original Jenkins one.
If you don’t use Docker containers in your Jenkins pipeline, then you need to follow the same advice as the previous section (i.e. find a Docker image that has the tools you need and create your own freestyle step in Codefresh).
Checking out source code
In Jenkins 1.x pipelines, code is automatically checked out by Jenkins when the pipeline starts. In Jenkins 2.x pipelines you are free to insert your own git steps inside a Job:
Jenkinsfile
node {
   stage('First Project') {
      git 'https://github.com/nodegui/react-nodegui.git'
   }
   stage('Second Project') {
      git url: 'https://github.com/jglick/simple-maven-project-with-tests.git'
          branch: 'master'
   }
}
Codefresh has a dedicated Git clone step that can be used in a similar manner.
codefresh.yml
version: '1.0'
steps:
  first_project:
    type: 'git-clone'
    description: 'Cloning first project...'
    repo: 'nodegui/react-nodegui'
    revision: '${{CF_BRANCH}}'
    git: github
  second_project:
    type: 'git-clone'
    description: 'Cloning second...'
    repo: 'jglick/simple-maven-project-with-tests'
    revision: 'master'
    git: github
You don’t need to define any credentials or tokens, as they are already defined centrally in the Git provider integrations you set up. The CF_BRANCH variable is one of the built-in Codefresh variables that shows the branch that was used by the Git commit as it came from the trigger attached to the pipeline.
You can also manually run Git commands in Codefresh pipelines.
Step conditions
In several cases, you want to add conditions to steps, such as the branch that is being compiled:
Jenkinsfile
pipeline {
    agent any
    stages {
        stage('Example Build') {
            steps {
                echo 'Hello World'
            }
        }
        stage('Example Deploy') {
            when {
                branch 'master'
            }
            steps {
                echo 'Deploying'
            }
        }
    }
}
This can be also configured in Codefresh using step conditions:
codefresh.yml
version: '1.0'
steps:
  my_first_step:
    title: Example Build
    image: alpine:latest
    commands:
     - echo 'Hello World'
  my_second_step:
    title: Example Deploy
    image: alpine:latest
    commands:
     - echo 'Deploying'
    when:
      branch:
        only:
          - master
You can define much more complex conditions using the Codefresh expression language.
Migrating Jenkins credentials
Codefresh contains a central repository for user variables and secrets in the form of shared configuration. You can also inject variables on a specific project or a specific pipeline.
All injected variables are automatically available to all Codefresh freestyle steps. You don’t need a special syntax or directive to enable this behavior (unlike Jenkins where you have to use a withCredentials block or something similar).
In Jenkins you have to explicitly ask for a secret:
Jenkinsfile
pipeline {
    agent any
    stages {
        stage('Example') {
            environment {
                  AWS_ACCESS_KEY_ID     = credentials('jenkins-aws-secret-key-id')
                  AWS_SECRET_ACCESS_KEY = credentials('jenkins-aws-secret-access-key')
            }
            steps {
                sh 'printenv'
            }
        }
    }
}
In Codefresh if you setup your variables in the pipeline settings, then the pipeline itself needs nothing special.
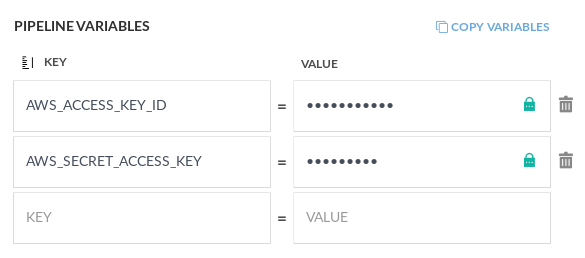
You can simply run the pipeline on its own:
codefresh.yml
version: '1.0'
steps:
  my_first_step:
    title: Example1
    image: alpine:latest
    commands:
     - printenv # Injected variables are always available
  my_second_step:
    title: Example2
    image: alpine:latest
    commands:
     - echo $AWS_ACCESS_KEY_ID
     - echo $AWS_SECRET_ACCESS_KEY
If you want to use a different name for each variable/secret then you can simply assign them to your desired names:
codefresh.yml
version: '1.0'
steps:
  my_first_step:
    title: Example
    image: alpine:latest
    environment:
     - MY_KEY=${{AWS_ACCESS_KEY_ID}}
     - MY_ACCESS_KEY=${{AWS_SECRET_ACCESS_KEY}}
    commands:
     - echo $MY_KEY
     - echo $MY_ACCESS_KEY
In the example above, even though the secrets are already available as environment variables AWS_ACCESS_KEY_ID and AWS_SECRET_ACCESS_KEY, we instead pass them to the pipeline step as MY_KEY and MY_ACCESS_KEY.
Migrating Jenkins shared libraries
Creating a Jenkins shared library has a lot of challenges:
- The library must be written in Groovy/Java,
- The library must use the Jenkins API,
- It is very hard to write unit tests for it,
- Installing it requires admin access in the Jenkins master.
Codefresh plugins, on the other hand, are just Docker images written in any programming language.
First of all, look at Docker Hub and see if there is already a utility or CLI that has the same functionality with your shared library. Codefresh also has a free marketplace for pipeline steps (which are Docker images essentially).
As a last resort, you need to rewrite your shared library and convert it to a Docker image. The process is the following:
- Start from a base image that contains Groovy and any other tool you need.
- Convert your shared library to a single Groovy executable that reads input from environment variables and/or files and writes output data to files.
- Remove all Jenkins specific APIs.
- Package the image with a simple Dockerfile that just compiles your executable.
Note that there is nothing Codefresh specific to the end-result. You should end up with a standard Docker image that would be usable in any environment that has Docker installed.
Once you have that image you can use it like any other Codefresh freestyle step as described in the previous section.
Migration of Jenkins pipelines that create Docker images
Codefresh has native support for:
- Building Docker images
- Running commands inside Docker images
- Pushing Docker images to different registries
If you are using Docker commands directly in your Jenkins file, or prefer to take advantage of the scripted variant of Docker image management then you can easily convert both approaches to Codefresh YAML like below:
Building Docker images
The most basic Docker operation is building an image. You will need a Dockerfile and a directory to use as build context (usually the same folder that contains the Dockerfile).
docker command
docker build . -t my-app-image:1.0.1
Or if you use Jenkins scripted pipelines…
Jenkinsfile
node {
    docker.build("my-app-image:1.0.1")
    docker.build("test-image", "./tests")
}
…they will become in Codefresh the following build steps:
codefresh.yml
version: '1.0'
steps:
  my_first_step:
    title: Building My App image
    type: build
    image: my-app-image
    tag: 1.0.1
  my_second_step:
    title: Building My Test image
    type: build
    image: test-image
    working_directory: "./tests"
Running commands in created containers
Sometimes you want to run commands inside a Docker image. Either to have access to specialized tools or to run tests.
docker command
docker build . -t my-app-image:1.0.1
docker run my-app-image:1.0.1 npm install
Or, if you use Jenkins scripted pipelines…
Jenkinsfile
node {
    def customImage = docker.build("my-app-image:1.0.1")

    customImage.inside {
        sh 'npm install'
    }
}
… they will become in Codefresh the following freestyle steps.
codefresh.yml
version: '1.0'
steps:
  my_first_step:
    title: Building My App image
    type: build
    image: my-app-image
    tag: 1.0.1
  my_second_step:
    title: Install Node dependencies
    image: ${{my_first_step}}
    commands:
      - npm install
Notice that the second pipeline step actually mentions the first one by name as a running context.
Pushing Docker images
Notice that in Codefresh all connected registries are automatically available to all pipelines.
You don’t need special directives such as withRegistry. All registries can be mentioned
by their name in any push step (and will be used automatically for pulls when an image uses their domain).
docker command
docker build . -t my-app-image:1.0.1
docker tag my-app-image:1.0.1 registry.example.com/my-app-image:1.0.1
docker push registry.example.com/my-app-image:1.0.1
Or, if you use Jenkins scripted pipelines…
Jenkinsfile
node {
    def customImage = docker.build("my-app-image:1.0.1")

    docker.withRegistry('https://registry.example.com', 'example-registry-credentials') {
            customImage.push("1.0.1")
            customImage.push("latest")
        }
}
…they will become in Codefresh the following push steps.
codefresh.yml
version: '1.0'
steps:
  my_first_step:
    title: Building My App image
    type: build
    image: my-app-image
    tag: 1.0.1
  my_second_step:
    title: Pushing image
    type: push
    candidate: ${{my_first_step}}
    tags:
    - 1.0.1
    - latest
    registry: example-registry
Notice again that the second step pushes the image created by the first one.
Complete Docker pipeline
Here is a full example with a pipeline that builds an image, runs tests, and pushes it to Dockerhub.
Jenkinsfile
node {
    def app

    stage('Clone repository') {
        checkout scm
    }

    stage('Build image') {
        app = docker.build("my-app-image:1.0.1")
    }

    stage('Test image') {
        app.inside {
            sh 'npm run test'
        }
    }

    stage('Push image') {
        docker.withRegistry('https://registry.hub.docker.com', 'docker-hub-credentials') {
            app.push("1.0.1")
            app.push("latest")
        }
    }
}
Here is the same pipeline in Codefresh:
codefresh.yml
version: '1.0'
steps:
  main_clone:
    type: "git-clone"
    description: "Clone repository"
    repo: "my-account/my-git-repo"
    revision: "${{CF_BRANCH}}"
    git: github
  my_first_step:
    title: Build image
    type: build
    image: my-app-image
    tag: 1.0.1
  my_second_step:
    title: Test image
    image: ${{my_first_step}}
    commands:
      - npm run test
  my_third_step:
    title: Push image
    type: push
    candidate: ${{my_first_step}}
    tags:
    - 1.0.1
    - latest
    registry: dockerhub
Notice that Codefresh has much more context regarding Docker registries and credentials. The same approach is followed with Kubernetes deployments as we will see in the next section.
Migration of Jenkins pipelines that deploy to Kubernetes
Codefresh has first-class support for Kubernetes deployments. Codefresh can deploy on its own using different options and no external tools (i.e. Ansible or kubectl) are needed.
Specifically for Kubernetes and Helm, Codefresh has declarative pipeline steps:
codefresh.yml
version: '1.0'
steps:
  RunningDeploy:
    title: Kubernetes Deployment
    type: deploy
    kind: kubernetes
    cluster: myDemoGKEcluster
    namespace: production
    service: my-service
    candidate:
      image: 'my-app-image:1.0.1'
      registry: 'dockerhub'
  DeployMyChart:
    image: 'codefresh/cfstep-helm:2.9.1'
    environment:
    - CHART_REF=charts/python
    - RELEASE_NAME=mypython-chart-prod
    - KUBE_CONTEXT=myDemoAKSCluster
As with Docker registries (described in the previous section), Codefresh makes all added Kubernetes clusters available to all pipelines. You don’t need any special plugin or directive (such as withKubeConfig) to work with Kubernetes clusters in Codefresh. You can see that the Codefresh pipeline simply mentions Kubernetes clusters and registries without any credential information.
Of course, it is also very easy to convert any existing Jenkins pipeline by just using any image that contains the kubectl executable.
Jenkinsfile
node {
  stage('Apply Kubernetes files') {
    withKubeConfig([credentialsId: 'user1', serverUrl: 'https://api.k8s.my-company.com']) {
      sh 'kubectl apply -f my-kubernetes-directory'
    }
  }
}
Codefresh will automatically setup Kube config access to the pipeline behind the scenes. Zero configuration is needed for this behavior.
codefresh.yml
version: '1.0'
steps:
  MyCustomKubectlCommands:
    title: Running Kubectl
    image: codefresh/kubectl
    commands:
      - kubectl config use-context "my-k8s-my-company"
      - kubectl apply -f my-kubernetes-directory
Once you use Codefresh for your deployments you also get access to:
- The Kubernetes Dashboard
- A free built-in Helm repository with each Codefresh account
- The Helm chart dashboard
- The Helm Release dashboard
- The Helm environment dashboard
For some easy templating see also the cf-deploy plugin.