Java Example with Gradle and Docker
Create Docker images for Spring/Gradle
Codefresh can work with Gradle builds in a similar manner as with Maven builds.
The example Gradle project
You can see the example project at https://github.com/codefresh-contrib/gradle-sample-app. The repository contains a Spring Boot 2 project built with Gradle with the following tasks:
gradle testruns unit tests.gradle buildcreates a self-contained jar file (using Spring boot).
Once launched the application presents a simple message at localhost:8080 and also at the various /actuator/health endpoints.
Gradle and Docker (multi-stage builds)
The easiest way to use Gradle is with multi-stage builds. With multi-stage builds a Docker build can use one base image for compilation/packaging/unit tests and a different one that will hold the runtime of the application. This makes the final image more secure and smaller in size (as it does not contain any development/debugging tools).
In the case of Gradle, you can use a base image that has the full JDK and Gradle itself, while the final image has the JRE and nothing else.
The example project is actually using multi-stage builds by default.
Here is the multi-stage Dockerfile:
Dockerfile
FROM gradle:4.7.0-jdk8-alpine AS build
COPY --chown=gradle:gradle . /home/gradle/src
WORKDIR /home/gradle/src
RUN gradle build --no-daemon

FROM openjdk:8-jre-slim

EXPOSE 8080

RUN mkdir /app

COPY --from=build /home/gradle/src/build/libs/*.jar /app/spring-boot-application.jar

ENTRYPOINT ["java", "-XX:+UnlockExperimentalVMOptions", "-XX:+UseCGroupMemoryLimitForHeap", "-Djava.security.egd=file:/dev/./urandom","-jar","/app/spring-boot-application.jar"]
This docker build does the following:
- Starts from the Gradle image
- Copies the Java source code inside the container
- Compiles the code and runs unit tests (with
Gradle build) - Discards the Gradle image with all the compiled classes/unit test results etc.
- Starts again from the JRE image and copies only the JAR file created before
We start Gradle without the long-running daemon, as the deamon is best used during local development only and not in CI/CD pipelines.
Create a CI pipeline for Gradle (multi-stage Docker builds)
Because in multi-stage builds Docker itself handles most of the build process, moving the project to Codefresh is straightforward. We just need a single step that creates the Docker image after checking out the code.
codefresh.yml
version: '1.0'
stages:
  - prepare
  - build
steps:
  main_clone:
    title: Cloning main repository...
    stage: prepare
    type: git-clone
    repo: 'codefresh-contrib/gradle-sample-app'
    revision: master
    git: github
  BuildingDockerImage:
    title: Building Docker Image
    stage: build
    type: build
    image_name: gradle-sample-app
    working_directory: ./
    tag: 'multi-stage'
    dockerfile: Dockerfile
This will compile/test/package the Gradle application and create a Docker image.
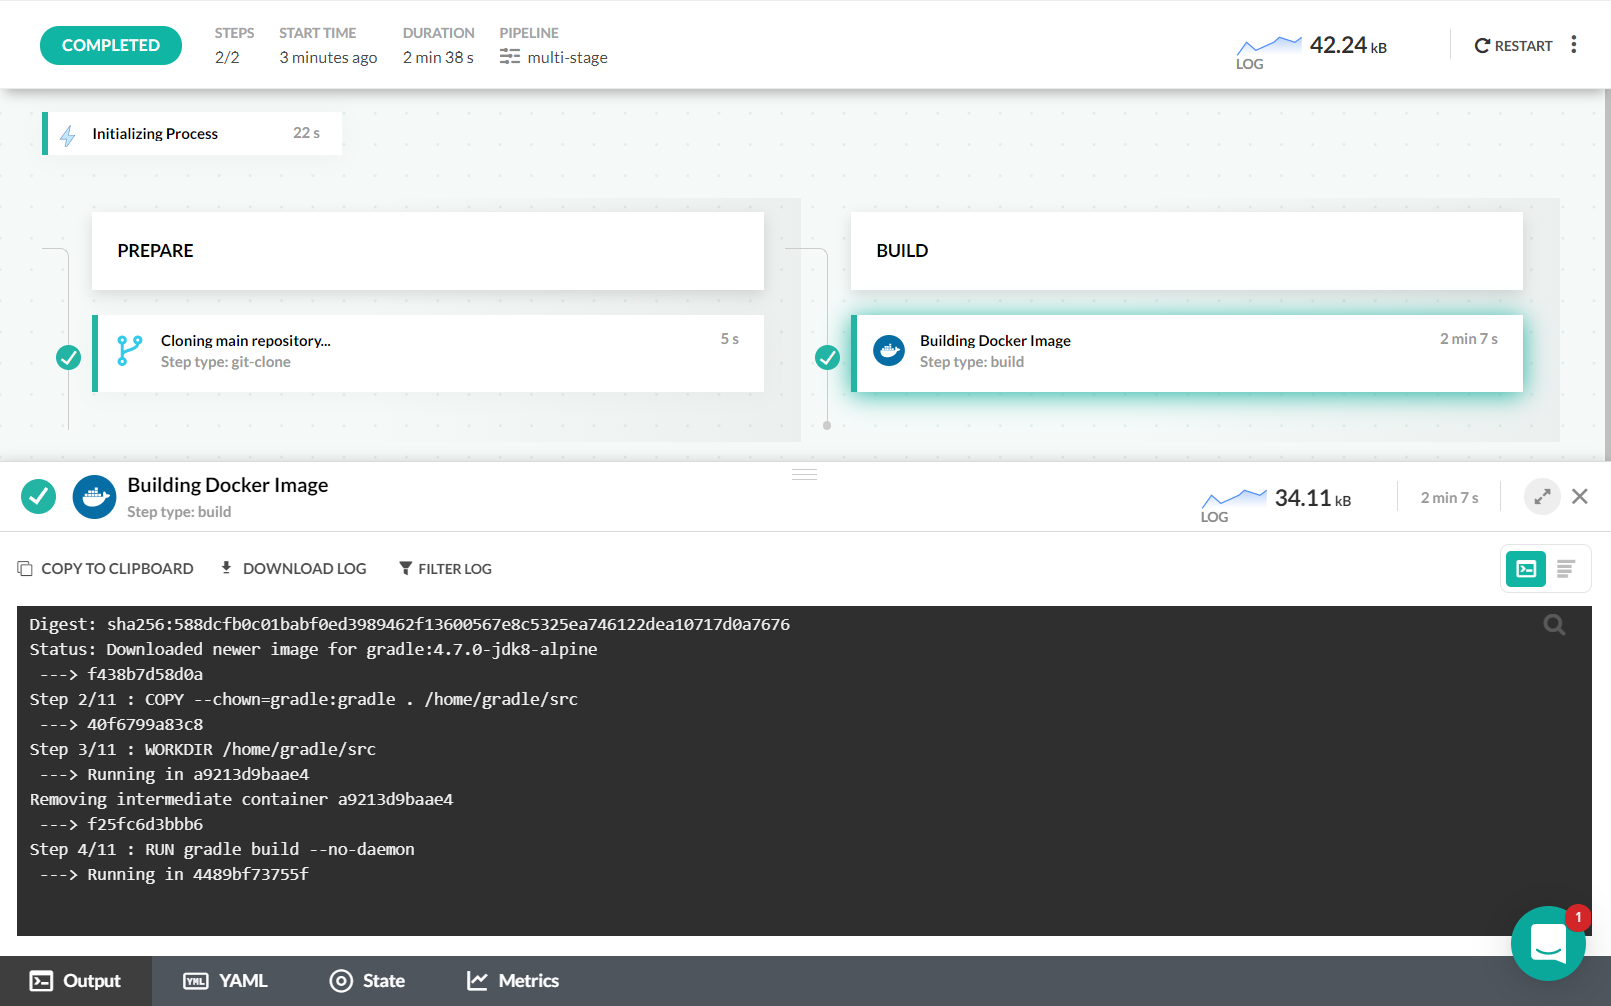
Codefresh is automatically caching Docker layers (it uses the Docker image of a previous build as a cache for the next) and therefore builds will become much faster after the first one finishes.
Packaging an existing Jar in a Docker image
It also possible to have a simpler Dockerfile that only packages the final jar which was already created in the CI/CD pipeline (i.e. outside of Docker).
A simpler Dockerfile is also provided at the same repository. It uses the base JRE image and just copies the JAR file inside the container.
Dockerfile.only-package
FROM openjdk:8-jre-slim

EXPOSE 8080

RUN mkdir /app

COPY build/libs/*.jar /app/spring-boot-application.jar

ENTRYPOINT ["java", "-XX:+UnlockExperimentalVMOptions", "-XX:+UseCGroupMemoryLimitForHeap", "-Djava.security.egd=file:/dev/./urandom","-jar","/app/spring-boot-application.jar"]
This means that before building the Docker image, the compilation step (gradle build) is expected to be finished already. Therefore, in the codefresh.yml file we need at least two steps. The first one should prepare the JAR file and the second
one should create the Docker image.
Create a CI pipeline for a Gradle JAR
The repository also contains a premade Codefresh YAML file that creates a JAR file first and then packages it in a Docker image.
Here are the full contents of the file.
codefresh-package-only.yml
version: '1.0'
stages:
- prepare
- test
- package
- build
steps:
main_clone:
title: Cloning main repository...
stage: prepare
type: git-clone
repo: 'codefresh-contrib/gradle-sample-app'
revision: master
git: github
MyUnitTests:
title: Compile/Unit test
stage: test
image: gradle:4.7.0-jdk8-alpine
commands:
- gradle test --no-daemon --build-cache --gradle-user-home=/codefresh/volume/.gradle -Dmaven.repo.local=/codefresh/volume/m2
BuildMyJar:
title: Packaging Jar file
stage: package
image: gradle:4.7.0-jdk8-alpine
commands:
- gradle build --no-daemon --build-cache --gradle-user-home=/codefresh/volume/.gradle -Dmaven.repo.local=/codefresh/volume/m2
MyAppDockerImage:
title: Building Docker Image
type: build
stage: build
image_name: gradle-sample-app
working_directory: ./
tag: 'non-multi-stage'
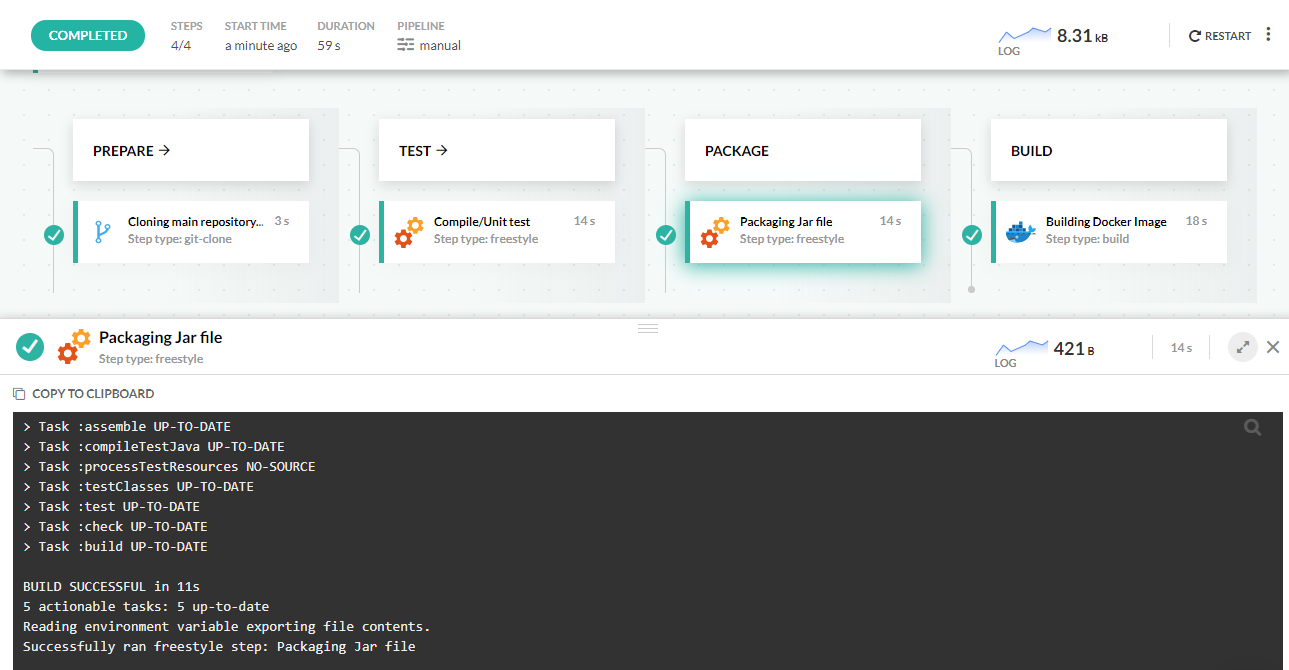
dockerfile: Dockerfile.only-packageThe pipeline starts by checking out the code using a git clone step. The next two steps are freestyle, while the last one is a build step.
After checking out the code we use the standard Gradle Docker image to run unit tests. We also pass parameters that disable the Gradle daemon, enable the build cache and also change the cache folder to reside in the Codefresh volume.
Using the Gradle cache in Codefresh
Codefresh is smart enough that caches automatically for us the workspace of a build (/codefresh/volume). This works great for build tools that keep their cache in the project folder, but not for Maven/Gradle which keep their cache externally. By changing the location of the Gradle cache we make sure that Codefresh will cache automatically the Gradle libraries resulting in much faster builds. We also place in the shared volume the local maven repo so that all jars that are created by Gradle (i.e. with an install task) are also available to the next pipeline stage.
The next step is similar to the previous one, but this time we actually build the JAR file. We define again a custom cache folder so when you run the build you will see that Gradle will automatically pick the cache from the previous step. All Codefresh steps in a pipeline run on the same workspace, so the build results from one step are visible to the next.
The last step is a Docker build. We name our image gradle-sample-app and tag it with a string non-multi-stage but of course you can use any other tag name that you wish.
Once the pipeline is finished you will see the Spring Boot 2 Docker image your Docker image dashboard.
Related articles
Spring Maven example
Codefresh YAML for pipeline definitions
Steps in pipelines
Creating pipelines
How Codefresh pipelines work