Quick start: Environments & Products in Codefresh GitOps
Understand and leverage power of Codefresh’s Environment and Product entities for applications
If you’ve been working with Codefresh GitOps, you’re likely familiar with managing Argo CD applications in Codefresh. From creating applications to monitoring deployments and resources.
If you’re new to Codefresh GitOps, start with our quick start on Argo CD applications to familiarize yourself with Argo CD application in Codefresh.
This quick start focuses on introducing you to the next-generation features for a new development and deployment experience Codefresh GitOps: Environments and Products!
For detailed information on all tasks and features, refer to the articles on Environments and Products.
We’ll begin by exploring the key benefits of Environments and Products.
And then guide you through how to work with these both to streamline and empower your software development lifecycle.
Why would you want to create Environments?
Here are some key benefits of Environments:
-
Mirror your SDLC
Codefresh Environments are designed to mirror your software development life cycle (SDLC). By aligning applications with their development stages, Environments offer a clear and contextual view of the entire application lifecycle, as it moves from development to production. -
Effortless creation
Creating an Environment in Codefresh is straightforward and intuitive. All you need is a unique name and the Kubernetes clusters and namespaces to associate with the Environment. -
Contextual visibility
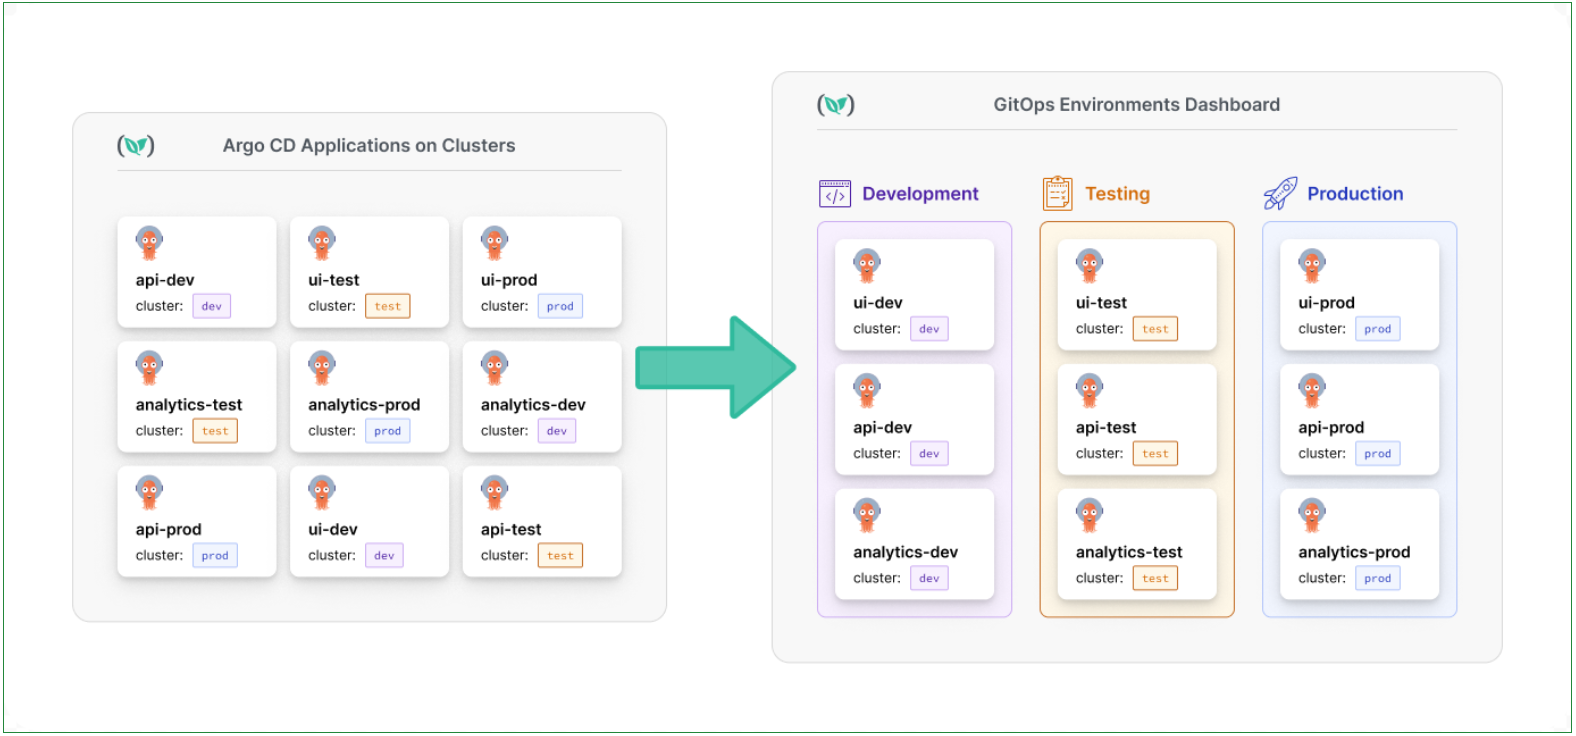
Environments consolidate Kubernetes clusters and namespaces, providing a unified view of all Argo CD applications deployed within. This centralized perspective allows teams to effortlessly track application deployments across various clusters and namespaces, enhancing operational transparency. -
Simple scalability and maintenance
Environments are equally simple to scale and maintain as they are to create. Whether expanding infrastructure or adapting to evolving project requirements, scaling is as simple as adding more Environments, or adding more clusters or namespaces to existing Environments. For flexibility, Codefresh allows you to also add Environments without deploying any applications to them.
What do you get from Products?
Now that we have briefly explored what you can accomplish with Environments, let’s see how Products in Codefresh GitOps complement Environments.
-
Unified application management
Managing complex Argo CD applications across multiple Environments can be challenging.
By grouping similar Argo CD applications into a unit, Products allow you to also efficiently manage them cohesively. -
Bridging applications and Environments
Products act as a bridge between applications and their respective Environments. By linking applications to Products, you can easily track their deployment across different environments, providing clarity and control over your deployment pipelines. -
Effortless creation
As with Environments, creating a Product is equally straightforward. You can create Products from the UI, or declaratively through annotations in your application manifests. -
Real-time insights with integrated views
The Products dashboard offers three distinct views - Pods, Git, and Features. These views provide real-time insights into the changes in the application repo, deployment details, code changes, and feature tracking. Whether you’re a developer tracking the latest commits or a project manager monitoring feature releases, these integrated views offer valuable insights tailored to your role.
We’ll now take you through the key tasks and functionality, starting with Environments.
Create an Environment
First, you’ll need to set up an Environment. Environments mirror the deployment lifecycle of your software, so create as many as you need to match your process.
Typically, organizations use environments like development, qa, staging, and production, but you can customize these to suit your needs. There’s no cap on the number of Environments you can set up.
For this quick start, we’ll set up just three Environments, dev, qa, and prod.
- In the Codefresh UI, from Ops in the sidebar, select Environments, and then click Add Environment.
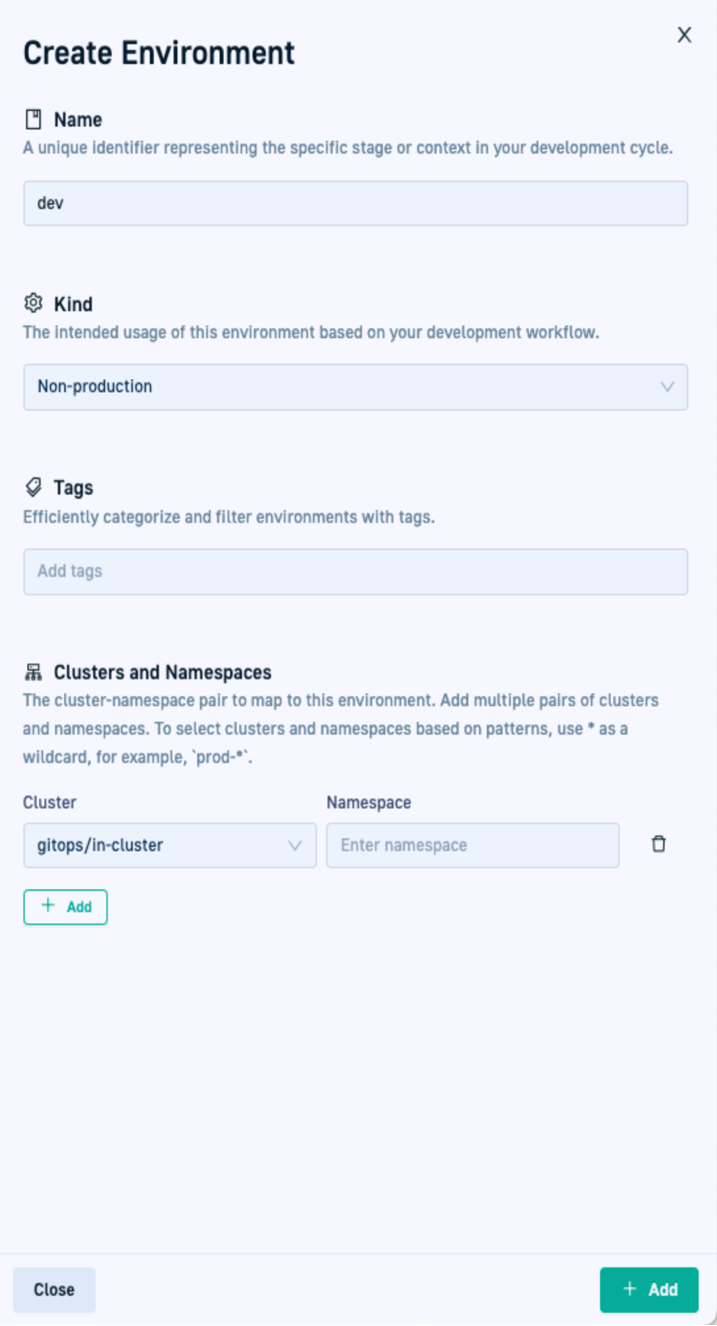
- Define the following:
- Name: A unique name for your GitOps Environment, which is meaningful in the context of your development and deployment cycle.
For the quick start, we’ll use
dev. - Kind: The purpose of this GitOps Environment. Select Non-production where development, testing, staging versions of applications are deployed.
Just a heads up that we will use this to define permissions for ABAC (Attribute Based Access Control). - Tags: Leave this empty for the quick start.
- Clusters and Namespaces: Single or multiple cluster/namespace/cluster-namespace pairs to map to the GitOps Environment.
The Environment is populated by all the applications deployed to the mapped clusters and namespaces.
To include all namespaces in a cluster, leave the Namespace empty.
For the quick start, we’ll add thein-clusterand thedemo-ta-devnamespace.
- Name: A unique name for your GitOps Environment, which is meaningful in the context of your development and deployment cycle.
For the quick start, we’ll use
- Click Add.
The environment is displayed in the Environments dashboard. - Repeat step 1 through step 3 to create the two other Environments:
qaandprod.
Create & work with Products
After creating at least one Environment, we can start creating Products and connect Argo CD applications to it. We’ll conclude with key insights in the Products dashboard.
(Optional) Create applications
If you don’t have Argo CD applications, fork the example repository and create three applications for each of the environments we created above.
Otherwise, continue with Identify applications in GitOps Apps dashboard.
- Fork the repository: https://github.com/idan-codefresh/promotion-example/tree/main/example-manifests/trio-app.
- In the Codefresh UI, from Ops in the sidebar, select GitOps Apps.
- Click Add Application.
- Define these settings for Source:
- Repository URL:
https://github.com/<username>/promotion-example.git - Revision:
main - Path:
example-manifests/trio-app/trio-dev
- Repository URL:
- Leave the rest of the settings unchanged.
- Commit the changes.
- Repeat step 2 through step 5 to create the
trio-qaandtrio-prodapplications.
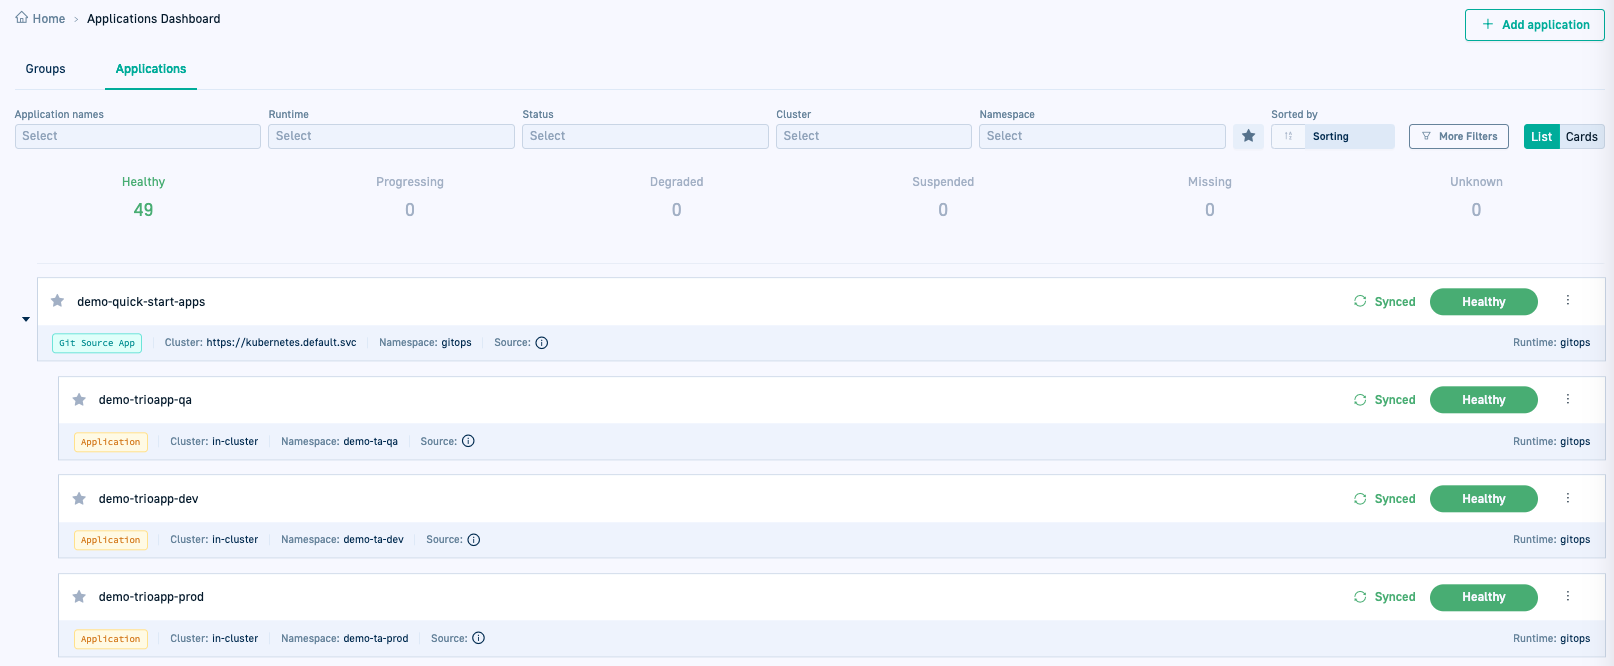
Identify applications in GitOps Apps dashboard
Let’s first identify the applications you want to group as a Product in the GitOps Apps dashboard. Look for different versions of the same software deployed in different Environments, utilizing similar microservices and dependencies. These are the applications ideal for grouping and monitoring as a Product.
For instance, consider three versions of the demo-trioapp application: demo-trioapp-dev, demo-trioapp-qa, and demo-trioapp-prod. We’ll group these into a Product.
Create the demo-trioapps Product
Once you identify the applications, create the Product. A Product requires a unique name, and optionally an annotation to connect the different Argo CD applications.
Before you begin
- Make sure you have created at least one Environment
How to
- In the Codefresh UI, from Ops in the sidebar, select Products.
- Click Add Product.
- Define the following:
- Name: A unique name for the Product,
demo-trioappsfor the quick start. - Connect Applications: The annotation to associate with this Product, and use to connect the different applications to it.
For the quick start, we’ll use the default annotation automatically created,codefresh.io/product: demo-trioapps. - Copy the annotation to the clipboard.
- Tags: Leave this empty for the quick start.
- Name: A unique name for the Product,
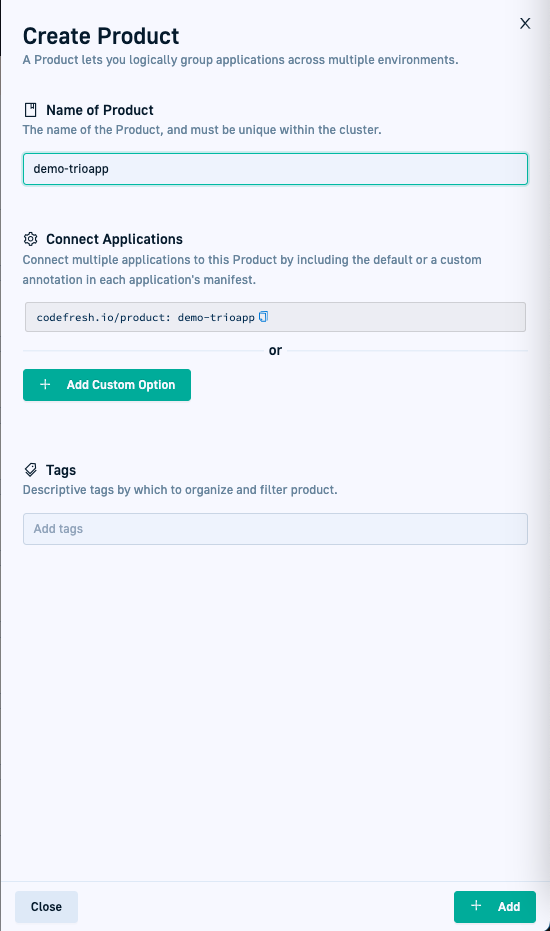
- Click Add.
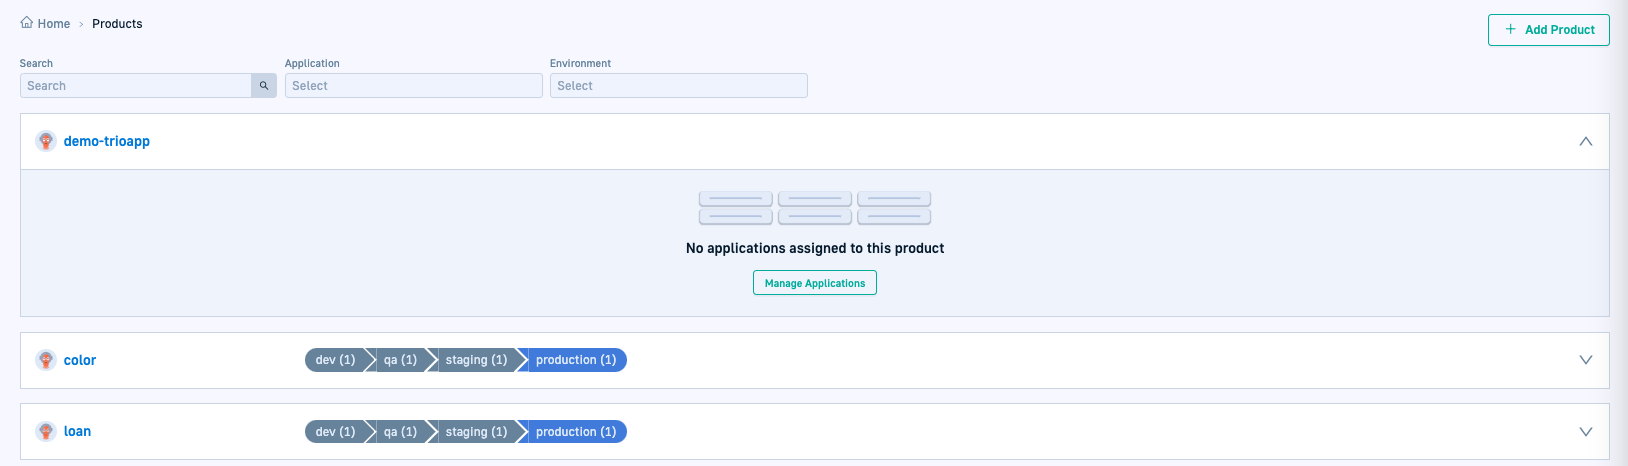
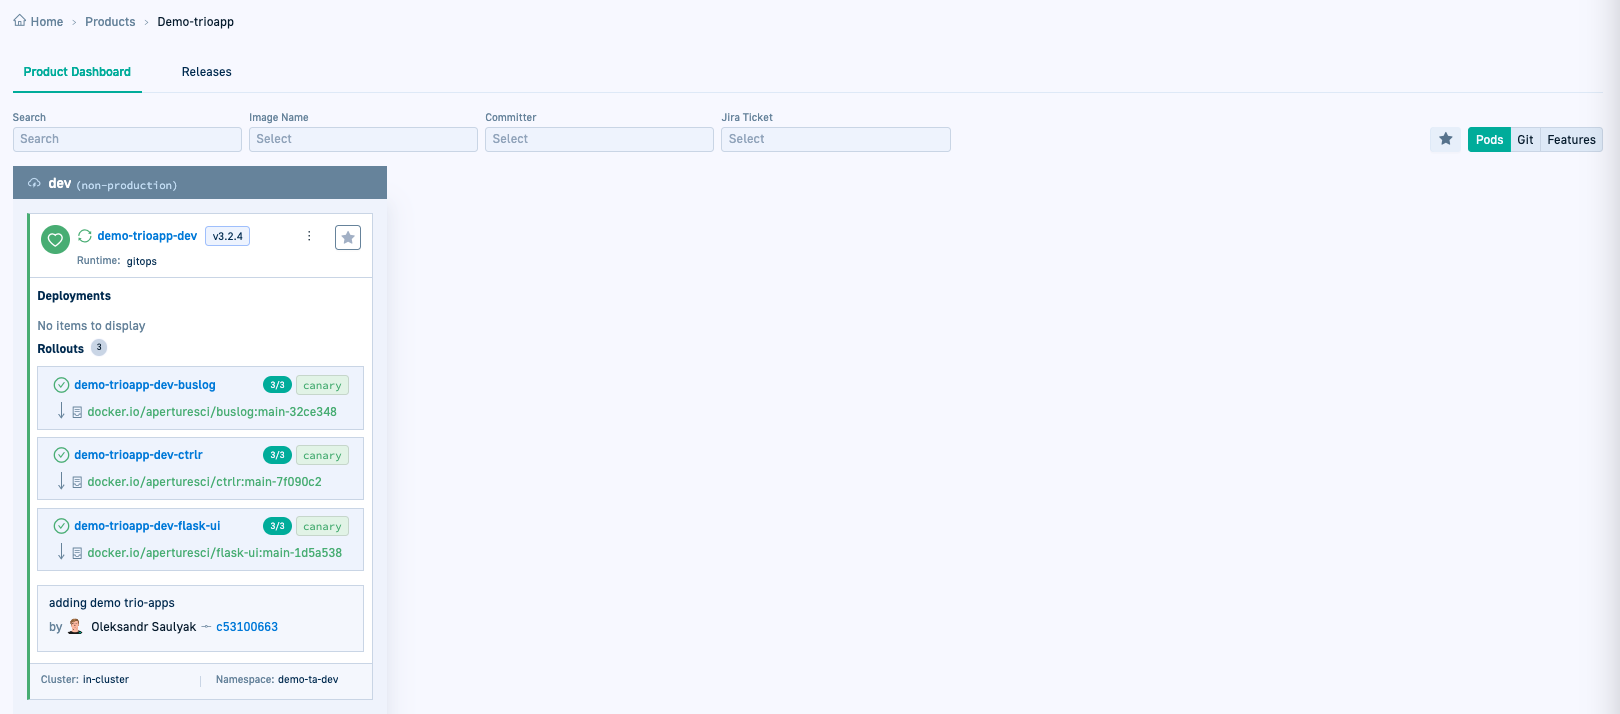
The Product is displayed in the Products dashboard. - Click the Product name to view details.
You’ll notice that the Product currently has no assigned applications.
Assign applications to Product demo-trioapp
The next step is to assign applications to the Product you created, demo-trioapp in our case for the quick start.
Codefresh offers two methods:
-
Manual assignment from the Products dashboard
This method is a single-click action for quick assignment from the UI. Unlike other UI actions, manual assignment does not require a commit action.
Recommended for trying and testing rather than as the go-to method. -
Declarative assignment through annotations
This method defines an annotation with the Product name in the application manifest. If the Product doesn’t exist, Codefresh automatically creates one for you.
Recommended as the go-to method as it is fully GitOps-compatible.
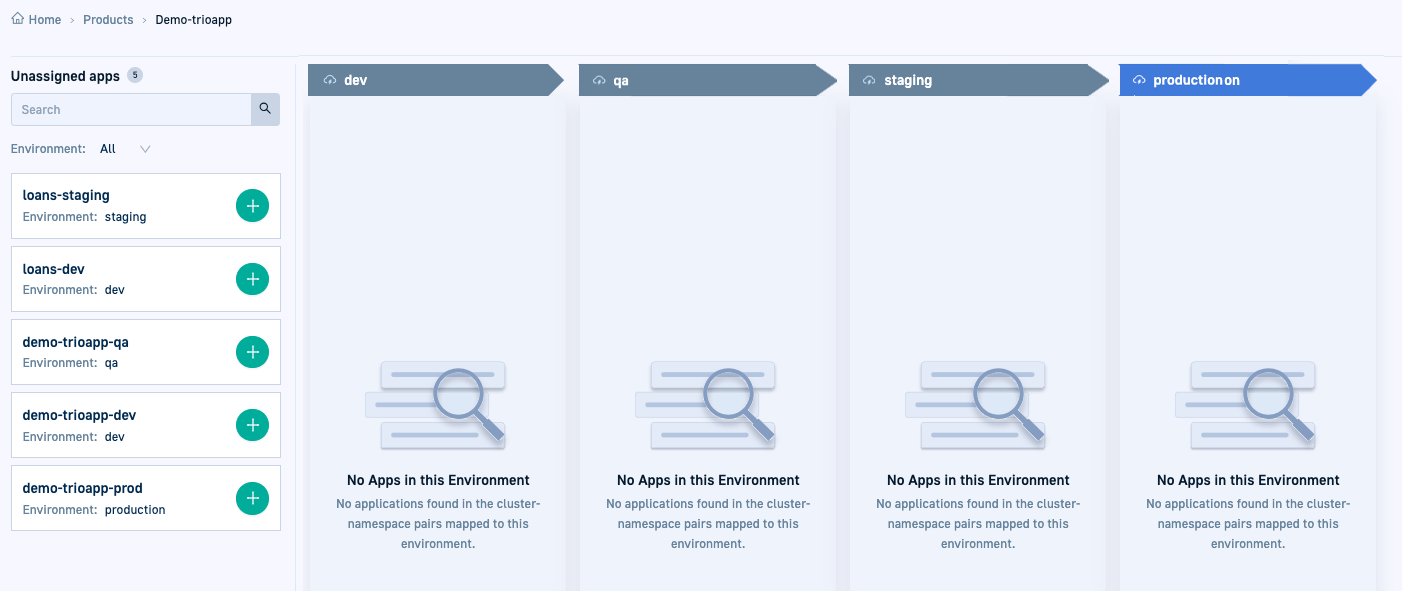
Manually assign application to a Product
Here we’ll manually assign the application demo-trioapp-dev to the Product demo-trioapps from the Products dashboard.
- In the Codefresh UI, from Ops in the sidebar, select Products.
- Expand the new Product,
demo-trioappin our case. - Click Manage Apps.
On the left, you’ll see the list of Unassigned apps, includingdemo-trioapp-dev,demo-trioapp-qa, anddemo-trioapp-prod.
- From the list of Unassigned apps, click
 next to the application to assign,
 demo-trioapp-devin our case.
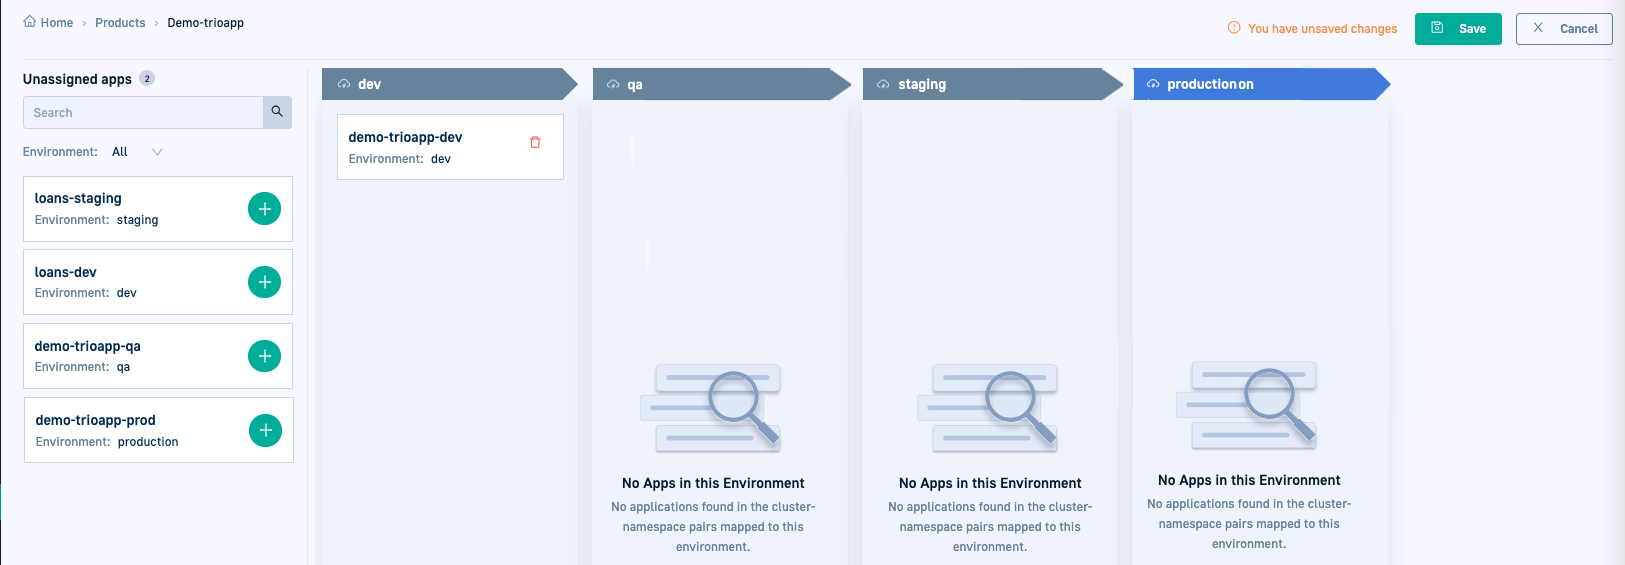
- To confirm, click Save.
Codefresh adds the application to the Environment defined for it.
Add annotation to connect application to Product
Now, let’s connect an application to a Product declaratively, by adding an annotation to the application’s manifest.
For the quick start, we’ll use the default annotation Codefresh generated when we created the Product, to connect demo-trioapp-prod.
- If needed, copy the Product’s annotation.
If not, continue from Step 2.
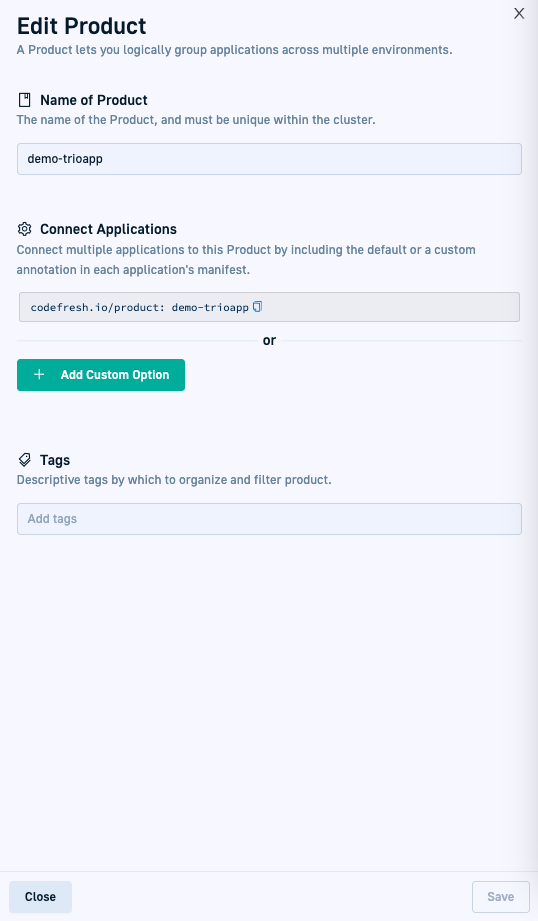
- In the Products dashboard, mouse over the row with the Product name, and then select Edit
 .
. - Copy the annotation and close the form.
- In the Products dashboard, mouse over the row with the Product name, and then select Edit
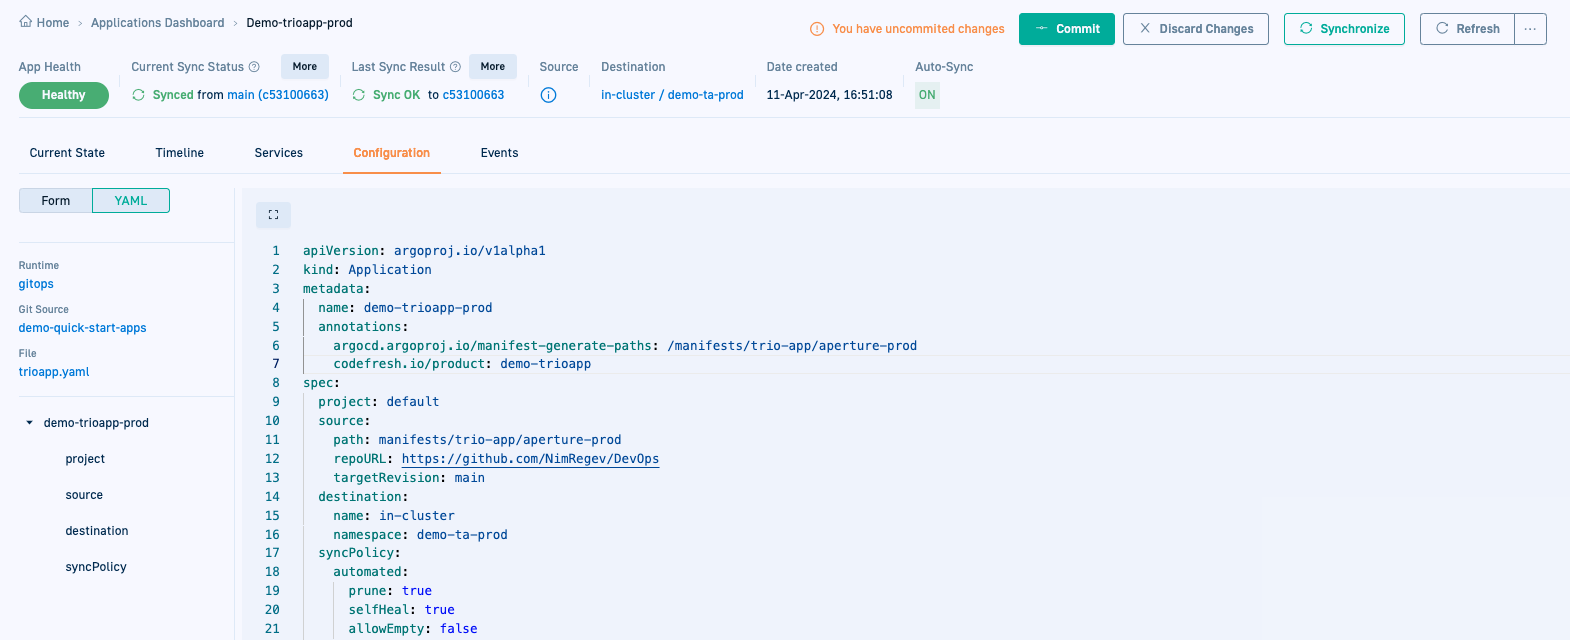
- Add the annotation to the application’s manifest:
- From Ops in the sidebar, select GitOps Apps.
- Select the application to which to add the annotation,
demo-trioapp-prodfor the quick start. - Click the Configuration tab and switch to YAML format.
- Add the annotation as in the example below.
- Commit to save the changes.
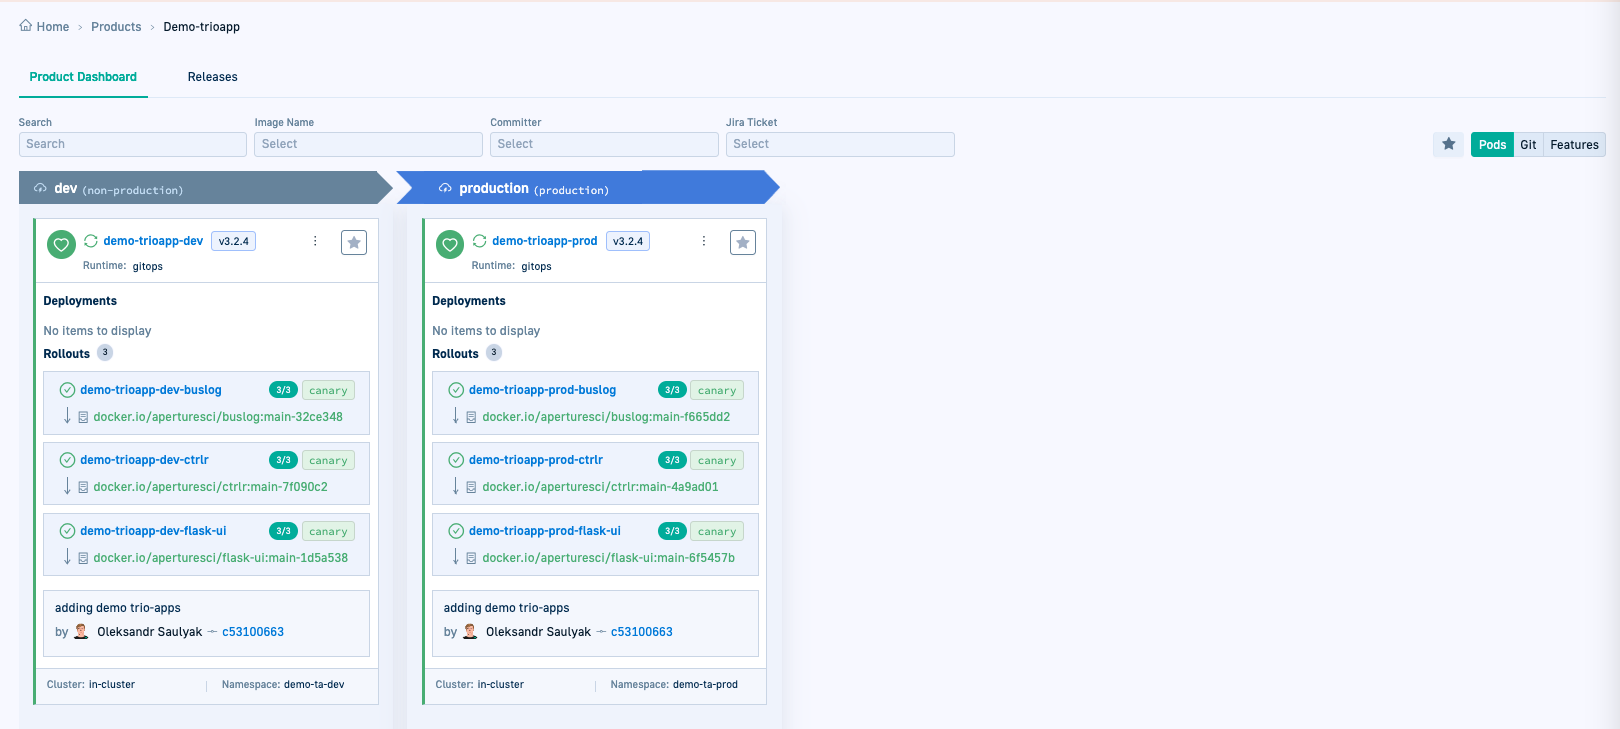
- Return to the Products dashboard and select the Product,
demo-trioappin our case. Both applications are now displayed as part of the Product.
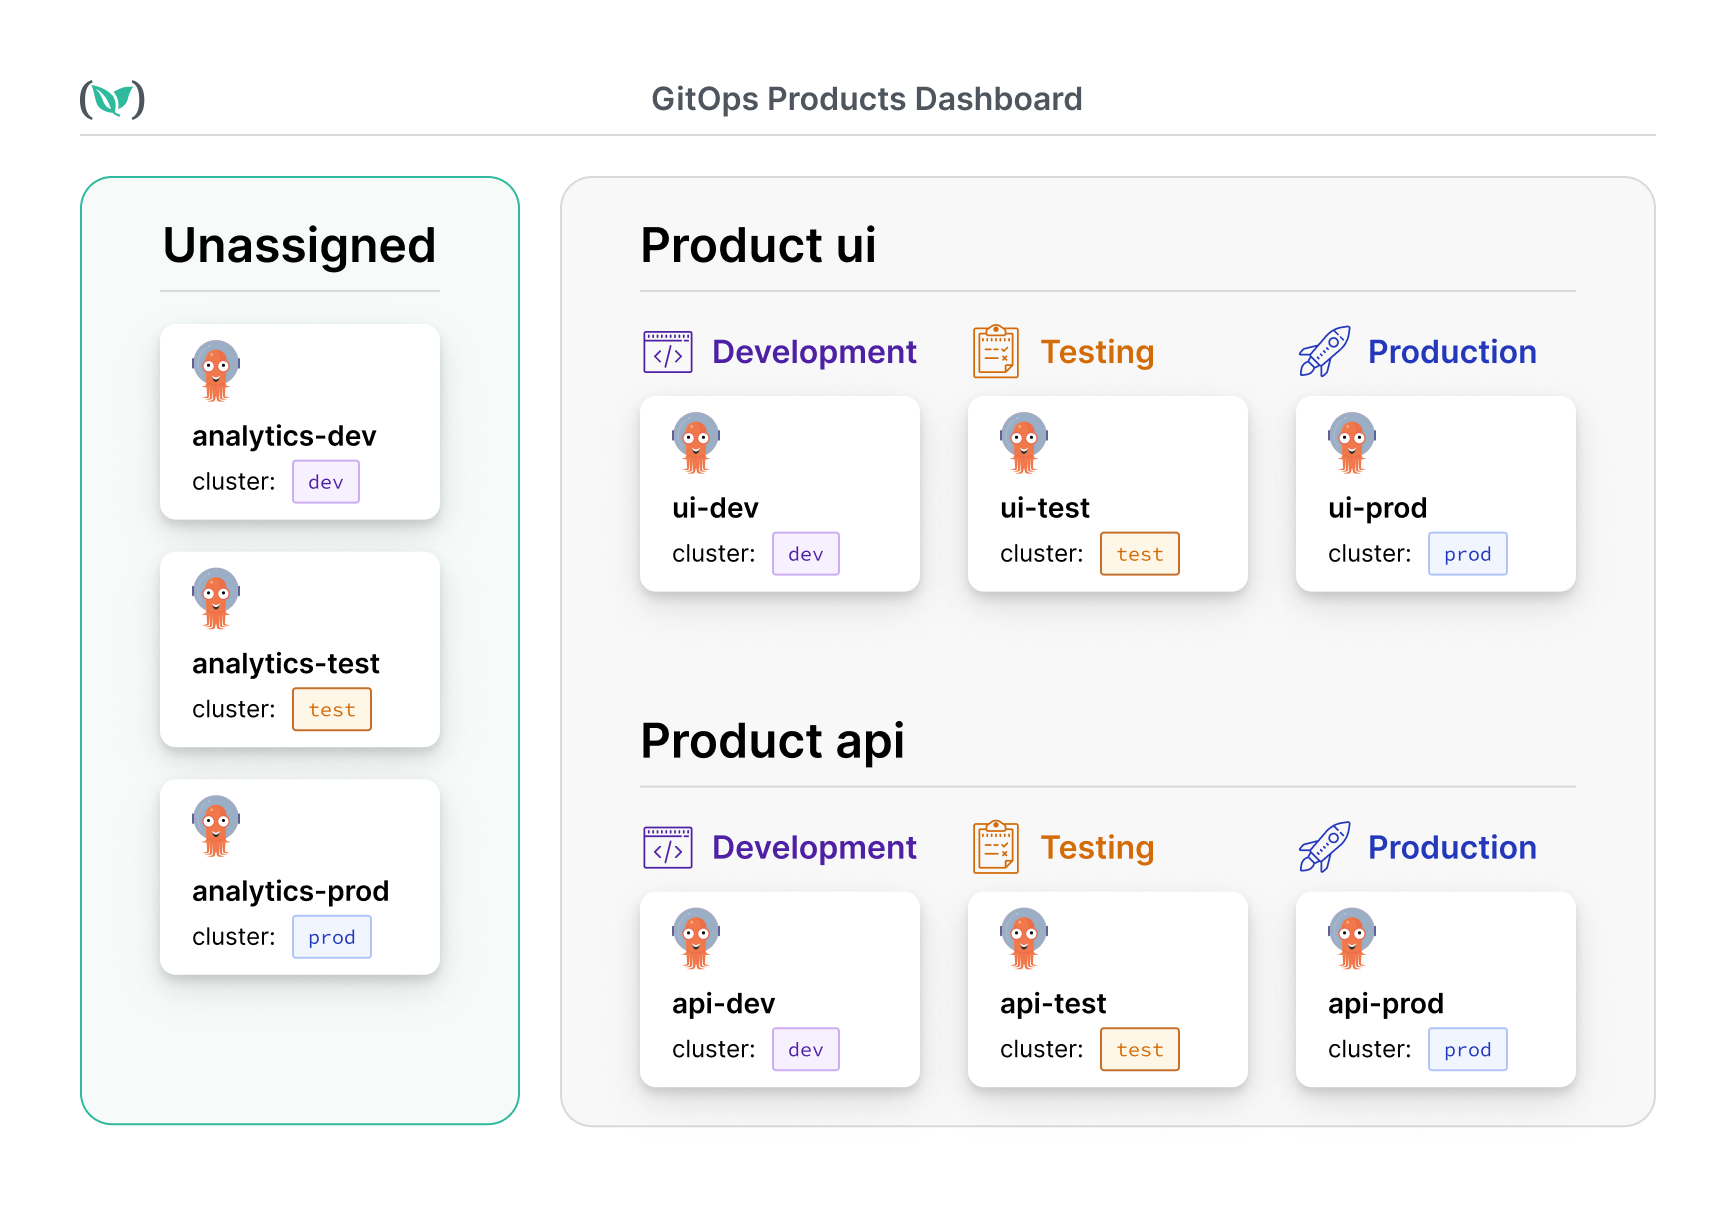
Explore the Products dashboard
Here’s an example of the Products dashboard.
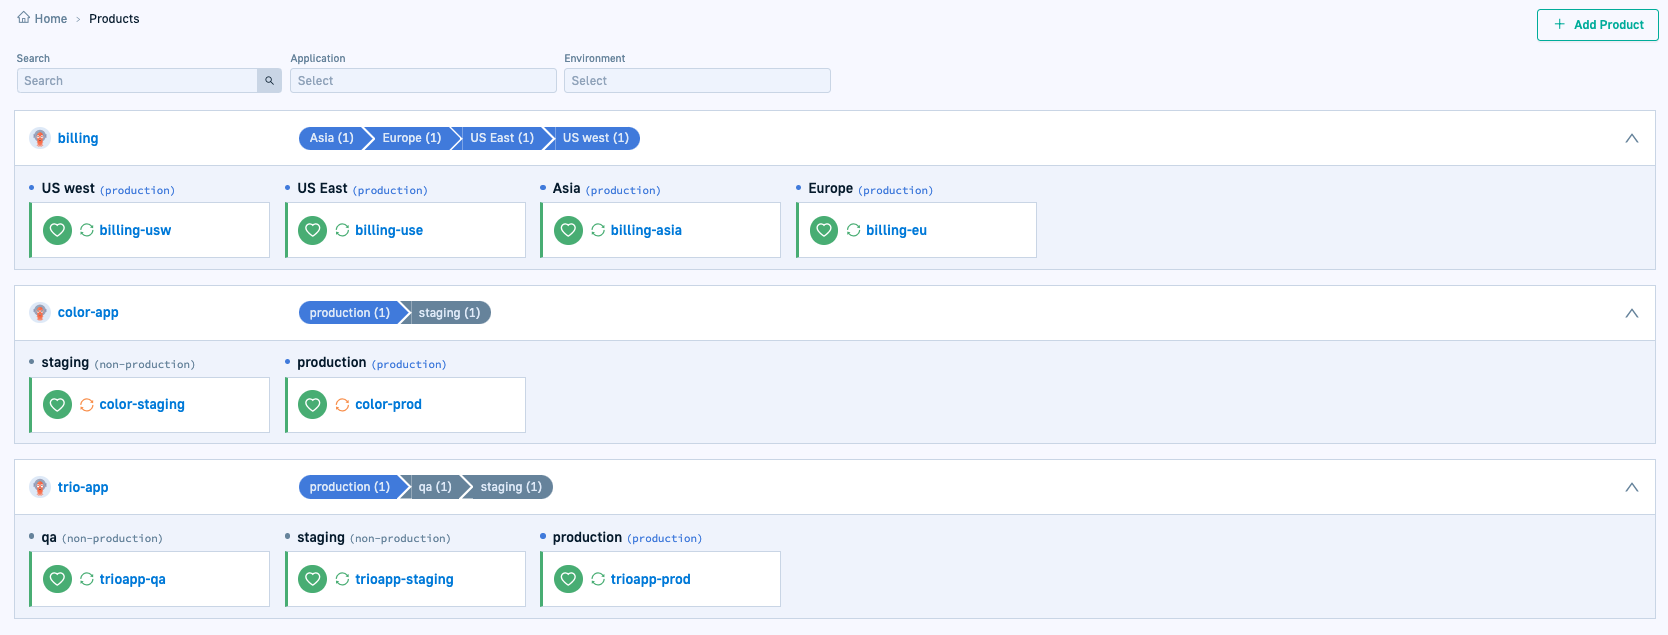
The Products dashboard showcases the Products created, whether or not applications are connected.
Clicking a Product provides detailed information on its applications.
For this quick start, we’ll focus on two key features: release versions and integrated insights into applications.
Release versions
Helm-based applications show the release version of the application. This is the app version as defined in the Helm chart, identifying the specific release version in the different Environments.
You can:
- View the application’s dependencies and their versions This is useful to identify which version is deployed where.
- Compare release versions of the dependencies across deployments in different Environments This is useful for troubleshooting as you can identify if the version that works in dev is the same as the version with the problem in staging.
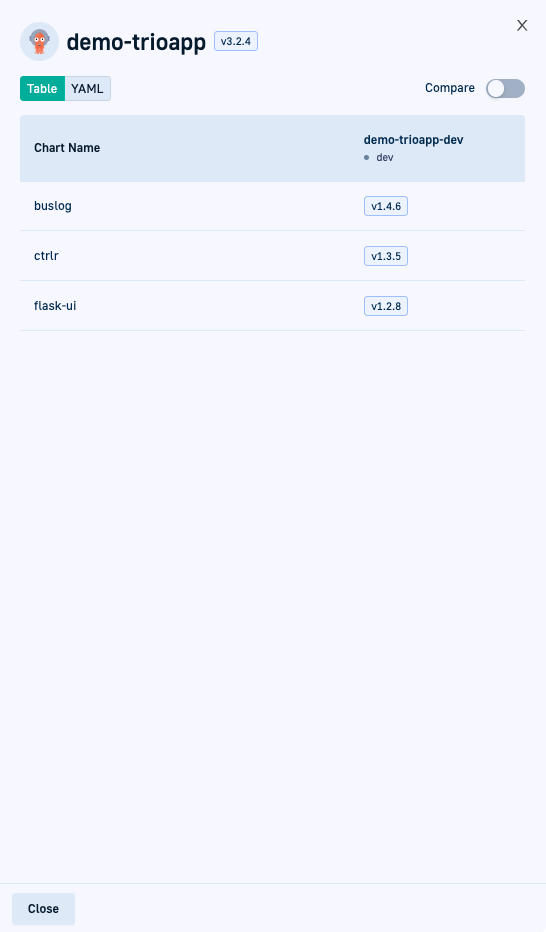
View dependencies
- Click the version to display the application’s dependencies.
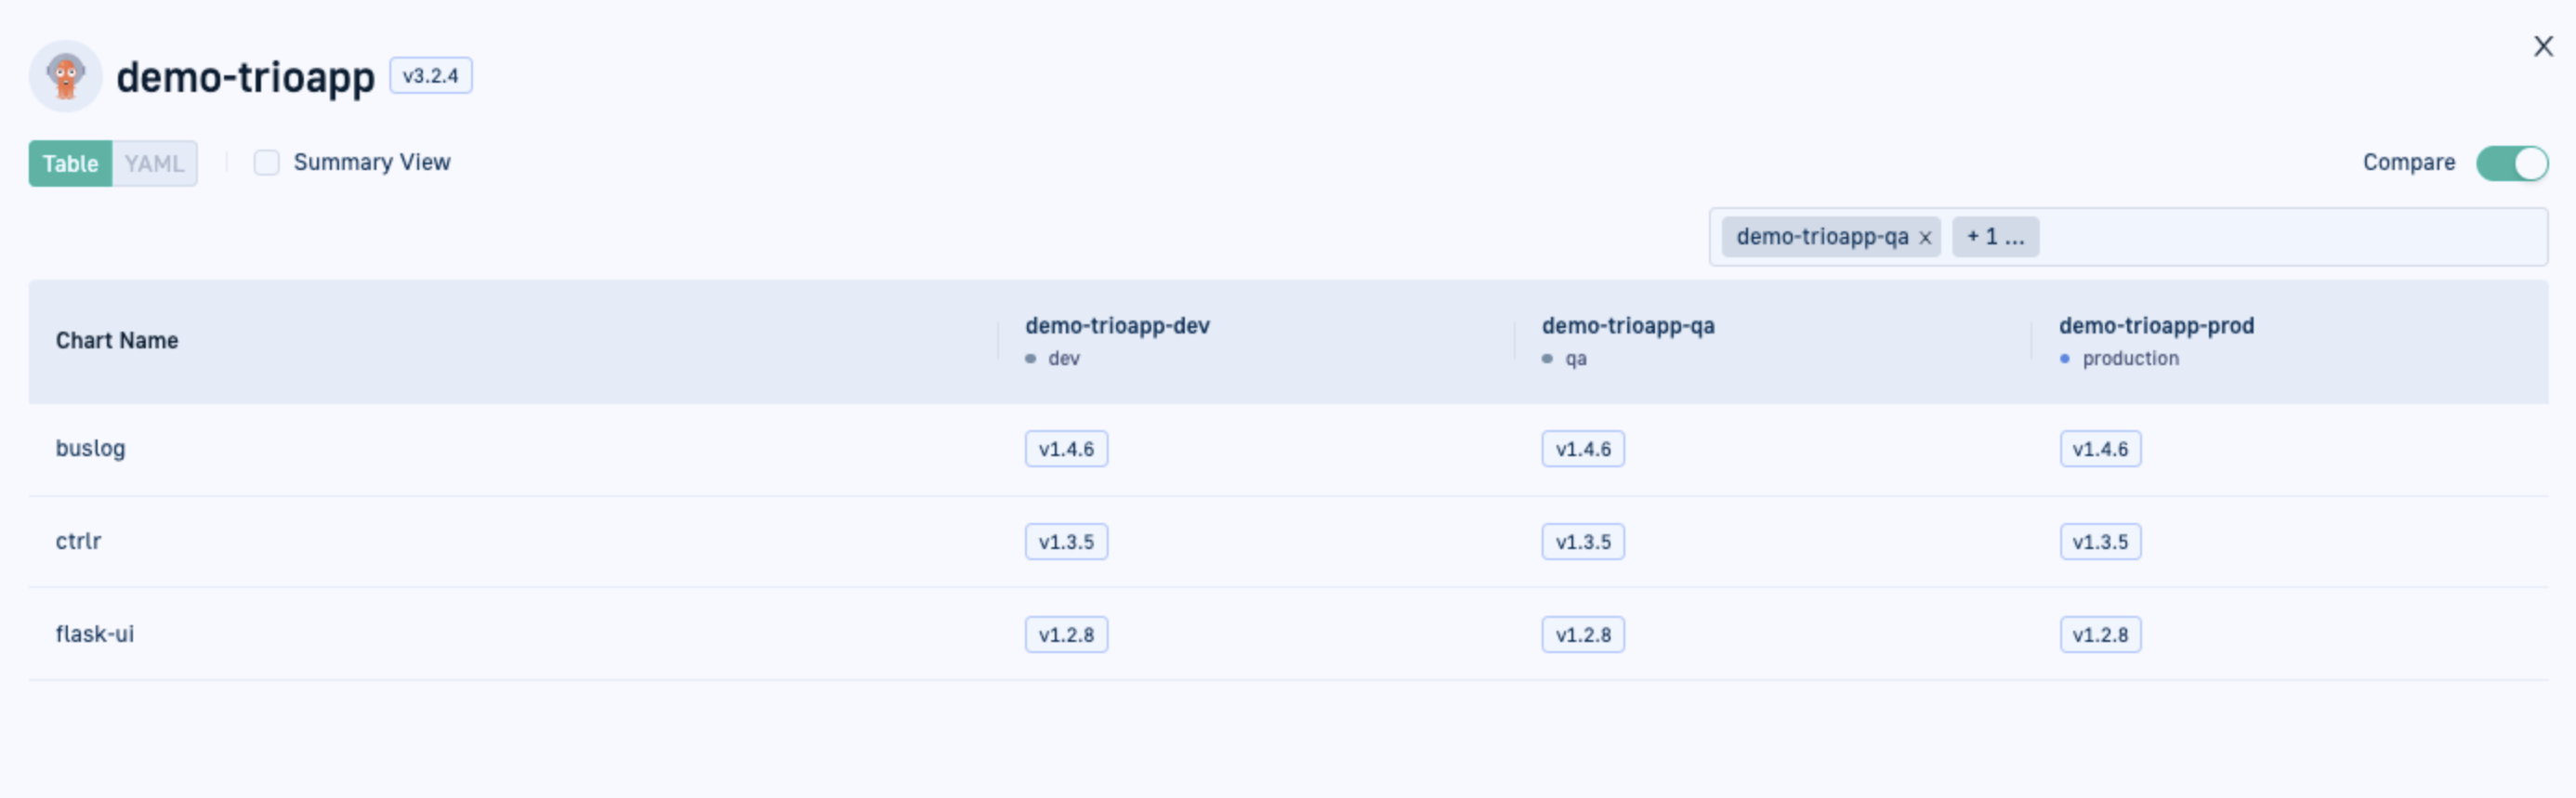
Compare deployed versions across applications
Compare the dependency versions in the different applications associated with the Product.
- In the same panel, enable Compare.
- Click within the field Select applications to compare, and select the applications.
- For up to two applications, switch between YAML and Table views.
- For more than two applications, the comparison view automatically switches to Table.
In this quick start, dependency versions are identical across all three applications.
Integrated insights into Product applications
Products offer more than just standard Git commit or hash information by providing enriched insights into your applications.
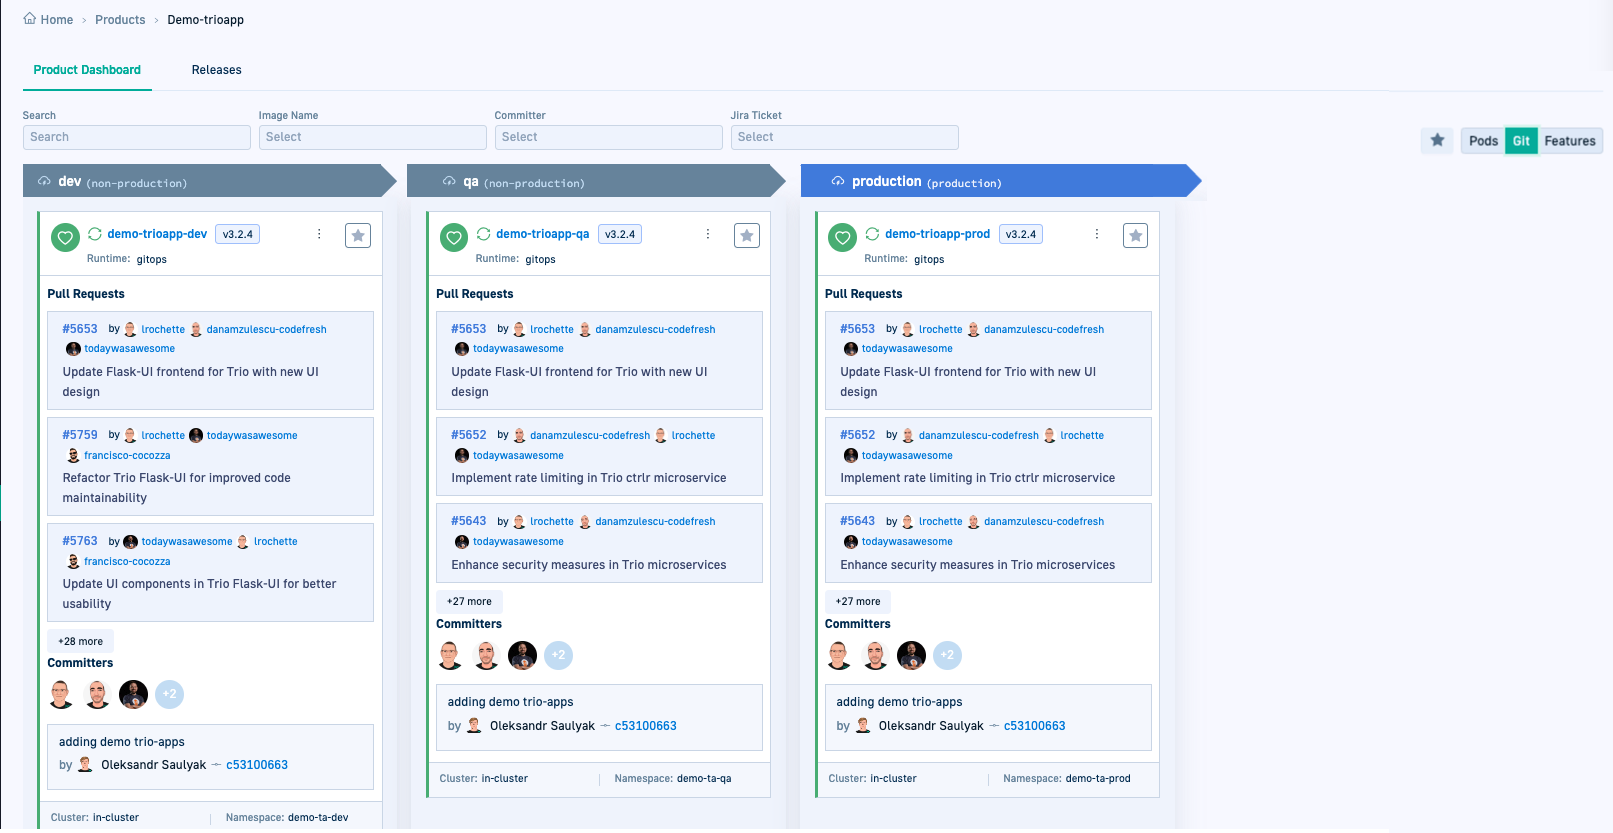
When you select a Product in the Products dashboard, three tabs appear on the right: Pods, Git, and Features. These tabs consolidate Kubernetes (Pods), version control (Git), and issue-tracking (Features) data into a single location.
Git
In the Git tab, you gain direct insights from the application repository, not the GitOps repository. This allows you to trace the complete commit history of the application’s repo up to the commit that initiated the build and deployed the new version. Commit history includes history of individual commits with deep links to source control.
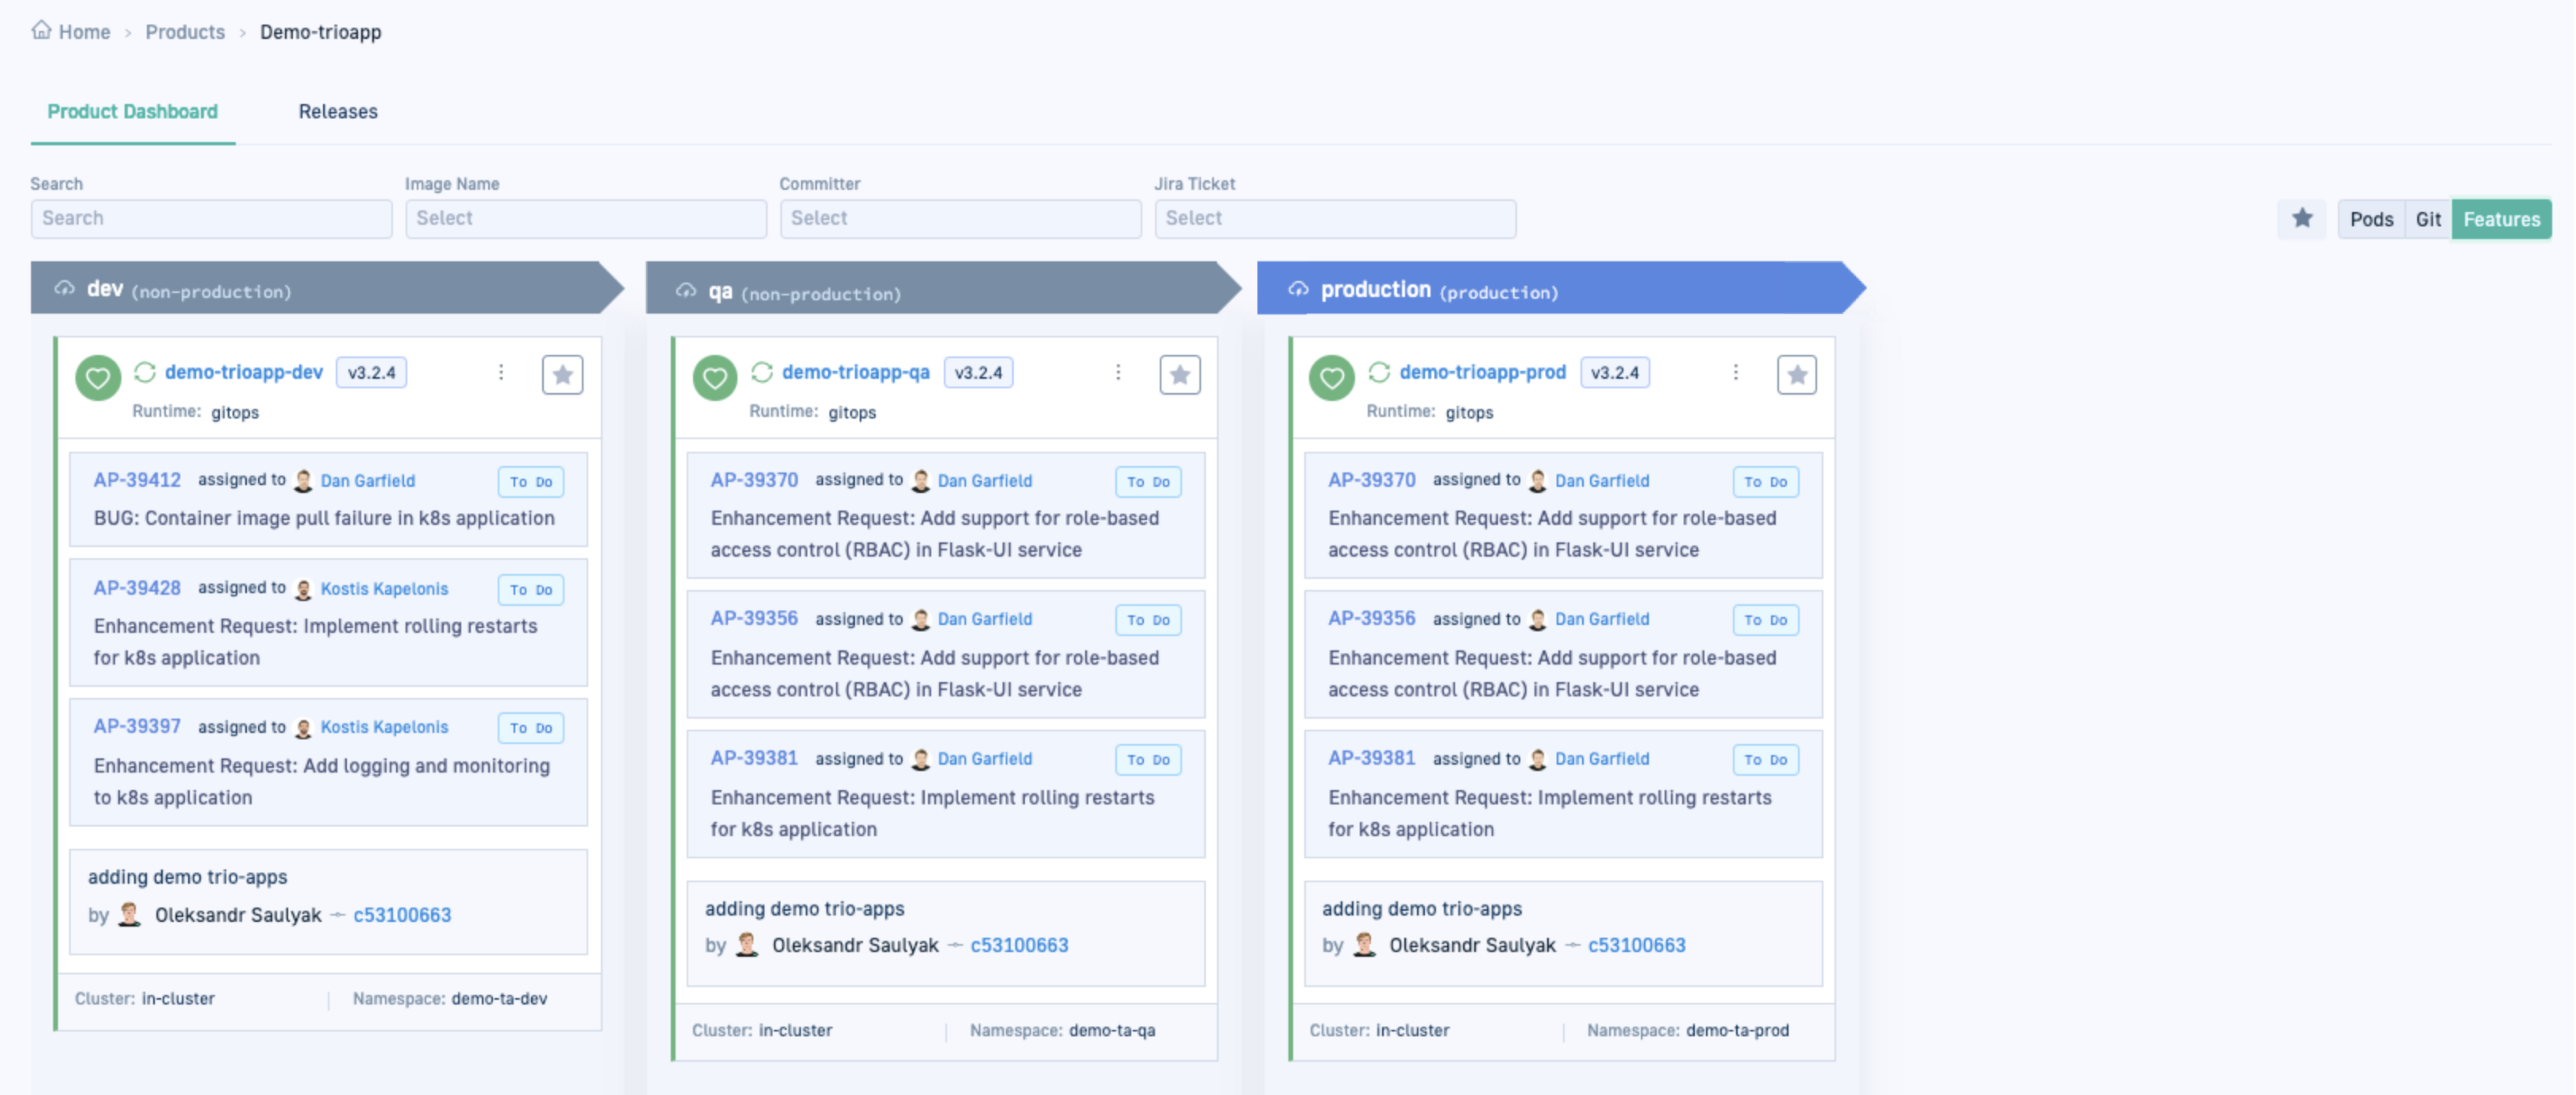
Features
The Features tab allows you to connect these commits with tickets in your issue-tracking tool or system. This integration enhances traceability and context, enabling you to monitor the deployment’s impact by tying deployed features to specific feature requests or bug fixes.
From this unified view, you can:
- Gain insights into deployment specifics
- Review all commits leading up to the latest one that triggered the deployment
- Align deployed features with related feature requests
- Effectively track deployment timelines
Why are these insights crucial?
When troubleshooting issues in production, having access to such comprehensive information is invaluable. You can pinpoint what occurred, when it happened, who made the change, and which feature or bug was addressed, streamlining your debugging process.
Requirement: Connect your CI platforms/tools to GitOps
To view this integrated information from Git and issue-tracking systems in the Products dashboard, you need to tie your CI system with your CD system. If you have CI platforms/tools already in place, be it Codefresh pipelines, GitHub Actions, or Jenkins, you can integrate them with Codefresh GitOps. The same applies to issue-tracking tools like Jira.
For an overview of the process, see Image enrichments with GitOps integrations.
Once these integrations are in place, Codefresh takes care of the heavy lifting and retrieves the information from the different tools. You can view this information in the Products dashboard when selecting a Product, as shown below, and also in our Images dashboard.
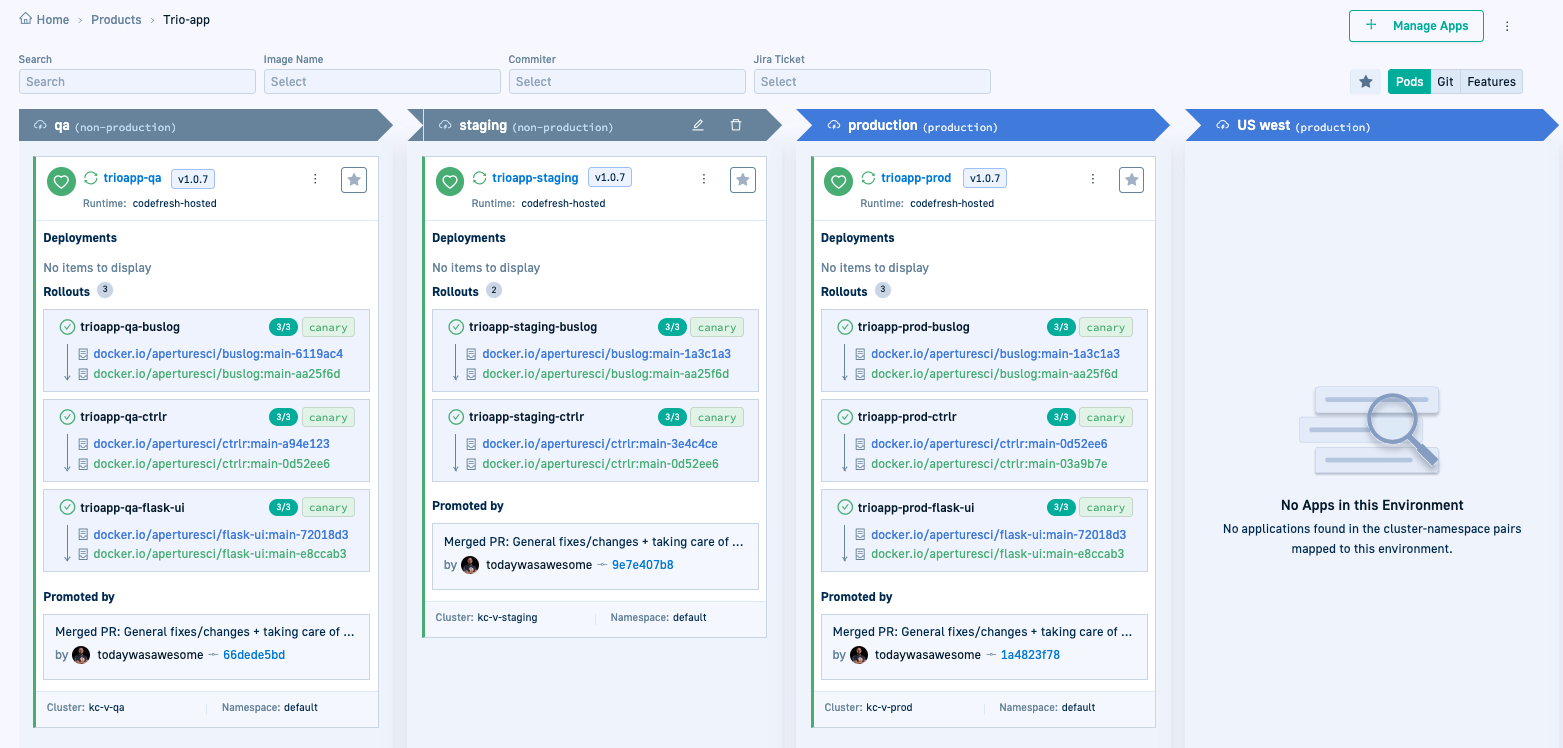
Pods
When you select a Product, the Pods tab is the tab in focus by default.
Here’s a view of the Pods tab with Rollout information.
Git
Features
Try out more functionality in Environments and Products.