Helm pipeline integration
Manage Helm releases and repositories with Codefresh pipelines
Codefresh is one of the few DevOps platforms with native support for Helm releases and deployments. In addition to the built-in Helm repository available to all Codefresh accounts,you can add any external Helm repository to Codefresh through integrations.
Native support for Helm in Codefresh includes:
- A pipeline step for deploying Helm applications
- A dashboard for your Helm charts
- A dashboard for your Helm releases
- A dashboard for promoting Helm releases between different environments
- A dashboard for Helm environments
The built-in Helm repository is production ready. You can start using Helm right away with your Codefresh account, even if you don’t have an external Helm repository. See our quick start guide for Helm or the complete Helm example.
For each Helm integration, you can toggle the level of access for non-admin users.
IMPORTANT
The name assigned to the integration must be unique within the account. Using the same name for other integrations or Shared Configuration contexts within pipelines will result in conflicts.
For troubleshooting, see Error: context already exists.
Set up external Helm integration
- In the Codefresh UI, on the toolbar, click the Settings icon, and then from the sidebar, select Pipeline Integrations.
- Select Helm and then click Configure.
- From the Add Helm Repository dropdown, select the type of external Helm repository:
- To restrict access to only Codefresh admins, toggle Allow access to all users to OFF.
NOTE
When access is restricted, users cannot use the CLI or API to programmatically access this Helm repository.
Otherwise, all users from all your Codefresh teams will be able to access this Helm repository with CLI commands or API calls.
Azure Registry Helm repository settings
Prerequsities
- Create the Helm repository in Azure.
- Click Authenticate.
- In the permissions dialog, to allow Codefresh to access the Azure services, click Accept.
NOTE
Make sure that you are using an organizational/company Azure account, and not a personal one. We are currently working with Microsoft to improve this integration.
Settings
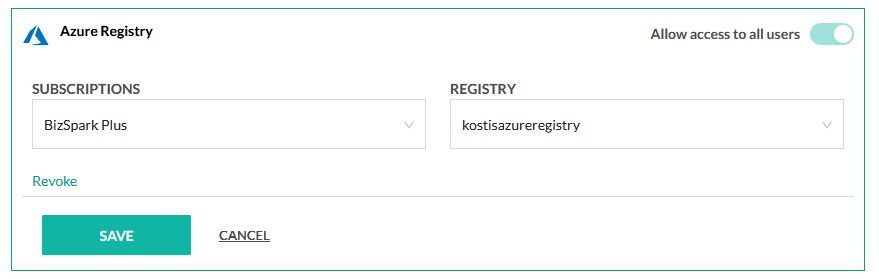
| Setting | Description |
|---|---|
| Subscriptions | Select your Azure subscription. |
| Registry | The Helm repository to connect to. |
TIP
If you are already authenticated to Azure, and cannot find your Helm repository in the list, try revoking access, and authenticating again.
Azure Registry with Service Principal (SP) Helm repository settings
An alternative method of adding an Azure Helm repository is by using a service principal.
Prerequsities
Settings
- Click Authenticate.
- Enter the following:
- Client ID
- Tenant
- Client secret
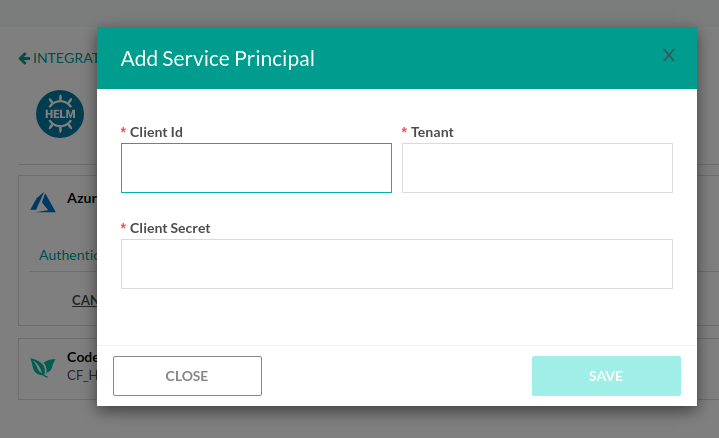
- Click Authenticate. Assuming that the authentication is successful, you can view your available Azure registries that can be used as a Helm repository.
Azure Registry with Managed Identity (ID) Helm repository settings
An alternative method of adding an Azure Helm repository is by using a managed identity.
Prerequsities
Settings
- Click Authenticate.
- Enter the following:
- Client ID
- Pod Identity Name
Change
1.Click Authenticate. Assuming that the authentication is successful, you can view your available Azure registries that can be used as a Helm repository.
Helm repository from another Codefresh account
You also add the private Helm repository of another Codefresh user as your integration.
NOTE
We don’t recommend sharing the Codefresh Helm repository between accounts. The built-in Helm repository of each account is best used as a private Helm repository of that account. See more details on how to make your private Helm public.
The table below describes the settings.
| Setting | Description |
|---|---|
| Helm Repository Name | The unique name for the Helm repository integration which is used to reference the integration in codefresh.yaml |
| Helm Repository URL | The URL to the Helm repository in the format cm://repository-name. |
| CF API Key | A token to access the other Codefresh account. |
Google Cloud Storage (GCS) Helm repository settings
You can connect to a Google Cloud Storage (GCS) Helm repository. Supply the GCS authentication credentials as you would for the GCloud CLI, or the GCS plugin for Helm. For details, see Creating Service Account.
The table below describes the settings.
| Setting | Description |
|---|---|
| Helm Repository Name | The unique name for the Helm repository integration which is used to reference the integration in codefresh.yaml |
| Helm Repository URL | The URL to the Helm repository in the format gs://bucketname. |
| Google Application Credentials JSON | The JSON content with the credentials of the service account. |
HTTP Basic Authentication settings
You can connect to your external repository with HTTP Basic authentication.
The table below describes the settings.
| Setting | Description |
|---|---|
| Helm Repository Name | The unique name of integration which is used to reference the integration in codefresh.yaml |
| Repository URL | The URL to the Helm repository with http:// protocol prefix. |
| Helm Repo Username | The username to authenticate with. |
| Helm Repo Password | The password for the username provided. |
Amazon AWS S3 Helm repository settings
You can connect to Amazon AWS S3 Helm repository. Supply the AWS authentication credentials as you would for the AWS CLI, or the S3 plugin for Helm. For details, see Configuring the AWS CLI.
The table below describes the settings.
| Setting | Description |
|---|---|
| Helm Repository Name | The unique name of integration which is used to reference the integration in codefresh.yaml |
| Helm Repository URL | The URL to the Helm repository in the format s3://bucketname. |
| AWS Access Key ID | The ID of the key with permissions to the S3 bucket. |
| AWS Secret Access Key | The Secret of the key with permissions to the S3 bucket. |
| AWS Default Region | The region where the S3 bucket is located. |
Related articles
Using a manageed Helm repositories
Using Helm in a Codefresh pipeline
Managing Helm releases
Helm best practices