Google SSO via OIDC
Set up Google SSO for OIDC
Set up SSO for Google using OIDC. For a general overview on OIDC, see Setting up OIDC Federated SSO.
Set up OIDC SSO for Google in Codefresh by:
- Creating the client secret in Google
- Configuring team synchronization settings in Google
- Configuring SSO settings for Google in Codefresh
- Setting up the redirect URI in Google
Step 1: Create Client Secret in Google
- Log in to https://console.developers.google.com/.
- From the sidebar, select Credentials.
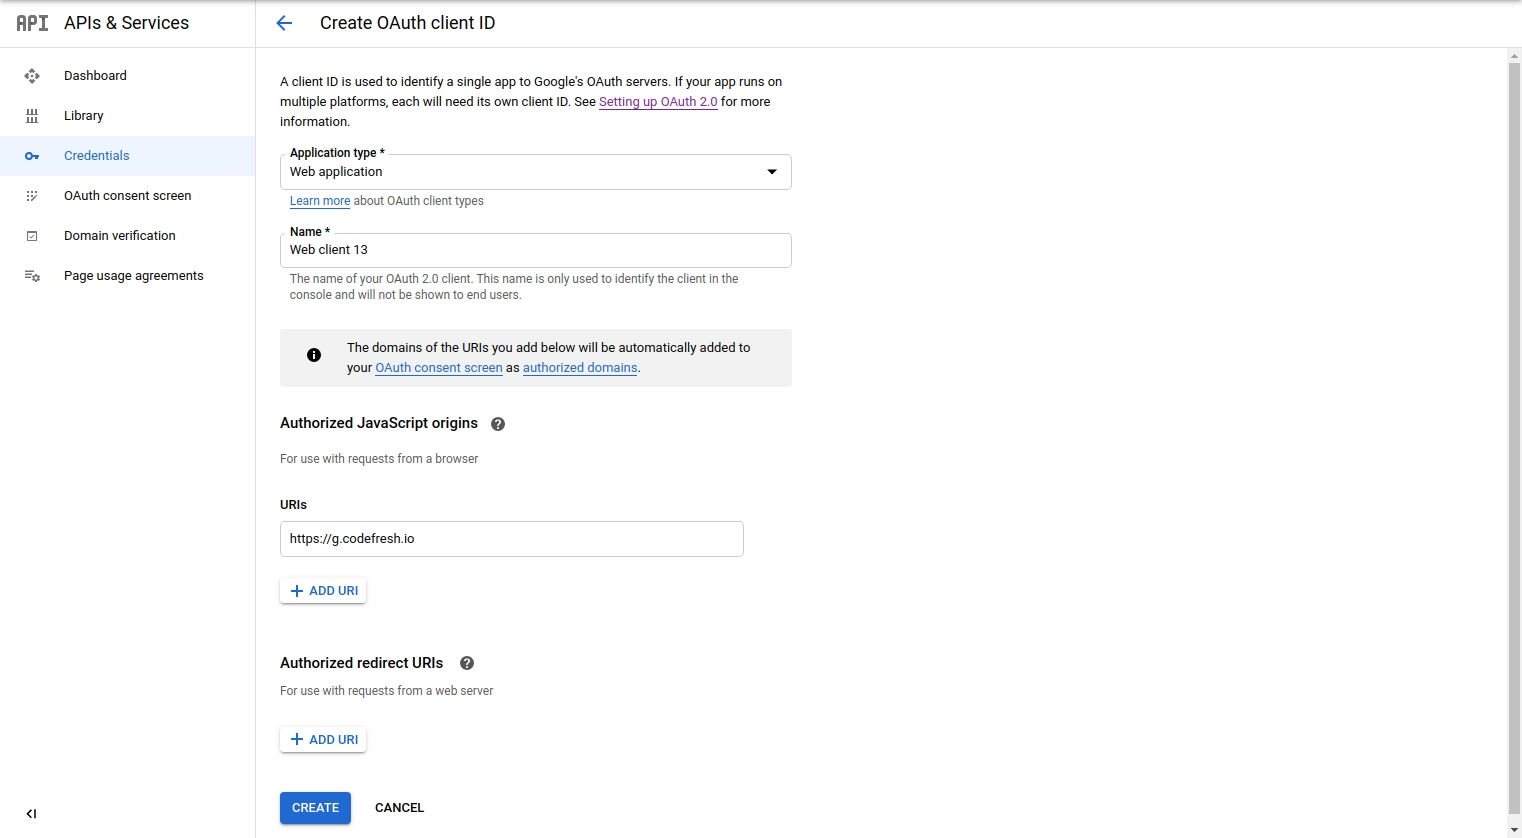
- Select Create Credentials, and from the drop-down, select OAuth client ID.
- Do the following:
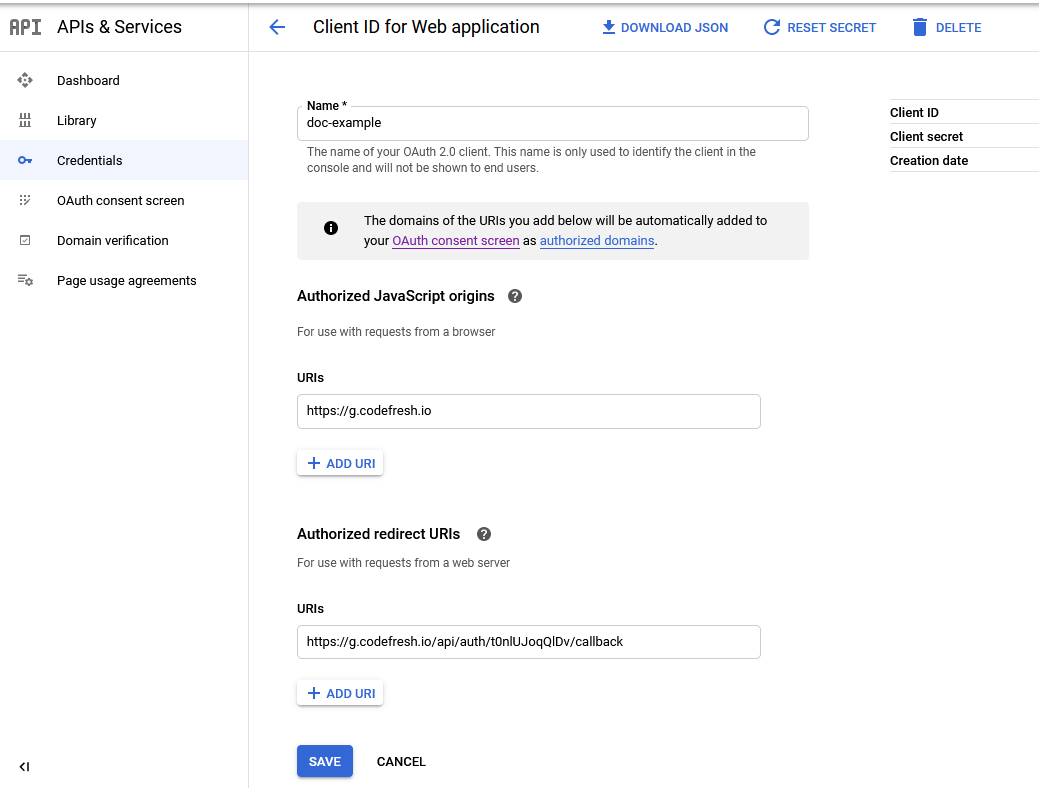
- From the Application type drop-down, select Web application.
- Enter a Name for your integration (user-defined).
- For Authorized JavaScript origins, URIs, enter,
https://g.codefresh.io. - Select Create.
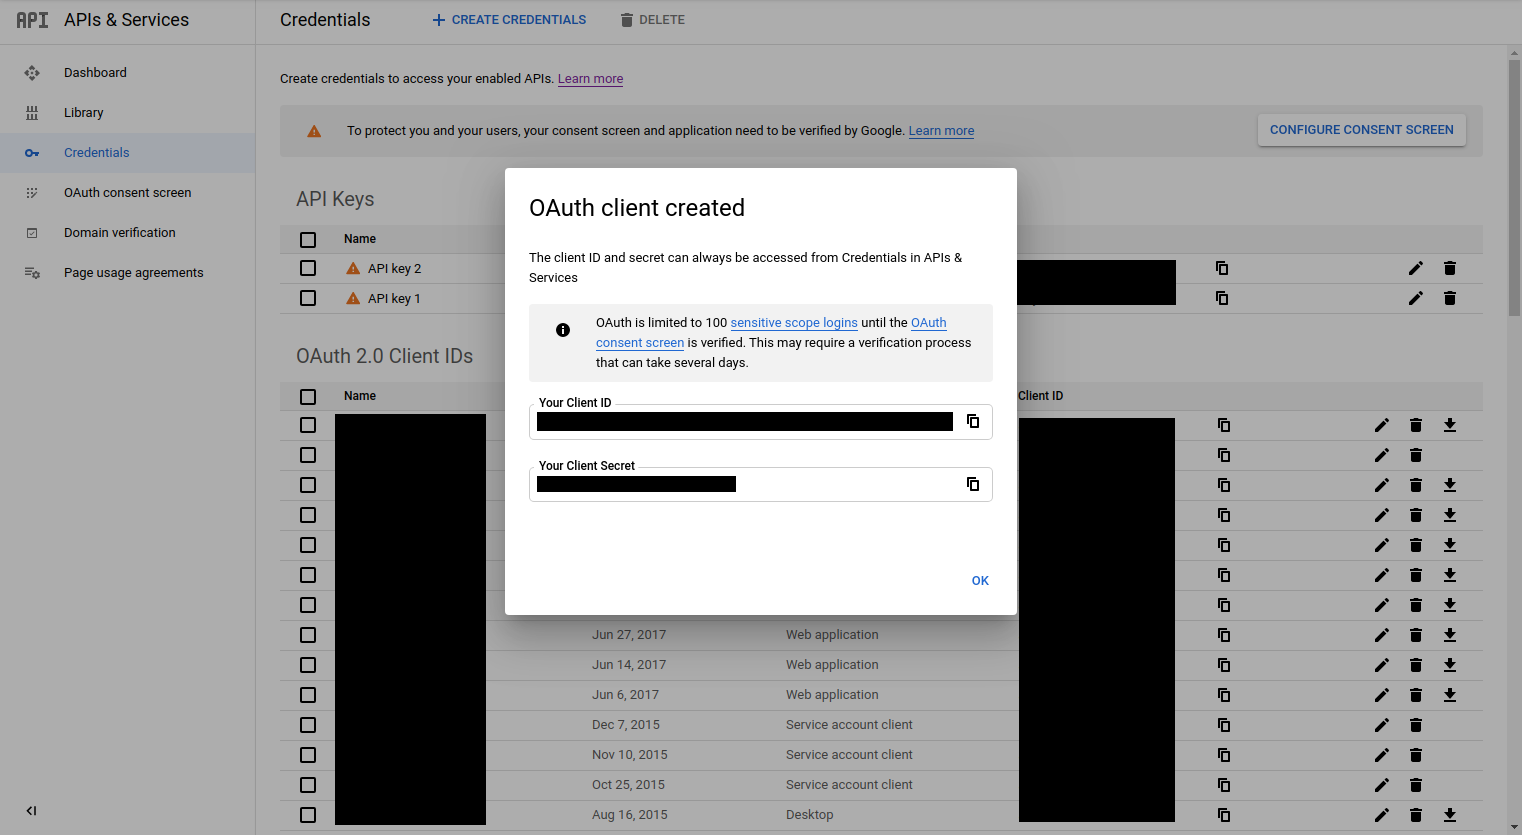
- From the OAUth client created dialog, note down Your Client ID and Your Client Secret.
You will need the Client ID and secret to configure SSO for Google in Codefresh.
- Continue with Step 2: Configure team synchronization settings in Google.
Step 2: Configure team synchronization settings in Google
When you configure SSO settings for Google OIDC in Codefresh, you can sync teams through a:
- Service account
OR - Custom schema
For both sync methods, you must configure settings in Google.
Create service account in Google Console to synchronize teams
To synchronize users and teams through a service account, create a service account in Google, and delegate user and group permissions for it.
- Create a service account in Google Console:
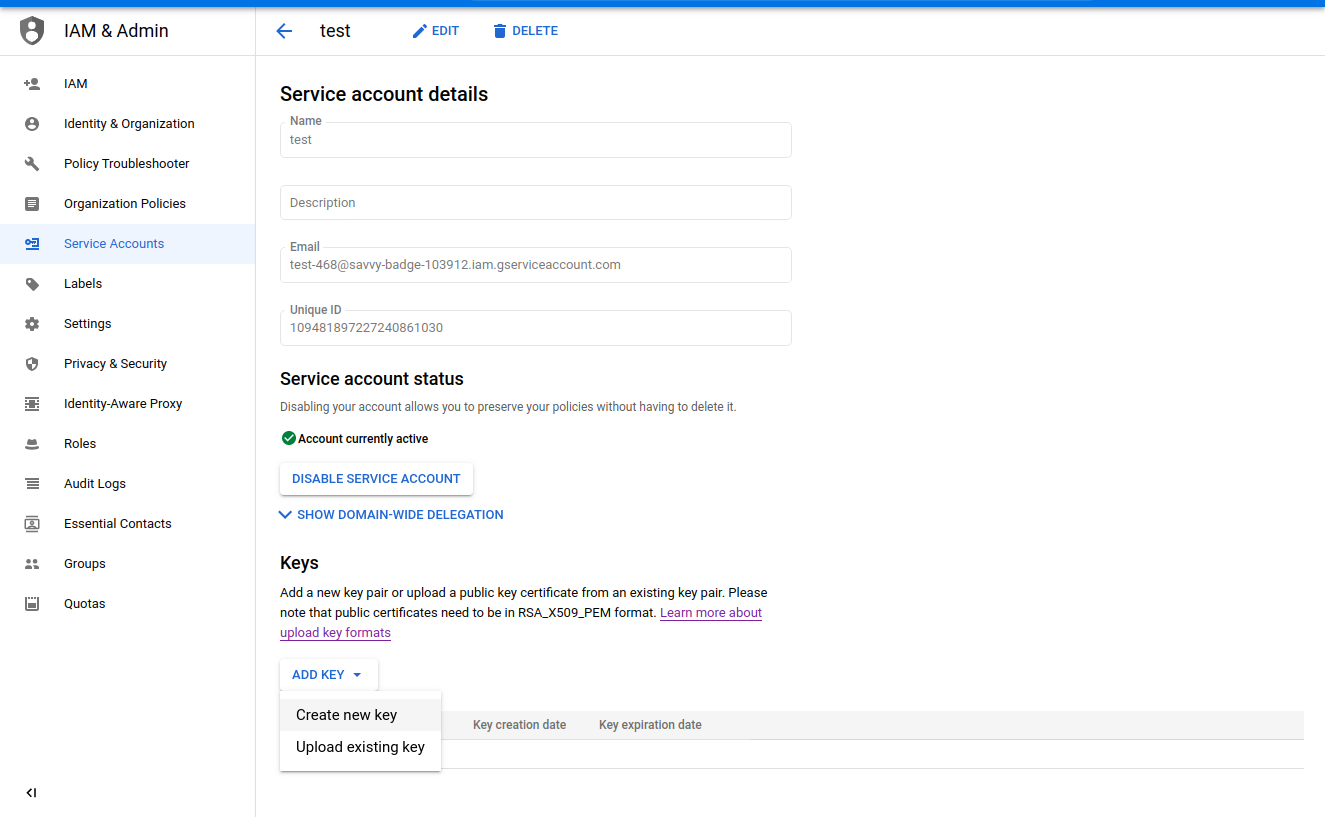
- Delegate from the Google admin console the following permissions:
https://www.googleapis.com/auth/admin.directory.user.readonlyhttps://www.googleapis.com/auth/admin.directory.group.readonly
- For that service account, create a private key in JSON format.

- Save the JSON file locally. You will need the JSON key file when you configure SSO settings for Google OIDC in Codefresh.
- Continue with Step 3: Configure SSO settings for Google in Codefresh.
Create custom schema
Use this method to sync only those users who have been assigned the user role with the custom schema.
- Navigate to the Google Directory API.
-
Add the following schema:
 {
   "schemaName": "SSO",
   "displayName": "SSO",
   "fields": [
     {
       "fieldType": "STRING",
       "fieldName": "UserRole",
       "displayName": "UserRole",
       "multiValued": true,
       "readAccessType": "ADMINS_AND_SELF"
     }
  ]
 }
- In the GSuite Admin panel, go to Apps > SAML.
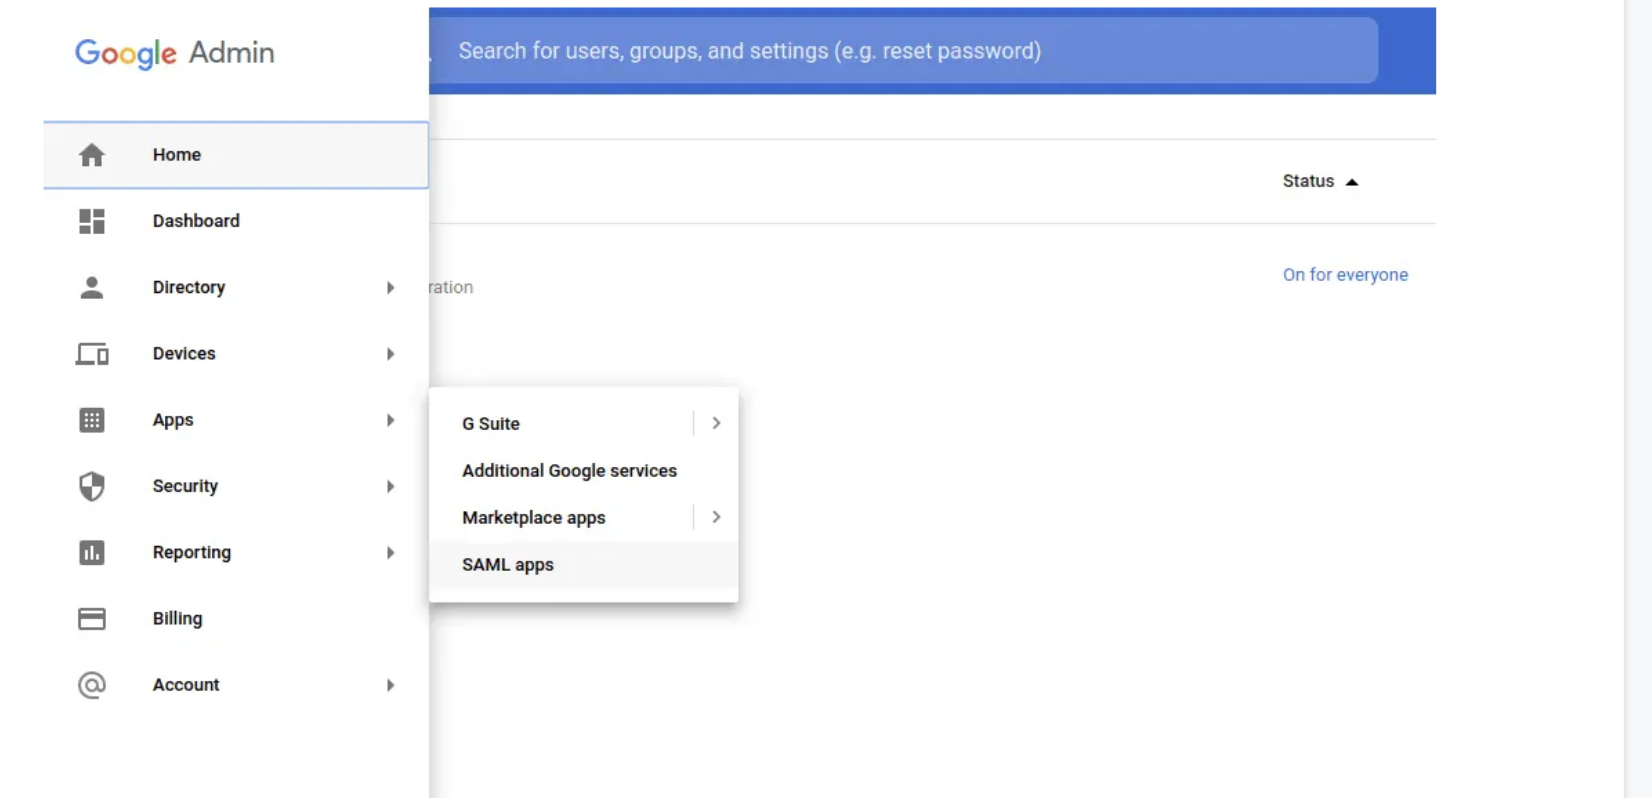
- Expand the Attribute Mapping settings, and add a Role attribute with the above schema for
SSOandUserRole.

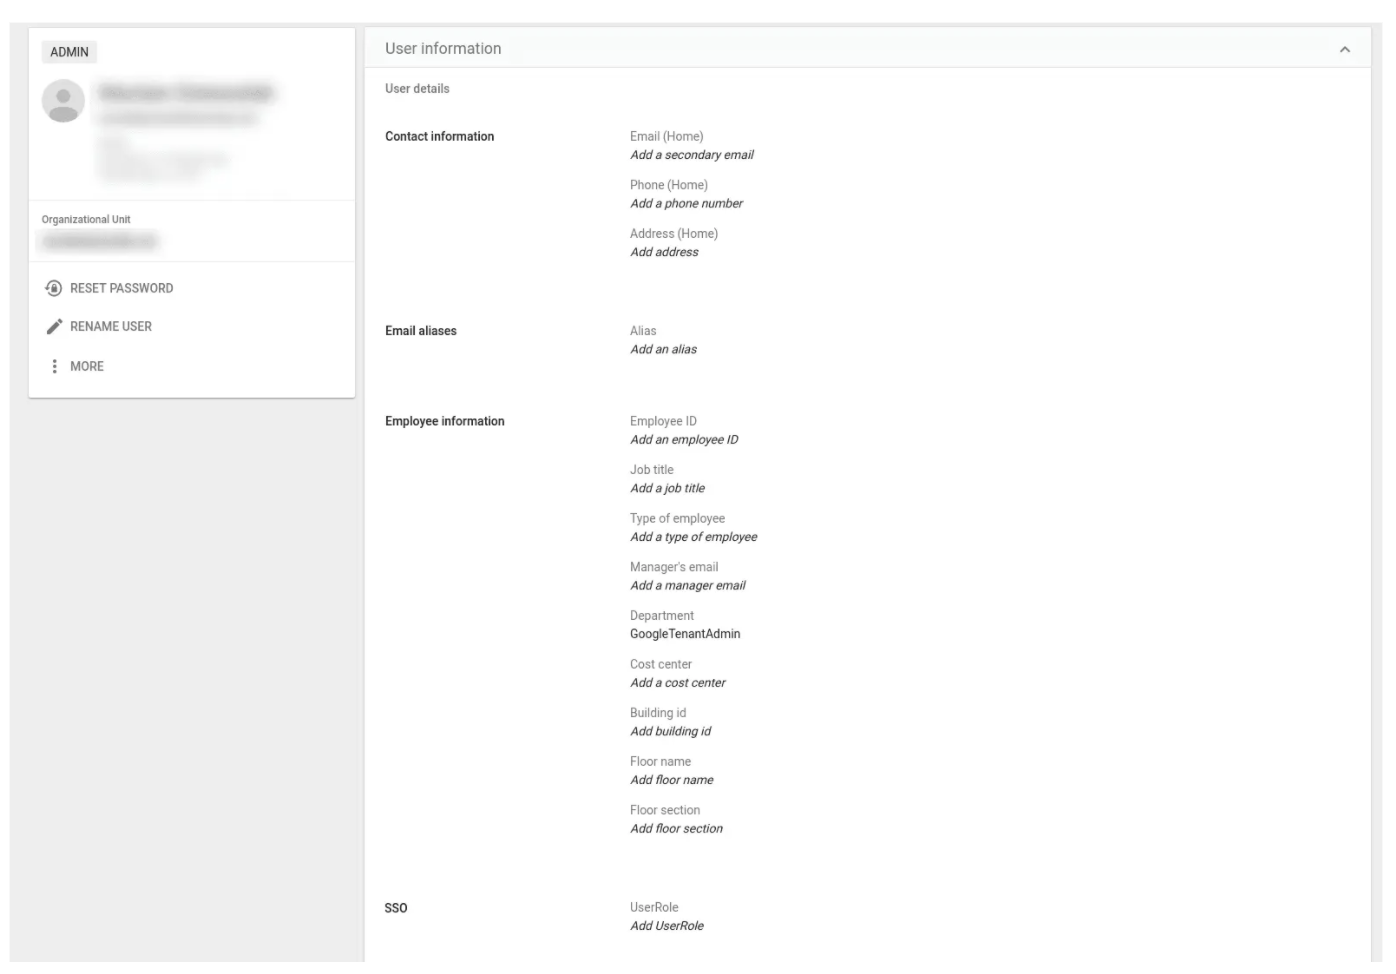
- For every user to be synced, in the User Information screen, scroll to
SSO > UserRole, and assign the user role.
- Continue with Step 3: Configure SSO settings for Google in Codefresh.
Step 3: Configure SSO settings for Google in Codefresh
Before you begin
- Make sure you have:
- The Client ID and Client Secret from Google in Step 1
- Created the service account or the custom schema in Google for user synchronization
How to
- In the Codefresh UI, from the toolbar click the Settings icon.
- In the sidebar, from Access & Collaboration, select Single Sign-On.
- Select + Add Single Sign-On, Google, and then Next.
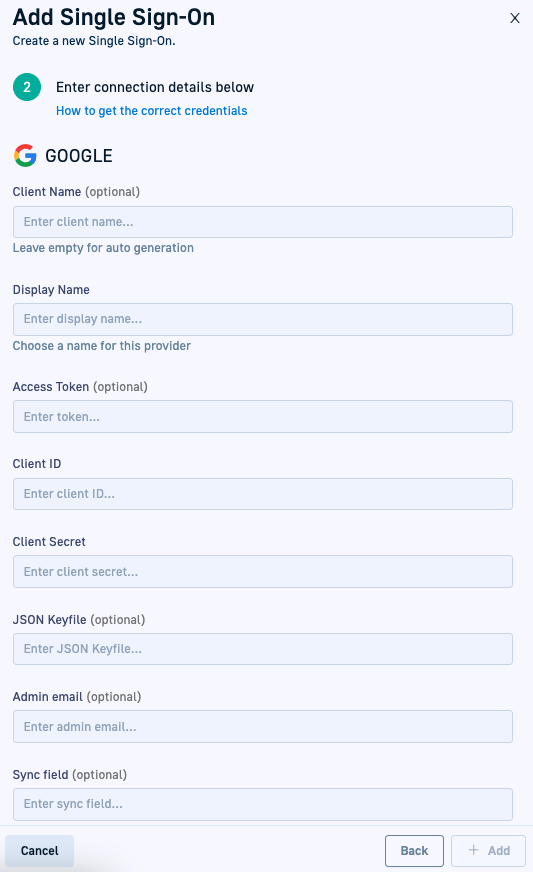
- Enter the following:
- Client Name: For auto-generation, leave empty. Codefresh generates the client name once you save the settings.
- Display Name: Meaningful name that identifies the SSO provider.
- Client ID: The Client ID generated by Google.
- Client Secret: The Client Secret also generated by Google.
- JSON Keyfile: Relevant for service-account synchronization only. Paste the content of the JSON file you saved locally.
- Admin email: Relevant for service-account synchronization only. Enter the email of the user
admin.google.com. - Sync field: Relevant for custom schema-based synchronization only. Enter the value set for
schemaName.
- Select Save. Codefresh generates the Client Name.
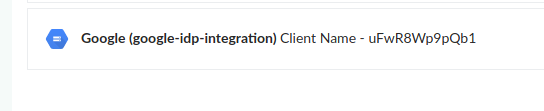
- Note down the Client Name, as you need it to set the redirect URI in Google.
- Continue with Step 4: Set up Redirect URI in Google.
Step 4: Set up Redirect URI in Google
- Go back to the Google Console Developer dashboard, and click the edit button on the OAuth 2.0 Client IDs that you created before.
- For Authorized Redirect URIs, in the URIs field, enter the Client Name you noted down to generate the Authorized Redirect URIs:
- Example Client Name:
t0nlUJoqQlDv - Example Redirect URI:
https://g.codefresh.io/api/auth/t0nlUJoqQlDv/callback
- Example Client Name:
You have now completed SSO setup for Google via OIDC.
Test SSO Connection
Now test the SSO with a test user in a different browser or in a private/incognito tab to make sure the integration works as it should.
- In the Codefresh UI, on the toolbar, click the Settings icon.
- From the sidebar, select Users & Teams.
- Locate a test user, and from the SSO list, select the integration name to enable SSO for that user.
- In a different browser or private/incognito browser window use the Corporate option to log in.
Related articles
About Federated Single Sign-On (SSO)
Setting up OIDC Federated SSO
Common configuration for SSO providers