Hosted GitOps Runtime installation
Set up your Hosted GitOps environment
IMPORTANT
Codefresh no longer offers free Hosted GitOps Runtimes.
If you’re interested in our paid options, please contact our sales team at [email protected] for details.
For GitOps, Codefresh offers the option of installing Hosted and Hybrid GitOps Runtimes.
Hosted GitOps Runtimes are fully managed and maintained by Codefresh.
This article describes how to install the Hosted GitOps Runtime to leverage GitOps capabilities.
For Hybrid GitOps Runtime installation, see Hybrid GitOps Runtime installation.
For a comparison between the two types of Runtime installations, see Hosted vs. Hybrid GitOps.
IMPORTANT
Codefresh is responsible for the availability of Hosted GitOps Runtimes.
The Argo CD applications created in Hosted GitOps Runtimes are the customer’s responsibility. Codefresh Support is happy to assist as needed.
NOTE
You can install a single Hosted GitOps Runtime per Codefresh account.
System requirements for Hosted GitOps Runtimes
| Item | Requirement |
|---|---|
| Kubernetes cluster | Server version 1.18 |
| Target Kubernetes clusters |
|
| Argo CD managed CRDs (Custom Resource Definitions) | Between 300 and 400 CRDs |
| Git provider |
|
| Git repo for manifests | Up to 100MB |
| CMP (Cloud Management Platform) plugins | Only for Enterprise customers |
For a comparison between Hosted and Hybrid GitOps Runtimes, see Hosted vs. Hybrid GitOps.
Where to start with Hosted GitOps Runtimes
If you have not provisioned a Hosted GitOps Runtime, Codefresh presents you with the setup instructions in the Home dashboard.
- In the Codefresh UI, from Ops in the sidebar, select Home.
Codefresh guides you through the three-step setup, as described below.

Prerequisites
- Set up integrations with the Git provider for the Hosted GitOps Runtime:
- GitHub
- Bitbucket Cloud
- Gerrit
Step 1: Install Hosted GitOps Runtime
Start installing the Hosted GitOps Runtime with a single-click. Codefresh completes the installation without any further intervention on your part. The Hosted GitOps Runtime is provisioned on the Codefresh cluster, and completely managed by Codefresh with automatic version and security upgrades.
- Do one of the following:
- To set up Hosted GitOps Runtime later, click Install later, and continue from step 2.
- To start setup, click Install, and continue from step 3.

- Do the following:
- In the Codefresh UI, click the Settings icon on the toolbar.
- From Runtimes in the sidebar, select GitOps Runtimes, and click + Add Runtime.
- Select Hosted Runtime and click Add.
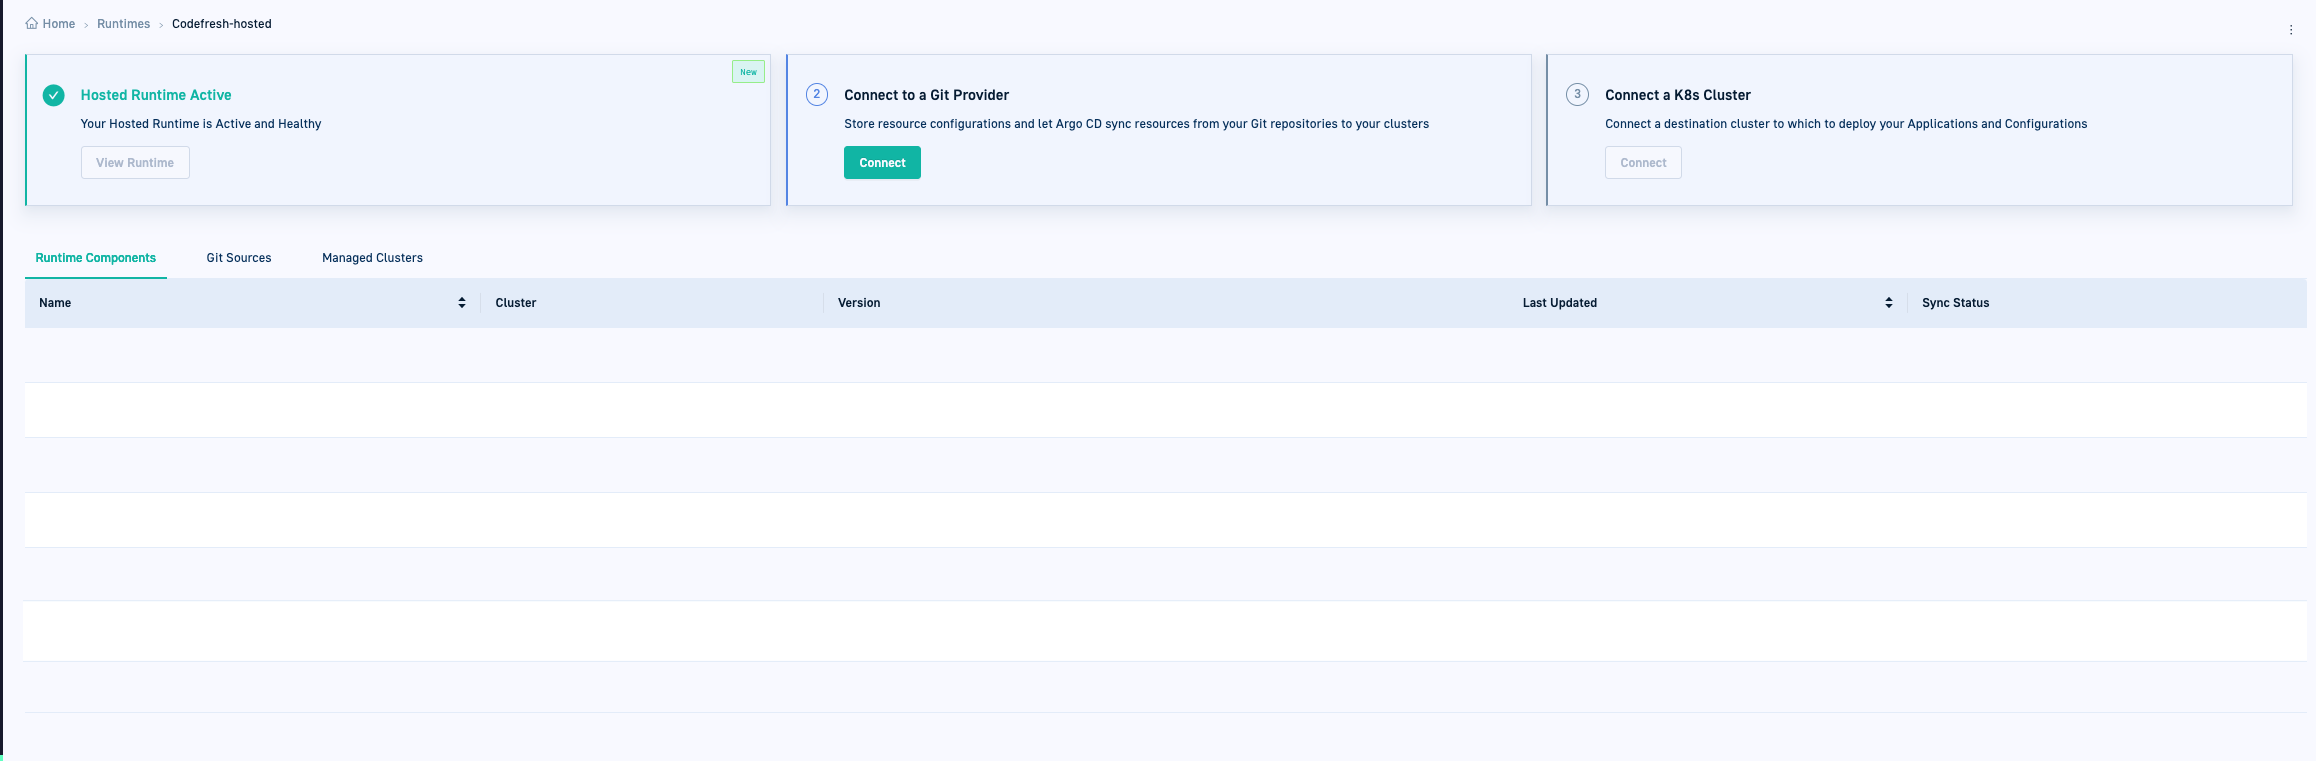
- Optional. When complete, click View Runtime.
- You can see that there are two steps to complete setup for the Hosted GitOps Runtime.
- The Runtime Components tab is empty as the Runtime components are hosted and managed by Codefresh.
When Argo Rollouts is deployed on target clusters, the Runtime Components tab displays rollout reporters whose manifests are stored in the customer’s Shared Configuration Repository created for the Runtime (described in Step 2). - The Git Sources and the Managed Clusters tabs are also empty as they will be set up in the next steps.
If you navigate to Runtimes > List View, you can identify the Hosted GitOps Runtime through the Type column (Hosted) and the Cluster/Namespace column (Codefresh).

Step 2: Connect Git provider
Connect your Hosted GitOps Runtime to a Git provider for Codefresh to create the required Git repos.
Authorize access
Based on the Git provider you select, you need to authorize access through OAuth or an access token, and then select the Git organizations or accounts in which to create the required Git repos.
Git organizations/accounts
Only authorized organizations are displayed in the list. To authorize organizations for the Codefresh application in GitHub, see Authorize organizations/projects.

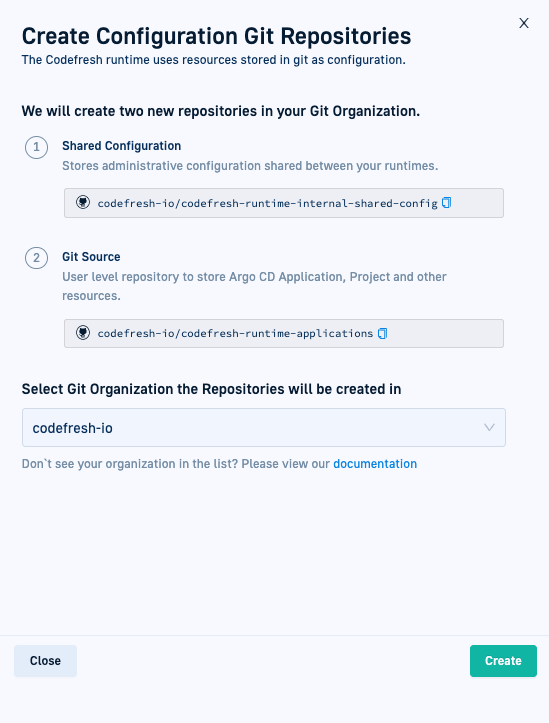
Once you authorize access, Codefresh creates two Git repositories, one to store the configuration settings for GitOps Runtimes in the account, and the other to store the Runtime’s application settings as a Git Source:
-
Shared Configuration Repository
The Shared Configuration Repository is a centralized Git repository that stores configuration settings for the Hosted GitOps Runtime. Additional Hybrid runtimes provisioned for the account can point to this repo to retrieve and reuse the configuration.
Read about Shared Configuration Repository.When you define the repository URL, you can also add the path, reference a branch, or both:
<repo_url>.git[/<path>][?ref=<branch>]where:
-
<repo_url>.gitis required and is the repository URL. This is the standard URL format which references the root of the default branch in the repository. The.gitsuffix is recommended. Example:https://github.com/codefresh-io/our-isc.git -
<path>is optional, and points to a specific path within the repository.
Use<path>if you want your configuration files within a subdirectory.
Example:https://github.com/codefresh-io/our-isc.git/some/path -
<branch>is optional, and references a specific branch in the repository.
Example:https://github.com/codefresh-io/our-isc.git?ref=isc-branch
-
-
Git Source application repo
Codefresh creates a Git Source application repo for every Hosted GitOps Runtime.
Read about Git sources.
Before you begin
Make sure you have the credentials for the Git provider handy
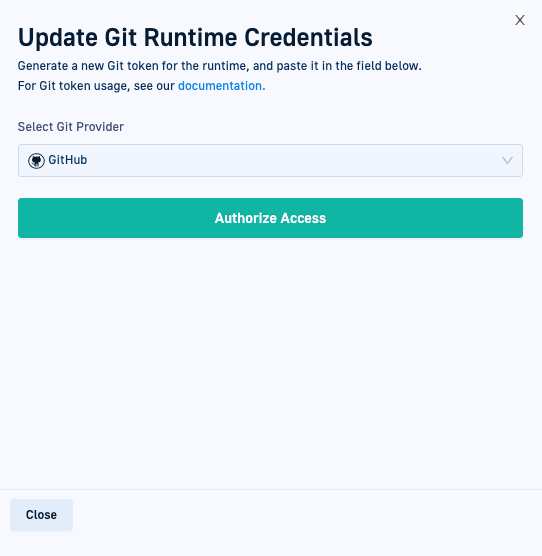
How to
- From the list, select the Git provider.
- Enter the credentials for the selected Git provider:
- Gerrit:
- Username: The username of your Codefresh user account in Gerrit.
- Password: Paste the HTTP Password you generated and copied into the field.
- Host URL: The URL of your website with the Gerrit instance, for example,
https://git.company-name.io.
- Gerrit:
- Click Authorize Access.
- Optional. To authorize access for GitHub and Bitbucket through OAuth, click Connect and enter your OAuth token.
- Optional. If required for your Git provider, select the Git Organization for which to create the repos.
NOTE
If the organization does not appear in the list, you need to authorize access to it. See Authorize organizations/projects. - Click Create. Codefresh creates the two Git repositories in the paths shown.
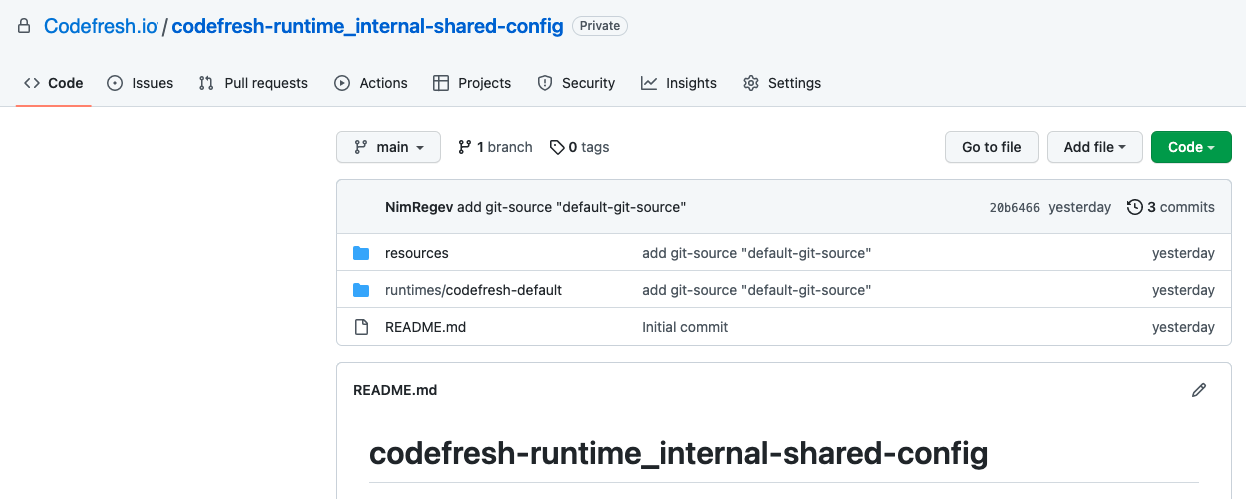
- Verify that both repositories have been created in your Git account.
- Optional. To see your tokens, click View Tokens.
If you return to the Runtimes page and select the Git Source tab, you will now see the Git Source that Codefresh created.
The Sync State may be Unknown for a few moments until the Git Source is synced to the Codefresh cluster.

Step 3: Connect a Kubernetes cluster
Connect a destination cluster to the Hosted GitOps Runtime and register it as a managed cluster. Deploy applications and configuration to the cluster. For information on managed clusters and installing Argo Rollouts, see Add and manage external clusters.

Before you begin
- Make sure your cluster has internet access
How to
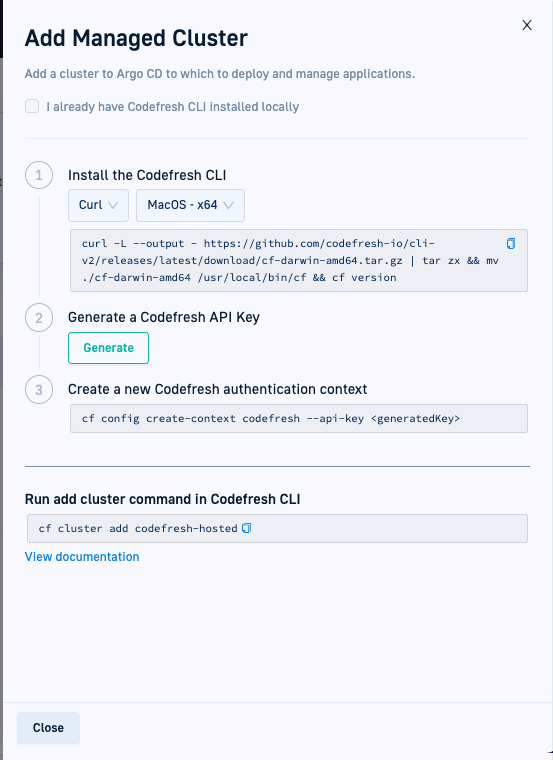
- Click Connect.
- In the Add Managed Cluster panel, copy the command
cf cluster add, and run it in the terminal. - When prompted to select the
kube-context, select from the list of available clusters as defined inkubeconfig.
- Return to the Runtimes page, and then select Topology View.
You can see the new K8s cluster you connected.

- Configure access to the IP addresses required. See Codefresh IP addresses.
You have completed setting up your Hosted GitOps Runtime. You are ready to create applications, and connect third-party CI tools for image enrichment.
(Optional) Create an Argo CD application
Optional. Create an Argo CD application in Codefresh, deploy it to the cluster, and track deployment and performance in the Applications dashboard.
- Follow our quick-start to create and deploy an application.
OR
Create your own application. See Create an application.
- In the Codefresh UI, view your application in the GitOps Apps dashboard. For more information, see Monitoring Argo CD applications.
(Optional) Connect CI
Optional. Integrate Codefresh with the third-party tools you use for CI to enrich image information in deployments.
See Image enrichment with integrations.
Related articles
Monitoring & managing GitOps Runtimes
Managing Git Sources in GitOps Runtimes
Shared Configuration Repository
Home Dashboard
DORA metrics