Article Content
How Can You Run Jenkins on Kubernetes?
Jenkins on Kubernetes is the integration of the Jenkins automation server with the Kubernetes container orchestration platform. This combination streamlines the deployment, scaling, and management of Jenkins instances and build environments.
Jenkins leverages Kubernetes’ dynamic resource allocation to create ephemeral build agents (slaves) as containers, which are automatically scaled and terminated based on demand. This integration provides flexibility, increased resource efficiency, and reduced operational overhead.
With Jenkins on Kubernetes, developers and operations teams can achieve faster build times, improved isolation between build environments, and better control over resource usage, enhancing continuous integration and continuous delivery (CI/CD) workflows for containerized applications.
Jenkins on Kubernetes: Benefits and Challenges
Running Jenkins on Kubernetes can provide several benefits and also pose some challenges.
Benefits:
- Scalability: Kubernetes allows Jenkins to scale efficiently by managing Jenkins slaves (agents) as containers, automatically scaling them based on workload demands. This enables better resource utilization and faster build times.
- Improved resource utilization: Kubernetes can efficiently allocate resources to Jenkins containers and ensure that they only use the resources they need. This allows for better utilization of cluster resources and can lower infrastructure costs.
- High availability: Kubernetes ensures high availability of Jenkins by managing its deployment and automatically recovering from failures. In case of a Jenkins master failure, Kubernetes can quickly restart the master container, minimizing downtime.
- Isolation: Running Jenkins jobs in isolated containers ensures that they don’t interfere with each other, improving security and reducing the risk of one job affecting another.
- Simplified maintenance: Kubernetes simplifies the management and maintenance of Jenkins by handling updates, rollbacks, and deployment processes. This reduces the operational overhead associated with managing Jenkins instances.
- Integration with cloud providers: Kubernetes can be easily deployed on various cloud providers, enabling seamless integration of Jenkins with cloud-based infrastructure and services.
Challenges:
- Complexity: Setting up and managing a Jenkins instance on Kubernetes can be complex, especially for users who are new to containerization and Kubernetes. This may require additional knowledge, training, and expertise.
- Networking: Configuring networking for Jenkins instances running on Kubernetes can be challenging, particularly when it comes to exposing services and ensuring secure communication between containers.
- Persistent storage: Managing persistent storage for Jenkins on Kubernetes can be complicated. It requires configuring and managing persistent volumes and claims, which can be challenging for users unfamiliar with Kubernetes storage concepts.
- Monitoring and logging: Collecting logs and monitoring metrics from Jenkins instances running on Kubernetes may require additional tools and configurations, adding complexity to the setup process.
- Security: Running Jenkins on Kubernetes introduces additional security considerations, such as ensuring proper access controls, network policies, and container security best practices.
- Initial setup and configuration: Deploying Jenkins on Kubernetes requires initial setup and configuration of various Kubernetes objects, such as deployments, services, and ConfigMaps. This may be time-consuming and require expertise in Kubernetes.
Tutorial: Deploying Jenkins on Kubernetes
Here is an overview of how to set up Jenkins on a Kubernetes cluster.
Step 1. Create a Jenkins Namespace
The DevOps tool suite should have a distinct namespace, isolated from the other applications. Create a Kubernetes namespace for Jenkins:
kubectl create namespace devops-tool-suite

Step 2. Create an Admin Service Account
Set up a serviceAccount.yaml file with Kubernetes admin permissions by copying the administrator service account manifest:
---
apiVersion: rbac.authorization.k8s.io/v1
kind: ClusterRole
metadata:
  name: admin-jenkins
rules:
  - apiGroups: [""]
    resources: ["*"]
    verbs: ["*"]
---
apiVersion: v1
kind: ServiceAccount
metadata:
  name: admin-jenkins
  namespace: devops-tool-suite
---
apiVersion: rbac.authorization.k8s.io/v1
kind: ClusterRoleBinding
metadata:
  name: admin-jenkins
roleRef:
  apiGroup: rbac.authorization.k8s.io
  kind: ClusterRole
  name: admin-jenkins
subjects:
- kind: ServiceAccount
  name: admin-jenkins
  namespace: devops-tool-suite

Step 3. Create a Local Persistent Volume for Jenkins Data
The local volume ensures that the Jenkins data persists when the pods restart. Create a volume.yaml and copy the manifest for a persistent volume:
kind: StorageClass
apiVersion: storage.k8s.io/v1
metadata:
  name: local-storage
provisioner: kubernetes.io/no-provisioner
volumeBindingMode: WaitForFirstConsumer
---
apiVersion: v1
kind: PersistentVolume
metadata:
  name: pv-jenkins
  labels:
    type: local
spec:
  storageClassName: localstorage
  claimRef:
    name: pvc-jenkins
    namespace: devops-tool-suite
  capacity:
    storage: 10Gi
  accessModes:
    - ReadWriteOnce
  local:
    path: /mnt
  nodeAffinity:
    required:
      nodeSelectorTerms:
      - matchExpressions:
        - key: kubernetes.io/hostname
          operator: In
          values:
          - worker-node01
---
apiVersion: v1
kind: PersistentVolumeClaim
metadata:
  name: pvc-jenkins
  namespace: devops-tool-suite
spec:
  storageClassName: localstorage
  accessModes:
    - ReadWriteOnce
  resources:
    requests:
      storage: 3Gi

Step 4. Create and Run Deployment
Create YAML file called deployment.yaml with the manifest for a Kubernetes deployment:
apiVersion: apps/v1
kind: Deployment
metadata:
  name: deployment-jenkins
  namespace: devops-tool-suite
spec:
  replicas: 1
  selector:
    matchLabels:
      app: server-jenkins
  template:
    metadata:
      labels:
        app: server-jenkins
    spec:
      securityContext:
            fsGroup: 1000
            runAsUser: 1000
      serviceAccountName: admin-jenkins
      containers:
        - name: deployment-jenkins
          image: jenkins/jenkins:lts
          resources:
            limits:
              memory: "2Gi"
              cpu: "1000m"
            requests:
              memory: "500Mi"
              cpu: "500m"
          ports:
            - name: httpport
              containerPort: 8080
            - name: jnlpport
              containerPort: 50000
          livenessProbe:
            httpGet:
              path: "/login"
              port: 8080
            initialDelaySeconds: 90
            periodSeconds: 10
            timeoutSeconds: 5
            failureThreshold: 5
          readinessProbe:
            httpGet:
              path: "/login"
              port: 8080
            initialDelaySeconds: 60
            periodSeconds: 10
            timeoutSeconds: 5
            failureThreshold: 3
          volumeMounts:
            - name: data-jenkins
              mountPath: /var/jenkins_home
      volumes:
        - name: data-jenkins
          persistentVolumeClaim:
              claimName: pvc-jenkins

This Jenkins deployment includes a securityContextthat allows the Jenkins pod to write data to the local storage volume. There is a liveness and readiness probe for monitoring the pod’s health and a local storage class to hold the data path for Jenkins: /var/jenkins_home.
Step 5. Build and Deploy a Service
The Jenkins deployment cannot be accessed from outside without a service YAML mapped to the deployment. Create a service.yaml with the manifest for a service:
apiVersion: v1
kind: Service
metadata:
  name: service-jenkins
  namespace: devops-tool-suite
  annotations:
      prometheus.io/scrape: 'true'
      prometheus.io/path:   /
      prometheus.io/port:   '8080'
spec:
  selector:
    app: server-jenkins
  type: NodePort
  ports:
    - port: 8080
      targetPort: 8080
      nodePort: 32000
The NodePorttype exposes Jenkins on port 32000 across all IPs of Kubernetes nodes. Creating an ingress rule for Jenkins access will enable an ingress configuration. Exposing the new Jenkins service as a load balancer is useful for running the Kubernetes cluster on Azure, AWS, or Google Cloud.
Use the following kubectl command to create a Jenkins service:
kubectl apply -f service.yaml

With this setup, users can browse to any node IP on port 32000 to view the Jenkins dashboard. Jenkins will prompt any first-time user to provide an initial admin password to access the dashboard. To get this password, use the Kubernetes CLI or dashboard. For instance, the following kubectl command will show the pod’s details:
kubectl get pods --namespace=devops-tool-suite

The pod name can be used to retrieve the relevant logs with the password at the end:
kubectl logs deployment-jenkins-999d94f98-5xkrk --namespace=devops-tool-suite
Enter the password and install the recommended plugin to create a new admin user.
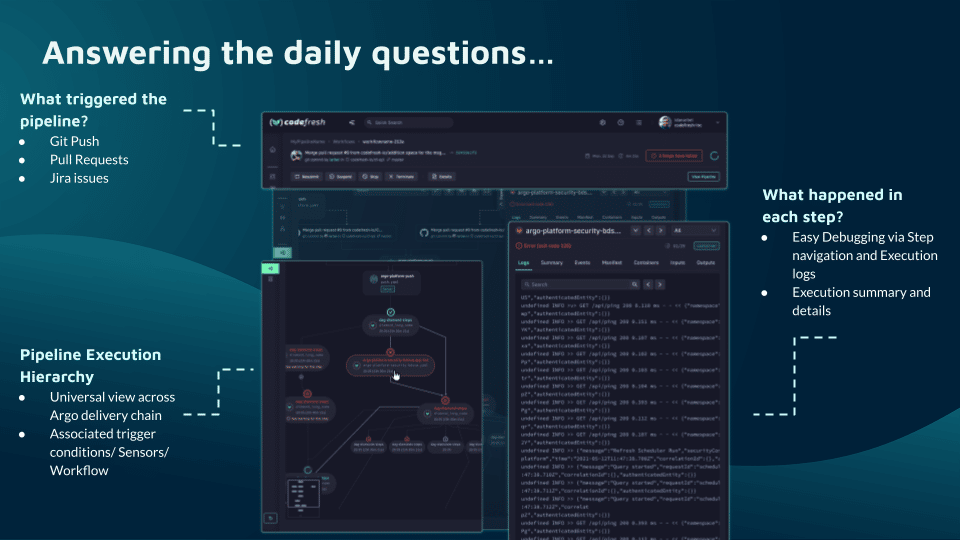
Codefresh: A Modern Alternative to Jenkins
You can’t get to continuous delivery or deployment without first solving continuous integration. Codefresh automatically creates a Delivery Pipeline, which is a workflow along with the events that trigger it. We’ve added a pipeline creation wizard that will create all the component configurations so you can spend less time with YAML and more time getting work done.
At the end of the pipeline creation wizard, Codefresh commits the configuration to git and allows its built-in Argo CD instance to deploy them to Kubernetes.
The Delivery pipeline model also allows the creation of a single reusable pipeline that lets DevOps teams build once and use everywhere. Each step in a workflow operates in its own container and pod. This allows pipelines to take advantage of the distributed architecture of Kubernetes to easily scale both on the number of running workflows and within each workflow itself.
Teams that adopt Codefresh deploy more often, with greater confidence, and are able to resolve issues in production much more quickly. This is because we unlock the full potential of Argo to create a single cohesive software supply chain. For users of traditional CI/CD tooling, the fresh approach to software delivery is dramatically easier to adopt, more scalable, and much easier to manage with the unique hybrid model.
Learn more about Codefresh

The World’s Most Modern CI/CD Platform
A next generation CI/CD platform designed for cloud-native applications, offering dynamic builds, progressive delivery, and much more.
Check It Out