Article Content
What is Jenkins?
Jenkins is an open source continuous integration (CI) server. It manages and controls several stages of the software delivery process, including build, documentation, automated testing, packaging, and static code analysis. Jenkins is a highly popular DevOps tool used by thousands of development teams.
Jenkins automation is commonly triggered by code changes in repositories like GitHub, Bitbucket, and GitLab, and integrates with build tools like Maven and Gradle. Jenkins supports the use of container technologies like Docker and Kubernetes for testing and packaging of software releases, but it is neither a Kubernetes native solution nor a container-native CI solution.
Source: Wikimedia Commons
This is part of an extensive series of guides about DevOps.
Jenkins Core Concepts
Jenkins Controller (Formerly Master)
The Jenkins architecture supports distributed builds. One Jenkins node functions as the organizer, called a Jenkins Controller. This node manages other nodes running the Jenkins Agent. It can also execute builds, although it isn’t as scalable as Jenkins agents.
The controller holds the central Jenkins configuration. It manages agents and their connections, loads plugins, and coordinates project flow.
Jenkins Agent (Formerly Slave)
The Jenkins Agent connects to the Jenkins Controller to run build jobs. To run it, you’ll need to install Java on a physical machine, virtual machine, cloud compute instance, Docker image, or Kubernetes cluster.
You can use multiple Jenkins Agents to balance build load, improve performance, and create a secure environment independent of the Controller.
Jenkins Node
A Jenkins node is an umbrella term for Agents and Controllers, regardless of their actual roles. A node is a machine on which you can build projects and pipelines. Jenkins automatically monitors the health of all connected nodes, and if metrics go below a threshold, it takes the node offline.
Jenkins Project (Formerly Job)
A Jenkins project or task is an automated process created by a Jenkins user. The plain Jenkins distribution offers a variety of build tasks that can support continuous integration workflows, and more are available through a large ecosystem of plugins.
Jenkins Plugins
Plugins are community-developed modules you can install on a Jenkins server. This adds features that Jenkins doesn’t have by default. You can install/upgrade all available plugins from the Jenkins dashboard.
Jenkins Pipeline
A Jenkins Pipeline is a user-created pipeline model. The pipeline includes a variety of plugins that help you define step-by-step actions in your software pipeline. This includes:
- Automated builds.
- Multi-step testing.
- Deployment procedures.
- Security scanning
You can create pipelines directly in the user interface, or create a “Jenkinsfile” which represents a pipeline as code. Jenkinsfiles use a Groovy-compatible text-based format to define pipeline processes, and can be either declarative or scripted.
Jenkins Architecture
Jenkins elements interact and work together in the following way:
- Developers modify the source code, committing changes to the repository, and Jenkins creates a new build in order to handle the new Git commit.
- Jenkins can work in “push” or “pull” mode. The Jenkins CI server is either triggered by an event such as a code commit, or it can regularly check the repository for changes.
- The build server builds the code and generates an artifact. If the build fails, the developer receives an alert.
- Jenkins deploys the built application/executable to the test server, which can execute continuous, automated tests. Developers receive alerts if their changes impact functionality.
- Jenkins optionally deploys the changes to the production server if the code has no issues.
The following diagram illustrates the Jenkins architecture:
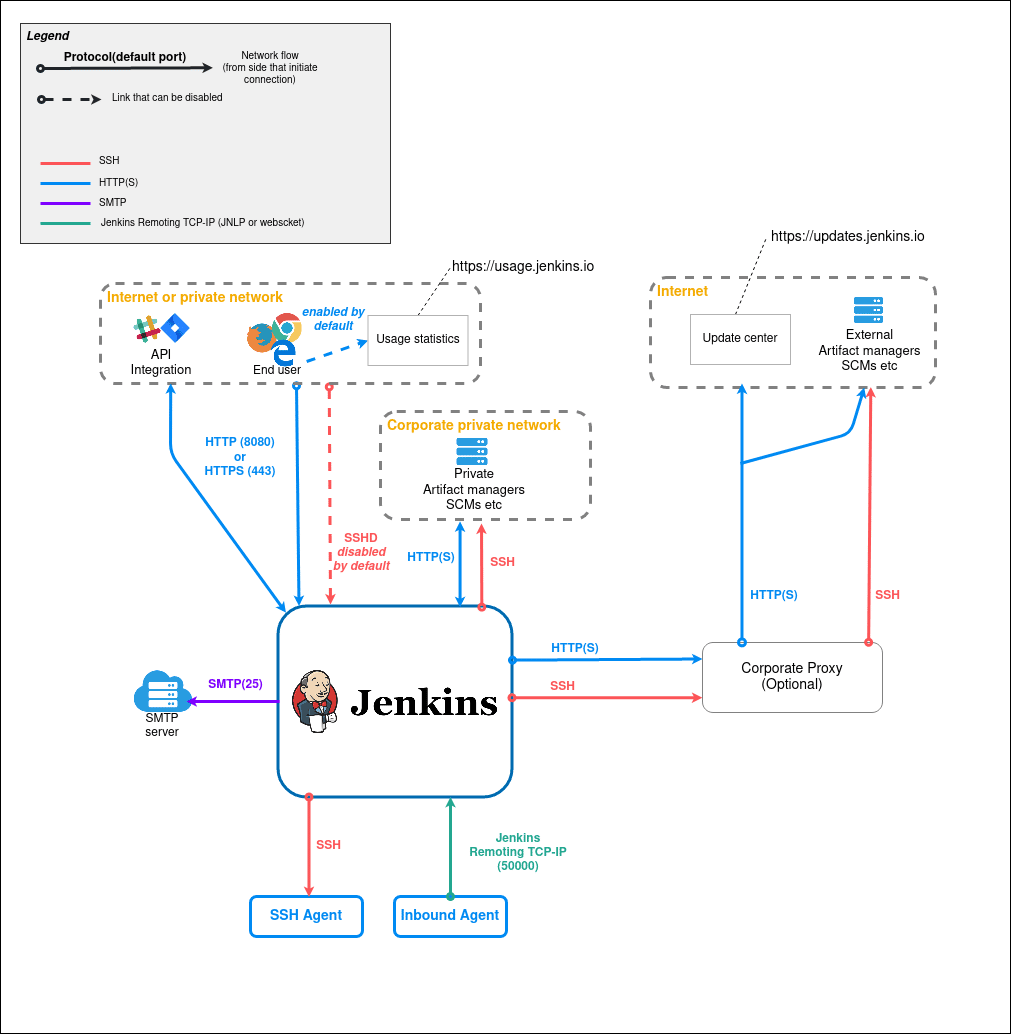
Image Source: Jenkins
You may need more than one Jenkins server to test code in different environments. A single server cannot always handle the load for large projects. If this is the case, you can use the distributed Jenkins architecture to implement continuous integration and testing. The Jenkins server can access the Controller environment, which distributes the workload across different Jenkins Agents.
This distributed model lets you run different builds and tests simultaneously, with each Jenkins Agent environment running a different version of the code and the Controller controlling the operations.
Jenkins Advantages and Disadvantages
Here are some of the key advantages of Jenkins:
- Highly extensible with a huge variety of existing plugins. Plugins contribute to Jenkins’ flexibility and rich scripting and declarative language which supports advanced, custom pipelines.
- Robust and reliable at almost any scale.
- Mature and battle-tested.
- Supports hybrid and multi-cloud environments.
- Offers an extensive knowledge base, documentation, and community resources.
- Based on Java, an enterprise development language with a broad ecosystem, making it suitable for legacy enterprise environments.
Here are some disadvantages of Jenkins:
- Single server architecture—uses a single server architecture, which limits resources to resources on a single computer, virtual machine, or container. Jenkins doesn’t allow server-to-server federation, which can cause performance issues in large-scale environments.
- Jenkins sprawl—this is a common problem which also stems from lack of federation. Multiple teams using Jenkins can create a large number of standalone Jenkins servers that are difficult to manage.
- Relies on dated Java architectures and technologies—specifically Servlet and Maven. In general, Jenkins uses a monolithic architecture and is not designed for newer Java technologies such as Spring Boot or GraalVM.
- Not container native—Jenkins was designed in an era before containers and Kubernetes gained popularity, and while it supports container technology, it does not have nuanced support for container and orchestration mechanisms.
- Difficult to implement in production environments—developing continuous delivery pipelines with Jenkinsfiles requires coding in a declarative or scripting language, and complex pipelines can be difficult to code, debug, and maintain.
- Offers no functionality for real production deployments—“deploying with Jenkins” means running a fully customized set of scripts to handle the deployment.
- Jenkins itself requires deployment—this can be difficult to automate. Organizations that need to combine Jenkins with a continuous delivery solution have traditionally used configuration management to do this, but this adds another layer of complexity and is error-prone.
- Complicated plugin management—Jenkins has nearly 2,000 plugins, which can be overwhelming to sort through until you find a useful plugin. Many plugins also have dependencies that increase the management burden, while some plugins may conflict with each other. There is no guarantee a plugin you use will continue to be maintained.
- Groovy expertise requirements—Jenkins has programmatic pipelines implemented in Groovy, a language that is currently not in wide use and can make scripts difficult to work with. Jenkins supports scripted and declarative Groovy modes.
For these reasons, many teams are transitioning away from Jenkins and adopting newer solutions that are more supportive of a containerized, microservices-oriented DevOps environment.
Getting Started with Jenkins and Running a Multi-Step Pipeline
This getting started tutorial is based on the Jenkins documentation.
Step 1: Installing Jenkins
Jenkins can be distributed as a set of WAR files, installers, Docker images, and native packages.
Its minimum requirements in terms of hardware include 256 MB RAM and at least 1 GB drive space (though 10 GB or more is recommended when running Jenkins as a container).
To install Jenkins:
- Download the Jenkins generic Java WAR package.
- In the download’s directory, open a terminal and run the following:
java -jar jenkins.war --httpPort=8080
- Navigate to http://localhost:8080 and follow the installation instructions.
Step 2: Creating a Pipeline
Jenkins Pipeline includes several plugins that support the implementation and integration of CI pipelines in Jenkins. This tool suite is extensible and can be used to model continuous delivery pipelines as codes, regardless of their complexity. You write the pipeline’s definition in a Jenkinsfile, which is a text file used in the project’s repository.
Prerequisites: Before following the procedures below, you need to have access to a Git Repository, with credentials to commit.
You can get started with Pipeline using these steps:
- Go to the Manage Jenkins page, then to Plugins, and install the plugin for Docker Pipeline.
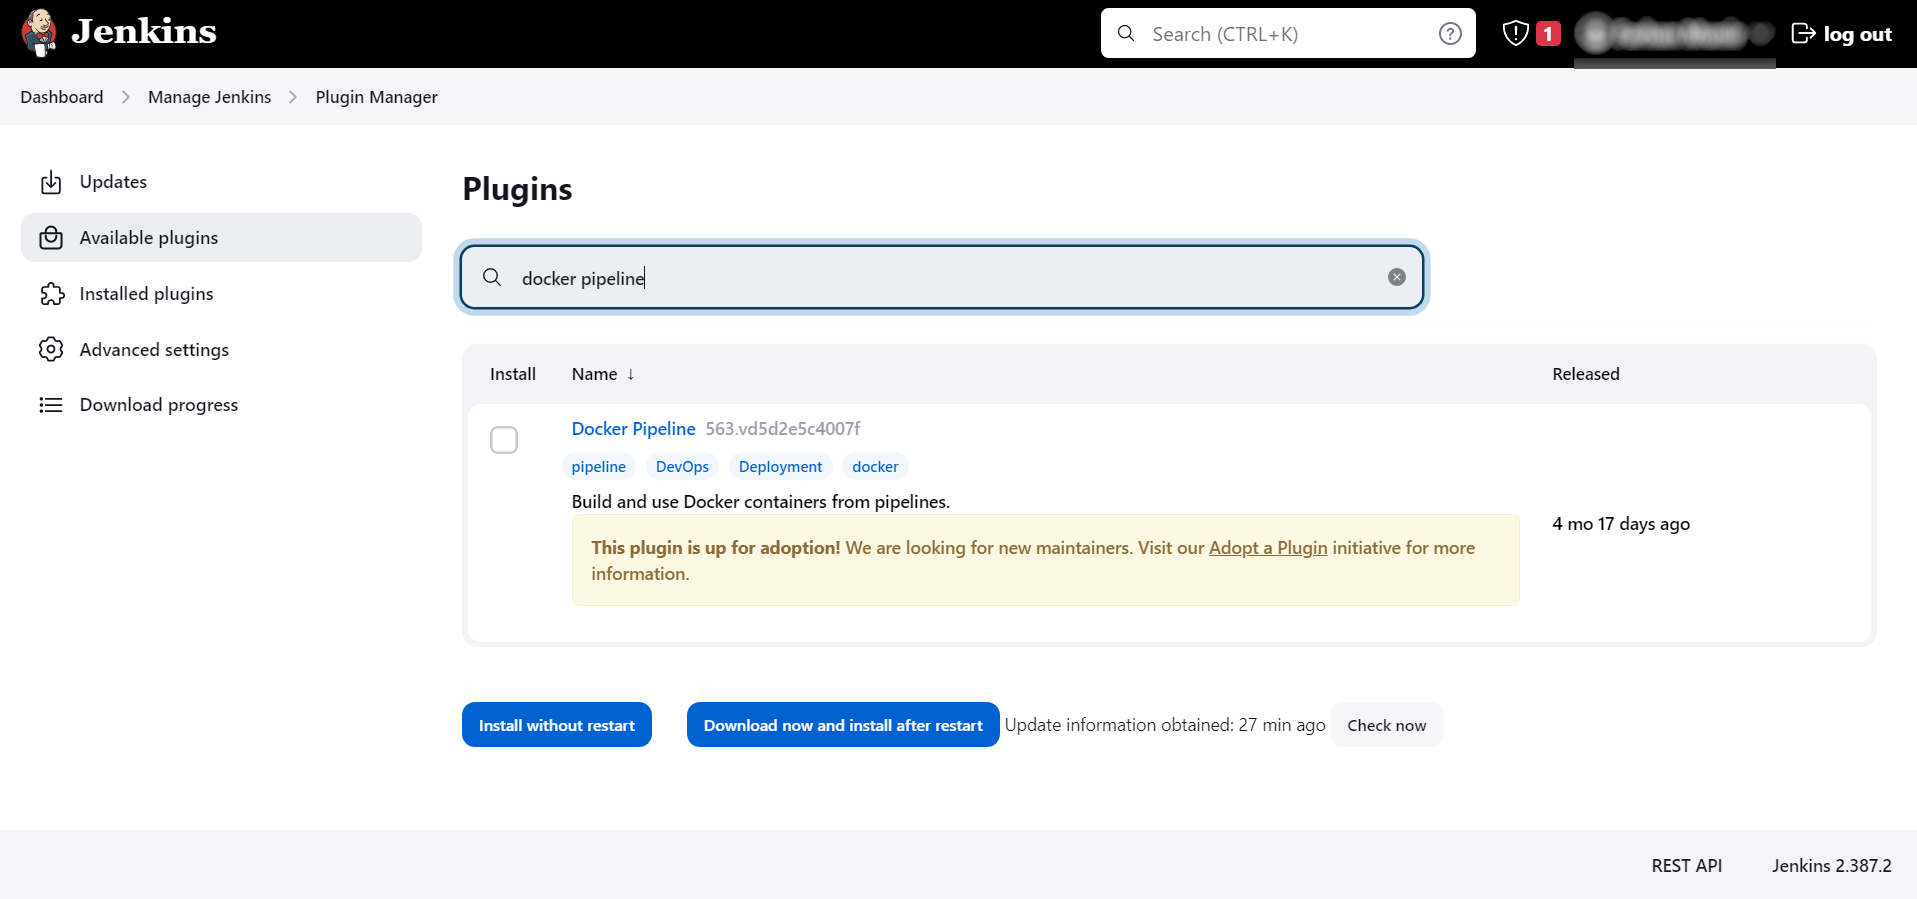
- Once the plugin is installed, you should restart Jenkins to ensure the plugin is usable.
- Copy the following text into the project’s source control repository and name the file
Jenkinsfile://Jenkinsfile (Declarative Pipeline)
/* Requires the Docker Pipeline plugin */
pipeline {
agent { docker { image ‘maven:3.9.0-eclipse-temurin-11’ } }
stages {
stage(‘build’) {
steps {
sh ‘mvn –version’
}
}
}
}

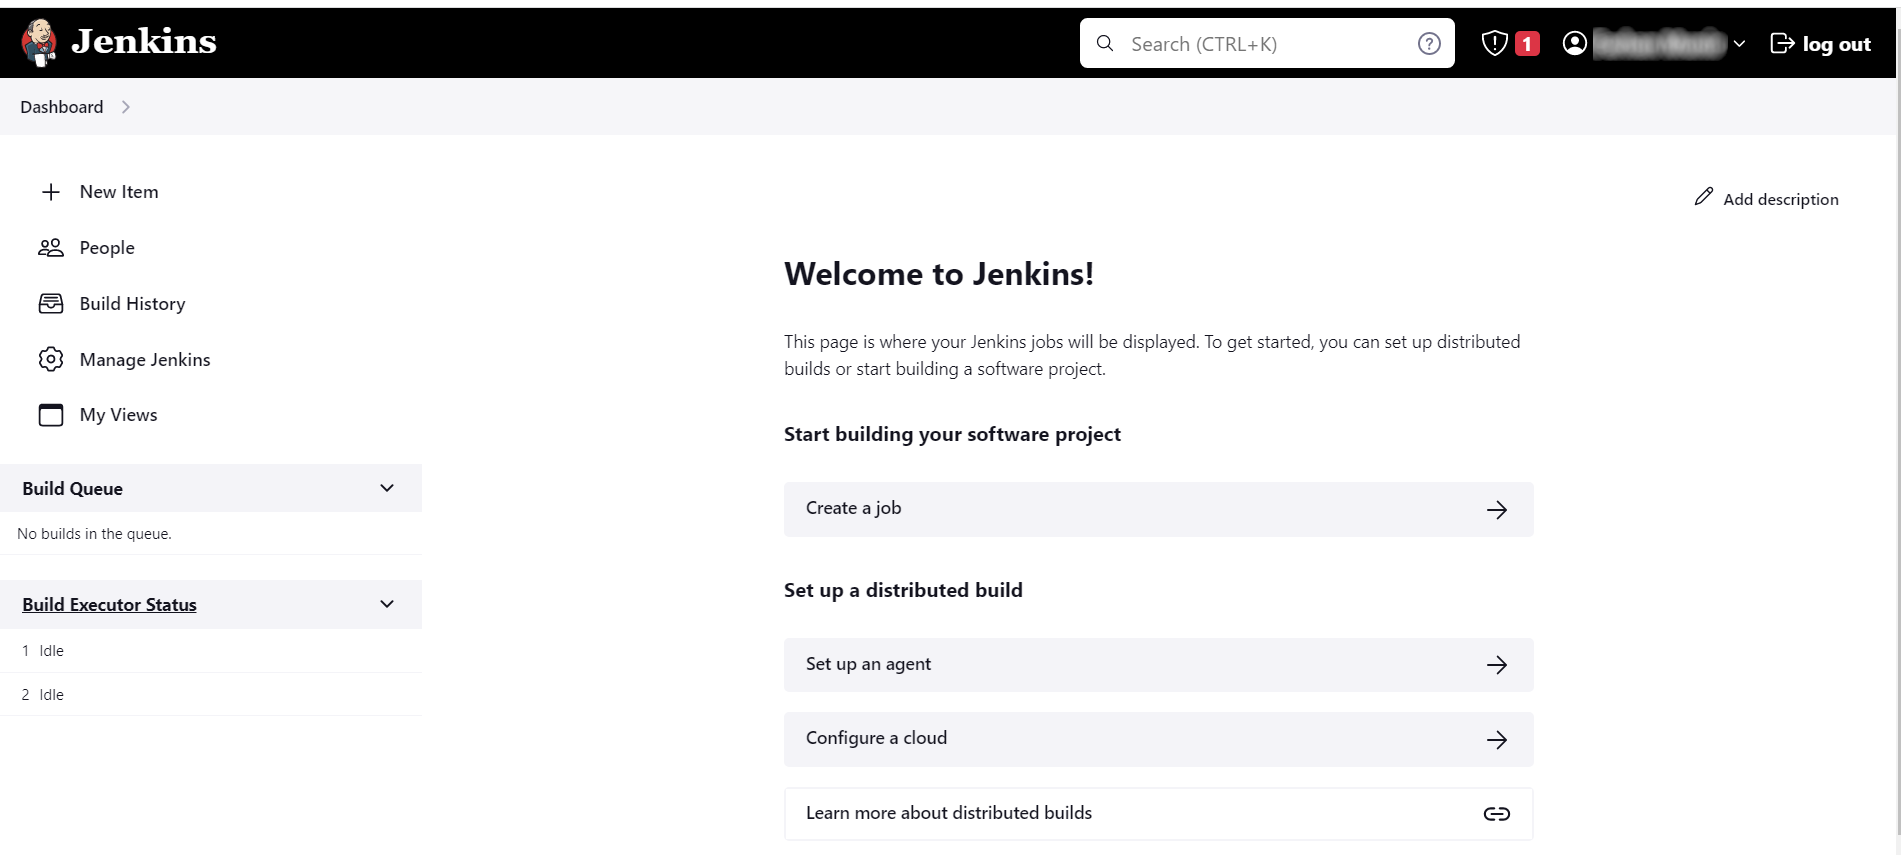
- Inside Jenkins, click on New Item to view the menu.
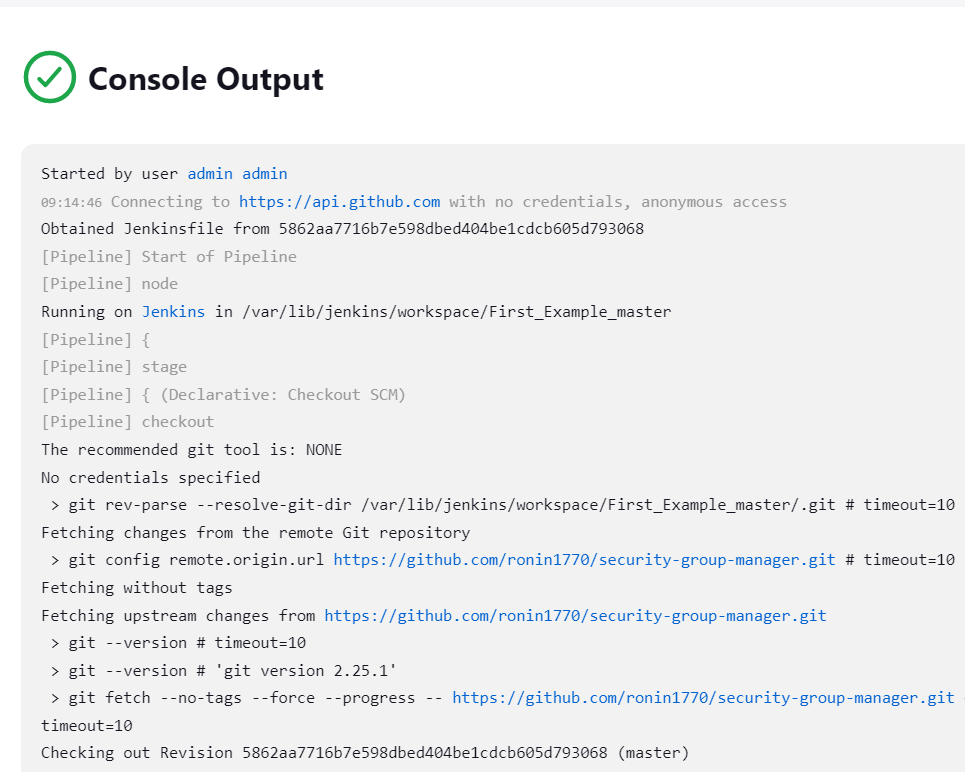
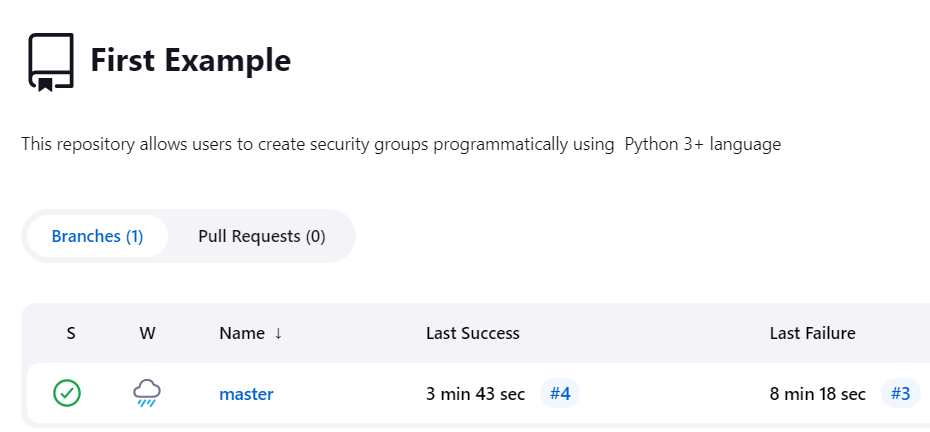
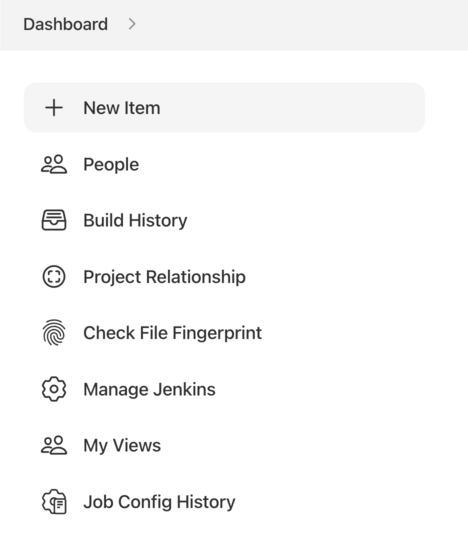
Image Source: Jenkins
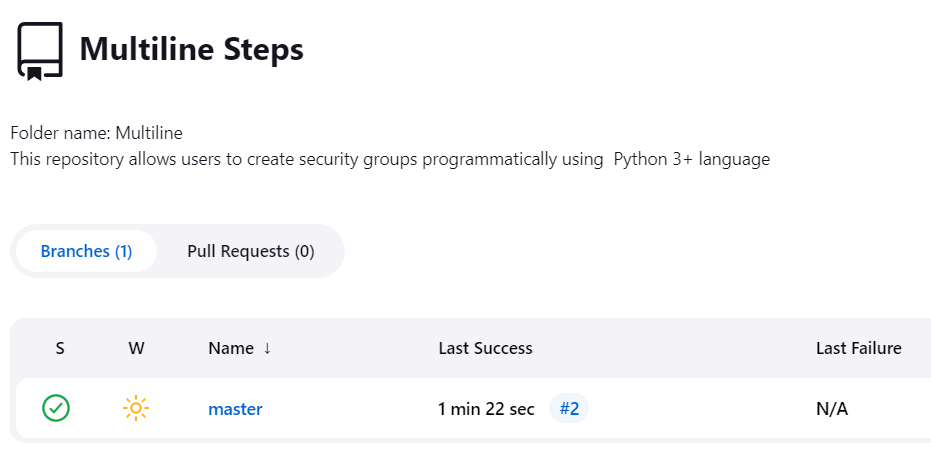
- Specify the name of the new item and choose the Multibranch Pipeline option.
- Click on Add Source and select your preferred repository type. Enter the relevant details.
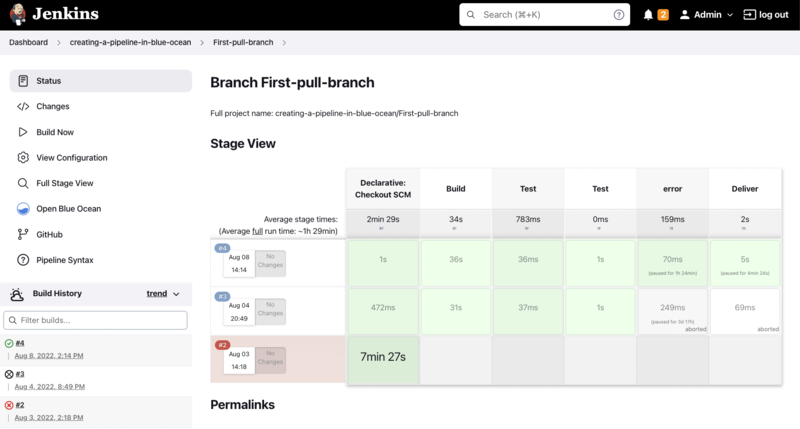
- Select Save and see the first Jenkins pipeline run.
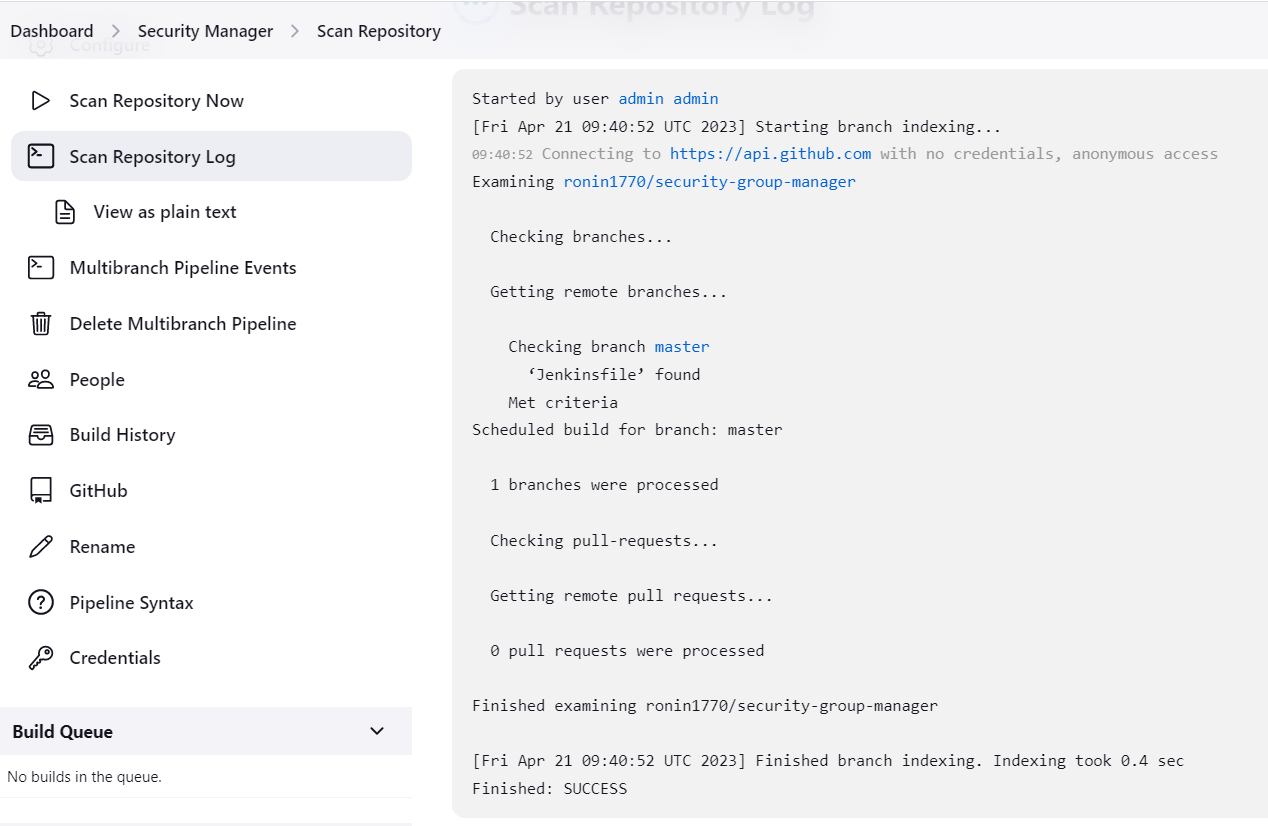
You might need to modify your Jenkinsfile to enable it to run with the project. For example, you can modify the shcommand to let it run the same command that would be run on a local machine. Once you’ve set up the pipeline, Jenkins will be able to automatically detect new pull requests and branches created in your source control repository. It will then run the pipelines for these.
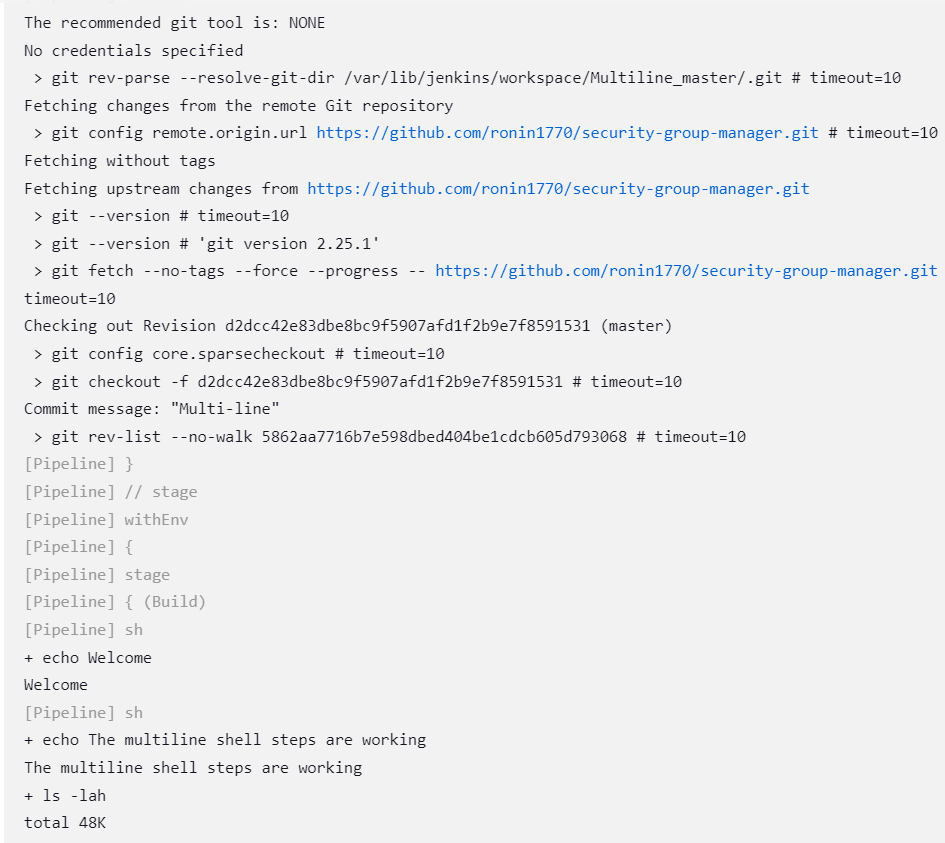
Step 3: Running a Pipeline with Multiple Steps
A typical pipeline has multiple steps involving the building, testing, and deployment of applications. With Jenkins Pipeline, you can define multiple steps in a simple way to help model various, more complex automation processes.
A step in this context is a specific command that performs a given action. Upon the successful completion of each step, the pipeline will continue to the next one. If one step fails, the overall pipeline also fails.
You can use the sh step on Linux, Mac OS, and BSD systems to execute shell commands in the pipeline:
//Jenkinsfile (Declarative Pipeline)
pipeline {
    agent any
    stages {
        stage('Build') {
            steps {
                sh 'echo "Welcome"'
                sh '''
                    echo "The multiline shell steps are working"
                    ls -lah
                '''
            }
        }
    }
}

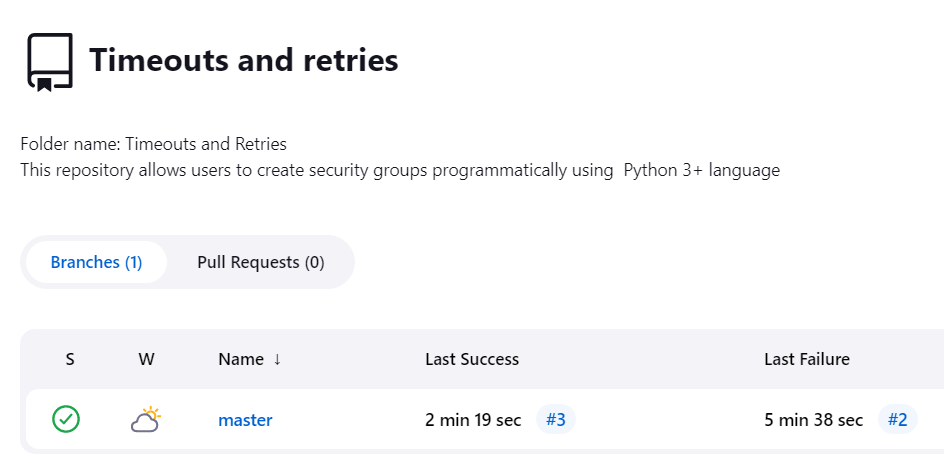
Step 4: Using Timeouts and Retries
Some steps can be used alongside other steps to make it easier to address issues such as retrying steps or timing out. A timeout step determines when Jenkins should exit an unsuccessfully retried step.
If a given step does not complete successfully within the specified time limit, the timeout prevents the controller from wasting further resources on attempting to run it. For example, you might allow the pipeline to retry a deployment step up to five times, and wait up to five minutes, before exiting:
//Jenkinsfile (Declarative Pipeline)
pipeline {
    agent any
    stages {
        stage('Deploy') {
            steps {
                retry(5) {
                    sh './flakey-deploy.sh'
                }

                timeout(time: 5, unit: 'MINUTES') {
                    sh './health-check.sh'
                }
            }
        }
    }
}
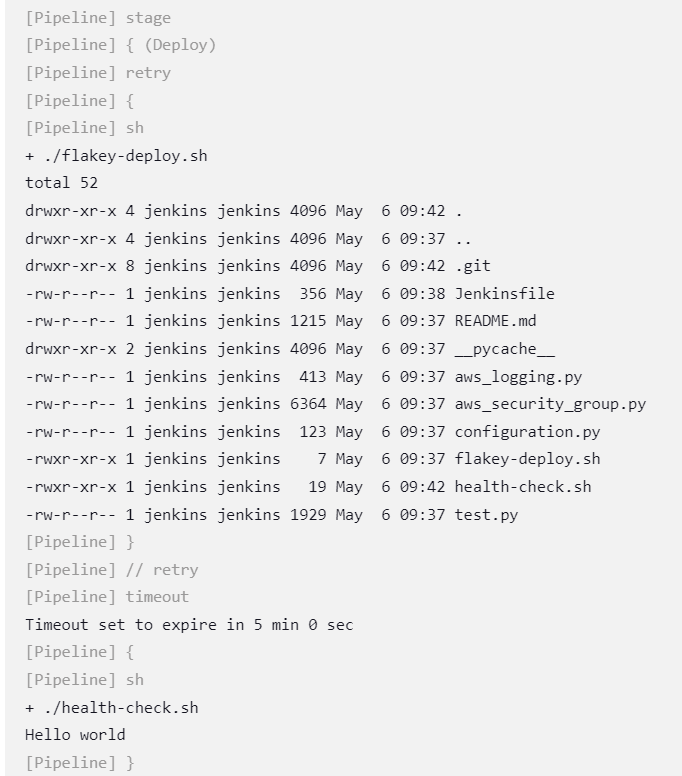
In this example, the flakey-deploy.shscript will be retried five times. If the health-check.shscript fails to execute within five minutes, Jenkins will mark the pipeline’s “Deploy” stage as failed. Retry and timeout steps are often used together.
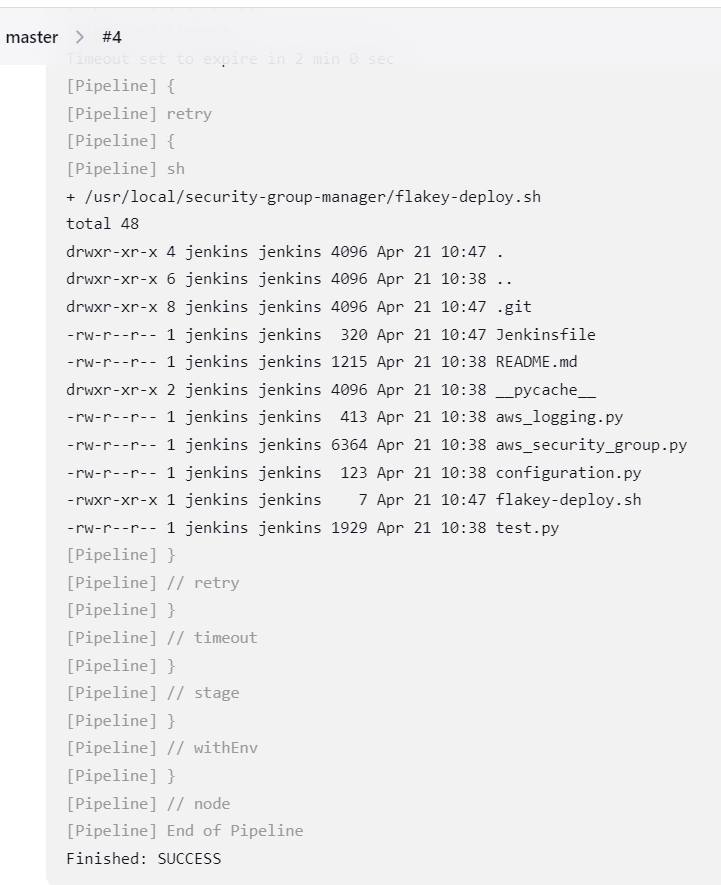
Here is an example of how to compose these wrapper steps to retry the deployment up to ten times, but without spending more than a total of two minutes before exiting the stage and marking it as failed:
Note: The code below assumes that your deployment folder is /usr/local/security-group-manager/and the script is flakey-deploy.sh. Ensure you provide the full path.
//Jenkinsfile (Declarative Pipeline)
pipeline {
    agent any
    stages {
        stage('Deploy') {
            steps {
                timeout(time: 2, unit: 'MINUTES') {
                    retry(10) {
                        sh '/usr/local/security-group-manager/flakey-deploy.sh'
                    }
                }
            }
        }
    }
}
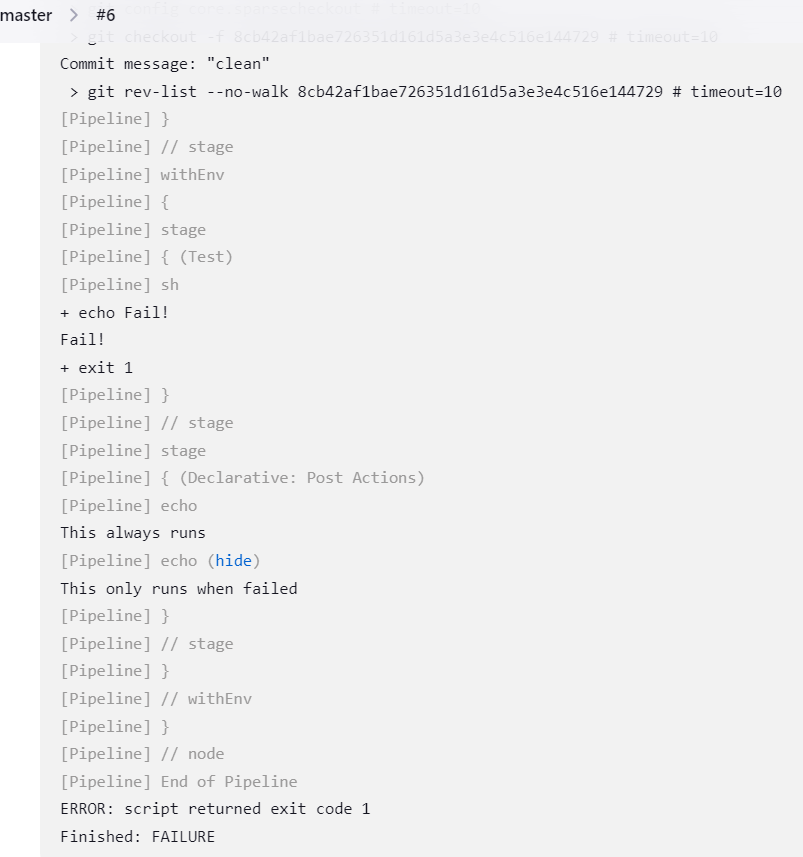
Step 5: Cleaning Up the Pipeline
Once your pipeline has finished running, you might want to execute steps to clean it up. You can carry out these actions from the postsection:
//Jenkinsfile (Declarative Pipeline)
pipeline {
    agent any
    stages {
        stage('Test') {
            steps {
                sh 'echo "Fail!"; exit 1'
            }
        }
    }
    post {
        always {
            echo 'This always runs'
        }
        success {
            echo 'This only runs when successful'
        }
        failure {
            echo 'This only runs when failed'
        }
        unstable {
            echo 'This only runs when marked unstable'
        }
        changed {
            echo 'This only runs when the Pipeline’s state changes'
        }
    }
}

What Is Jenkins X?
Jenkins X is a CI/CD solution that continuously ships applications with Kubernetes. Jenkins X emphasizes CI/CD automation for the cloud.
Jenkins X combines Jenkins with open source tools like Helm, Docker, Nexus, and KSync. It automatically installs, configures, and upgrades these tools to integrate them into your CI/CD process.
Jenkins X offers feedback for all pull requests, providing previews before pushing code changes to the staging and production environments. It helps you incorporate authentication and reliability early on, preventing post-deployment surprises. You leverage a higher degree of automation to enable frequent, secure, and predictable software releases.
Jenkins X is useful regardless of your familiarity with Kubernetes, providing a CI/CD process to facilitate cloud migration. It supports bootstrapping onto your chosen cloud, which is crucial for a hybrid setup.
However, Jenkins X also has the following drawbacks:
- A primary drawback of Jenkins X is that the project went through rapid change, which makes it difficult to adopt by new users and challenging to maintain for existing users.
- It only deploys via Helm, so you need to adopt Helm if you haven’t.
- It requires trunk-based development.
- It lacks its own UI (it relies on the limited Jenkins UI), so you need to use the command line for new constructs.
- Scales by adding builders to its Kubernetes cluster and automatically connecting Jenkins Slaves to the Master.
- You can implement a serverless installation without a Master, which consumes excessive resources.
Codefresh: A Modern Alternative to Jenkins
You can’t get to continuous delivery or deployment without first solving continuous integration. Codefresh automatically creates a Delivery Pipeline, which is a workflow along with the events that trigger it. We’ve added a pipeline creation wizard that will create all the component configurations so you can spend less time with YAML and more time getting work done.
At the end of the pipeline creation wizard, Codefresh commits the configuration to git and allows its built-in Argo CD instance to deploy them to Kubernetes.
The Delivery pipeline model also allows the creation of a single reusable pipeline that lets DevOps teams build once and use everywhere. Each step in a workflow operates in its own container and pod. This allows pipelines to take advantage of the distributed architecture of Kubernetes to easily scale both on the number of running workflows and within each workflow itself.
Teams that adopt Codefresh deploy more often, with greater confidence, and are able to resolve issues in production much more quickly. This is because we unlock the full potential of Argo to create a single cohesive software supply chain. For users of traditional CI/CD tooling, the fresh approach to software delivery is dramatically easier to adopt, more scalable, and much easier to manage with the unique hybrid model.
Learn more about Codefresh.
See Additional Guides on Key DevOps Topics
Together with our content partners, we have authored in-depth guides on several other topics that can also be useful as you explore the world of DevOps.
Authored by Codefresh
Authored by Codefresh