We’ve had many customers ask us for micro-service applications that they can deploy with HELM to Kubernetes, so we’ve created a demo app that you can access yourself.
This walk How-To is meant to walk you through configuring Codefresh pipelines to build and deploy Docker’s Example Voting App as a Helm Release to your Kubernetes cluster.
Spoiler alert, it’s gonna be a long article. To follow along, please create a free Codefresh account by adding one of your repos, and start building, testing and deploying Docker images instantly.
This is Part 1 of an ongoing series of How-Tos on our way to the Perfect Pipeline*.
What we will accomplish:
- Connecting your Kubernetes cluster to Codefresh
- Setting up your Kubernetes cluster for private Docker registry
- Creating a Codefresh Matrix Pipeline to build result, vote and worker Docker images in Parallel and push them to a private Docker registry.
- Adding a build step to deploy the Voting App Helm chart as a Helm Release to your Kubernetes cluster that pulls Docker images for the (3)** micro-services from your private Docker registry.
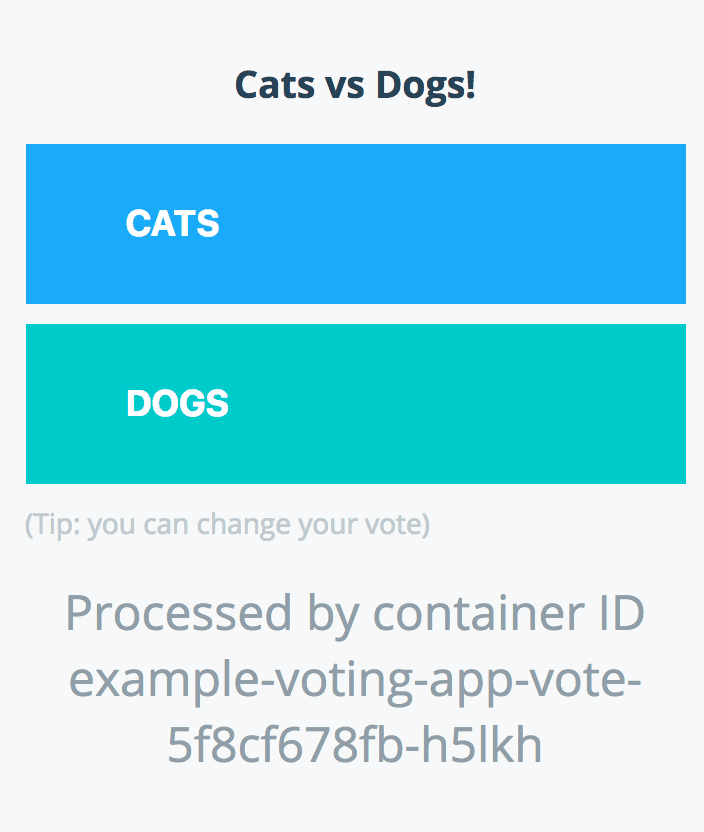
Some of you might have already seen Docker’s Example Voting App. Maybe, even deployed it yourself locally using docker-compose.
If you haven’t, see screen shots below that detail the architecture and the web pages.

For Codefresh’s take on Docker’s Example Voting App we’ve added the following:
- codefresh.yml files for the code defined build definitions for each micro-services and for the matrix pipeline.
- Helm chart for the entire application known as a chart of charts that relies on (3)** charts for each micro-service and community Postgres and Redis charts.
- We had to make a couple minor changes to the code to support authentication with Postgres.
Now let’s dig in and configure this!
First if you are on the Free Tier you won’t be able to execute the matrix pipeline to take advantage of the parallel builds. The setup is the same but instead of executing the matrix build to build and deploy you will execute each micro-service pipeline 1 by 1 and you’ll need to remove the BuildMicroServices build step from your codefresh-matrix-pipeline.yml then you can run the matrix pipeline to perform a Helm release.
If you are interested in a PoC with access to additional concurrent builds to try this using parallel pipelines please reach out to our Sales team.
Creating Codefresh pipelines
PreReqs:
Links to some popular Kubernetes options
- Amazon KOPs Codefresh KOPs Tutorial
- Amazon EKS (Preview)
- Azure Container Service (Moving to AKS)
- Azure Kubernetes Service (Preview) Codefresh Azure AKS Webinar
- Google Kubernetes Engine GKE Codefresh GKE Tutorial
- IBM Cloud Container Service
- Stackpoint Cloud
Fork the repository below:
- Github Repository
https://github.com/codefresh-io/example-voting-app
Either Fork or copy this repositories content to your Github Account or a GIT repository in another Version Control System.
Change branch to how-to-helm-deploy <- this branch contains only helm deploy nothing else. If you choose to use master there will be more and more added to that branch as work progresses on the Perfect Pipeline*.
Attach Kubernetes Cluster to Codefresh
You’ll need to configure your Kubernetes cluster in Codefresh. See link above.
Setup Docker Registry Pull Secret in Kubernetes
If you’d like to add your own Docker Registry click the link below for instructions.
If you want to use your Codefresh Integrated Docker Registry click the link below.
Example commands below use cfcr (Codefresh Integrated Registry). Update if you decide to use your own Docker Registry.
Click the link below for additional information on Kubernetes Pull Secrets.
Command to create Pull Secret
- Replace kubernetes_namespace with name for your Kubernetes namespace ex. default
- Replace secret_name with name given to secret ex. cfcr
- Replace docker_server with name for Docker Registry server ex. r.cfcr.io
- Replace docker_username with your Docker Registry Username for this example. Codefresh Username ex. dustinvanbuskirk
- Replace docker_password with your Docker Registry Password for this example. Codefresh Registry Token ex. 56f7c362746f1f6fdf261803875a1571
- Replace service_account_name with name for your Kubernetes Service Account ex. default
kubectl create secret docker-registry -n kubenetes_namespace secret_name --docker-server=docker_server --docker-username=docker_username --docker-password=docker_password --docker-email=docker_email
Command to patch Service Account with Pull Secret
kubectl patch serviceaccount service_account_name -p "{"imagePullSecrets": [{"name": "cfcr"}]}" -n kubernetes_namespace
Create Codefresh CLI Key
- Create API key in Codefresh
- Click GENERATE button.
- Copy key to safe location for later use in
CODEFRESH_CLI_KEYvariable.
Update YAML files
If you decided not use cfcr as your Docker Registry then you can skip this step.
Edit the Codefresh YAML in ./result, ./vote and ./worker directories with your friendly Docker registry name for registry in YAML.
Create Codefresh pipelines
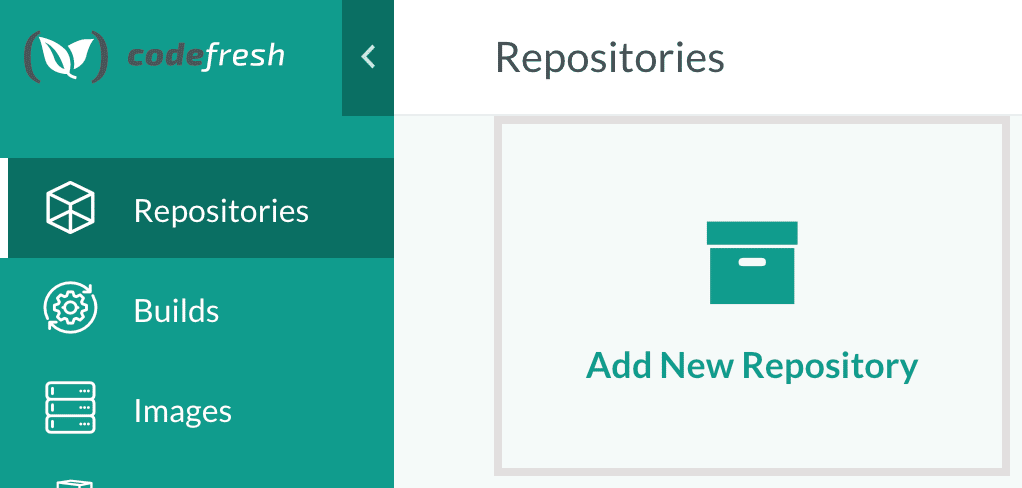
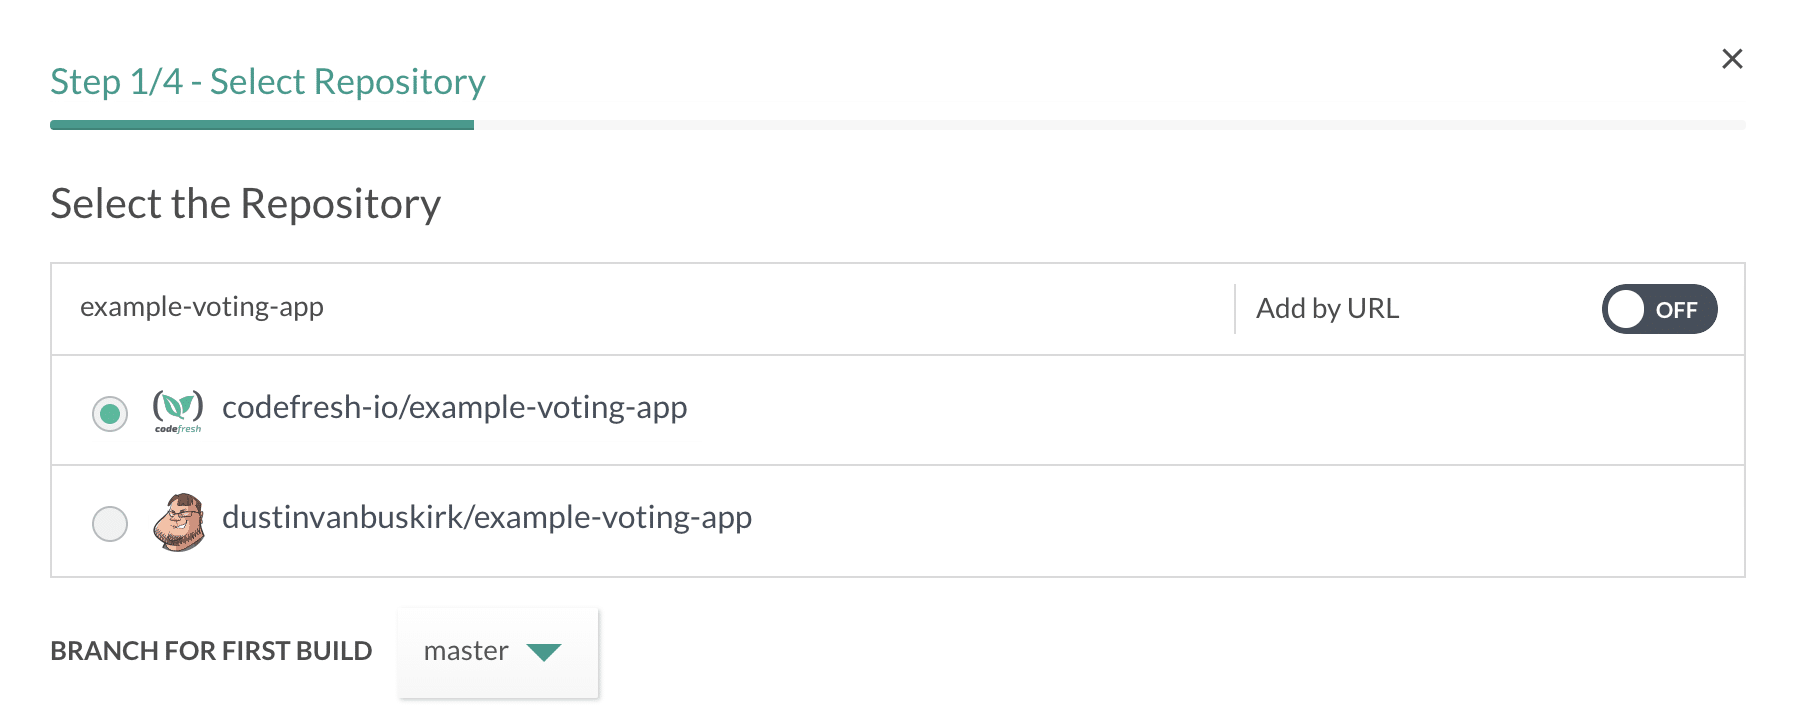
In Codefresh add a new Repository and select example-voting-app
- Click Add New Repository button from Repositories screen.

- Select the example-voting-app repository you forked or clone to your VCS/Organization. (master branch if fine) Then click NEXT button.

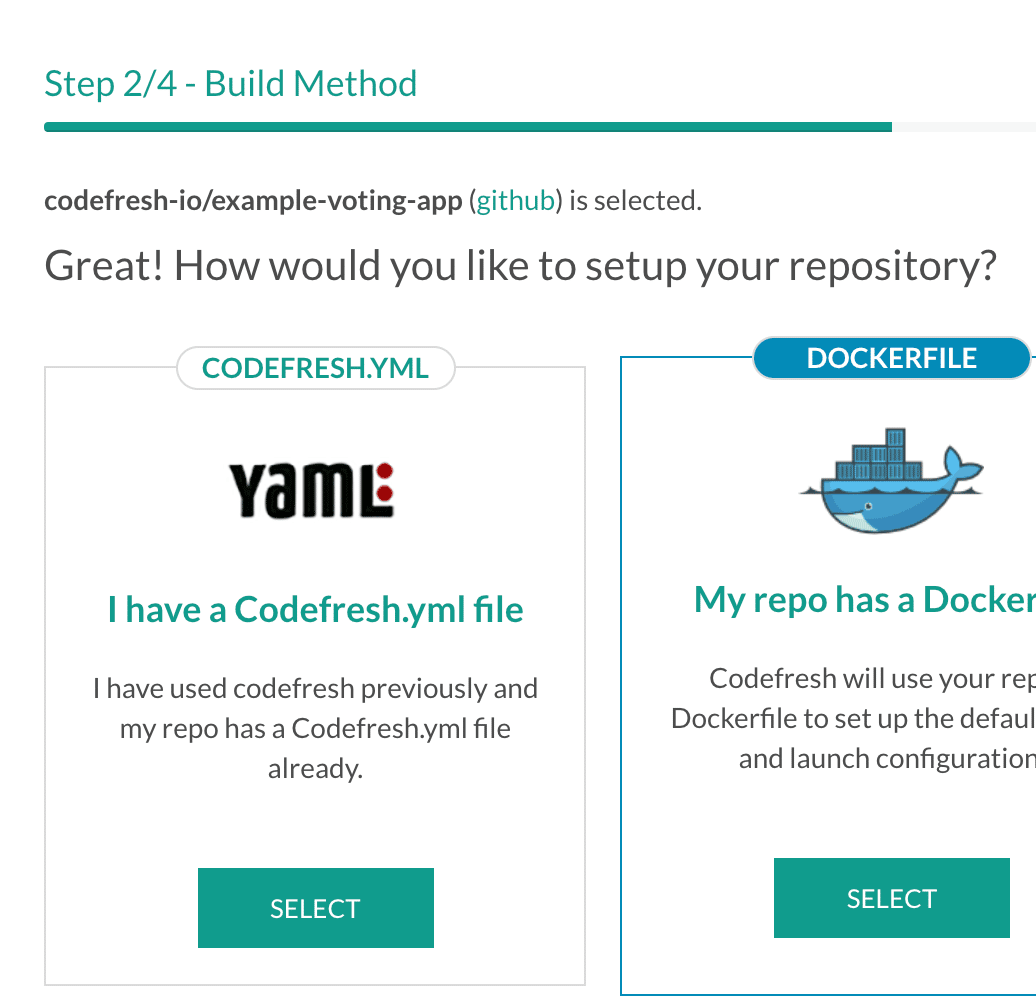
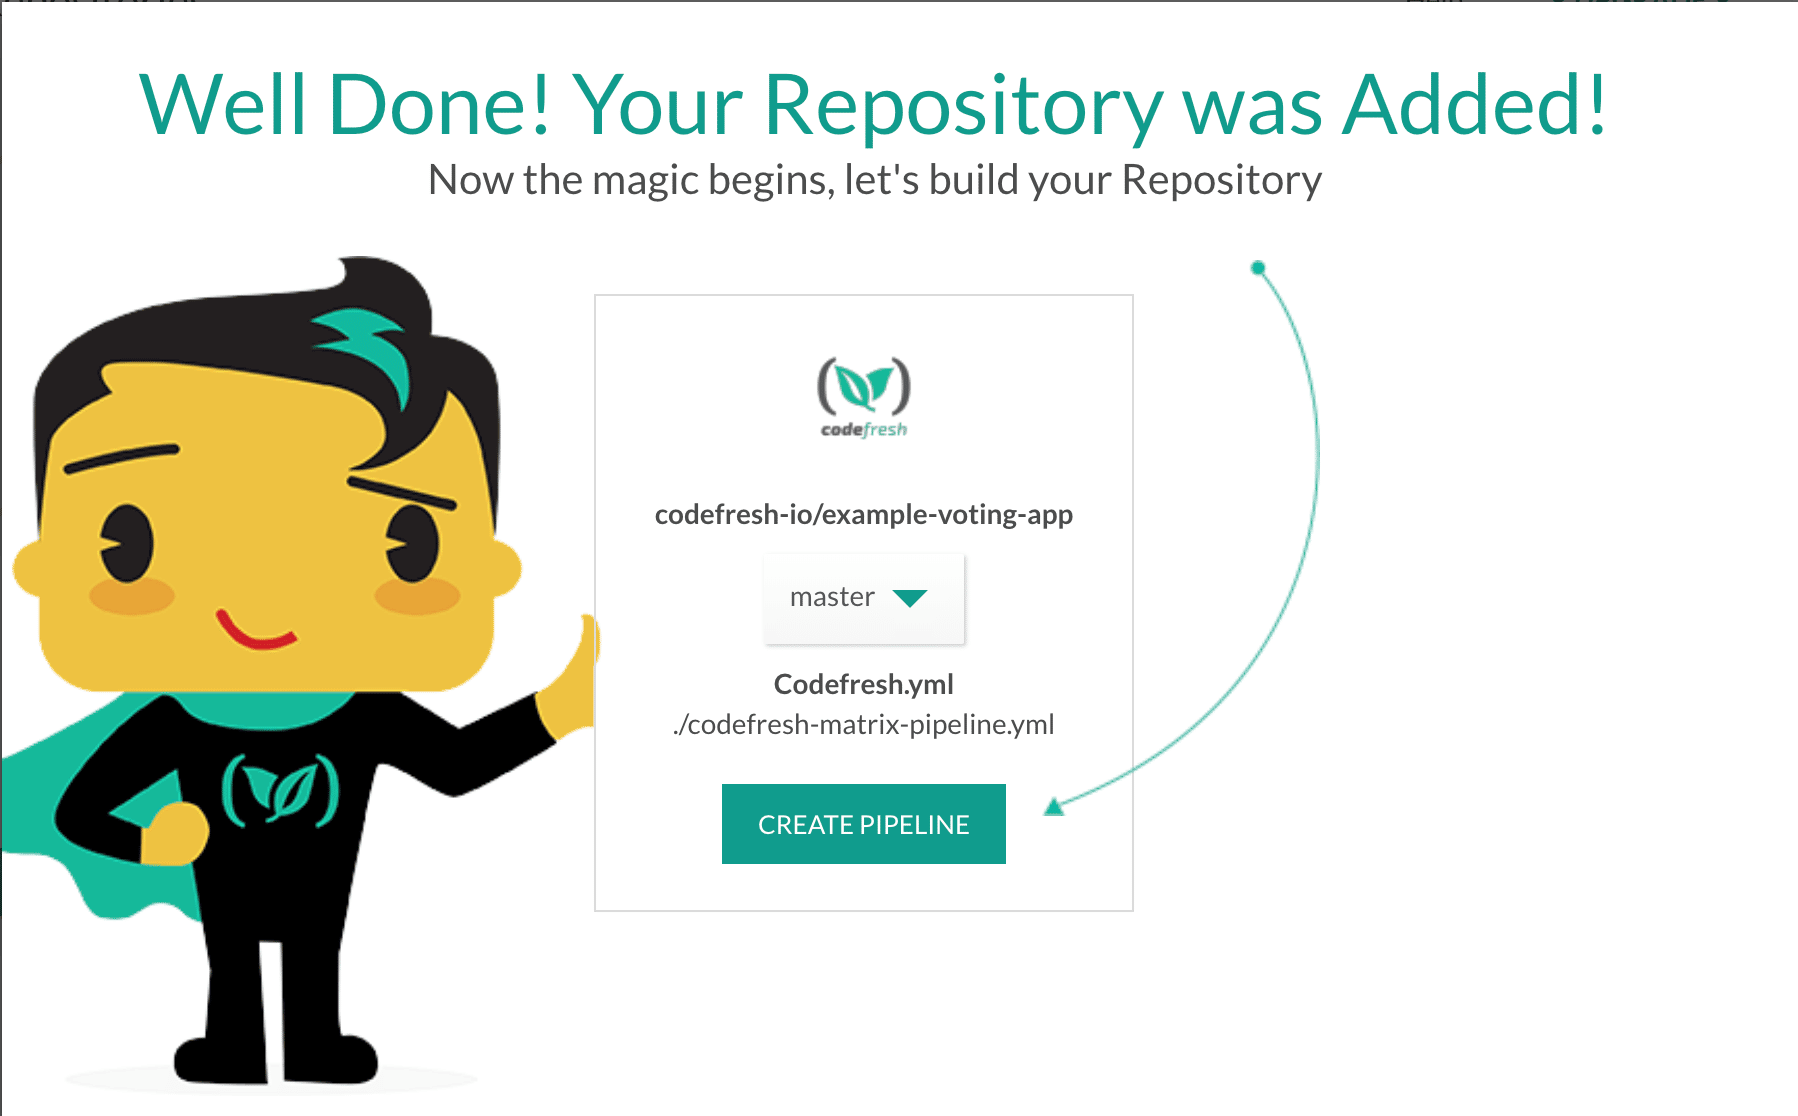
- Click SELECT for CODEFRESH.YML option.

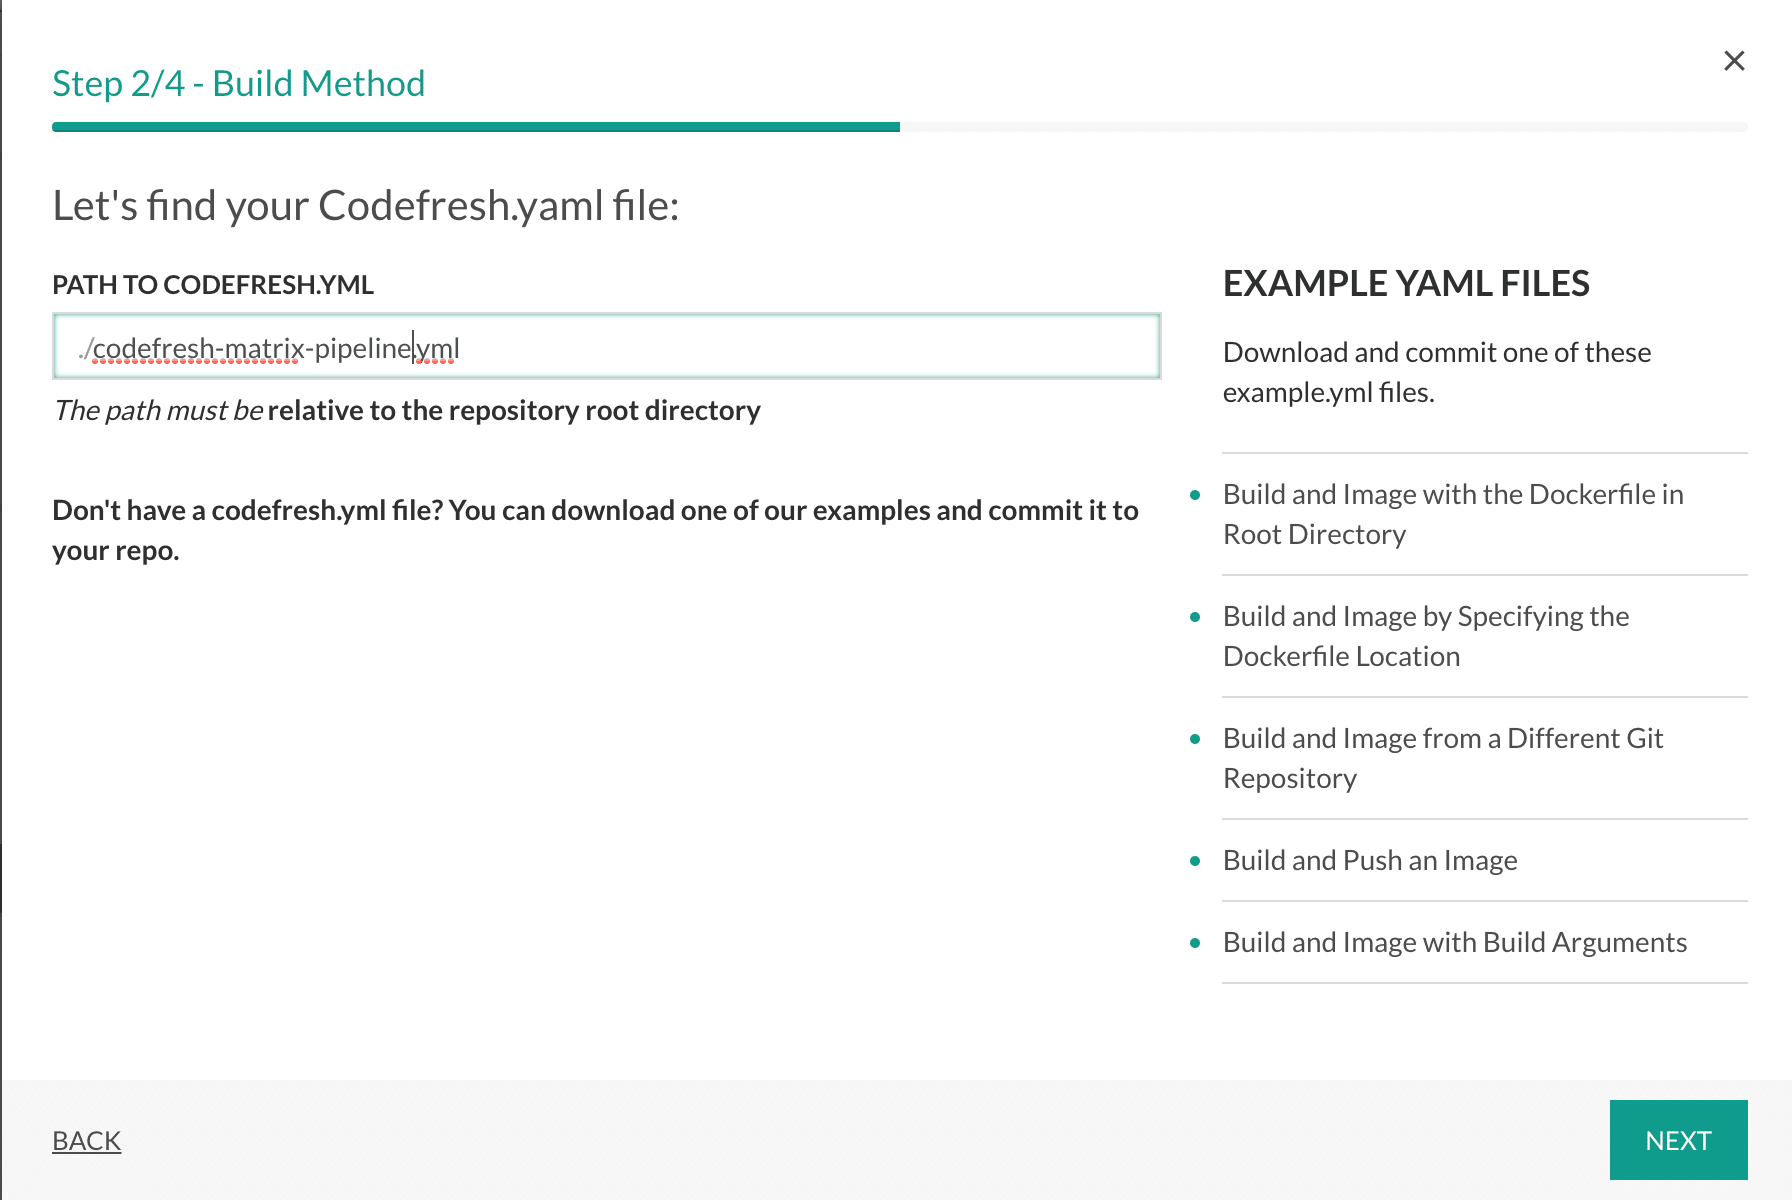
- Update PATH TO CODEFRESH.YML with
./codefresh-matrix-pipeline.yml. Then click NEXT button.

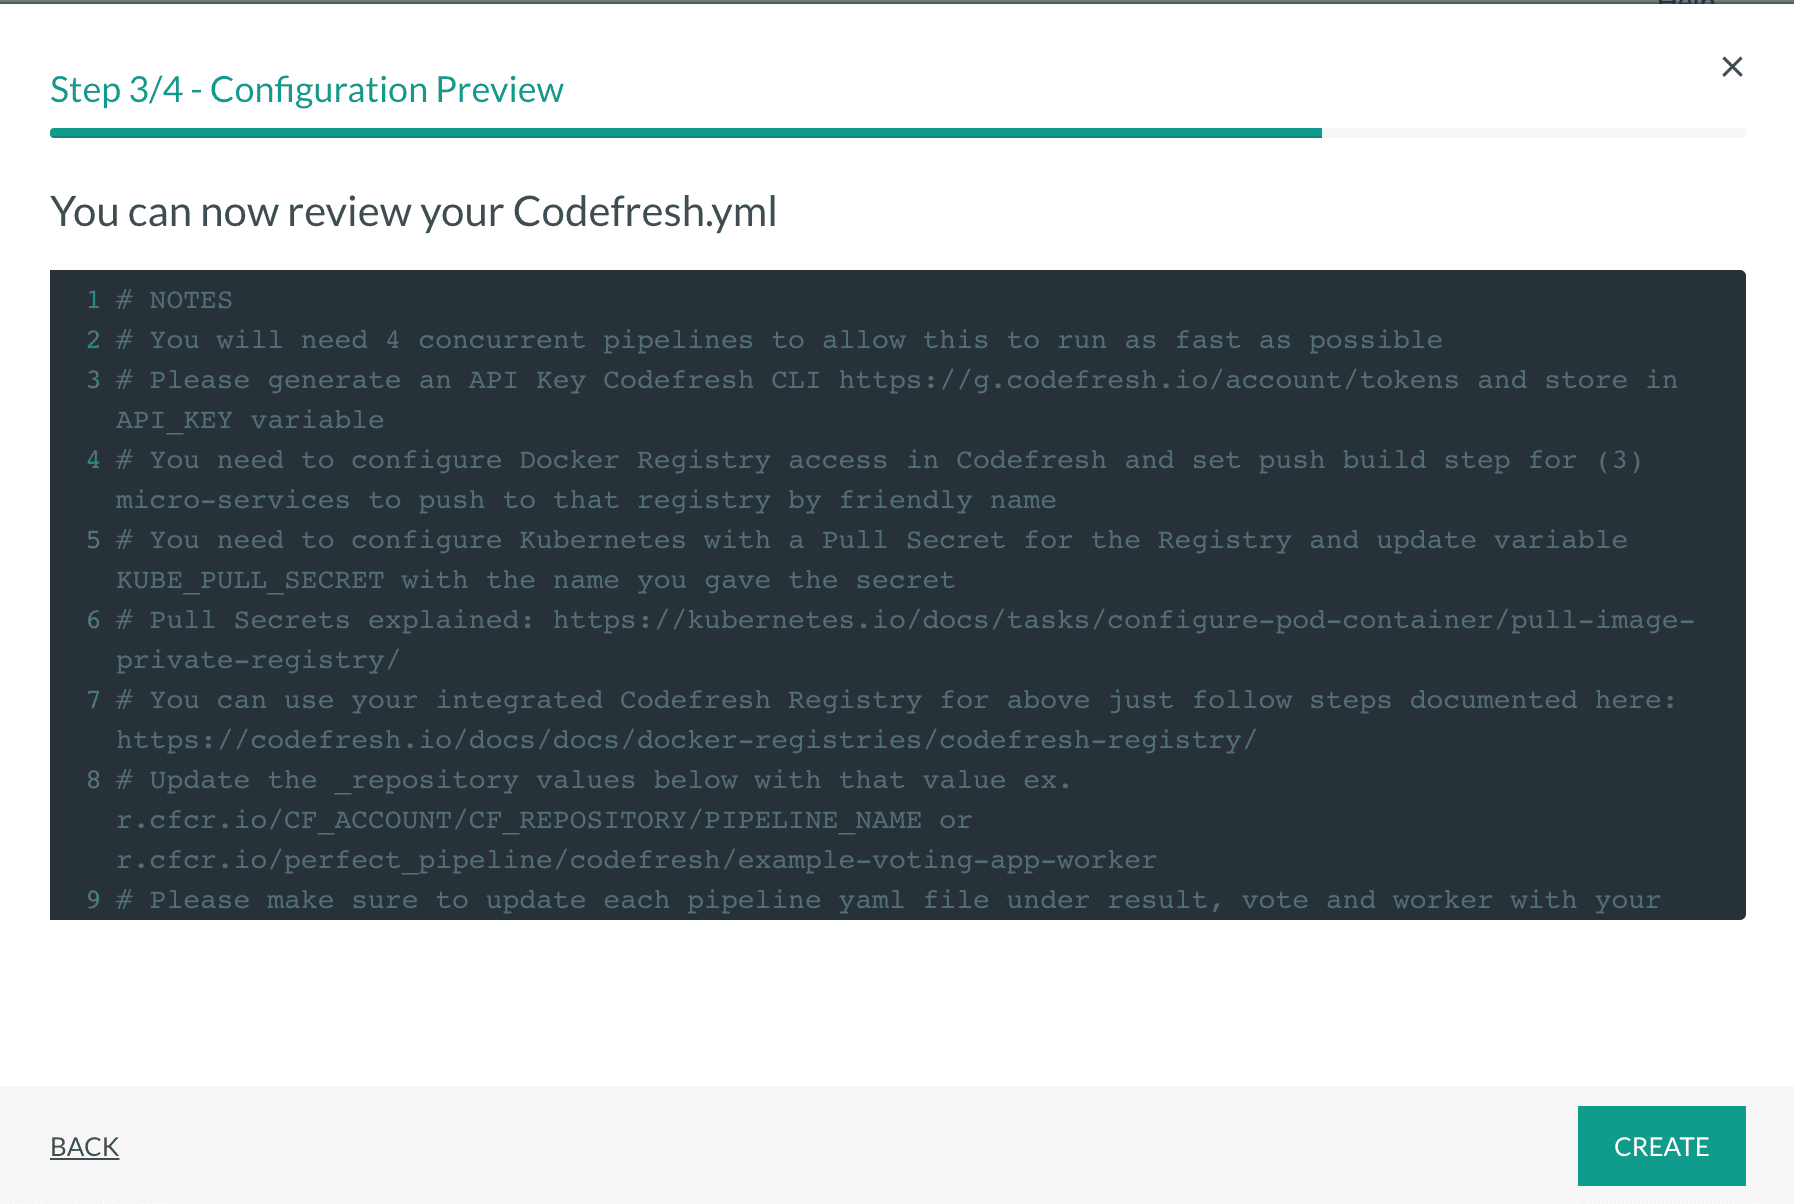
- Review Codefresh YAML. Then click CREATE button.

- Click CREATE_PIPELINE button.

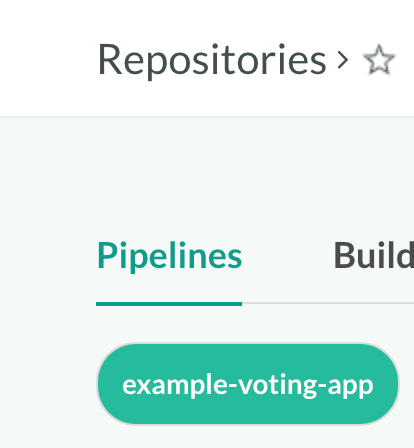
You’ll arrive at the example-voting-app pipeline.
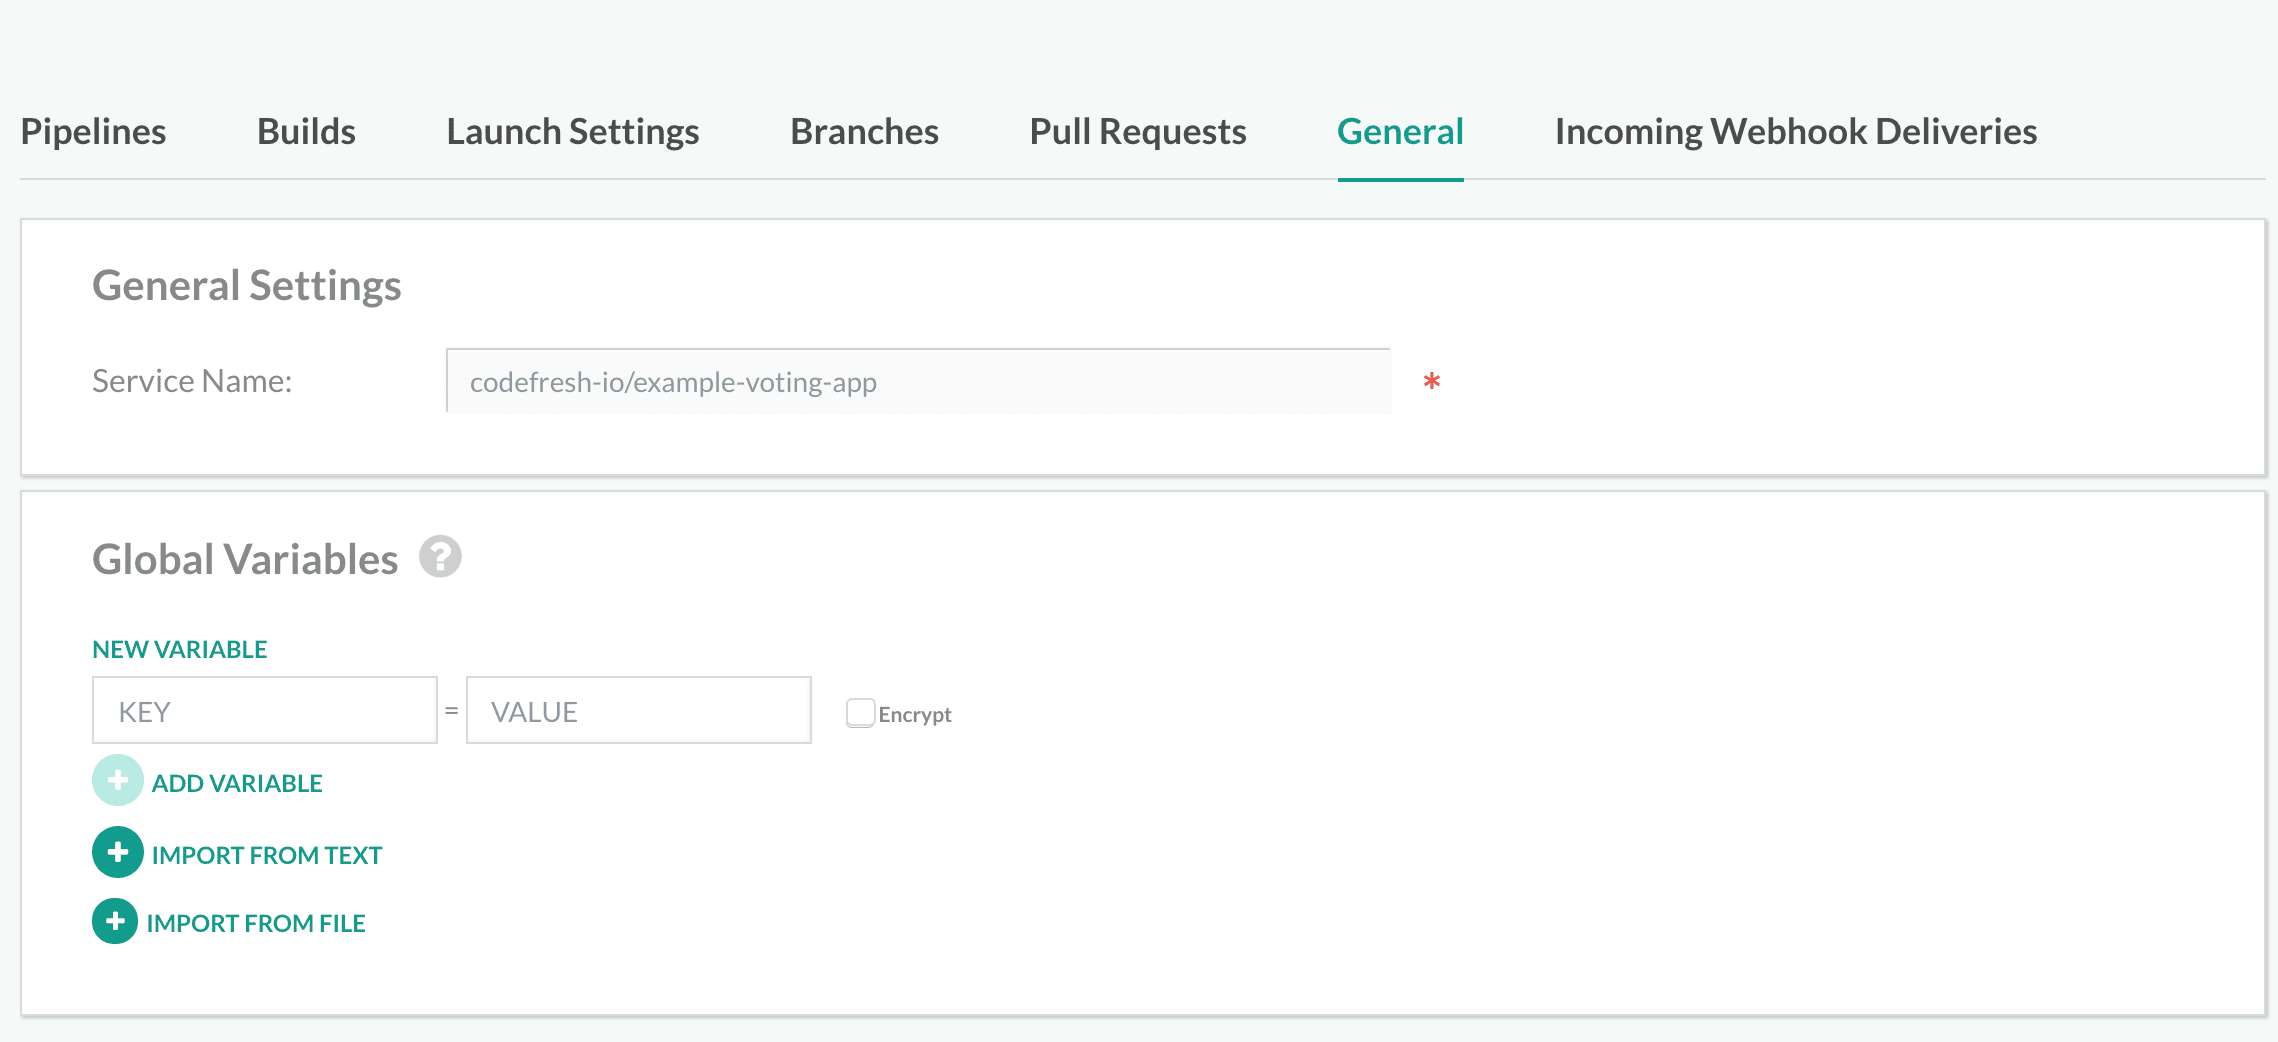
Now we need to configure some Environment Variables for the Repository.
- Click on General tab in the
example-voting-appRepository page.

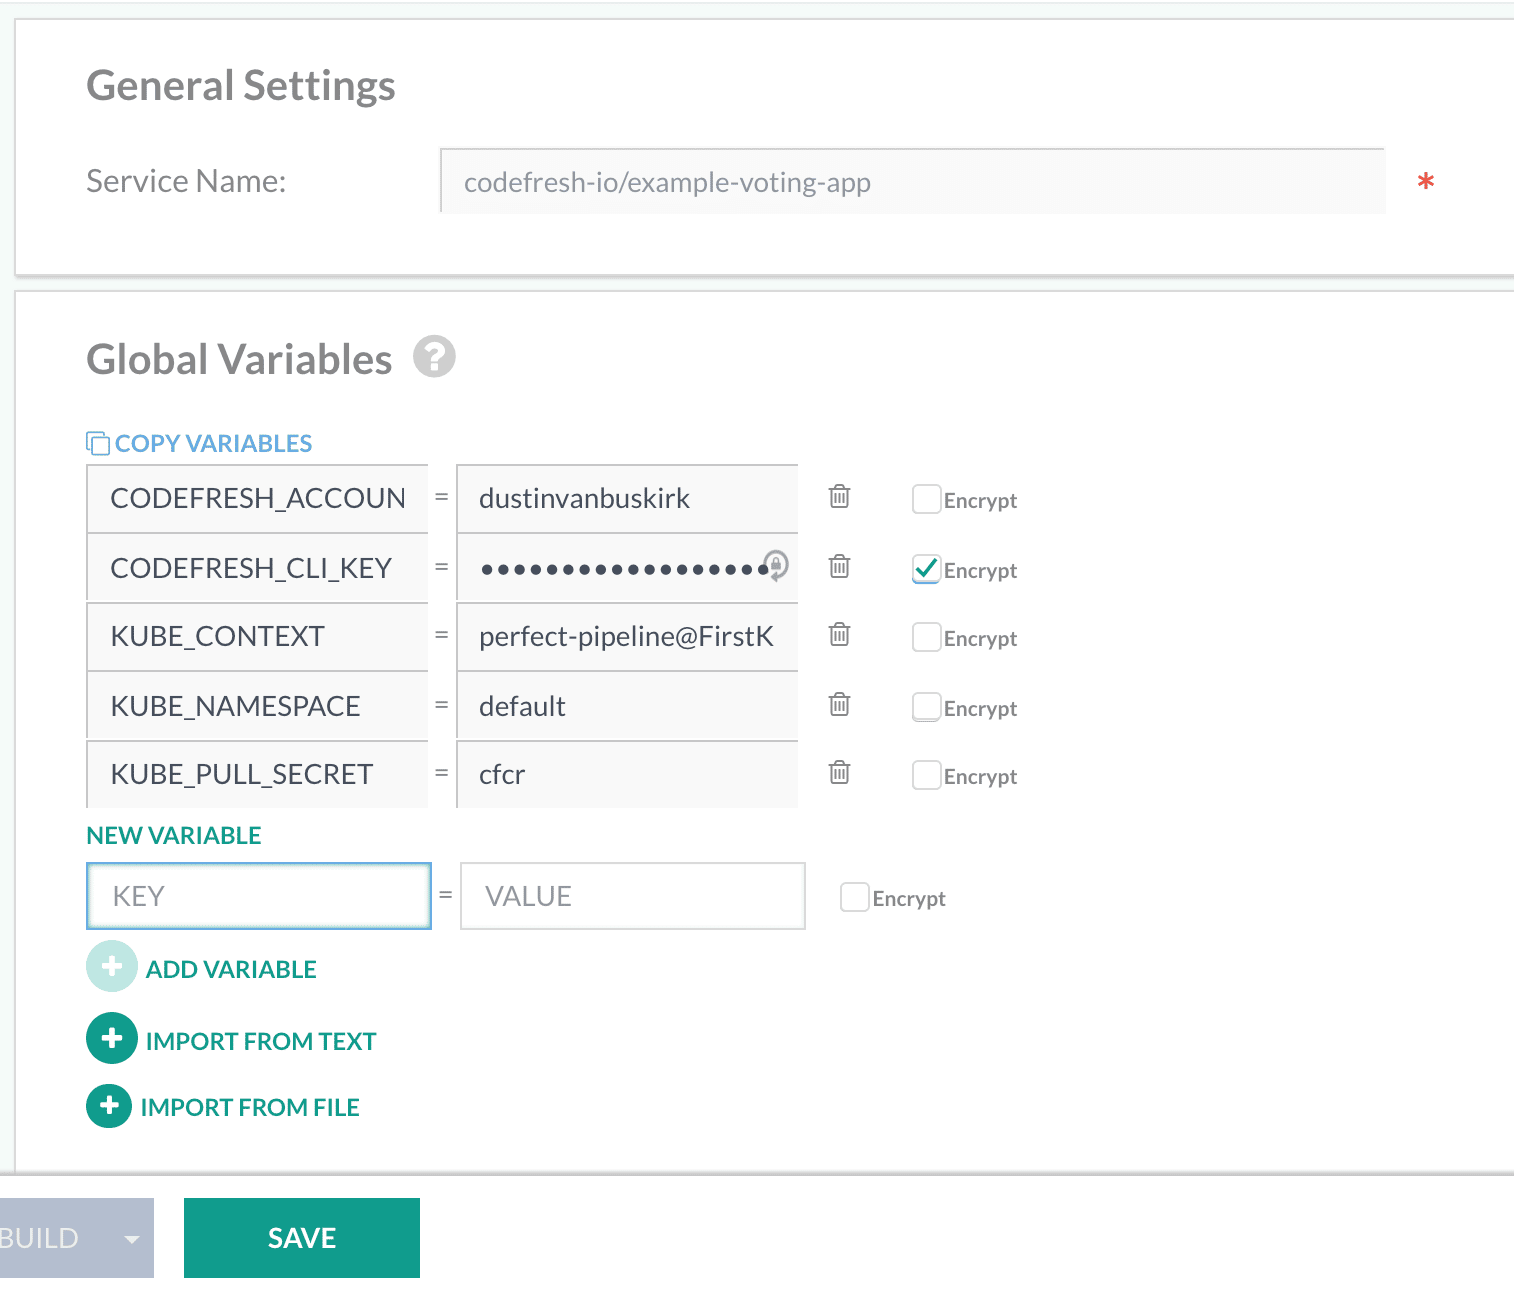
- Add the following variables below. (Encrypt the sensitive variables). Click ADD VARIABLE link after every variable to add.
CODEFRESH_ACCOUNTYour Codefresh Account Name (shown in lower left of Codefresh UI). If you chose to use CFCRCODEFRESH_CLI_KEYYour Codefresh CLI Key ENCRYPT.KUBE_CONTEXTYour friendly Kubernetes Cluster Name to use for release.KUBE_NAMESPACEKubernetes namespace to use for release.KUBE_PULL_SECRETKubernetes Pull Secret name.

The matrix pipeline is already configured and named after your GIT repository example-voting-app.
We need to setup the following (3)** pipelines.
From Pipelines page of example-voting-app repository.
1. Click ADD PIPELINE (do this 3 times)
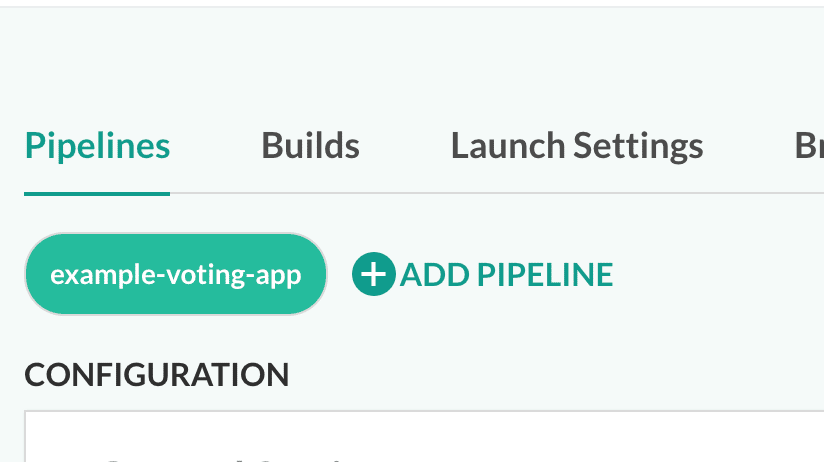
See screen shots below outlining steps.
2. Name example-voting-app1 to example-voting-app-result; Set WORKFLOW to YAML, Set Use YAML from Repository; Edit PATH_TO_YAML ./result/codefresh-result-pipeline.yml; Click SAVE button at bottom of page.
3. Name example-voting-app2 to example-voting-app-vote; Set WORKFLOW to YAML, Set Use YAML from Repository; Edit PATH_TO_YAML ./vote/codefresh-vote-pipeline.yml; Click SAVE button at bottom of page.
4. Name example-voting-app3 to example-voting-app-worker; Set WORKFLOW to YAML, Set Use YAML from Repository; Edit PATH_TO_YAML ./worker/codefresh-worker-pipeline.yml; Click SAVE button at bottom of page.


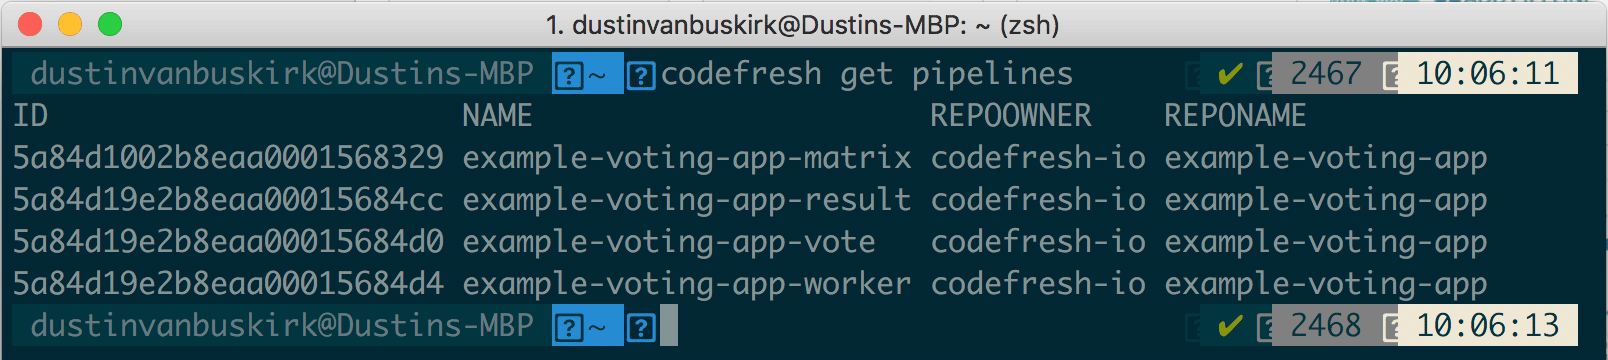
Now we need to get your Codefresh Pipeline IDs to setup parallel builds.
Two options:
* CLI
1. codefresh get pipelines
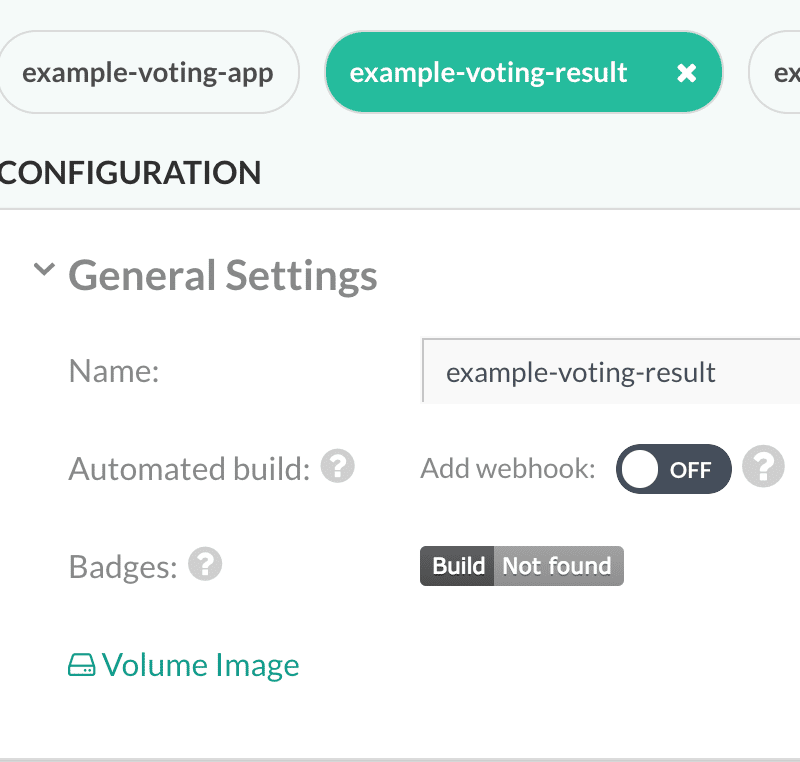
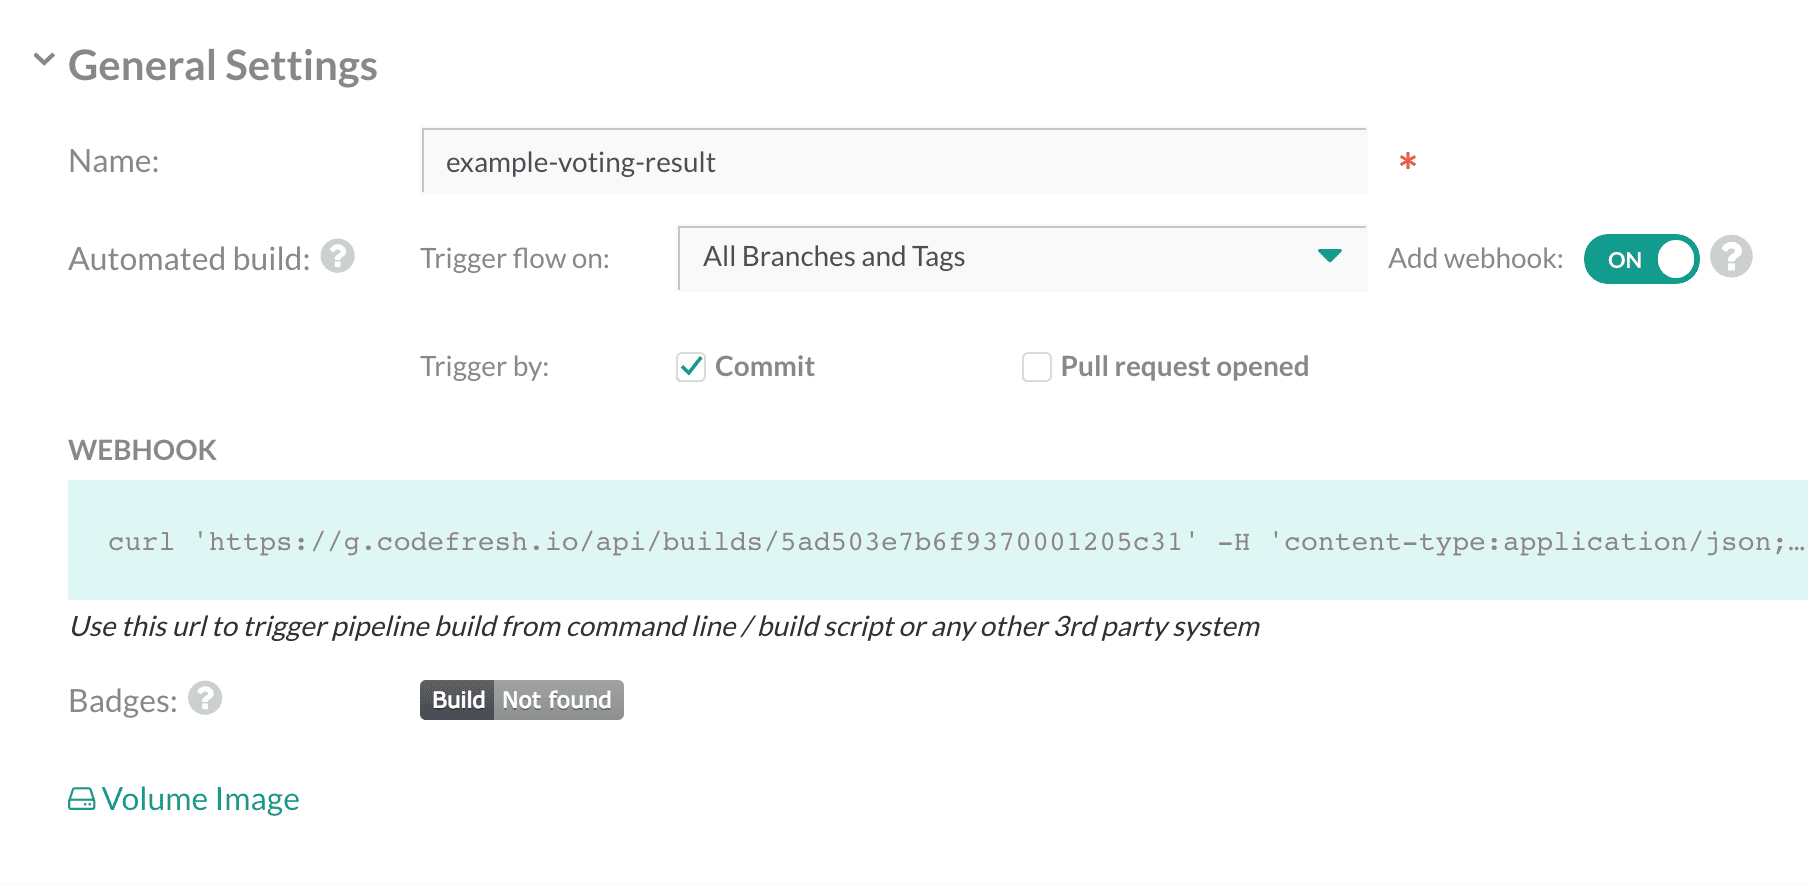
- UI
- Open Repository.
- Click on each pipeline.

- Expand General Settings.

- Temporary toggle on Webhook.
- Capture ID from the curl command shown.

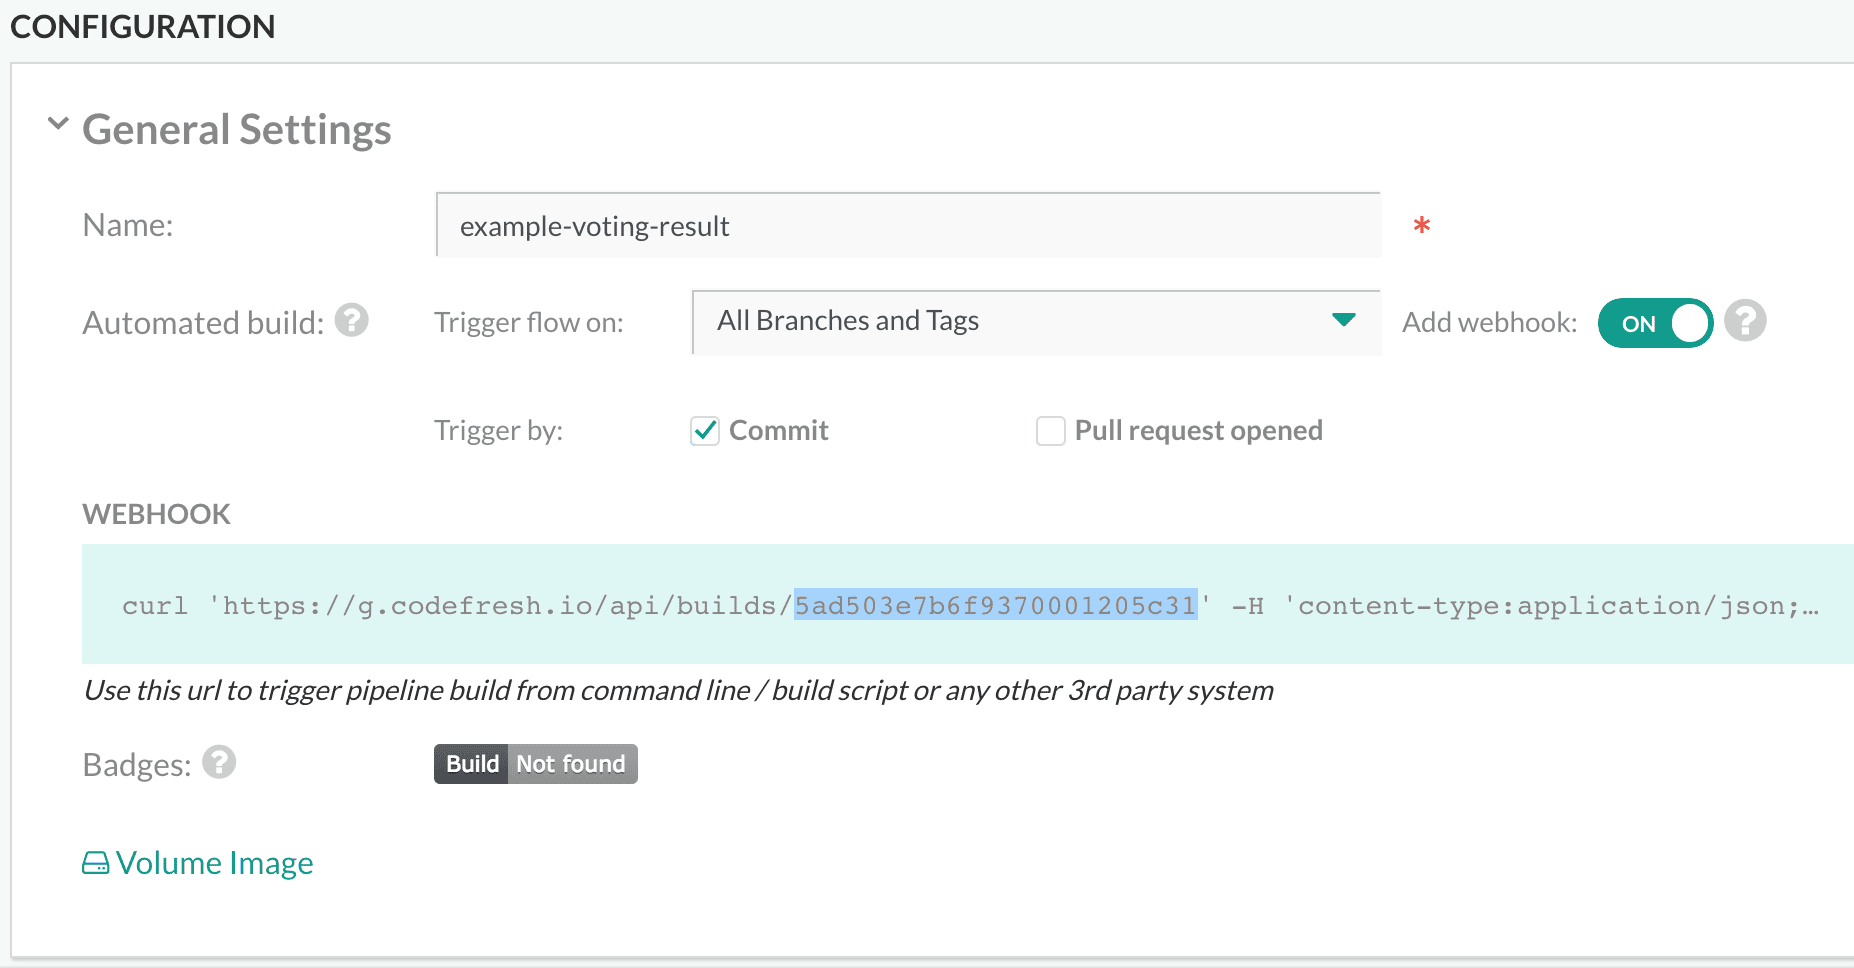
Record your Pipeline IDs
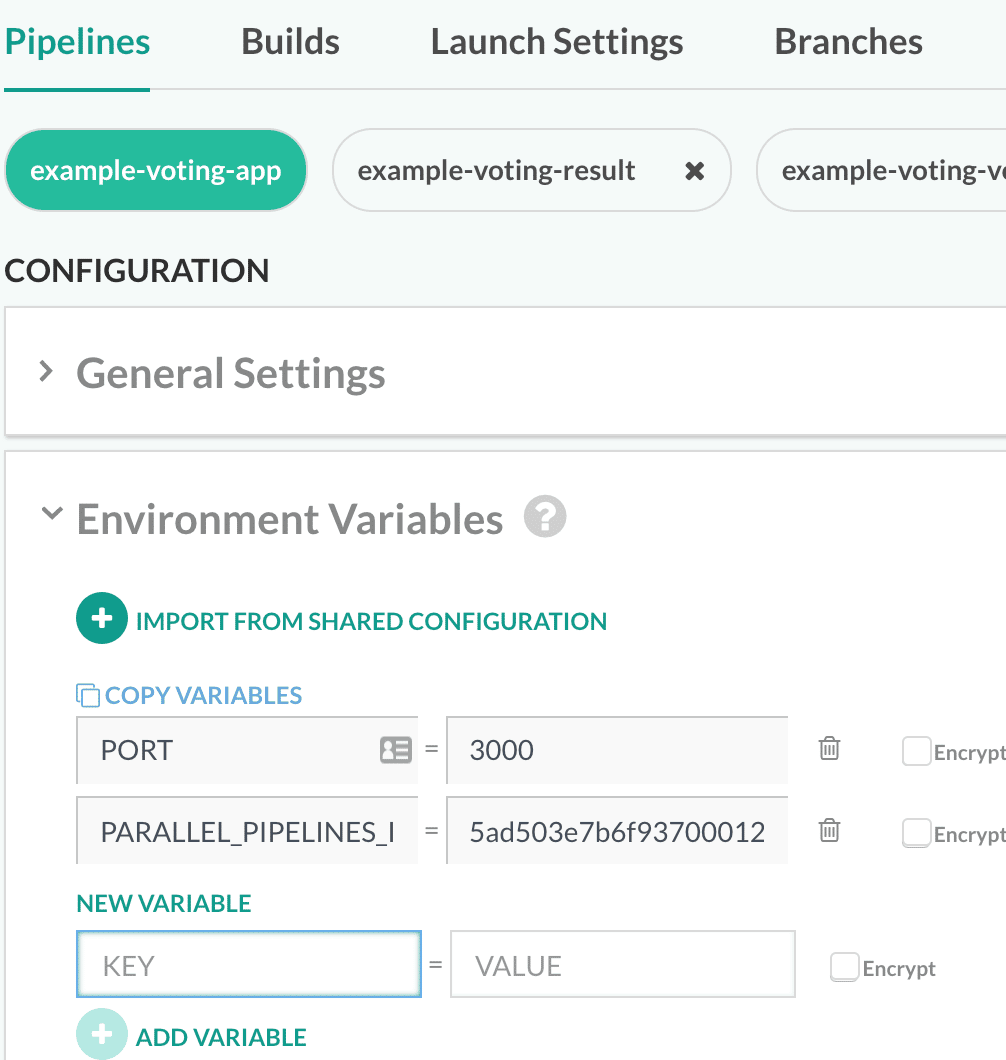
- Open your
example-voting-appCodefresh pipeline. - Add the following environment variable.
PARALLEL_PIPELINES_IDSwith space delimited Codefresh Pipeline IDs.

- Click ADD VARIABLE link below variable listing.
- Click SAVE button at bottom of page.
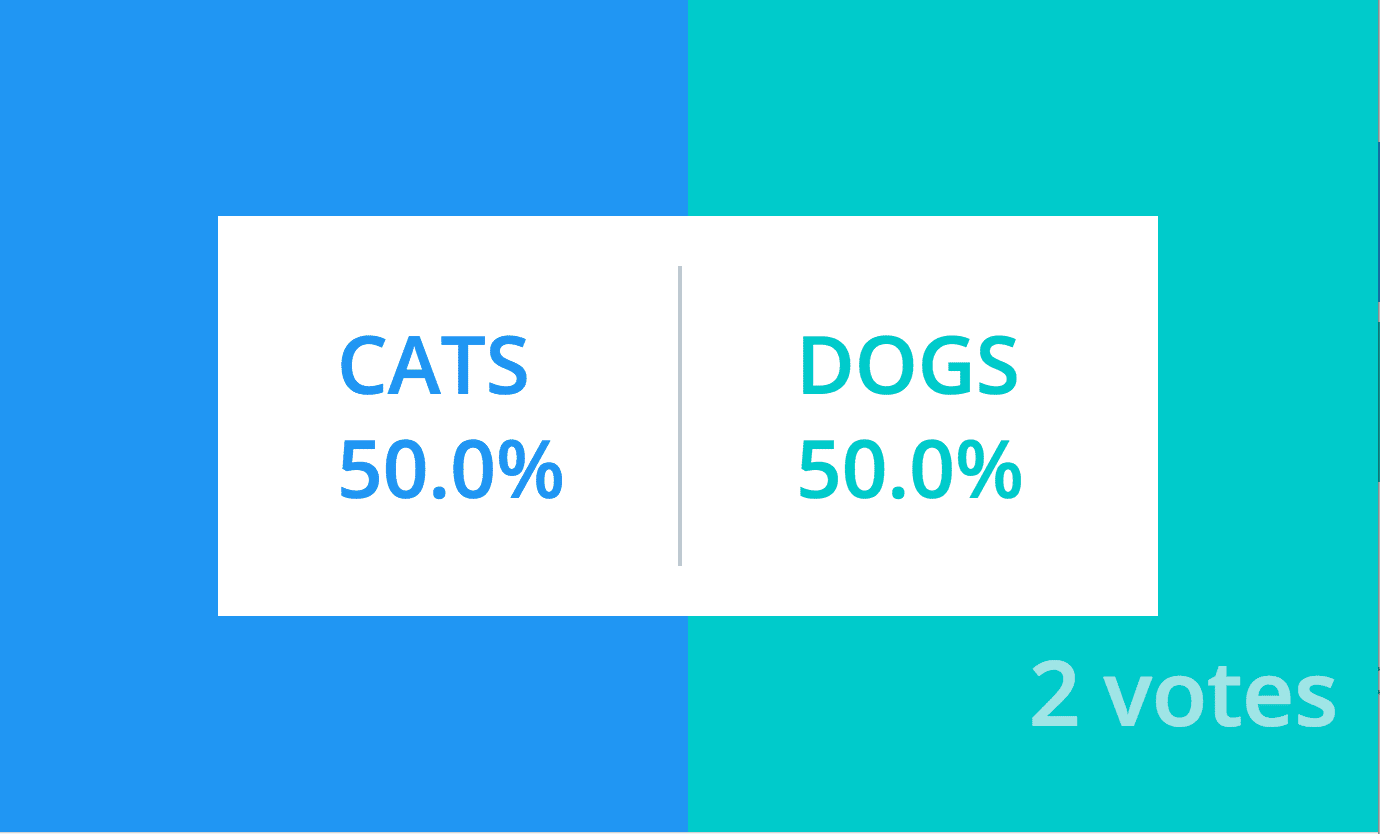
Now you can run your example-voting-app pipeline to produce a Helm Release.
When the build is finished you will see a new Helm Release for example-voting-app
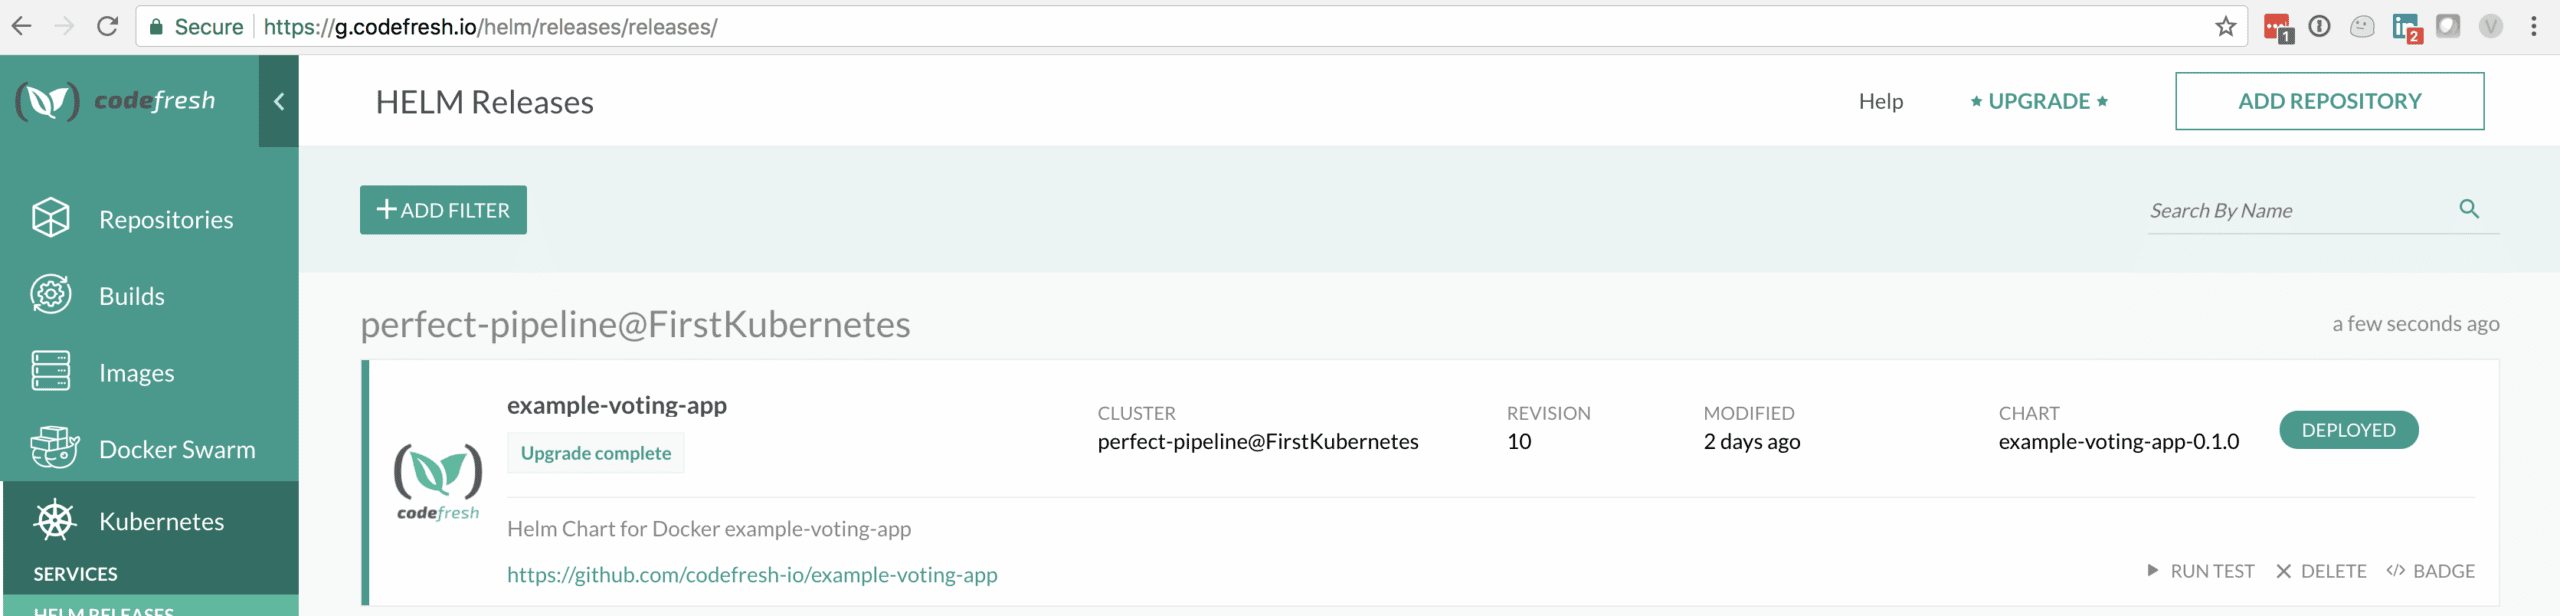
You can add a Helm Release badge like below to your VCS repository’s README.md

Hopefully this has given you a somewhat overall picture of setting up Codefresh to run a Kubernetes deployment utilizing Helm.
Now you can play with the release or do something similar with your own application.
*Perfect Pipeline
A collection of pipelines for a micro-services repository that will contain some industry best practices.
For example:
* Parallel Builds of micro-services contained with the mono-repo that will build the Docker image, run unit tests, scan Docker image for vulnerabilities.
* Deploy the micro-service using Helm and a popular deployment strategy like Blue/Green.
* Run Integration testing using an ephemeral Kubernetes deploy.
* Run Performance testing using an ephemeral Kubernetes deploy.
* Annotate the Docker image metadata with important information about the build.
In my next post, we will deploy Chart Museum to our Kubernetes cluster using community Helm chart and build/upload our Example Voting App chart to Chart Museum for others to use.
After that, we will be deploying Clair using Helm chart and scanning our Docker images as part of our Docker micro-services (3)** pipelines.
**(3) Used to identify the 3 micro-services (result, vote and worker) contained in the example-voting-app mono-repo
Hope, you find this tutorial useful. I look forward to your comments and any questions you have. To try this out, create a free Codefresh account and start building, testing and deploying Docker images faster than ever.