Article Content
What is Azure Pipelines?
Azure Pipelines is a cloud-based solution by Microsoft that automatically builds and tests code projects. It supports all major languages and project types. Azure Pipelines combines continuous integration (CI) and continuous delivery (CD) to test, build, and deliver code to any destination. It also offers an efficient and secure way to automate builds and make them available to end-users.
Azure Pipelines is one of the key services that make up Azure DevOps.
Azure Pipelines Concepts
Azure Pipeline Tasks
Tasks are the building blocks that define pipeline automation. A task is a packaged script or procedure that is abstracted as a set of inputs. When a job is executed, all tasks defined within it are executed sequentially.
When tasks are added to a pipeline, they can add specific “demands”. A demand defines prerequisites that must be installed on the agent in order to perform the task. When Azure runs the build or deployment, it selects agents that meet those requirements.
Azure Pipeline Templates
Templates allow you to define reusable content, logic, and parameters that can be used in a pipeline. Templates work in two ways:
- Inject reusable content into a pipeline—this works like an embed directive in many programming languages. The contents of one file are inserted into another.
- Control what is allowed in the pipeline—this can help you define pipeline security. The template then defines the logic that other files must follow.
Azure Pipeline Parameters
Runtime parameters give you more control over what values can be passed to the pipeline. You can use runtime parameters to provide different values for scripts and actions at runtime, as well as dynamically select jobs and stages. You can control parameter data types (e.g. string or integer), set acceptable ranges or values, and specify default values.
Azure Pipelines lets you specify parameters both in templates and pipelines. They are set via the parameters section in an Azure Pipelines YAML.
Azure Pipeline Variables
Variables let you place important pieces of data in different parts of the pipeline. The most common use for a variable is to define a value that can be used in a pipeline. All variables are stored as strings and can be modified at runtime. Variable values can change between different runs of a pipeline or from task to task. You can use variables in expressions to conditionally assign values and further customize your pipeline.
If you define the same variable with the same name in multiple places, the variable with the largest local scope takes precedence. Thus, variables defined at the task level can override variables set at the step level. Variables defined at the stage level override variables set at the pipeline root level. Variables set at the pipeline root level override variables set in the Pipeline Settings UI.
Azure Pipeline Secrets
Secret variables are encrypted, meaning you can use them in a pipeline without exposing their values. You can use secret variables for sensitive information you do not want exposed in the pipeline, such as passwords, access tokens, and IDs. Secrets are encrypted with a 2048-bit RSA key and are available to agents through tasks and scripts. You can use variable groups to share multiple secrets between pipelines.
Azure Pipeline Triggers
Triggers let you automatically run pipelines when certain events occur. Azure Pipelines supports the following types of triggers:
- Scheduled triggers—starts a pipeline on a fixed schedule
- Event-based triggers—start a pipeline in response to an event, such as creating a pull request or pushing it to a branch.
- Pipeline triggers—start one pipeline upon completion of another.
How to Use Azure Pipelines
There are two main options for operating Azure Pipelines—you can define pipelines using YAML code or the classic UI.
Define Pipelines Using YAML Syntax
Azure Pipelines provides a YAML configuration called azure-pipelines.yml, which allows you to define your pipeline as code.

Image Source: Azure
The process works as follows:
- You write a simple YAML configuration file that specifies the structure of your pipeline.
- The pipeline YAML is versioned with your code. This means any changes to it can be managed via pull requests and build policies.
- Any changes to the pipeline configuration can break the process or have unexpected side-effects. When the pipeline is managed as code, you can easily identify the change that caused a problem and revert or resolve it.
To work with pipelines as YAML code, you’ll need to:
- Configure Azure Pipelines to point to your Git repo
- Define your build process using
azure-pipelines.yml - Push the YAML code to your version control repository. This will trigger automatic build and deploy, and you can monitor results.
Define Pipelines Using the Classic Interface
Azure Pipelines also provides a UI that lets you define pipelines manually. You can specify how the pipeline should build and test your code, and a release pipeline that defines how artifacts generated by the build process should be deployed to a target environment.

Image Source: Azure
To work with pipelines via the UI, follow these steps:
- Configure Azure Pipelines to point to your Git repo.
- Use the classic editor to configure a build pipeline and release pipeline for your project.
- Push code to version control repository. This will trigger the pipeline, run build and test steps, and then move artifacts into the release process.
Tutorial: Create Your First Azure DevOps Pipeline
Before you start, create a GitHub repo, if you don’t already have one, and an Azure DevOps organization.
- Fork the Pipelines Java repo into your GitHub account. This is an example pipeline that can show you how to get started with Azure DevOps.
- Sign into Azure DevOps, select your project, navigate to the Pipelines screen and click Create new pipeline.
- Select GitHub as the source code location, then follow the steps to select your GitHub account.
- When you see the list of repositories in your account, select the Pipelines Java sample repo.
- Azure Pipelines automatically creates a Maven pipeline template. Click Save and run.
- Click Commit directly to master branch and then click Save and run.
- Azure DevOps will now start a new run in your sample pipeline. Wait for it to finish.
Make sure you have the Azure CLI installed on your machine. You can now run, update, or show details of your pipeline in the command line using the following commands:
az pipelines run

az pipelines update

az pipelines show
See the documentation for flags and more details on using these comm
Using Codefresh Workflows to Automate CI/CD Pipelines
Codefresh is a CI/CD platform that supports Azure and other cloud environments, and is an alternative to Azure DevOps. It includes a Workflows capability that allows you to define any kind of software process for creating artifacts, running unit tests, running security scans, and all other actions that are typically used in Continuous Integration (CI).
Codefresh workflows redefine the way pipelines are created by bringing GitOps into the mix and adopting a Git-based process instead of the usual ClickOps.
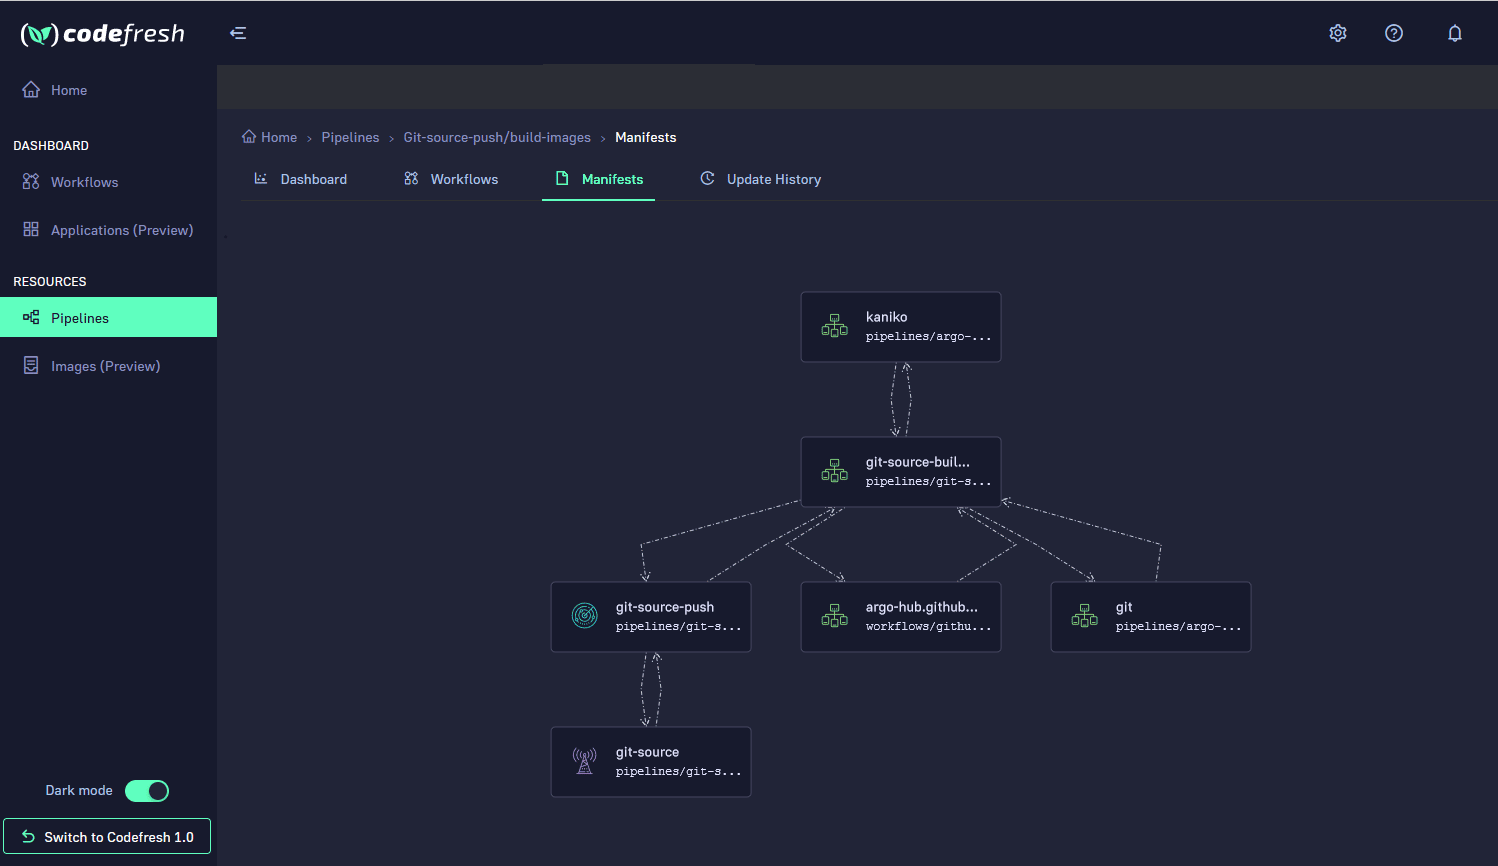
Here is an example of a Codefresh workflow as it is presented in the graphical user interface. The tree representation shows an overview of the workflow along with its major components/steps and how they communicate with each other.
Codefresh Workflows are Powered by Argo Workflows and Argo Events
The Codefresh platform is powered by the open source Argo projects and workflows are no exception. The engine that is powering Codefresh workflows is the popular Argo Workflows project accompanied with Argo Events. Codefresh is fully adopting an open source development model, moving towards a standardized and open workflow runtime while at the same time giving back all our contributions to the community.
Adopting Codefresh with Argo Workflows has the following advantages:
- Mature, battle-tested runtime for all pipelines
- Flexibility of the Argo engine and its Kubernetes native capabilities
- Reusable steps in the form of Workflow templates
- Leveraging existing Artifact integrations
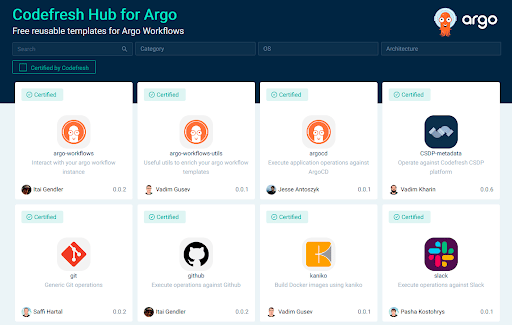
Apart from individual features and enhancements, one major contribution to the Argo ecosystem is the introduction and hosting of the Codefresh Hub for Argo Workflows. The Hub lets you to find curated Argo templates, use them in your workflows, share and reuse them in a way that was never possible before.

The World’s Most Modern CI/CD Platform
A next generation CI/CD platform designed for cloud-native applications, offering dynamic builds, progressive delivery, and much more.
Check It Out