Wouldn’t it be handy to quickly spin up a Kubernetes cluster for CI testing, on-demand?
Interested? If so, read on!
Background
Here at Codefresh, many of our customers develop Kubernetes-native applications. A common CI task is to create a Kubernetes cluster to test out deployment processes and integrations. Often, such tests can be greatly simplified if this cluster is ephemeral – that is, it is created on-demand for each build of a test pipeline. This ensures that the tests always run on a fresh cluster, where they start with a clean slate.
Creating such a cluster can be a very time-consuming affair. For example, creating a simple EKS cluster in AWS usually takes a minimum of 15 minutes. Additionally, the test pipeline must also be configured to remove this cluster after the tests have concluded, as well as know how to handle any errors that may occur during creation/removal.
One way to combat this time-consuming and complex creation/removal process is to use technology like kind (Kubernetes in Docker) which creates a super-simple cluster within Docker containers. A kind cluster can be created in ~2 minutes and deleted almost instantly – perfect for an ephemeral cluster whose lifespan is a single test pipeline build.
When using kind to create an ephemeral cluster for CI testing, we need a place where we can create its parent Docker container that will persist for the duration of the CI pipeline. For legacy CI systems that are built to run on VMs, this Docker container can be started in the VM’s host OS (security permitting). For more modern, Kubernetes-native platforms like Codefresh, however, it is preferable if this Docker container just runs as a native Kubernetes pod. While kind doesn’t come with a Kubernetes pod configuration out of the box, Jie Yu and Steven Chung have gone ahead and created one that we can use. You can check it out in their blog article and GitHub repository.
Specifically, we will use their pod resource YAML and related Docker images to create a kind cluster nested within a pod on an existing Kubernetes cluster. First, we’ll see how a Codefresh pipeline can quickly create this kind of pod, connect to it to run some deployment tests, and then delete it. After that, we’ll see how packaging these steps into a Codefresh typed step makes it easy to share and re-use them in your other pipelines.
Prerequisites
- Create a Codefresh account if you don’t already have one
- Install the Codefresh Runner in your Kubernetes cluster
- Install the Codefresh CLI on your local workstation
- Clone the GitHub repo with the example code for this article
Create Your Pipeline
First off, when we create our pipeline we need to configure its Runtime so that it executes on a cluster with network access to the cluster where you want to deploy the kind pod (i.e., its parent cluster). The simplest way to ensure this access is to install the Codefresh Runner on the parent cluster so that you can also choose it as your pipeline’s Runtime cluster. We’ll be accessing kind’s Kubernetes API service via the parent cluster’s node IP addresses and a NodePort.
Pipeline Steps
There are five main steps that our pipeline will perform:
- Get the kind pod resource YAML from a Git repo.
- Deploy the kind pod resource YAML to the parent Kubernetes cluster in which it will live.
- Update the pipeline’s kubeconfig to include the kind cluster.
- Run some deployment tests on the kind cluster.
- Delete the kind pod from its parent cluster. We made this step a “hook” so that it always runs after the end of the pipeline, even if the pipeline should fail. Its output appears on the build screen under “Initializing Process.”
To that end, I’ve placed a copy of the kind pod YAML from Jie Yu and Steven Chung’s blog article, as well as the Codefresh pipeline YAML for these steps, into one GitHub repo. You can check them out here: https://github.com/TedSpinks/kind-codefresh-demo.
First, create a new pipeline in your Codefresh account. Copy and paste the steps from pipeline-examples/kind-with-freestyle-steps.yaml into your pipeline. You’ll notice that the deploy_pod step deploys kind-pod.yaml to create the kind pod in our parent Kubernetes cluster.
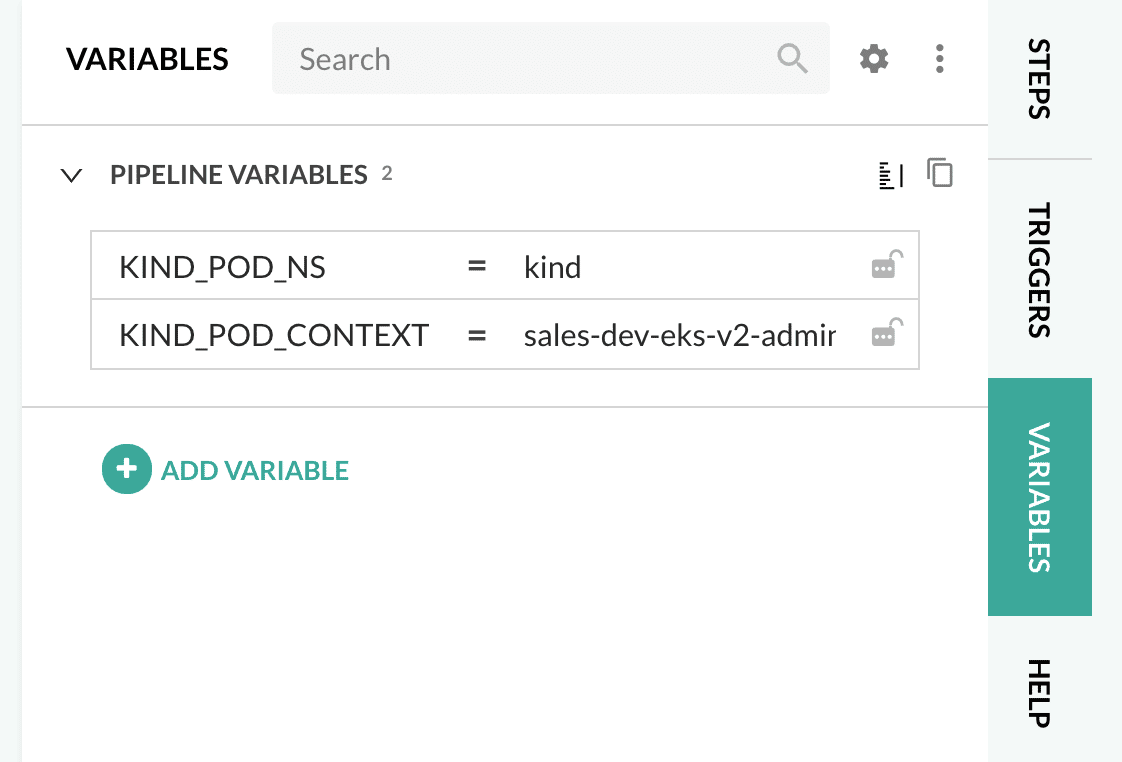
Next, be sure to define two variables as pipeline inputs (right-hand side of the IDE):
- KIND_POD_CONTEXT – Name of the Kubernetes Integration in your Codefresh account where the kind pod should be deployed
- KIND_POD_NS – The namespace where the kind pod should be deployed
If you were to go ahead and run this pipeline in your Codefresh account, it would look like this…
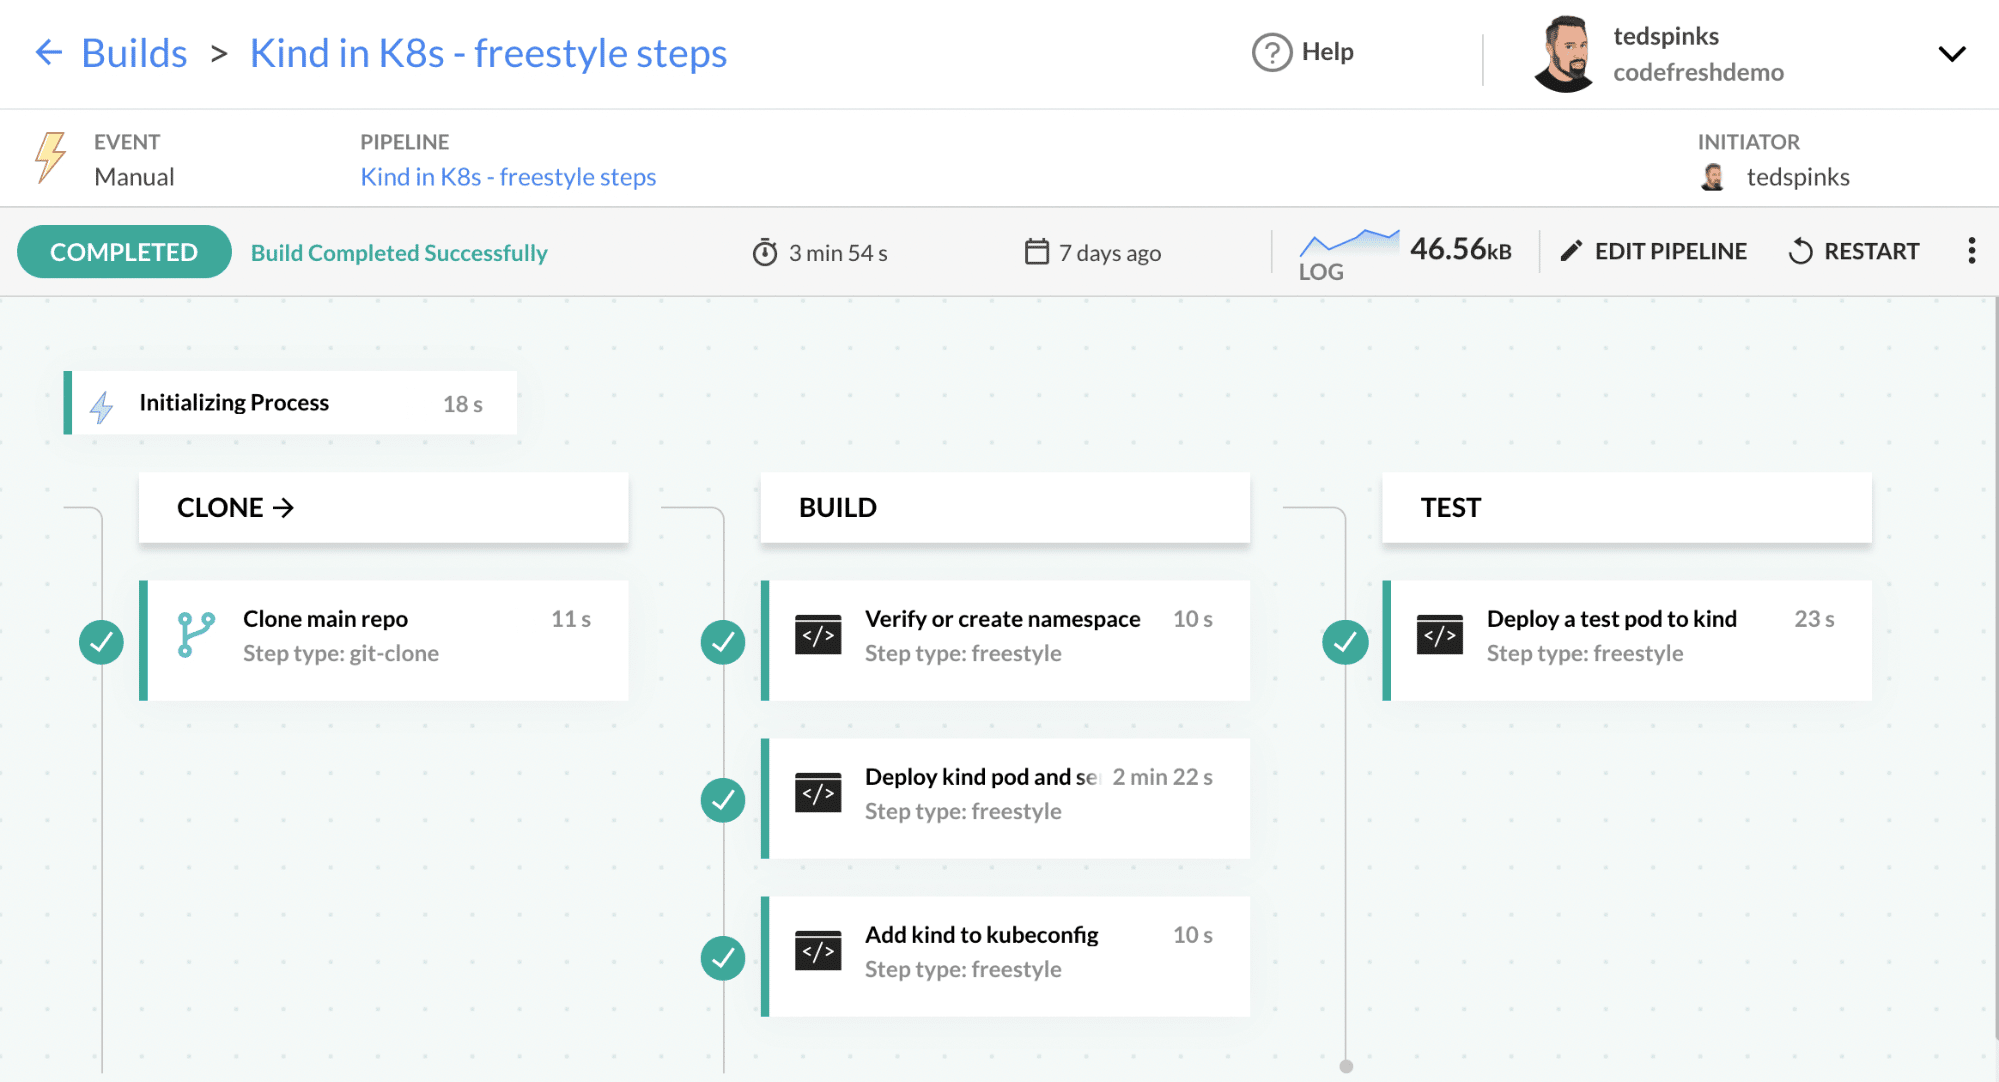
BUT WAIT! Keep reading to simplify your pipeline even more…
Just use the kind type step
In Codefresh, one can create what is called a typed step, which packages together multiple steps, documentation, and example code into a single module, so that they’re easy to share and re-use.
Now that we understand what it takes to deploy a kind cluster, let’s press the easy button and use a typed Codefresh step that consolidates our first three steps. Calling the step looks like this.
create_kind_cluster:
    title: "Create the kind cluster"
    stage: build
    type: ${{CF_ACCOUNT}}/kind
    arguments:
      KIND_POD_CONTEXT: '${{KIND_POD_CONTEXT}}'
      KIND_POD_NS: '${{KIND_POD_NS}}'
Note that the kind step uses the same two pipeline variables that we discussed previously: KIND_POD_CONTEXT and KIND_POD_NS.
The code for the typed step, step.yaml, is also in the same GitHub repo. Here’s how to install the step into your Codefresh account using the Codefresh CLI. If you don’t have yq version 4+ installed on your workstation, you can just manually edit the step.yaml to change “your-account-name” to match your account name.
# Look up the name of your Codefresh account.
codefresh auth get-contexts

# Update the name of the step so that it is namespaced with your account.
# Be sure to change "your-account-name" before running these commands!
CF_ACCOUNT=your-account-name
STEP=$CF_ACCOUNT/kind yq eval '.metadata.name = env(STEP)' -i step.yaml

# Install the step
codefresh create step-type -f step.yaml
After you install the step, you’ll be able to search for it from within the Codefresh IDE. On the right, click the STEPS tab, and then the MY STEPS tab.

When you drill into the step, you’ll see example YAML code for all three steps we need in our pipeline:
- Call the kind step to get/deploy the kind pod YAML and update the pipeline’s kubeconfig
- Run some deployment tests on the kind cluster. The example includes deploying a basic “hello world” pod to the kind cluster.
- Delete the kind pod from its parent cluster. We made this step a “hook” so that it always runs after the end of the pipeline, even if the pipeline should fail. Its output appears on the build screen under “Initializing Process.”
Or you can simply copy kind-with-typed-step.yaml from the GitHub repo into your pipeline.
Presto!
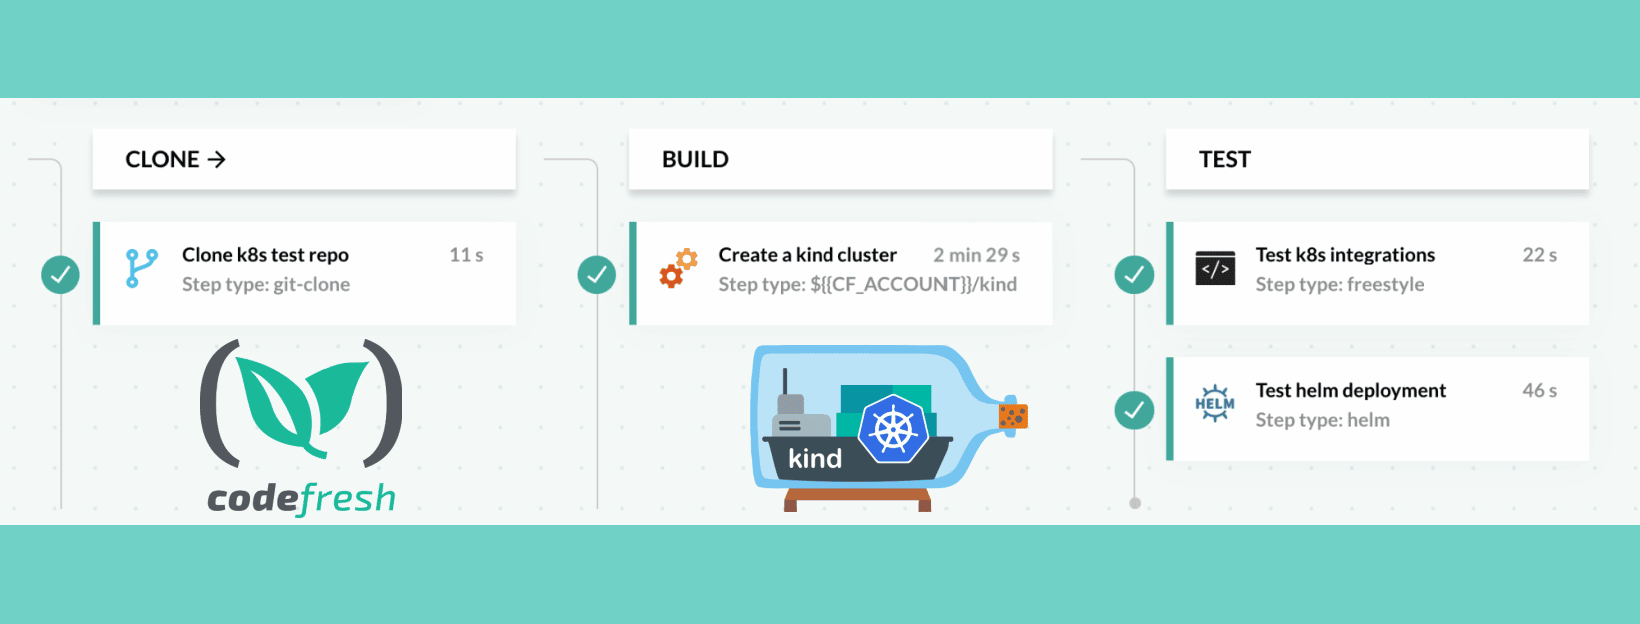
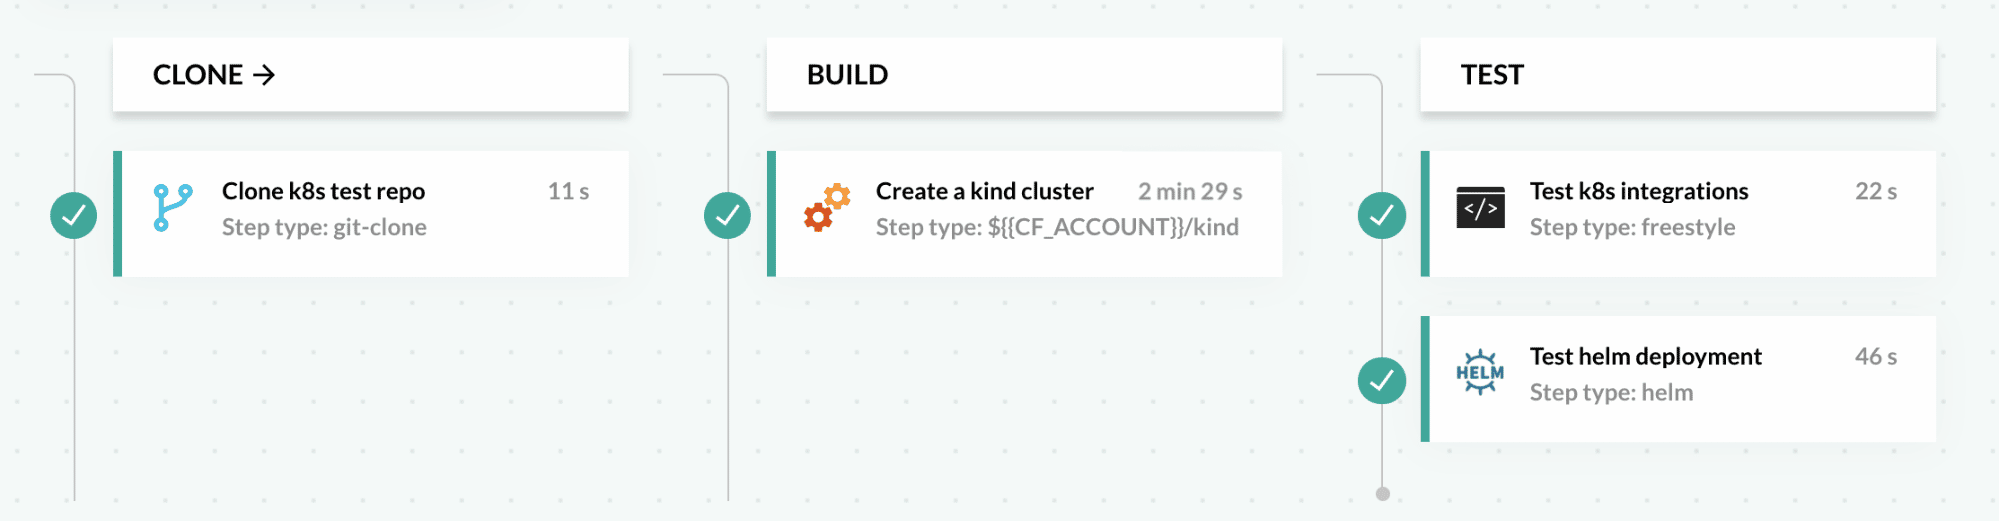
Now when we use our kind step, our pipeline build looks like this:
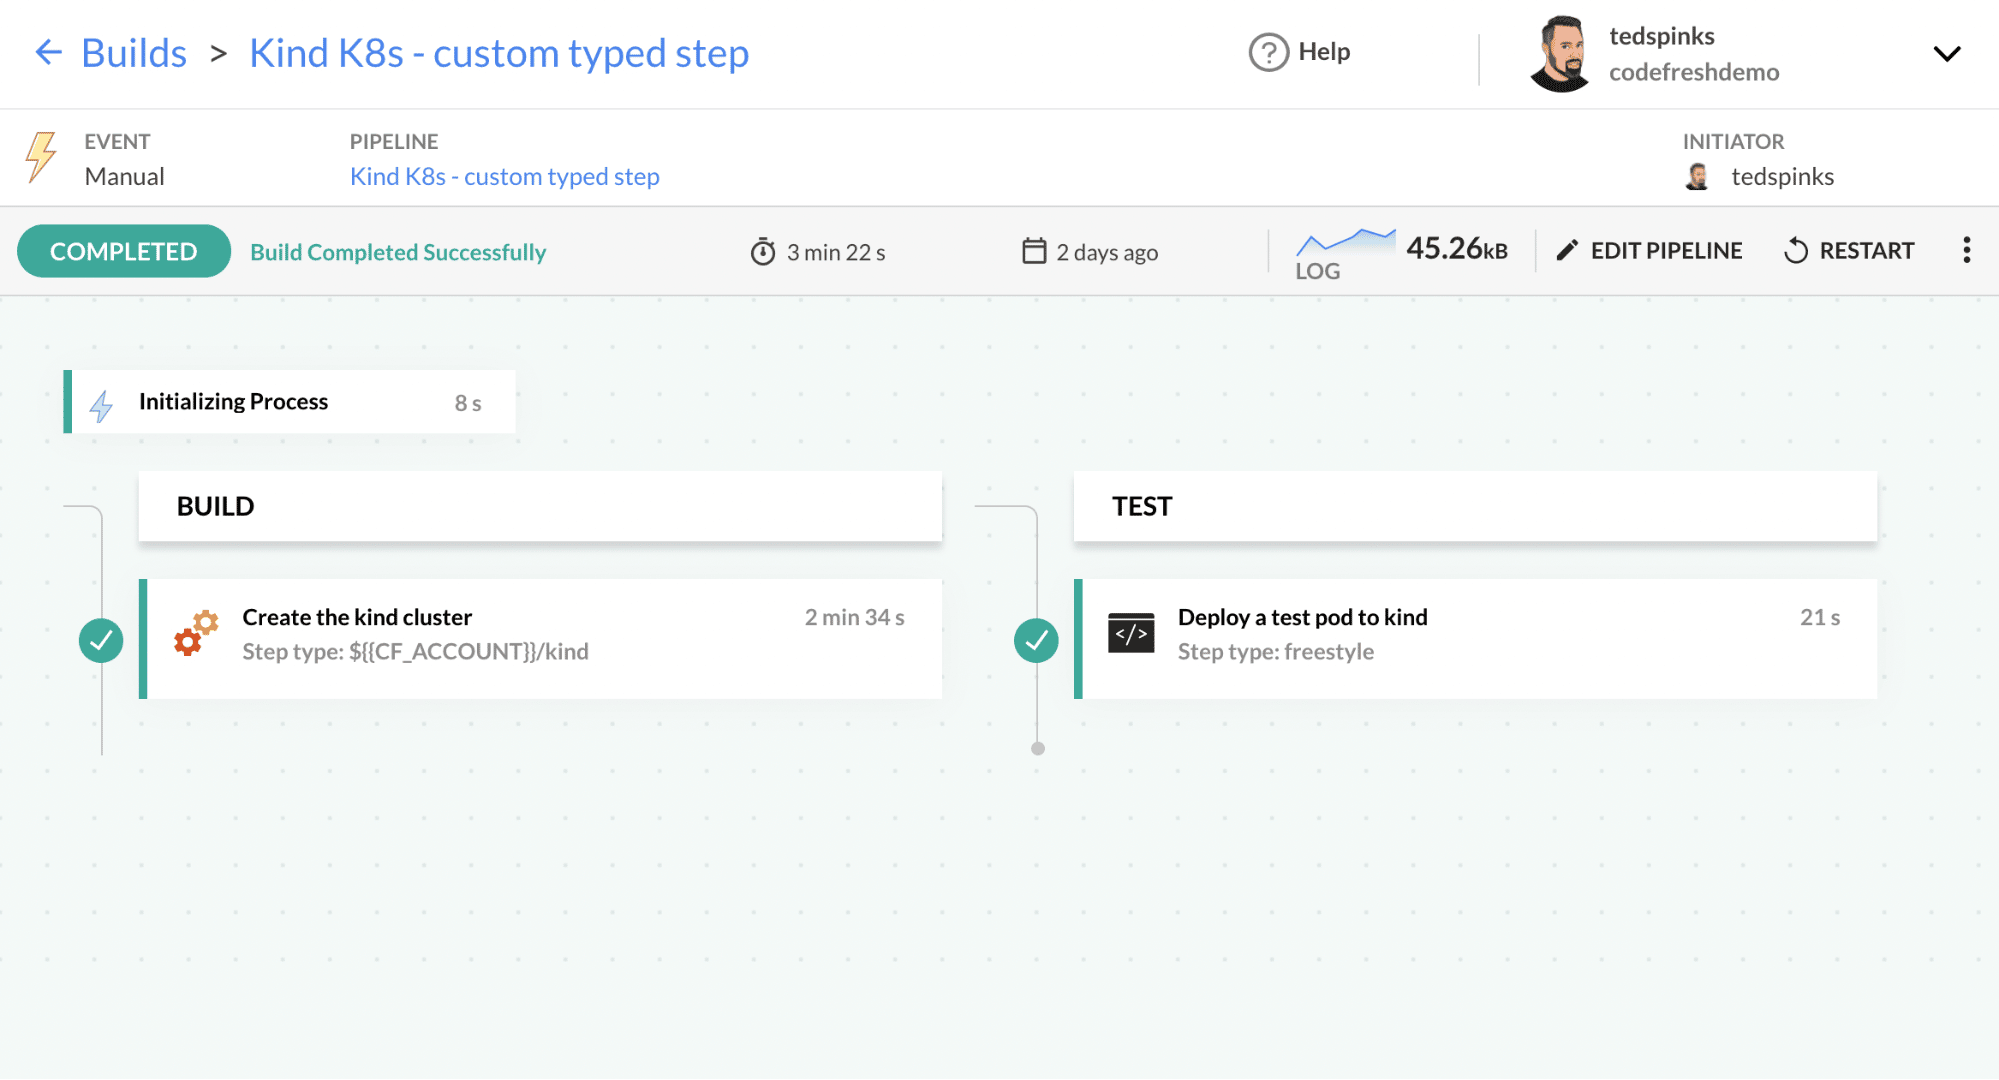
Nice and simple! Our ephemeral Kubernetes cluster was created in 2.5 minutes and deleted in less than one second!!
New to Codefresh? Create Your Free Account today!