DigitalOcean has just announced the DigitalOcean Container Registry, which is directly integrated into the DigitalOcean Dashboard. While you can use any Container Registry in your DigitalOcean resources, the goal of the Container Registry is to provide for easy connection between the Container Registry and DigitalOcean Kubernetes resources.
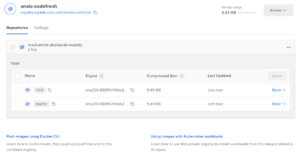
DigitalOcean Container Registry Dashboard
Whether you have already integrated DigitalOcean cloud resources into your Codefresh pipelines or not, you could use the DigitalOcean Container Registry like any other container registry in your Codefresh Pipeline.
Overview
The DigitalOcean Container Registry provides:
- Three subscription plans that offer different allowances for repositories, storage, and bandwidth
- 1-click method to configure DigitalOcean Kubernetes Cluster to use the registry
- Garbage collection using the command line or the API
- Ability to see the current storage usage in the control panel
- Automatic global load balancing across caching endpoints in multiple geographic regions
- Ability to store any artifact that is compatible with OCI-based registries, such as Helm charts
Furthermore, the DigitalOcean Container Registry is not just for containers. It allows users to store any artifacts that are compatible with the OCI specifications. This allows you to keep Helm Charts in your DigitalOcean Container Registry (note that Helm’s OCI support is still experimental).
Building and pushing a Container image with DigitalOcean and Codefresh
The set-up will only take 4 steps, assuming that you have a
- DigitalOcean Account
- Codefresh Account — If not Create Your Free Account today!
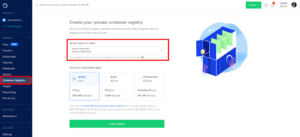
First, we have to set-up our Container Registry in DigitalOcean. This can be done by opening your account and accessing the “Container Registry” section:
Since we are already in DigitalOcean, we can go ahead and create our access token. Open API in the bottom left of the Account page (below Settings). And create a new token at Tokens/Keys. The token needs to have both read and write permissions. Make sure to take note of the token since we will need it in the next step.
Now we can add the DigitalOcean Container registry to our Docker registries in Codefresh. For this, open:
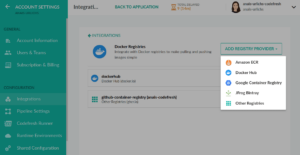
Codefresh Account => Account Settings (bottom left) => Docker Registries => Integrations => Docker Registries => Add Registry Provider => Other Registries
This should get you to the following screen. As you can see, Codefresh supports a variety of Container Registries:
Next, we have to provide the configuration information for the DigitalOcean Container Registry. For this, you will need our DigitalOcean Access Token. The token is used both as username and as password.
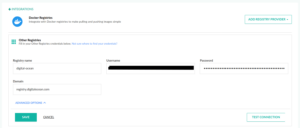
The URL is going to be registry.digitalocean.com — you can then provide the registry name in the advanced options (alternatively, you could include it in your build step before the image name).
That’s it! Now we can push images from our Codefresh Pipeline directly to the DigitalOcean Container Registry. Note that if DigitalOcean is not set as your default registry, you have to define the registry in your build step:
registry: "digital-ocean"
Our full build step will look as follow:
  build:
    title: "Building Docker image"
    type: "build"
    image_name: "anais-codefresh/react-article-display-do-registry"
    tags:
      - "1.0.0"
    dockerfile: "Dockerfile"
    registry: "digital-ocean"
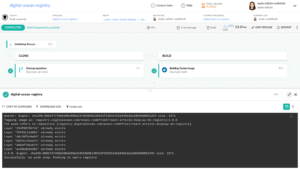
Different to other platforms, the Codefresh Build Step both builds AND pushes the image to the registry.
Running the image, we can see the step execute in the output section of our pipeline:
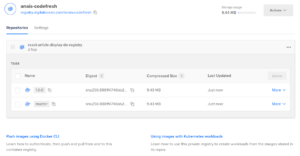
And view the Container image directly in DigitalOcean:
Try it out TODAY!
We made it super easy for you to connect DigitalOcean Container Registry to your Codefresh pipeline. You can find more details in the Codefresh documentation.
Wait, you are not a Codefresh user yet? Create Your Free Account today!
This process works on all Codefresh accounts. You can set it up in minutes to try it out.
If you have any questions, feel free to ask in our community forum, we would love to hear from you.
