Where do you usually track your code coverage? If you are not sure about the answer to this question or you would like to explore other options to the ones that you are currently using, then this post is for you.
Specifically, this post details how you can use Codacy in your Codefresh pipeline to create and send coverage reports of your repository with every pipeline build.
To follow along, make sure to have a Codacy and a Codefresh account. If not, now is the time to set-up a fresh account for free!
Codacy Overview
Codacy is a code review tool that allows for automatic analysis, code coverage tracking, and extensive reports that allow you and your team to improve your code quality over time.
The goals of Codacy is to provide insights on
- How is your code quality today and
- How is your code quality evolving over time
Additional features include:
- User management: Mirroring GitHub permissions
- Extensive configuration
- Additional integration with other tools, such as notifications
- Receive analysis reports per file
- Depending on the standards that your team wants to enforce, you can add additional parameters such as coverage thresholds
Codacy has a free version, a pro version, and an on-premises version. The latter two have a free trial, which allows you to test all features over the course of two weeks. You can sign-up via GitHub, Bitbucket, or GitLab.
It supports over 30 different languages. In our example, we’ll be using TypeScript. If you would like to follow along with a different language make sure it is supported by Codacy.
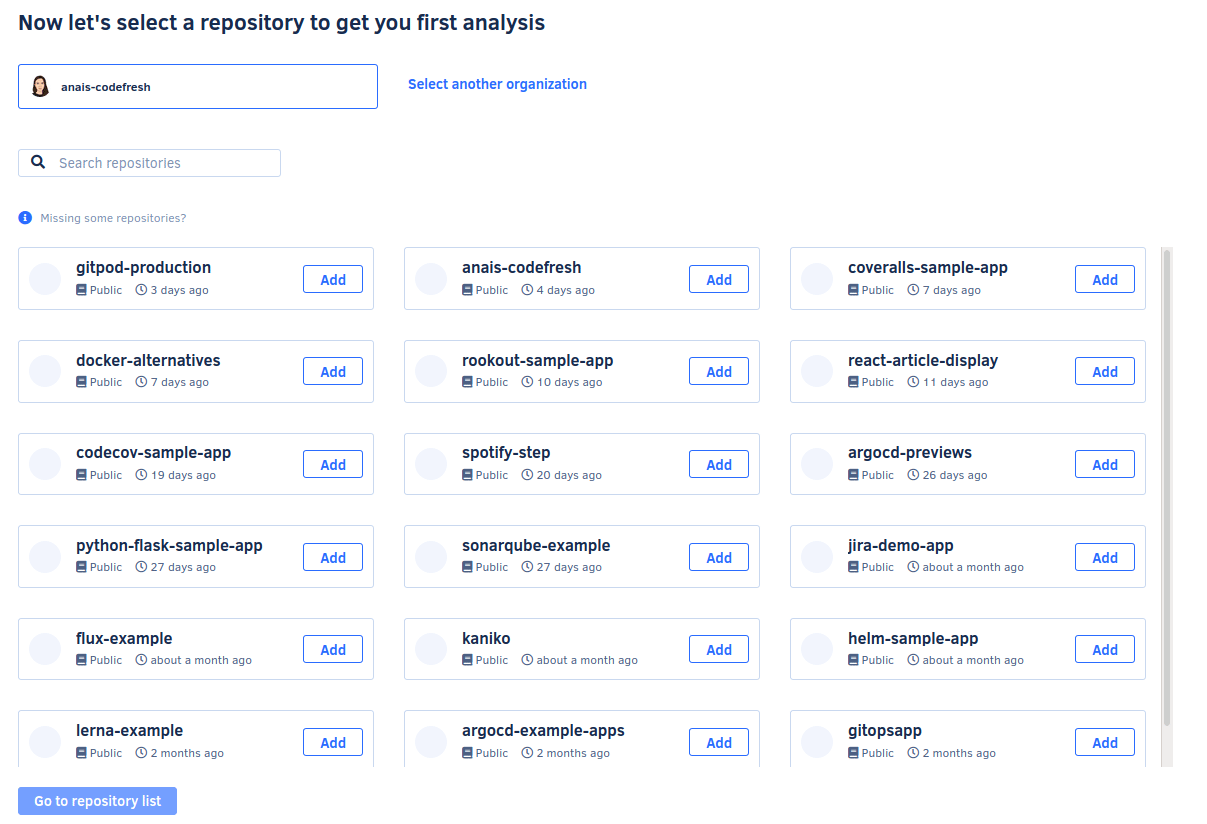
When you log into Codacy for the first time, it will ask you to provide access to a repository. At this stage, Codacy will not download any code from your repository but merely access its names. You can then either provide access to selective repositories or your entire Git repository.
After adding a repository, it will automatically update the information recorded about your application in the Dashboard. Codacy’s UI has the following taps:
- The Dashboard with an overview of issues and code coverage reports
- The Commits, which provides a history of all commits that are associated with this repository
- The Files within the repository and their respective issues
- The issues that Codacy identified in our repository
- Open Pull requests
- And lastly, as part of the pro features, users can set-up security alerts.
We will stick for now with the Dashboard tap.
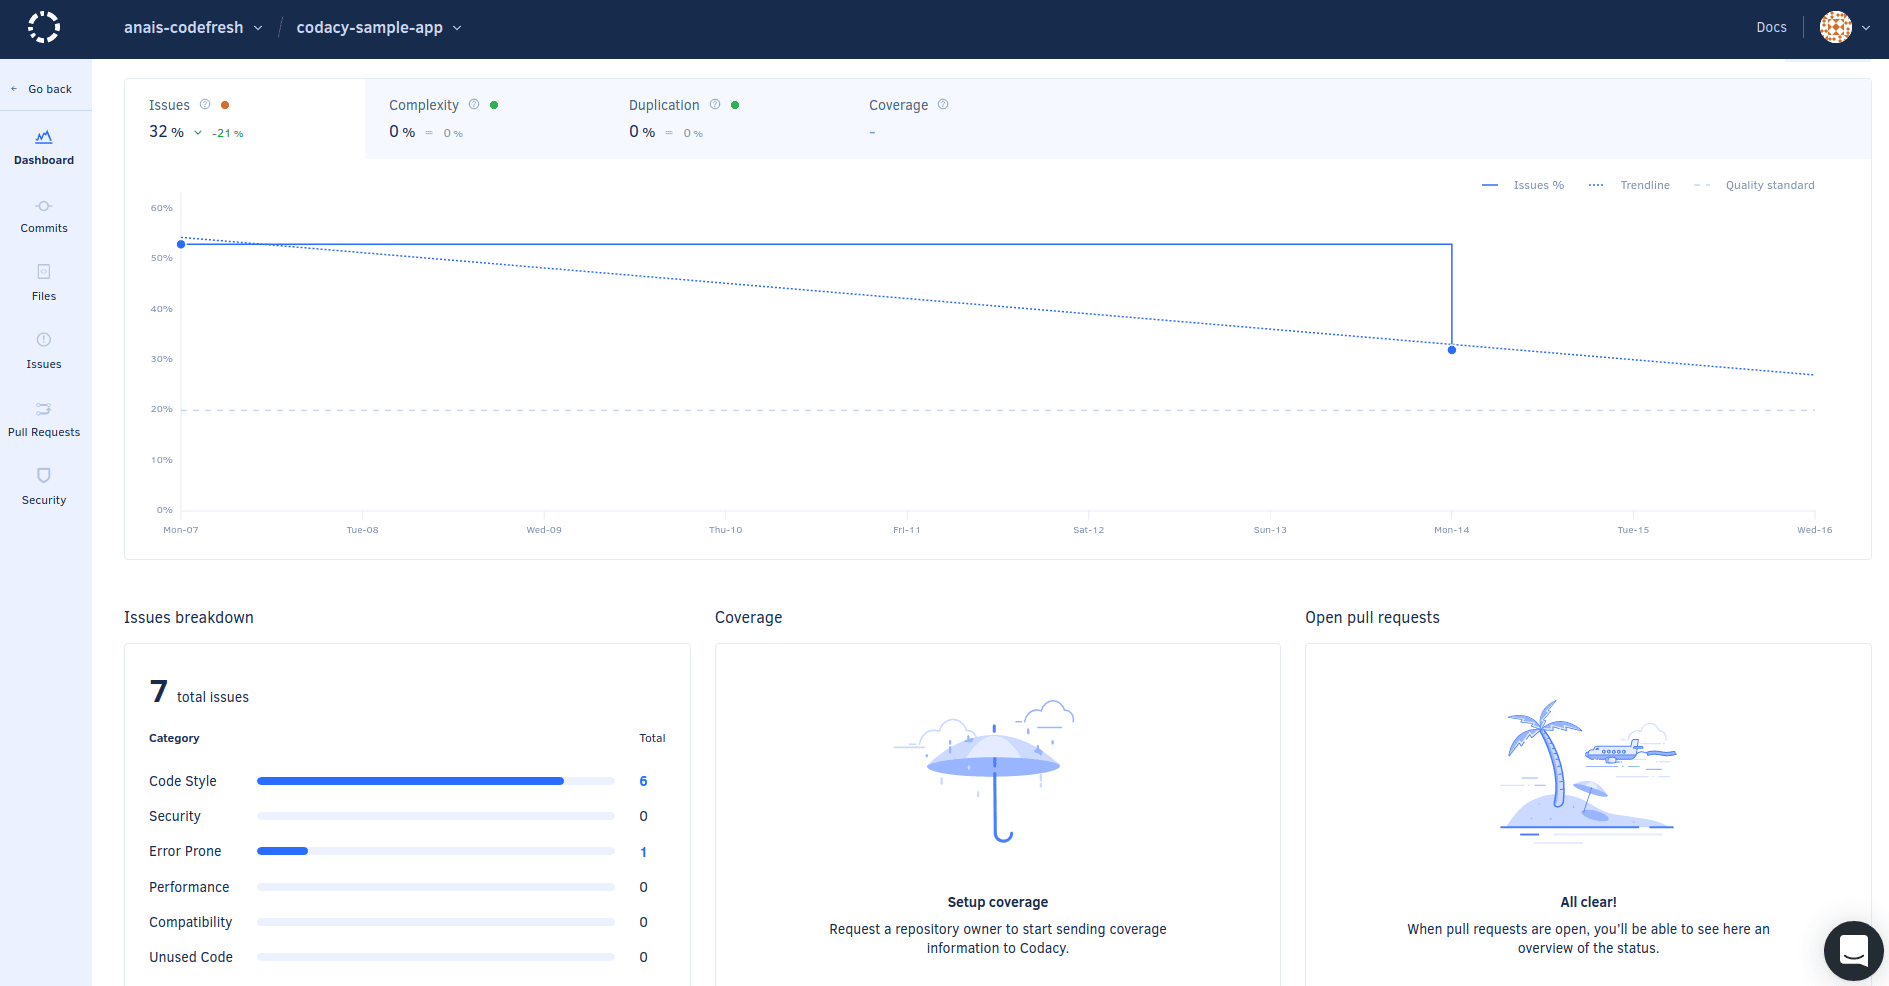
As you might be able to tell, the Dashboard does not have access to code coverage reports by default. The next section will provide a guide on connecting Codacy to your code coverage reports.
Set-up Codacy
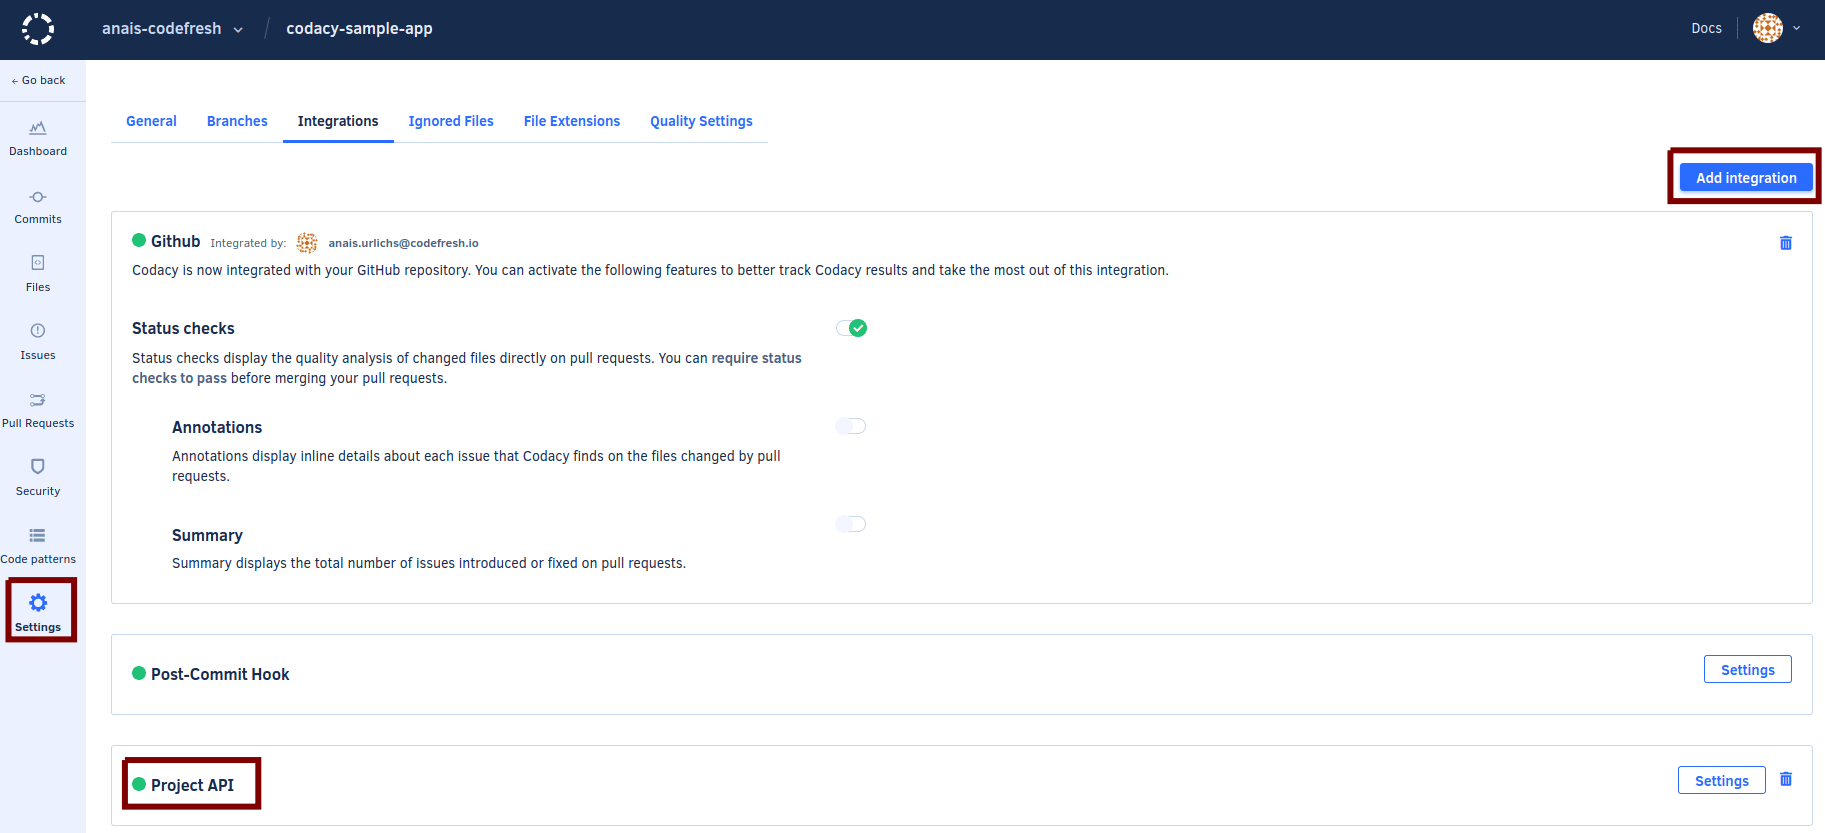
To connect Codacy either to our local set-up or to Codefresh, we need an API token. The token can be accessed through the taps in the project. For this, select your project => go to settings => integrations => add integration => select “Project API”. Make sure that you select the API token from here and not your general project settings:
Next, we are going to prepare our project. In our case, we are using a simple Typescript application and uses jest to produce coverage reports.
git clone [email protected]:anais-codefresh/codacy-sample-app.git

# now cd into the cloned repository
cd codacy-sample-app
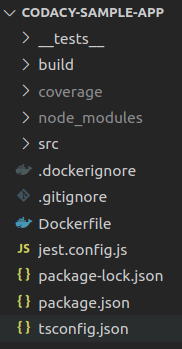
You should then find yourself in the following project structure:
To run the application, you can use the following commands:
npm install
npm run build
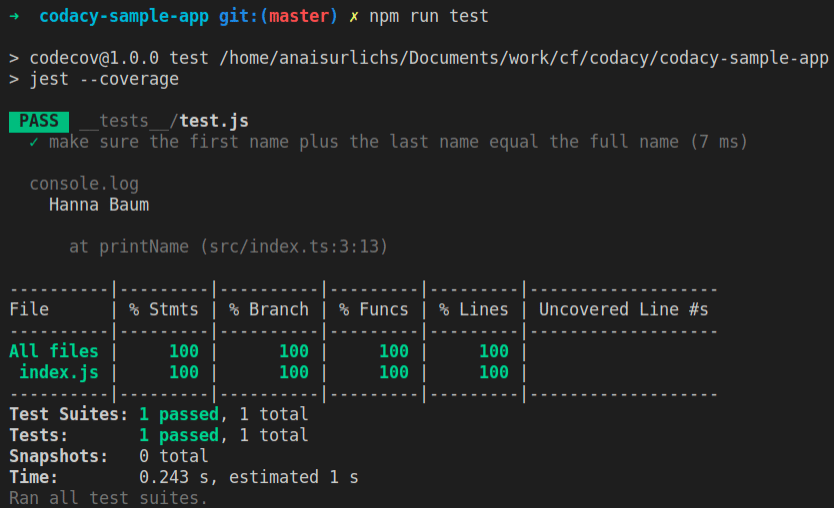
And to test:
npm run test
This should produce the following test coverage report:
Once we have our testing and coverage reports set-up, we can push our changes to our Git repository.
Set-up Codefresh
The previous section showed how we can set-up our node project with code coverage reports. However, that would not be scalable to continue across machines, versions, or our application, and team members. In this section, we will set-up our Codefresh pipeline to push our code coverage reports to Codacy automatically.
To follow this section, please have your Codefresh account ready! And integrate with a container registry e.g. Docker Hub or the GitHub container registry.
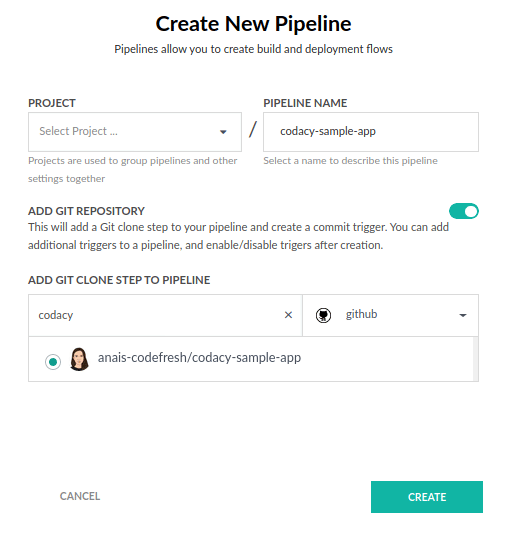
Once we enter the Codefresh platform, we want to create a new Pipeline. Make sure to select the repository in which we set-up our coverage reports:
The pipeline will come with a basic codefresh.yml file. If you are following along, make sure to delete everything that is in the current inline YAML. If you are using your existing pipeline, the next section will show you how to modify the YAML to integrate with Codacy. In the end, we will have the following pipeline:
To use Codacy, we will have to modify our pipeline to generate the code coverage reports and then push those to our Codacy account. First, we are going to run our tests inside a node image and then connect to Codacy. Our full pipeline will look as such:
version: "1.0"
# Stages can help you organize your steps in stages
stages:
  - "clone"
  - "build"
  - "test"

steps:
  clone:
    title: "Cloning repository"
    type: "git-clone"
    repo: "codefresh-contrib/codecov-sample-app"
    # CF_BRANCH value is auto set when pipeline is triggered
    # Learn more at codefresh.io/docs/docs/codefresh-yaml/variables/
    revision: "${{CF_BRANCH}}"
    git: "github"
    stage: "clone"

  build:
    title: "Building Docker image"
    type: "build"
    image_name: "codefresh-contrib/codecov-sample-app"
    working_directory: "${{clone}}"
    tag: "${{CF_BRANCH_TAG_NORMALIZED}}"
    dockerfile: "Dockerfile"
    stage: "build"

  tests:
      title: "Running test"
      type: "freestyle"
      working_directory: '${{clone}}'
      arguments:
        image: 'node:15.2'
        commands:
          - "npm install --save-dev jest"
          - "npm run test"
      stage: "test"

  codacy:
        title: "Pushing reports to codacy"
        type: "freestyle"
        working_directory: '${{clone}}'
        arguments:
          image: 'alpine:3.8'
          commands:
            - "export CODACY_PROJECT_TOKEN=${{CODACY_PROJECT_TOKEN}}"
            - "wget -qO - https://coverage.codacy.com/get.sh | sh"
        stage: "test"
Make sure to
Change image_name in the build step to your image name in the following format:
Container-registry/image-name,
Change the tag of the image to fit your tag,
And lastly, replace the image and the commands in the “tests” stage to use the commands of your repository to run tests and create coverage-reports.
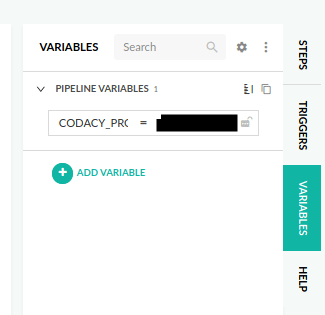
The last step, called “codacy” in this case, is responsible for running the Codacy script. To set the env variable, we are going to export our Codacy project token and add the token in the toolbar that you can find on the right of the UI. Once the variable is called through the Codefresh YAML syntax, it will automatically use the value provided within the variables section. Note that you could also provide your token directly in the YAML; however, once we add the pipeline to our git repository, we do not want to worry about accidentally exposing secrets.
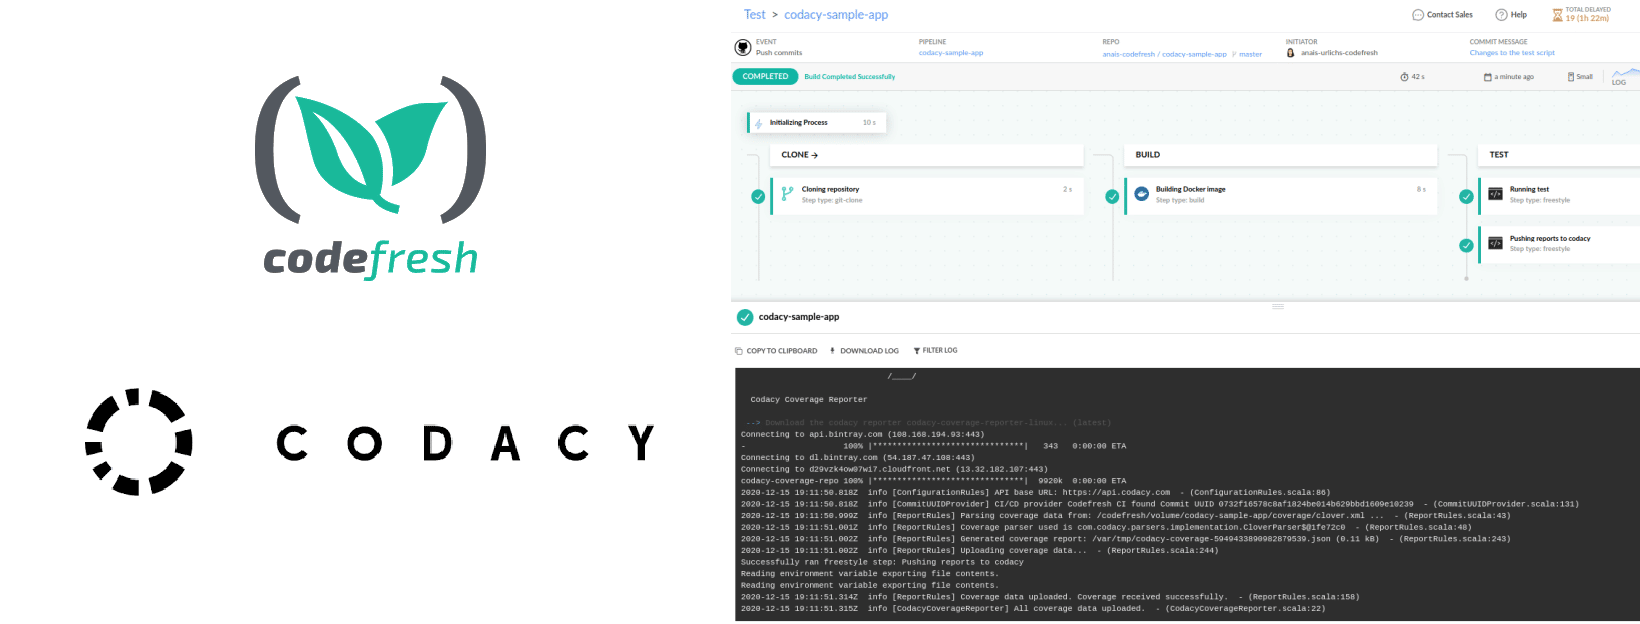
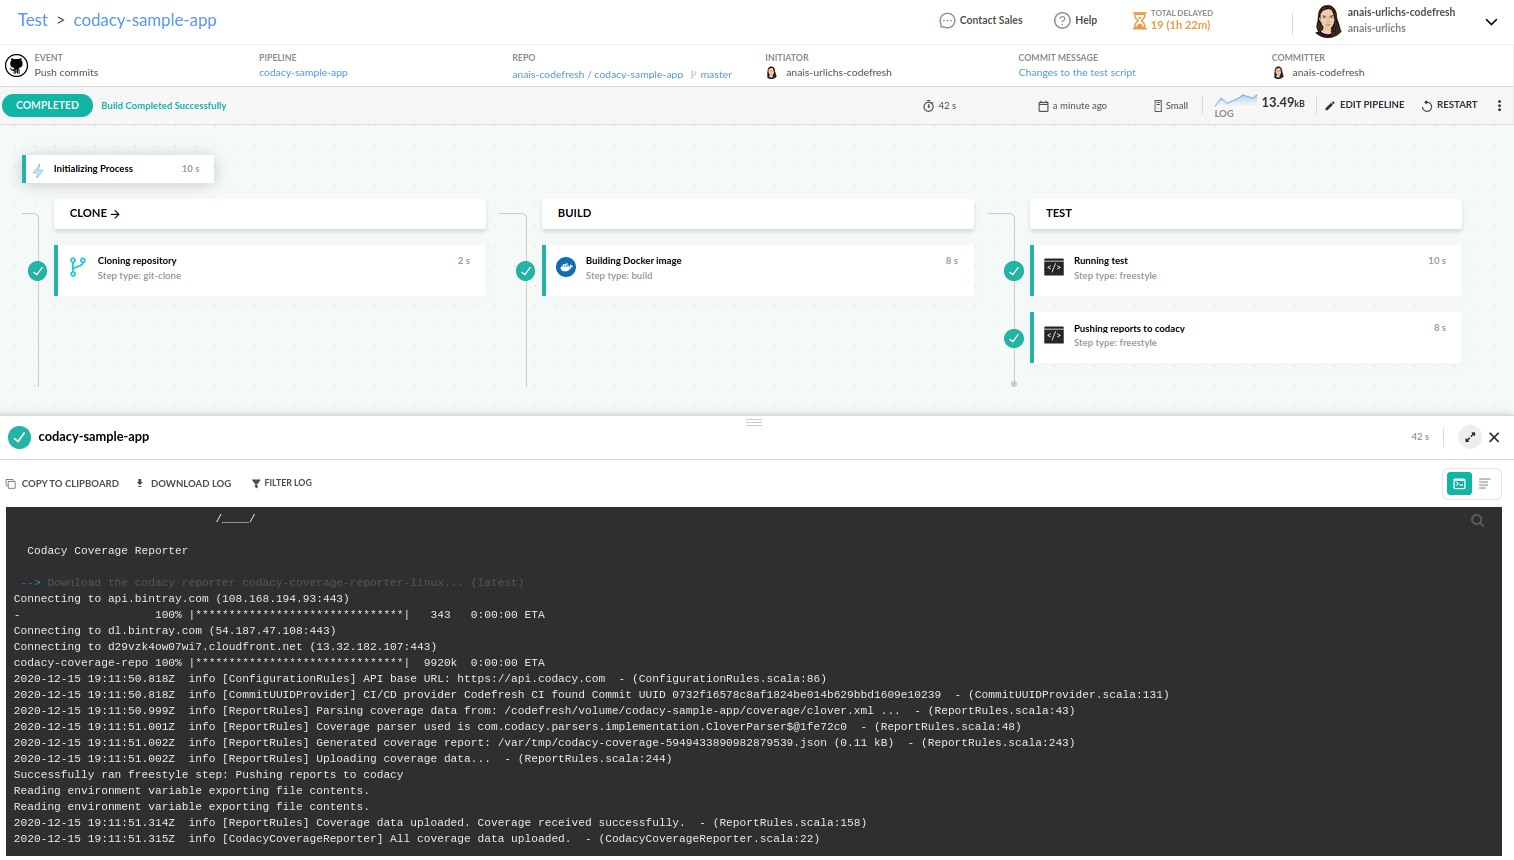
Once added, we can save and run our pipeline.
You can follow the execution of the pipeline in the output section. The next time that we commit to our repository, a new coverage report will be generated and pushed to our Codacy account through our Codefresh pipeline.
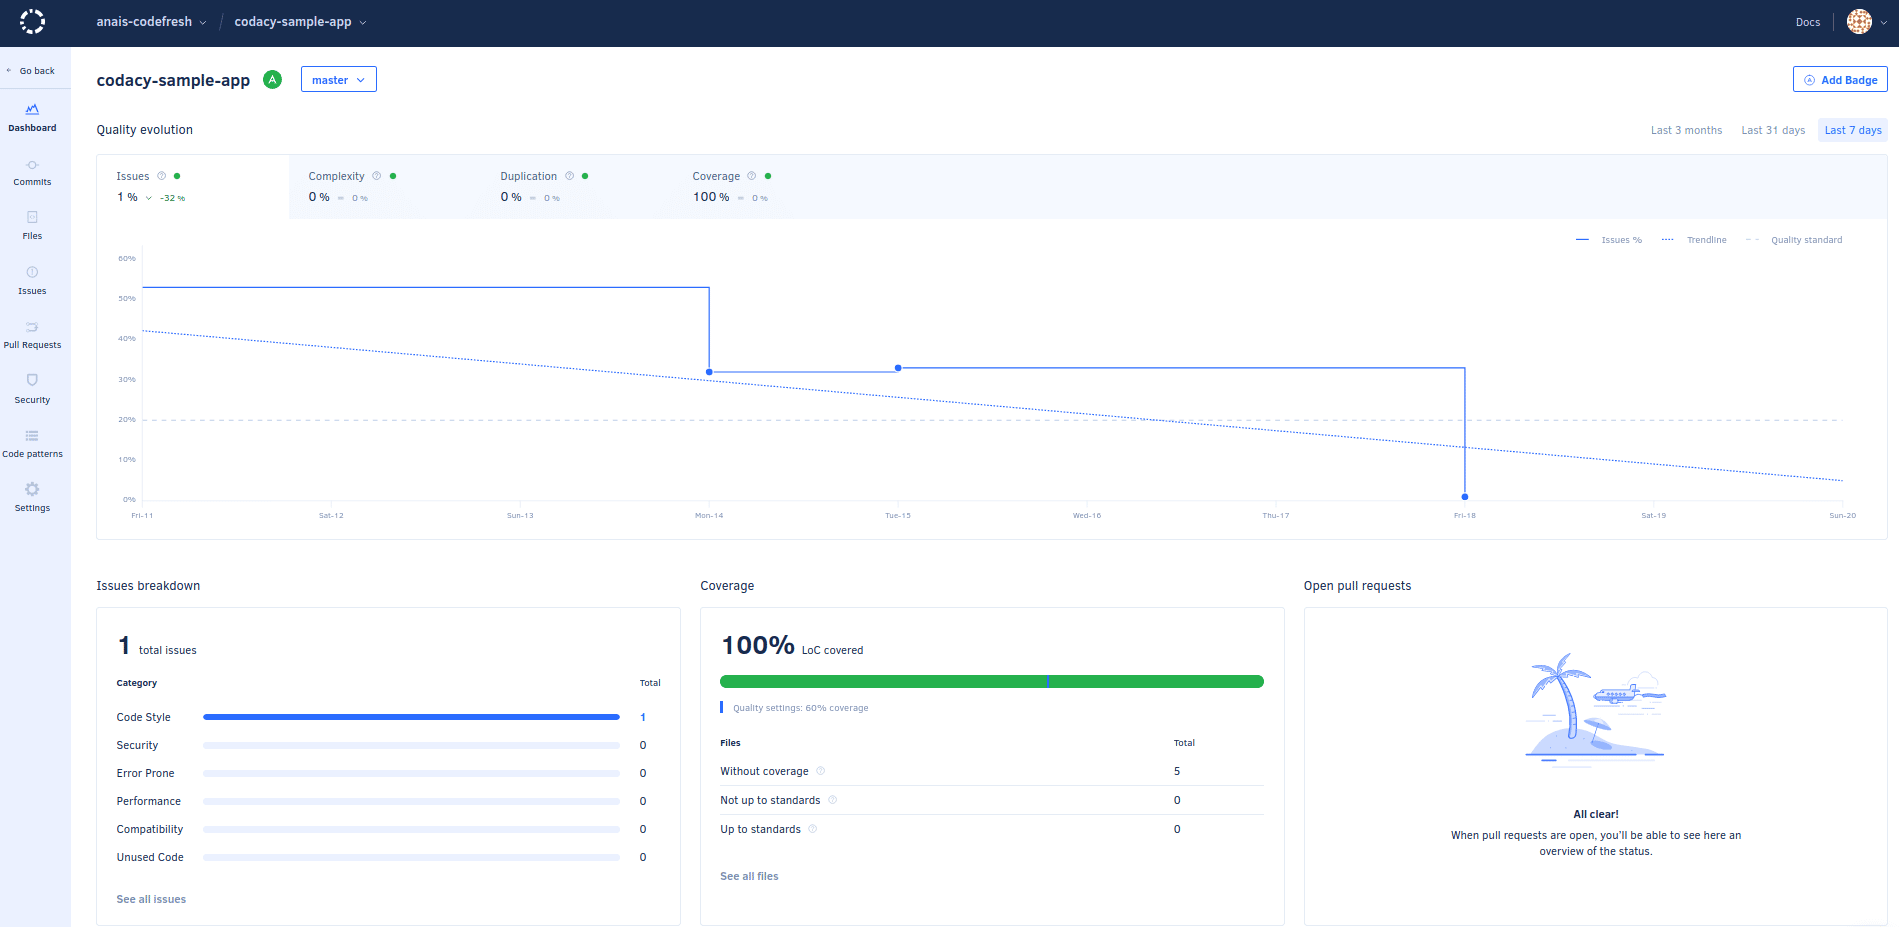
View the reports in Codacy
Now we can head over to our Codacy account and see the updated data:
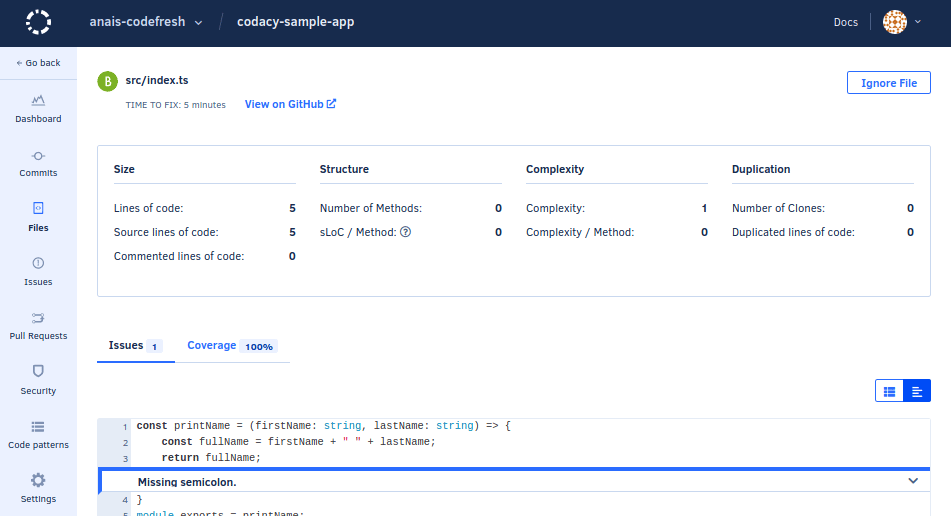
Selecting the files tap and a specific file to analyze we can find more information on our code quality:
Let’s Recap
Codacy provides a fast way to integrate code coverage into your Codefresh pipeline. It supports over 30 different languages and an extensive dashboard that also displays information on issues, PRs, and your commit history.
In this tutorial, we set-up coverage reports in our node application, set-up our project in Codacy, and create a Codefresh pipeline with two additional steps.
If you are new to Codefresh, now is the time to set-up a fresh account for free! Also, do join our forum and ask away if you have any questions.