When I first started to learn Docker on my own, I quickly realized that while there are some amazing blogs/videos/classes online, there are very few articles that pull all the components of Docker together in one quick and easy getting-started guide. So, in preparation for an intro to Docker class I’ll be teaching at my alma mater, Hackbright, in a couple weeks I decided to make a simple guide on how to get started with Docker that touches all the things I’d like to touch on. So, I present to you, Chloe’s 10 minute Docker crash course!
If you’re looking for a deeper dive into some of these topics, I will provide links along the way of previous articles I’ve written about particular subjects. But if you want a quick/simple intro to Docker, and want to get up and running in about 10 mins- this article is for you!
More a “video” person?
If you’re more of a visual learner, I’ve created a video version of this article here: Hello Whale- Getting Started with Docker!
Ok, here we go!
So, what’s the deal with containers?
Today as developers, we are quickly scaling, have multiple environments, implement fast improvements to our code, and work with decoupled services. This differs quite a bit from the days of slow scale, individual environments, lengthy development cycles, and monolithic applications. Since we deal with so many different frameworks, databases, and languages (as well as different dev environments, staging servers, and production models), we needed a new model to enable us to quickly spin-up apps with all our information in one place.
Enter Docker! Docker launched as open source technology in March 2013, and very quickly gained popularity in the developer community. By containerizing applications (which we’ll go into momentarily), developers began to see significant decreases in development-to-production length, continuous integration time, and much less “works on my machine” scenarios. While Docker is often referred to as a “lightweight VM”, the two are quite different. You can read more about Containers != VMs in my article here.
As a platform, Docker is know as “Docker Engine”. It also has many tools including Docker Compose, Docker Swarm, Docker Cloud, etc., but let’s not get ahead of ourselves Let’s get up and running!
First, let’s install Docker
This is easy- go here and follow the directions: https://docs.docker.com/engine/installation/
You can also use this web-hosted demo (note: it will expire after 4 hours of use!) http://play-with-docker.com/
Cool, let’s run our first container
Great! You now have Docker installed and you’re in your terminal (or, you’re using play-with-docker!). Run the following: docker run -it ubuntu and you’ll see something similar to root@04c0bb0a6c07:/# . Hooray! We just used the Docker client to interact with the Docker daemon.
So, what’s happening here? Well, you’re running an image (ubuntu). What’s an image, you ask?
An image is an application you would like to run.
And what happens when you run that image? You get a container! But, what’s a container?:
A container is a running instance of an image.
Still want to know more? You can read more about images and containers here.
And guess what? You’re running your first container! This is just a simple ubuntu system. Pretty cool huh? And no, you’re not just telling Docker to “run it” (although, that’s a great way to remember that command!).
-i informs Docker that we would like to connect to the container’s standard input
-t let’s Docker know that we want a pseudo-terminal
Now, if you try to do the following, you’ll see we get a command not found response.
figlet hey
Don’t fret- we just need to install it! Run apt-get update to update the apt packages. Now run apt-get install figlet
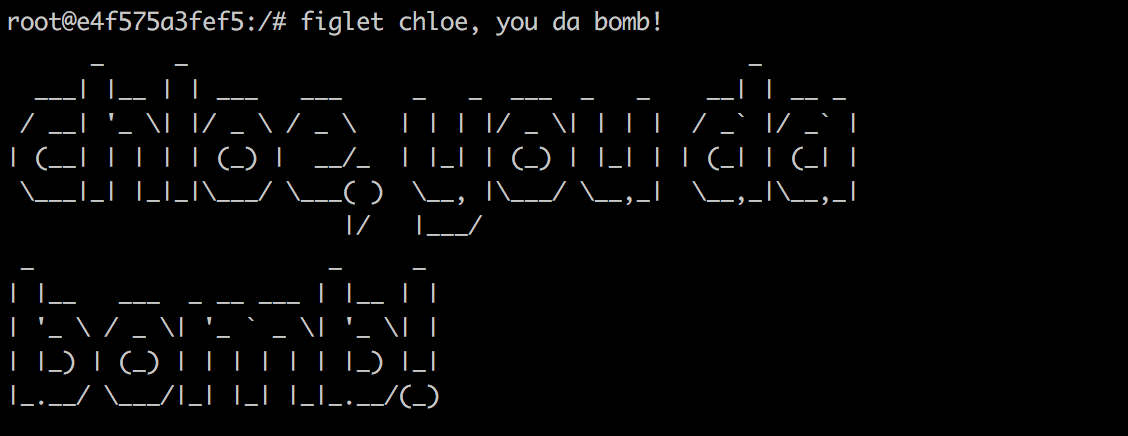
Here’s the fun part… write figlet [your name here], you da bomb!
Oh hey! Look at that! In just a minute we installed figlet, and ran it in our container. Pretty cool, huh?
Now, let’s exit our container. Type exit. Right now, it still exists, but it’s resources are now freed up.
So, if we try to run this again (docker run -it ubuntu)… and try to run figlet hey- where’s figlet? Well, it was in our other container. This is a new container that does not have figlet. See what’s going on here? Multiple instances (containers) of the image Ubuntu. Still fuzzy on images vs. containers? Check out this article I wrote on how to differentiate them.
TLDR: you can think of images as a VHS, and your containers as a VHS player.
If I open another tab (if you’re using the playground, skip ahead to next paragraph), and then I run docker ps, I am given a list of all my running containers. Now I can see my container id, our image, when it was created, ports, names, etc.
Using Docker Hub
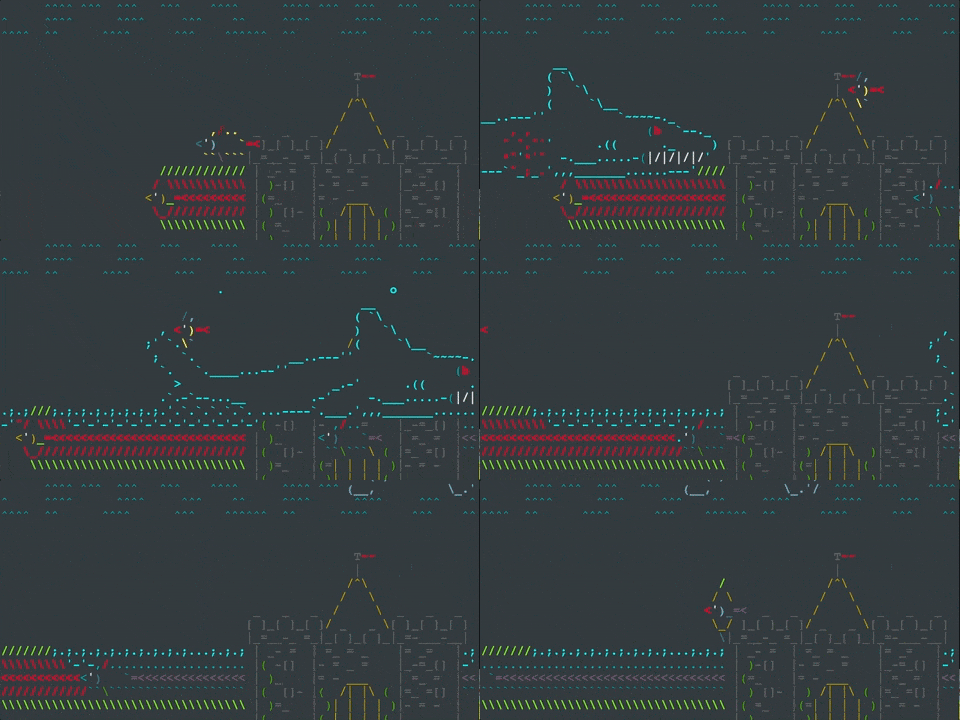
Now, open a new tab (or, instance if you’re using the playground) and run the following: docker run -it --rm danielkraic/asciiquarium
WHOA! An aquarium!! But where did it come from?! Great question. It came from the Docker Hub registry! This is a public docker repository- what does that mean? This image is a user image, created by danielkraic. You can find it here: https://hub.docker.com/r/danielkraic/asciiquarium/
Did you happen to notice the output of our terminal when we ran our previous command? First, it told us it was “Unable to find image ‘danielkraic/asciiquarium:latest’ locally”. Then, it said “latest: Pulling from danielkraic/asciiquarium”. So, what’s happening here? Docker checked if we had that image locally, and it was not there. It then pulled danielkraic/asciiquarium and its layers from Docker Hub. This is where Docker gets it “light-weight” street cred- it will never pull the same image if you have it locally, only the layers it may not have had previously. This copy-on-write system allows for much faster build speeds. You can learn more about layers in my article here: Hello Whale: Layers in Docker
While aquariums are cool, you’ll probably be using Docker for more than just cool ascii fonts and sharks… The good new is that Docker Hub has images of just about everything you could possibly need. Be it official images of languages, databases, or even the entire Star Wars movie in ascii art- Docker Hub has it.
Here are a couple things to know about the Docker registry:
-Many repos on DockerHub are created by people just like you (we’ll make one of these in my next article). The format of these will be something like chloecodesthing/reallycoolthing
-There are also official images like this python one. They usually have really good documentation, tags for their many version listed, directions on how to run them, etc.
While my aquarium is still running, let’s run docker ps in our other tab. You’ll see our aquarium is running, as well as ubuntu (and perhaps Star Wars, because I’m sure you were intrigued). If I exit out of any one them, and run a docker ps, I’ll no longer see that container listed.
Docker Layers
I’m sure you’ve noticed when you pull an image from Docker that you’ll see a bunch of letters/numbers and either the words “pull complete” or ‘already exists” beside them. (If you want to see for yourself, run docker pull docker/whalesay twice and look at the different outputs). You’ll see that the first time we run this command we see things loading and the “pull complete” response upon completion. While the second time we run the command, we get an “Already exists” message (and it goes much faster!). Believe it or not, this isn’t witchcraft. This is part of the awesomeness that is “layers” in Docker.
There are some really great articles out there that compare Docker layers to tracing paper, pancake stacks, etc., but I prefer the pizza metaphor. You can read more here, but TLDR:
Let’s say we had a cheese pizza. We have a base layer of dough, tomato sauce, and cheese. Then I decide I want to have half of my pizza with pepperoni with it. Would I bake another pizza from scratch, make new layers, and add pepperoni to that one? Of course not! I’d just add a layer of pepperoni to half of my existing pizza. No need to go through the trouble of making a whole new base pie. As we make more changes, we create more layers.
After running a container once on a machine, you’ll notice that subsequent builds load much faster. That’s because Docker’s layers allow for copy-on-write system- only requiring us to add what we need, and not rebuild anything we already have.
To break it down even more:
Images are read-only. Any time we create a new container from an image and we make changes to it, we can transform it into a new layer. A new image is created by stacking a new layer on top of an old image.
Make it stop!
There are two ways that we can stop our containers. If we use the docker stop command, it will send a TERM signal, and (after 10 seconds) will KILL it if the container has not stopped. Using the kill command will immediately stop the container. Feel free to try either now! First, you can run a docker ps to see what containers you have running. Simply write docker stop or docker kill and then the container id. It’s worth noting that “kill” can take multiple ids at a time, and you only need to include the first 3 numbers/letters. Run a docker ps after killing/stopping your containers to see them removed.
Here are a couple more helpful commands:
- Want to see a list of your stopped containers? Use
docker ps -a - Want to restart a container (using the same options you launched with)? Use
docker start [your container id goes here]
Congrats! You did it!
Awesome! In about 10 minutes (maybe a little longer if you got distracted by ascii Star Wars) you’ve learned about Docker, ran your first container, used Docker Hub, learned about Docker layers, and stopped/killed your running containers. Ready to dig a little deeper? Look out for my next article where we’ll create a repo on Docker Hub, learn about tags, and make our first Dockerfile.


