In this tutorial, we will use Azure Kubernetes Service (AKS) to deploy an application in the form of a Helm package. We will use Codefresh for CI/CD and also get a brief look at Draft for creating Helm charts.
What you will learn
- How to create a Kubernetes cluster in Azure
- How to install Helm -the Kubernetes package manager – on the cluster
- How to add/view/edit the cluster in Codefresh
- How to use Draft to create a starting Helm chart for the application
- How to push Helm charts with Codefresh
- How to deploy Helm charts with Codefresh
Prerequisites
If you want to follow along as you read the tutorial, you will need:
- A free Codefresh Account
- An Azure subscription (trial should work fine)
- A Github repository with your application (Codefresh also supports Gitlab and Bitbucket)
The programming language of your application does not really matter, as long as it comes with a Dockerfile. Even if you don’t have a Dockerfile at hand we will see how you can create one easily with Draft.
Creating a Kubernetes cluster in Azure
The documentation for AKS explains how you can create a cluster using the command line or the GUI of Azure Portal. Both ways are valid but since we are also going to use Helm from the command line, it makes sense to dive into the terminal right away. For the sake of convenience, however, we will use the terminal offered in the Azure portal (Azure cloud shell) which offers some nice features such as automatic authentication as well as preinstalled kubectl and helm executables.
Login into Azure portal with your account and launch the cloud shell from the top right of the GUI.
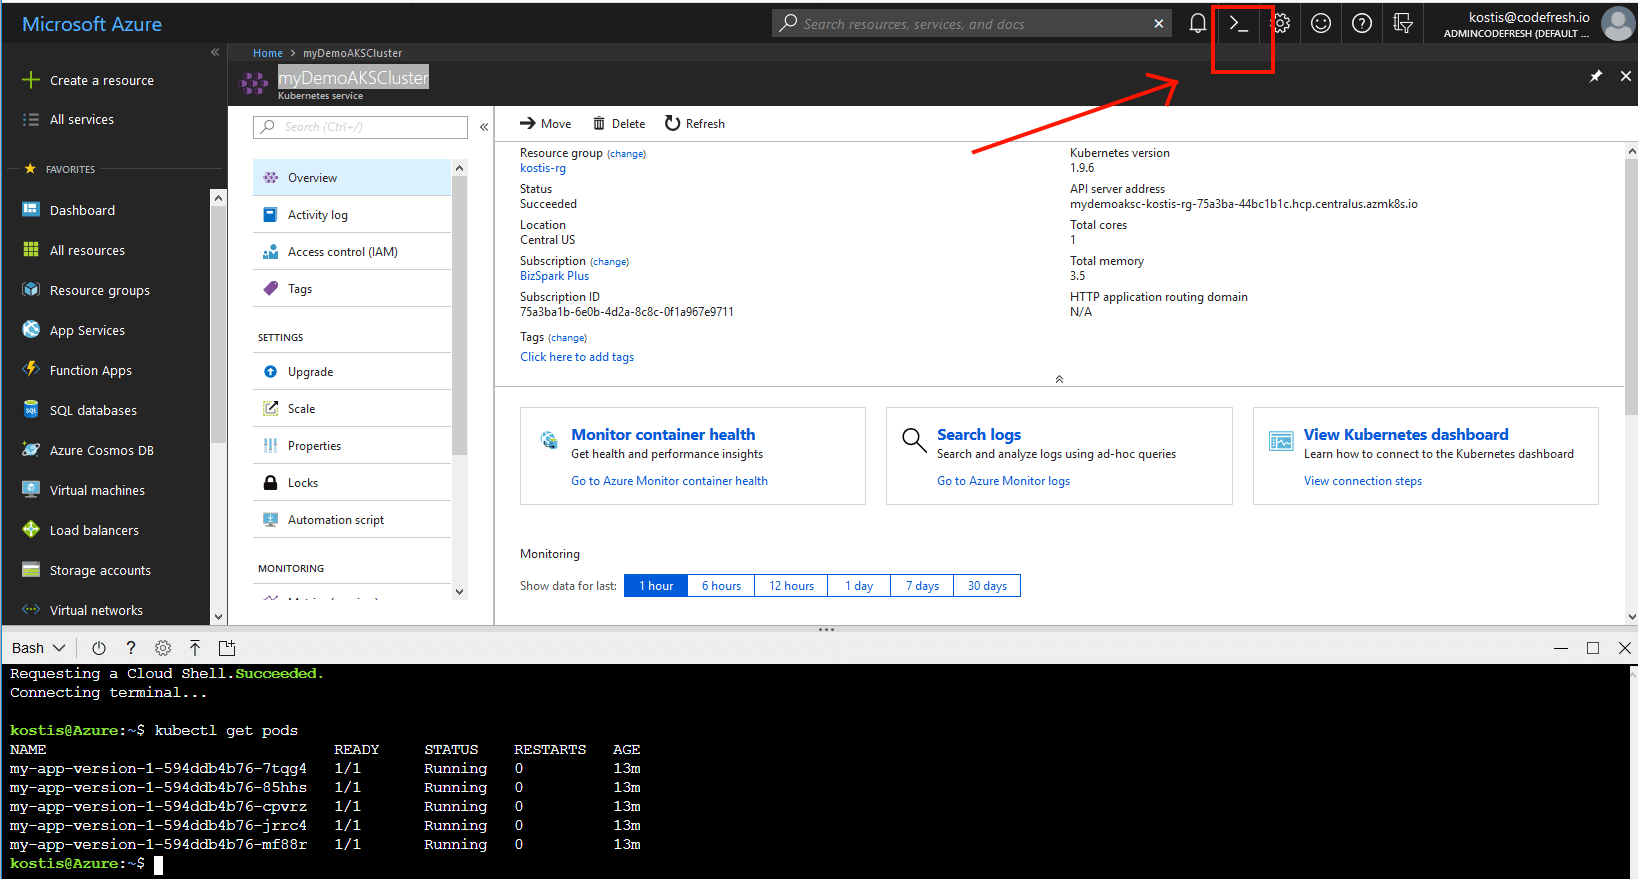
After a few moments, you should have access to the command line right from your browser!
Before you create your first Kubernetes cluster in Azure you need to understand the concept of Resource Groups. Everything in Azure is created under a Resource Group. If you don’t have a Resource Group yet you need to create one first following the documentation.
A Resource Group was already available for the purposes of this tutorial and therefore creating an Azure cluster was a single line in the terminal:
az aks create --resource-group kostis-rg --name myDemoAKSCluster --node-count 1 --generate-ssh-keys
Adjust the node count according to your preference but be aware that this affects billing. In this tutorial we’ll use one, but adding more won’t change how you interact with Kubernetes.
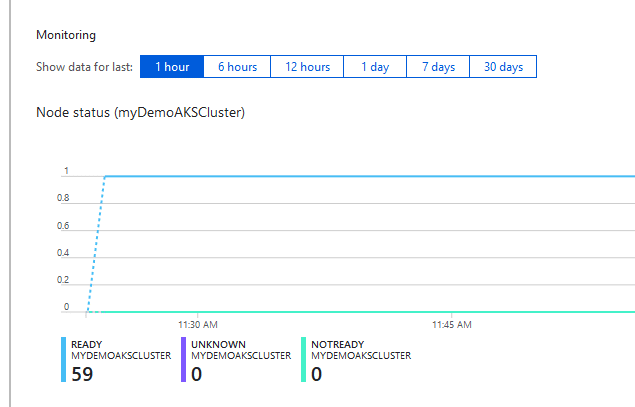
After a few minutes, the cluster will be created and you can even visit it from the GUI and see its details.
The next step is to setup kubectl access to the cluster. Kubectl is already available in the command line but you still need to match its config with the cluster we just created. The command that does this uses the Azure CLI:
az aks get-credentials --resource-group kostis-rg --name myDemoAKSCluster
Once that is done, we have full access to the cluster with kubectl. We can now enter any of the familiar commands and see the resources of the cluster (pods, deployments, services etc).
Connecting the Azure Kubernetes cluster to Codefresh
Codefresh has native support for Azure Kubernetes clusters which includes a nice dashboard that can be used both for viewing existing resources as well as modifying them and built-in deploy steps through pipelines.
To connect the Azure Kubernetes cluster, log in to your Codefresh account and click Kubernetes on the left sidebar. Then click “Add Cluster”

From the drop-down menu select Microsoft Azure and enter your cluster credentials (url, certificate, and token). To obtain these values, Codefresh documentation explains the kubectl commands that you need to execute. You can execute them in the Azure cloud shell directly, as we have already seen in the previous section that kubectl is configured to point at the newly created cluster.
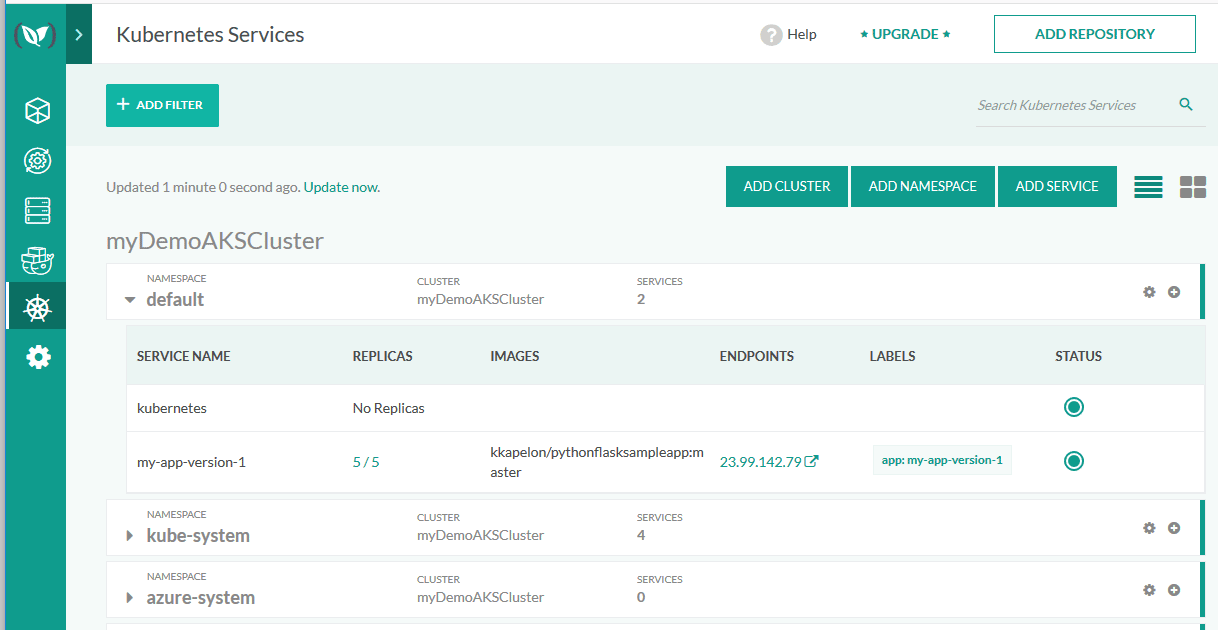
Once all the details are filled in, test your settings and save the cluster configuration. If everything goes well, you will be able to click on Kubernetes on the left sidebar and view all the cluster details within Codefresh.
The last step is to create a registry pull secret so that the cluster can pull Docker images from the Codefresh Registry. Each Codefresh account comes with a built-in free Docker registry that can be used for image storage. Of course, you can also use your own external registry instead. (Azure offers a Docker Registry as well.)
First, you need to create a token for the Codefresh registry, then execute the following kubectl command in the Azure cloud shell:
kubectl create secret docker-registry my-codefresh-registry --docker-server=r.cfcf.io --docker-username=--docker-password= --docker-email=
Of course, you need to enter your own values here. Notice also that this secret is for the default namespace, so if you want to use another namespace add it as a parameter on the command above.
Tip – If you don’t want to run the command line to create the secret, you can goto the Kubernetes dashboard and click “Add Service” then click on “Image Pull Secret” to add a secret for any of your connected repositories.
That’s it! The Kubernetes cluster is now ready to deploy Docker applications. At this point, we could use plain Kubernetes manifests to deploy our application. In this tutorial, however, we will see how we can use Helm.
Installing Helm on the Azure Kubernetes cluster
Helm is a package manager for Kubernetes. It offers several extra features on top of vanilla Kubernetes deployments, some of which are:
- The ability to group multiple Kubernetes manifests together and treat them as a single entity (for deployments, rollbacks, and storage).
- Built-in templating for Kubernetes manifests, putting an end to custom template systems that you might use for replacing things such as the Docker tag inside a manifest.
- The ability to package the collection of manifests in Charts which contain the templates as well as default values.
- The ability to create catalogs of applications (Helm repositories) that function similar to traditional package repositories (think deb, rpm, nuget,brew, npm etc).
Helm comes in two parts, the client (Helm) and the server component called Tiller. The Azure cloud shell comes with the client already preinstalled. The client can be used to install the server part as well. Therefore, just execute in the Azure cloud shell the following:
helm init
The helm executable uses the same configuration as kubectl. Because kubectl was already configured to point to our Kubernetes cluster in the beginning of this tutorial, the helm init command works out of the box without any extra configuration.
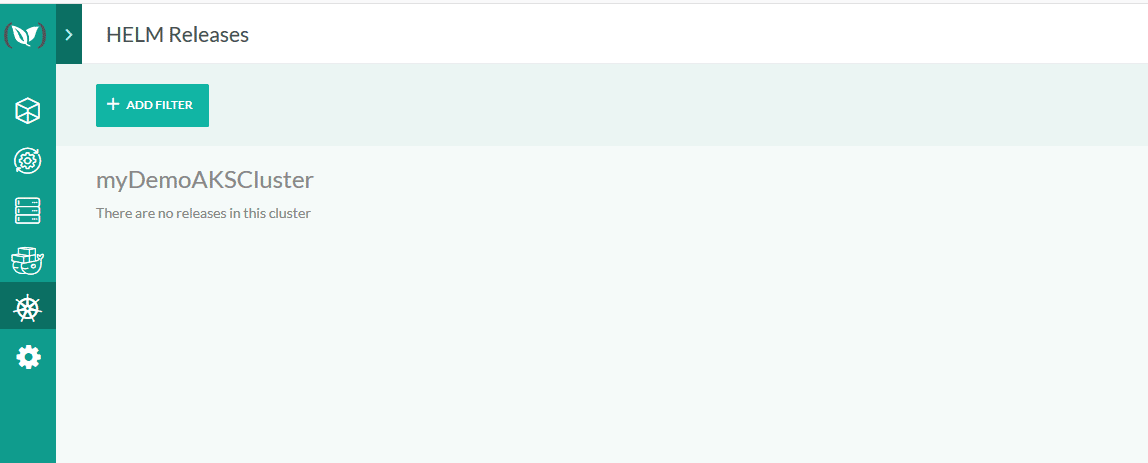
Codefresh also comes with a Helm dashboard that you can now visit. It should be empty because we haven’t deployed anything yet.
Creating a starter Helm chart using Draft
Creating a Helm template and associated default values is a well-documented process. Maybe you are already familiar with Helm templates and your application already has its own chart. In that case, skip this section.
In this tutorial, however, we will select the easy way out and auto-generate a chart that will serve as a starting point for the Helm package. We will use Draft for this purpose.
Draft is a tool geared towards local Kubernetes deployments (i.e. before you actually commit your code) such as Minikube. It is developed by the same team that develops Helm so obviously, they play along very well together.
We will explore the deployment capabilities of Draft in a future article. For the present situation, we will exploit its capability to create a Helm chart for any of the supported languages.
Download Draft for your OS and then execute it at the root directory of your project.
draft create
This will create a default Helm chart under the charts folder. Notice that Draft will even create a Dockerfile for your application if it doesn’t contain one already.
Edit the values.yaml file to your preference. At the very least you should change:
- The ports for the Kubernetes service
- The type of Service from ClusterIP to LoadBalancer
You can also add the Docker repository/tag values, although this is not strictly necessary as Codefresh will do this for us during the actual deployment.
Once you are finished, commit the chart folder to your Git repository.
Preparing a Helm Chart with Codefresh
Apart from a built-in Docker registry, all Codefresh accounts also include an integrated Helm Repository. A Helm Repository can be used to catalog your own Helm Charts in addition to the public charts already included with Codefresh from KubeApps.
To push the Helm Chart, create a new Codefresh Pipeline with the following yml build file:
version: '1.0'
steps:
 BuildingDockerImage:
    title: Building Docker Image
    type: build
    image_name: kostis-codefresh/python-flask-sampleapp
    working_directory: ./
    tag: ${{CF_BRANCH_TAG_NORMALIZED}}
    dockerfile: Dockerfile
 StoreChart:
    title: Storing Helm Chart
    image: 'codefresh/cfstep-helm:2.9.1'
    environment:
     - ACTION=push
     - CHART_REF=charts/python
This yml file contains two steps. The first step, BuildingDockerImage creates a Docker image from a Dockerfile that exists at the root of the project.
The second step uses the premade Codefresh Helm Docker image and pushes the Helm chart located at charts/python in the root folder. The names of steps are arbitrary.
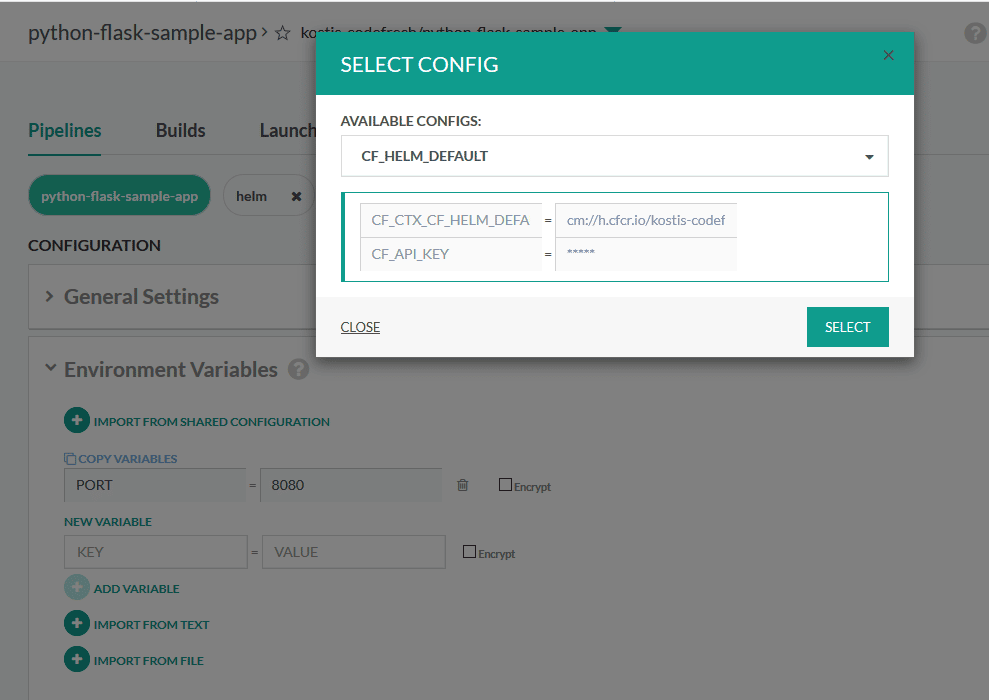
In order to make this pipeline have access to the internal Helm Repository you also need to import its configuration. Select “import from shared configuration” in your Codefresh pipeline and choose the CF_HELM_DEFAULT config.
After you execute the pipeline you will see the chart getting pushed in the Codefresh Helm Repository. To browse this repository select Kubernetes->Helm Releases from the left sidebar and expand the CF_HELM_DEFAULT Repo.
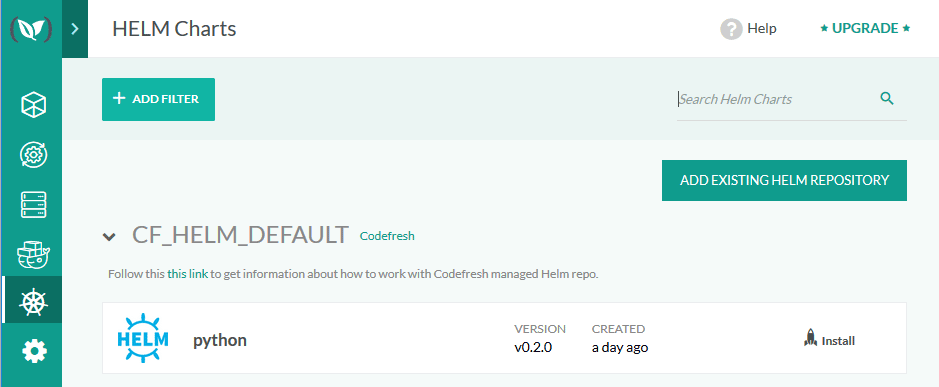
You can also manually deploy this chart to your Azure cluster by clicking the Install icon as shown on the right-hand side. Even though this is a convenient way to deploy applications via the Codefresh GUI, it is best if we fully automate this process as you will see in the next section.
Automatically deploying a Helm Chart with Codefresh
In the previous section, we saw how you can store the Helm chart in the integrated Codefresh Helm repository. The final step is to actually deploy the application and get a full CI/CD pipeline. Here are the respective pipeline steps:
DeployChart:
    image: 'codefresh/cfstep-helm:2.9.1'
    environment:
     - CHART_REF=charts/python
     - RELEASE_NAME=mypython-chart-prod
     - KUBE_CONTEXT=myDemoAKSCluster
     - VALUE_image_pullPolicy=Always
     - VALUE_image_tag=${{CF_BRANCH_TAG_NORMALIZED}}
This is a Helm step as before, but with the following parameters:
- We define again which chart we will deploy
- We select a release name. (This is optional and if not provided, Helm with autogenerate one for us using a funky naming pattern.)
- The Kube context selects the Azure Cluster as the target of the deployment (Codefresh supports linking multiple Kubernetes clusters from multiple cloud providers).
The last two lines show the power of Helm. Instead of having to use custom replacement scripts or external templating system that are needed for plain Kubernetes manifests, Helm has built-in templating. The two lines override the default values for the chart.
We change the pull policy to “always” (by default it was IfNotPresent) and also we make sure that we use the Docker image from the branch that we are building from. This is just a suggestion and you can use any other combination of tags on your Docker images. You can find all built-in Codefresh variables in the documentation.
Once the application is deployed you should be able to access it from its external endpoint. If you visit again the Codefresh Helm dashboard you should now see the release along with its templates and values.

Congratulations! You have now deployed a Helm chart in the Azure Kubernetes cluster and the application is ready to be used.
You can also see the release from the Azure Cloud shell if you execute
helm list
This will print out the release details in the terminal.
Rolling back deployments without re-running the pipelines
Another big advantage of Helm is the way it gives you easy rollbacks for free. If you make some commits in your project, Helm will keep the same deployment and add new revisions on it.
You can easily rollback to any previous version without actually re-running the pipeline.
The server part of Helm keeps a history of all releases and knows the exact contents of each respective Helm package.
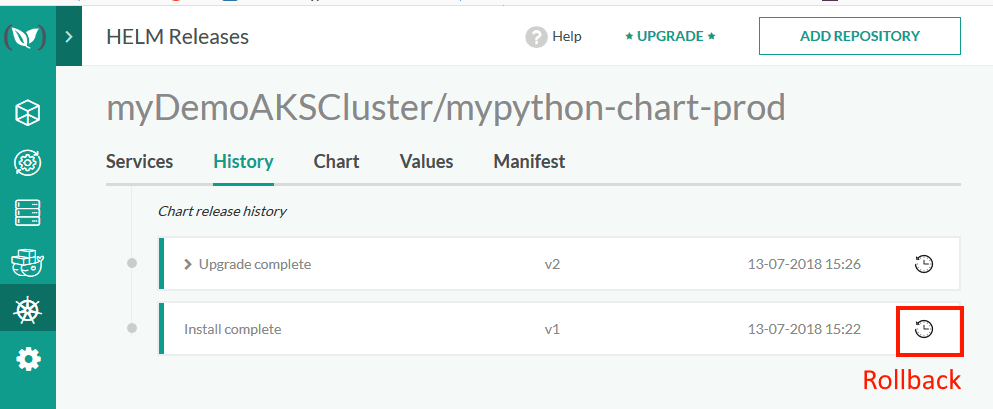
Codefresh allows you to do this right from the GUI. Select the History tab in the Helm release and from the list of revisions you can select any of them as the rollback target. Notice that rolling back will actually create a new revision. So you can go backward and forward in time to any revision possible.
Conclusion
We have reached the end of this tutorial. You have now seen:
- How to create an Azure Kubernetes cluster
- How to install Helm
- How to give access of the Codefresh Registry to the Azure cluster
- How to connect the Azure cluster in Codefresh
- How to inspect Kubernetes resources and Helm chart/releases from the Codefresh GUI
- How to create a Helm chart using Draft and how to edit default values
- How to use Codefresh to store the chart in the integrated Helm repository
- How to use Codefresh to deploy applications to the Azure cluster from a Helm chart
- How to easily rollback Helm releases
Now you know how to create a complete CI/CD pipeline that deploys applications to Kubernetes using Helm packaging.
New to Codefresh? Create Your Free Account Today!