SonarQube is a universal tool for code analysis that provides continuous inspection of your code to highlight existing and newly introduced issues. This allows you to “Clean as You Code”, which aims to reach the maximum code quality in your newly written code.
This post will:
- Provide an overview of SonarQube and how you can use it locally
- Introduce you to Codefresh Pipelines
- And lastly, we will show you how to integrate SonarQube directly in Codefresh with our SonarQube plugin
An Overview of SonarQube
The SonarQube architecture consists of a server and a SonarScanner. The Scanner is a separate client type application that is used to analyze projects in connection with SonarQube. The Scanner is usually included in your CI/CD pipeline.
In case you want to use SonarQube locally, there are two different ways to install it; either through the zip file or using the official Docker image that you can find on the Docker Hub. The local version can be used to scan your code during development. Alternatively, using the SonarCloud, once the code is pushed to your remote git repository, you can access their online UI. The SonarCloud can be used for free for testing purposes.
To get started installing SonarQube locally, you need to have Docker installed. This will allow you to pull the official Docker image of SonarQube:
docker pull sonarqube
We can then run the image to access the UI locally:
docker run -d --name sonarqube -e SONAR_ES_BOOTSTRAP_CHECKS_DISABLE=true -p 9000:9000 sonarqube:latest
Now you should be able to access SonarQube on localhost:9000. Log in to the service with the System Administrator credentials (login=admin, password=admin).
For more advanced use of SonarQube, it is recommended that you install the server. In this case, you will use:
- The SonarQube server running the following processes:
- a web server that serves the SonarQube user interface.
- a search server based on Elasticsearch.
- the compute engine in charge of processing code analysis reports and saving them in the SonarQube database.
- The database to store the following:
- Metrics and issues for code quality and security generated during code scans.
- The SonarQube instance configuration.
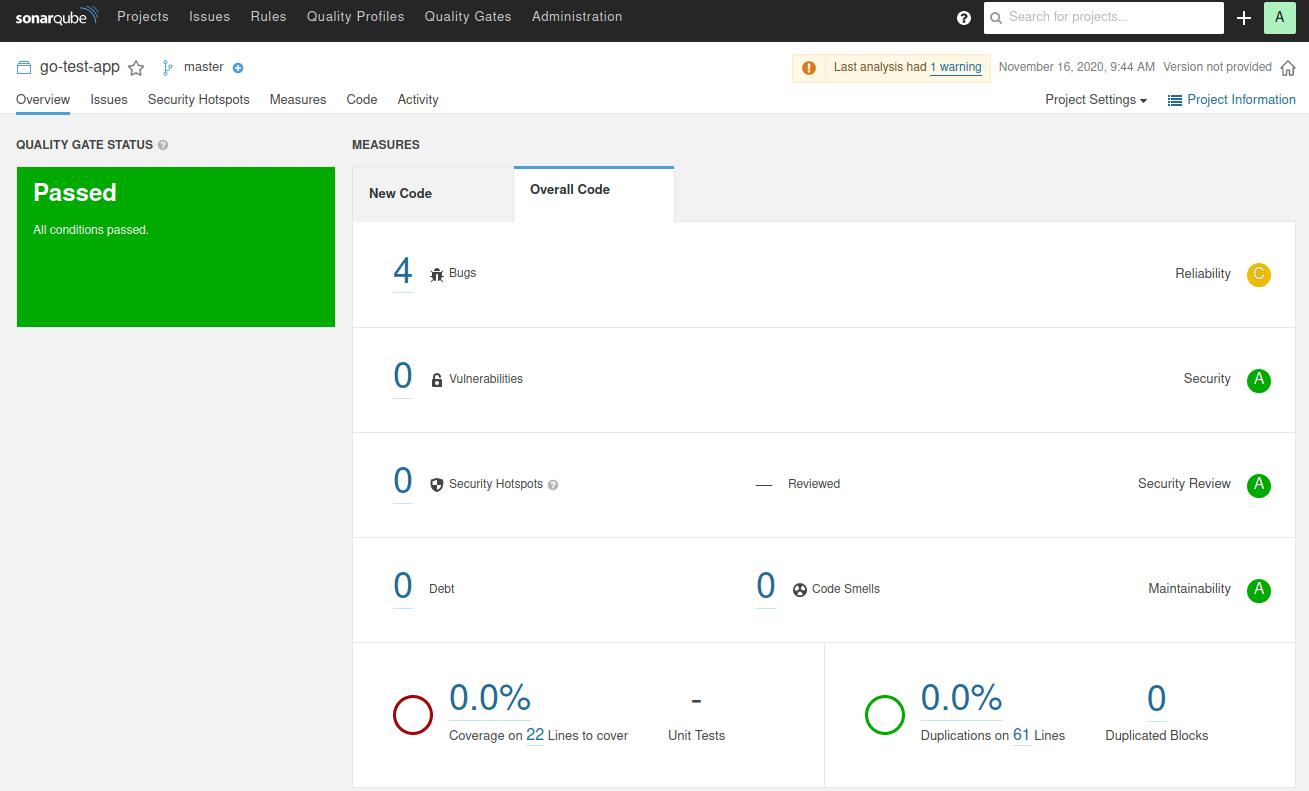
The process that SonarQube follows when analyzing your code is highly dependent on the programming language that your application is written in. While SonarQube has been used predominantly to analyze Java files, it can analyze 27 different languages. SonarQube can report on bugs, vulnerabilities, code smells, coverage, or duplication. Additionally, it also calculates more advanced metrics, such as the complexity of your code. For each category, the UI will show you the number of issues detected within the category as well as the percentage.
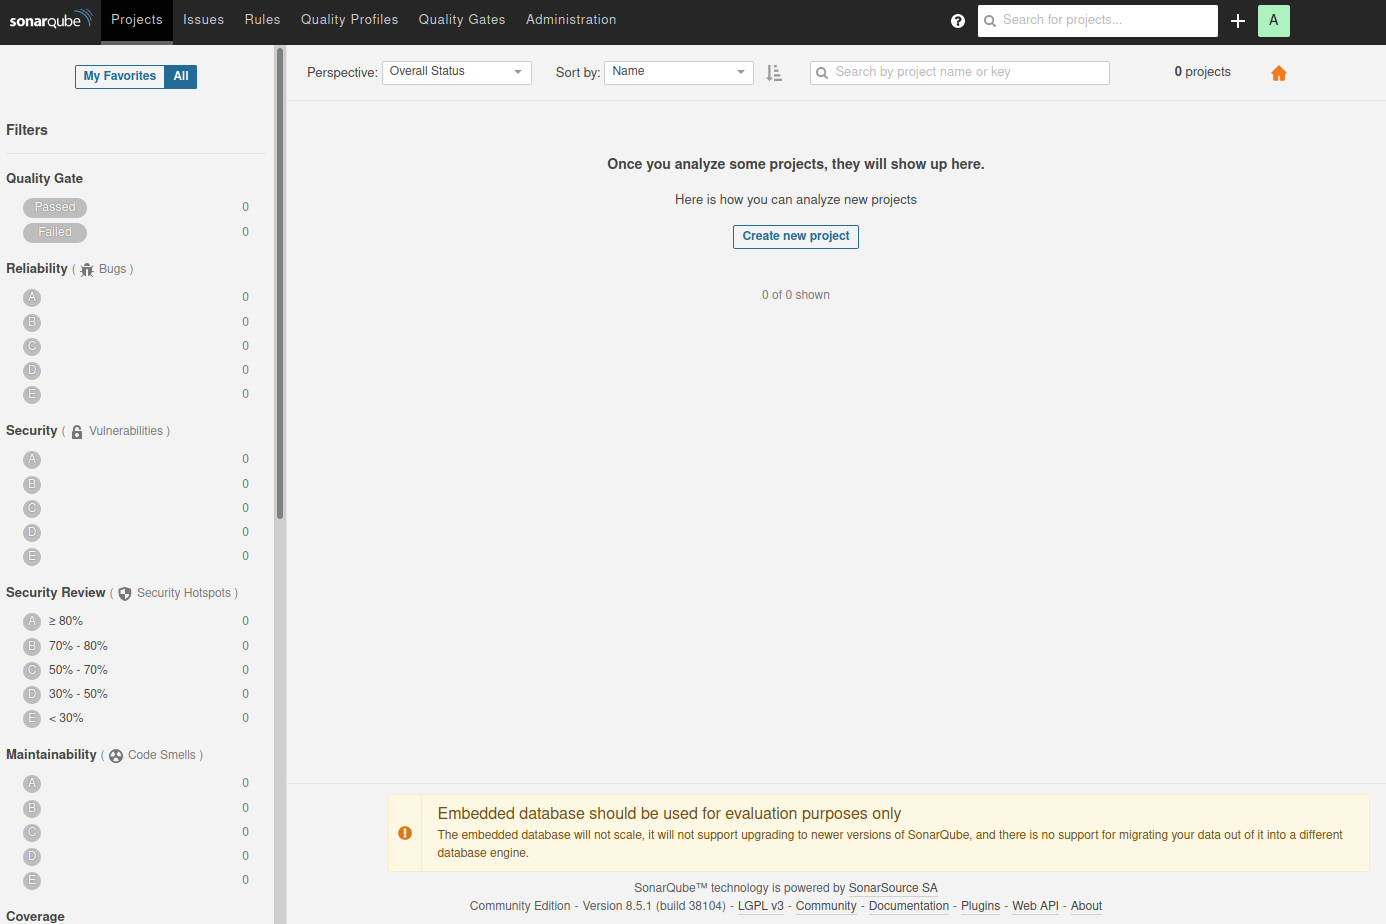
Let’s go ahead and scan the code in the following project. Note that you can also follow along using your own project, as long as it is written in a language that is supported by SonarQube.
- Click the Create new project button.
- When asked How do you want to create your project, select Manually.
- Give your project a Project key and a Display name and click the Set Up button.
- Under Provide a token, select Generate a token. Give your token a name, click the Generate button, and click Continue.
- Select your project’s main language under Run analysis on your project, and follow the instructions to analyze your project. Here you’ll download and execute a Scanner on your code (if you’re using Maven or Gradle, the Scanner is automatically downloaded).
Now we have to do the following to add the SonarScanner to our PATH and scan our project:
- Extract the zip file within your working directory
- Access the following file `working-directory/sonar-scanner-cli-4.5.0.2216-linux/sonar-scanner-4.5.0.2216-linux/conf` and edit it as such that the following line is uncommented:
#----- Default SonarQube server
sonar.host.url=http://localhost:9000
- Save and close the file
- Sonar Scanner /bin directory to your path
export PATH="sonar-scanner-4.5.0.2216-linux/bin:$PATH"
In our case, the folder sonar-scanner-4.5.0.2216-linux/bin is inside the directory that we run the command in. Note that we are on Ubuntu 20.04; if you are on another operating system, this command will vary.
- Verify that the path is added correctly by running: sonar-scanner -h
- Now we can scan our project with the command provided in the UI from step 5:
sonar-scanner
 -Dsonar.projectKey=go-test-app
 -Dsonar.sources=./simple-go
 -Dsonar.host.url=http://localhost:9000
 -Dsonar.login=the token you generated in step 4
Once the command executed successfully, go ahead and refresh the UI. You should now be able to see the following output:
This might not have been the most straight forward process to get up and running. Next, we will show you an easier option using the custom SonarQube plugin in Codefresh.
Using SonarQube in Codefresh
To use SonarQube in Codefresh does not require custom installation. Instead, you can use the Codefresh SonarQube plugin to integrate SonarQube directly into your pipeline. The Codefresh pipeline is composed of a series of steps. In this case, SonarQube will become one of the steps. The official SonarQube step can be found in the Codefresh plugin directory, along with several more.
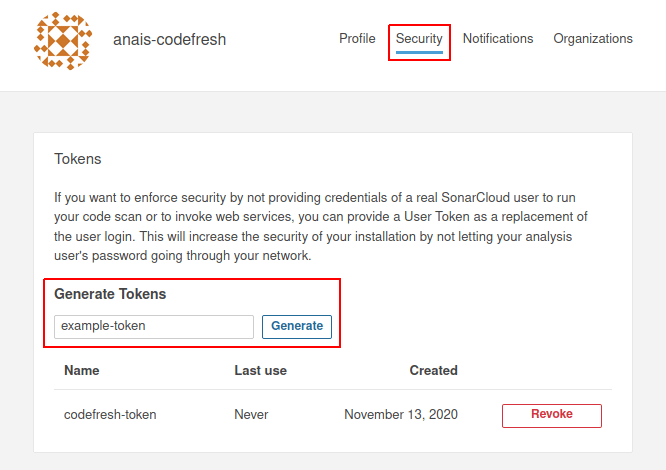
For our Codefresh step, we need again an access token from the SonarQube application. In this case, we are going to use SonarCloud.
- Go to your User > My Account (top right corner)
- Select the Security tap
- Generate your token — we named ours `codefresh-token`
- Save the token somewhere where you will be able to access it again easily.
Next, we need to add a sonar-project.properties file to our project. Not all environment variables are currently automatically defined in the SonarScanner. Thus, we have to set-up a sonar-project.properties file in our root directory:
touch sonar-project.properties
This file is used to define the sonar.organization and the sonar.projectKey
# must be unique in a given SonarQube instance

sonar.projectKey=sonarqube-example

# organization name

sonar.organization=anais-codefresh
Please replace the values with your project-specific values. You can find the organization name in your SonarCloud Account under My Organizations.
Now go ahead and create a Codefresh account (if you don’t have one yet, now is the time — it’s free!!).
Create a new project and within the project, we want to create a new pipeline. Upon creating the pipeline, make sure that you select the right project from your git repository. We are going to use the same app as before; which contains a basic go application and a Dockerfile. If you are using your own application, please make sure that it contains a Dockerfile.
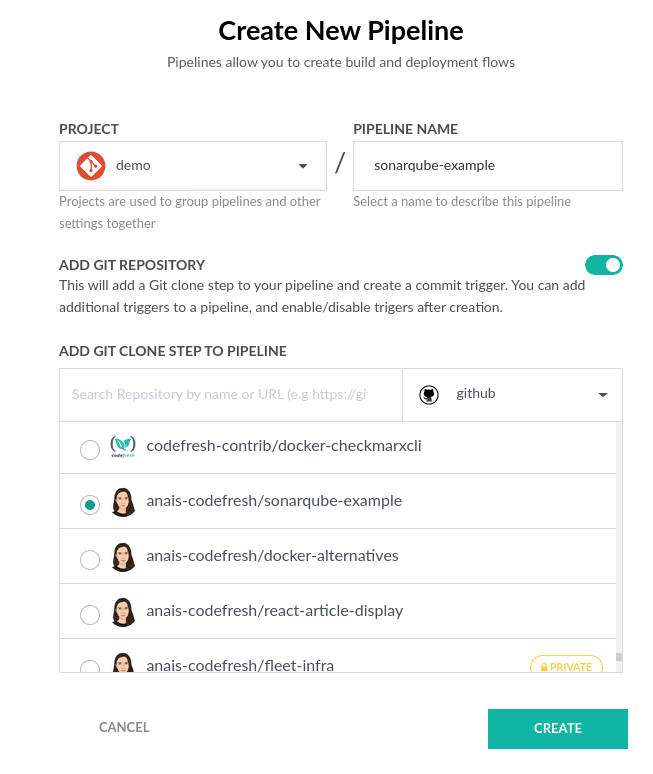
Once you hit “CREATE”, you will be redirected to the workflow of your pipeline. This includes an automatically generated codefresh.yml file, which defines your pipeline. We now want to add the SonarQube step.
Looking at the custom plug-in, we have the following options:
Sonarqube:
  type: sonar-scanner-cli
  arguments:
    SONAR_HOST_URL: 'http://foo.acme:9000'
    SONAR_LOGIN: username or key
    SONAR_PASSWORD: password if username is used
    SONAR_PROJECT_BASE_DIR: set working directory for analysis
    SONAR_SCANNER_CLI_VERSION: latest
We will modify our Codefresh pipeline to include the custom step:
 sonarqube:
    type: "sonar-scanner-cli"
    stage: "push"
    arguments:
      SONAR_HOST_URL: 'https://sonarcloud.io/' # replace with your host url
      SONAR_LOGIN: "insert access token" # replace with your access token
      SONAR_PROJECT_BASE_DIR: "/codefresh/volume/sonarqube-example" # replace with your working directory
      SONAR_SCANNER_CLI_VERSION: "latest"
For reference, have a look at the codefresh.yml in the repository.
Once added, save the pipeline and run the pipeline. You should then see the following output:
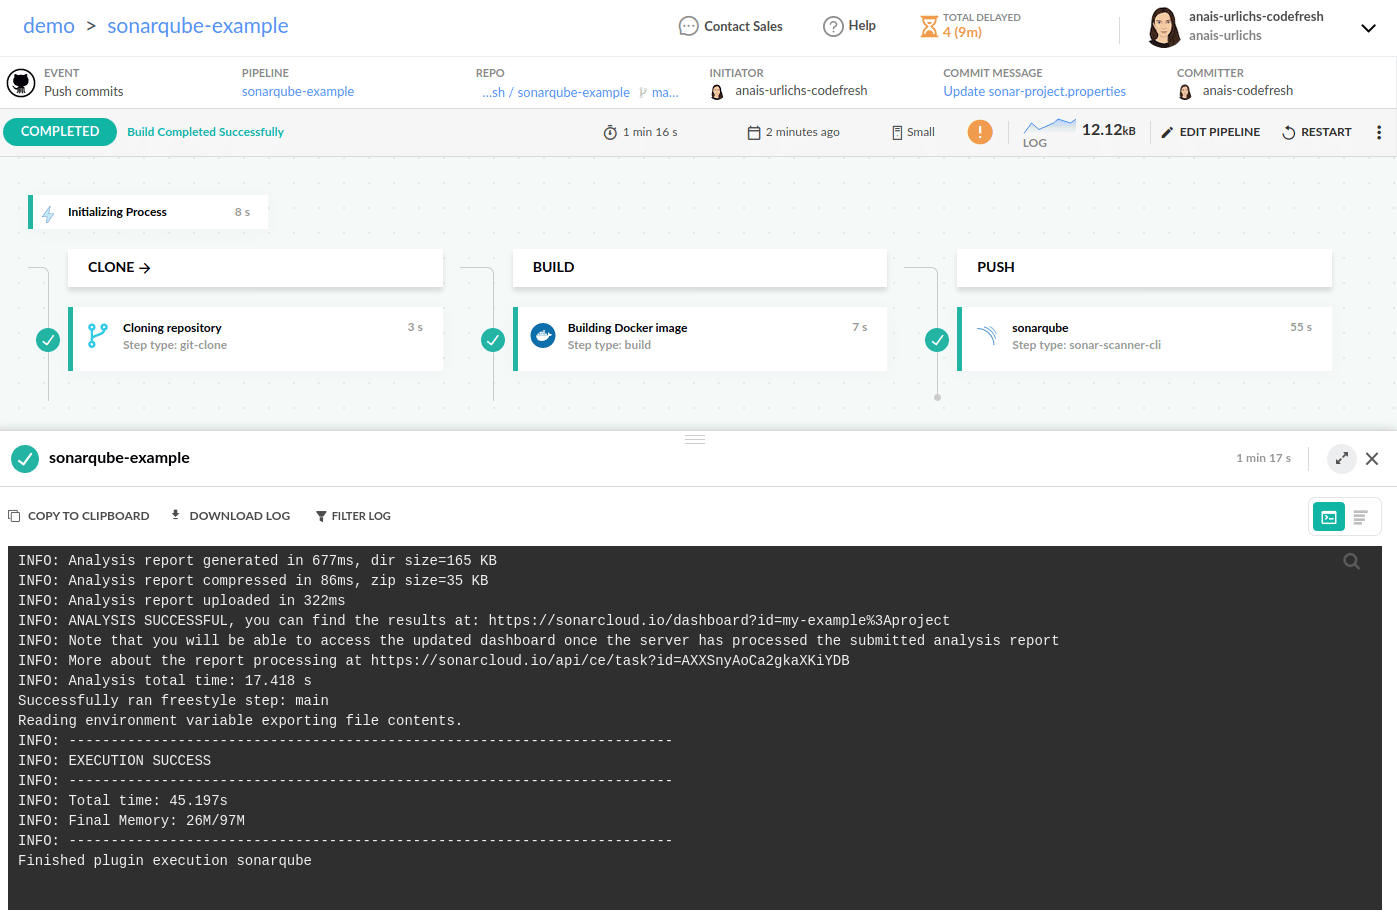
You can then view the analysis of your project in the SonarCloud:

Note that you can access different visualization formats of the report in the taps. Additional information is provided in the other sections on the platform. For more information please refer to the SonarQube official documentation.
Summary
Congratulations! Once you add the SonarQube step to your Codefresh pipeline, you will receive analysis reports of your code automatically with every pipeline build.
In this tutorial, we looked at:
- What SonarQube is
- How you can try out SonarQube locally
- Making everything easy peasy by adding a step to your Codefresh pipeline and automating the process
Please let us know in the comments how you liked this tutorial. If you have any questions, please join our community chat, we would love to hear from you.
You do not have a Codefresh account yet? — Create Your Free Account today!