Helm is an application package manager for Kubernetes. Using Kubernetes can often be overwhelming to maintain resources. Since Kubernetes is configured by YAML files, the more complex your application becomes, the more difficult it will be to navigate and make changes to the respective files; think about lots and lots of repetitive YAML files. A scenario that makes every developer cringe. Helm can help you solve this.
This blog post will explain what Helm is, how it works, and provide a walkthrough of how you can set-up your first Helm chart.
Helm Overview
Helm allows users to define a common blueprint for an application or a selection of microservices on a Kubernetes cluster through Helm templates. Helm templates describe the resources of your application. They will generate manifest files, which Kubernetes can understand to install and run your application. The combination of Helm templates and according values is called a Helm chart.
Each release goes through multiple stages, including its installation, upgrade, removal, and rollback. With Helm, you can group multiple microservices together and treat them as one entity. You can either create your own chart or use an existing one from Helm Artifact Hub. Once your application is packaged into a Helm chart, it can easily be shared and deployed on Kubernetes.
A lot of the criticism of Helm is based on Helm 2. However, Helm made several major changes between Helm 2 and Helm 3, namely:
- No more Tiller: Helm 2 had to be used in combination with Tiller which got a lot of criticism for its access-control;
- Release information is now by default stored in Secrets: to retrieve release information Helm can simply access the secret, decrypt it, and apply it. This is why Tiller is not needed anymore.
- Namespaces are not automatically created for releases: Helm 3 follows kubecl naming conventions by throwing an error message if you attempt to create a release where the namespace does not exist;
- JSON Schema Chart Validation: allowing maintainers to set-up a JSONSchema to define specific value types on a chart, the validation tool is automatically be run on helm install/unpgrade/lint.
Several features and specifications of Helm are optional or can be customized based on your project’s needs and your preferences. If you are familiar with Helm 2 but not 3, you might want to check those out. Also, Helm 2 will no longer receive security updates from November 13th onwards.
We will not look at the differences between Helm versions in this tutorial. If you are curious whether Helm is the right fit for your project, I recommend having a look at our e-book.
Alternatives to Helm
There are several Helm alternatives that provide templating options to manage Kubernetes resources. However, just templating is often not enough to manage the complexity of Kubernetes.
One widely promoted alternative is Kubernetes Operators. An Operator is a method of packaging, deploying, and managing a Kubernetes application. Thus, both Helm and Kubernetes Operators are sometimes used interchangeably to automate tasks. However, they are actually quite different.
Both tools are supposed to be used for different purposes. Helm set out to be the package manager for Kubernetes. In comparison, Operators are meant to translate user-knowledge into reusable code to extend and automate processes. Thus, as Matt Butcher, the creator of Helm, puts it:
“Helm is a package manager for Kubernetes. Operators are design-pattern-driven pieces of code that encapsulate knowledge for running an application. Yet (…), there are questions floating around about which one is ’the winner.’”
A lot of the confusion between Helm and Kubernetes Operators is based on the same terminology being used for different processes. For instance, when Helm users talk about installing something, they usually mean finding and installing a chart that, with little configuration, can manage their application resources. In contrast, using Kubernetes Operators, the conversation is usually around creating a Kubernetes YAML that manages and maintains an application.
Deciding between both, or using both in combination, is largely dependent on the type of application that you want to manage.
Getting started with Helm
This tutorial will provide a step-by-step guide on how you can set-up your first Helm chart for your project; taking you from Helm installation to deploying the chart and setting up a Codefresh pipeline.
Prerequisites
- Please make sure to have access to a Kubernetes cluster. For the first half of the tutorial minikube or microk8s are sufficient. If you are not sure which one to use, have a look at this tutorial.
- Kubernetes command-line tool — kubectl.
Installing Helm
Helm provides multiple installation options. We are on Ubuntu and are going to use snap to install Helm:
sudo snap install helm --classic
However, you could also use an existing package manager, such as Homebrew or Chocolatey, or install from the Binary Release, Source, or Script.
Setting up your first Helm Chart
We will base our Helm Chart on this React App. To follow the tutorial, you could either
- clone the App and do exactly what we do,
- apply the steps to your own NodeJS App,
- or apply and adapt the steps to your own application, using the steps here as a reference.
The decision is up to you.
Set-up Dockerfile
We will be using a Docker Image of our application in our Helm Chart. Follow the next steps to create your Dockerfile.
For the Dockerfile, we are using a multi-stage-build to combine multiple builds in a single Dockerfile. You can read more on multi-stage-builds on the Codefresh blog.
In your main project folder, create the Dockerfile:
touch Dockerfile
Open the file and either copy and paste the following Dockerfile into your own Dockerfile or modify the content in accordance with your needs. Please have a look at the comments provided for further information.
# Pull official base image

FROM node:14.9.0 as build-deps

# A directory within the virtualized Docker environment

# Becomes more relevant when using Docker Compose later

WORKDIR /usr/src/app

# Copies package.json and package-lock.json to Docker environment

COPY package.json yarn.lock ./

# Installs all node packages

RUN npm install

# Copies everything over to Docker environment

COPY . ./

# Installs all node packages

RUN npm run build

# the base image for this is an alpine based nginx image

FROM nginx:1.19-alpine

# copy the build folder from react to the root of nginx (www)

COPY --from=build-deps /usr/src/app/build /usr/share/nginx/html

# expose port 80 to the outer world

EXPOSE 80

# start nginx

CMD ["nginx", "-g", "daemon off;"]
Note our .dockerignore file, referencing the files and folders that will be ignored by the Docker daemon. Read more about the importance of dockerignore and how you can optimise your Docker images with the right specifications.
Before we are going any further, we will want to make sure that our Dockerfile set-up works. For this we are using the following command to build the Docker image:
docker build -t .
If you are using the same Dockerfile, you should expect an output similar to the one provided below:
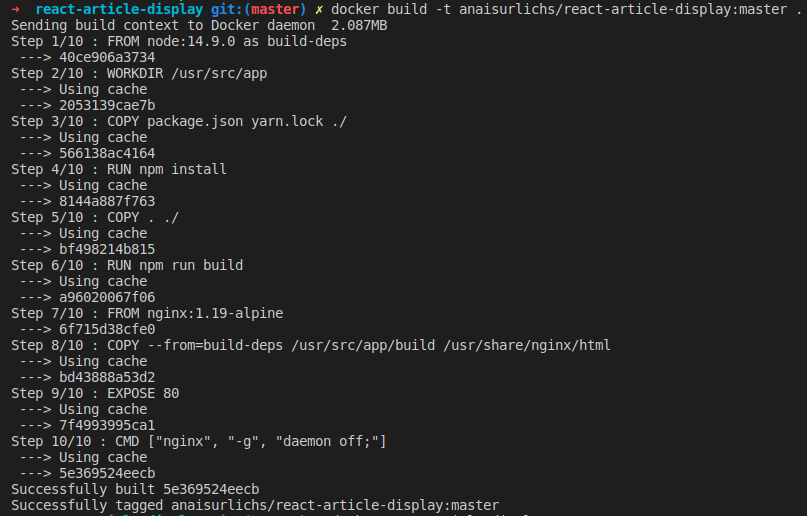
If you have received any error messages, please resolve those first before moving on to the next step.
Once we have built the Dockerfile, we can run the following command to access our application:
docker run -it --rm -p 3001:80
Then you can open the application on http://localhost:3001/.
Lastly, we want to publish our Docker image to a public registry. In our case, we are going to use the Docker Hub. However, you could also use another registry, such as the Github Container Registry. The choice is yours.
Log-into Docker:
docker login
Push your image:
docker push
Set-up Helm Chart
Next, we will set-up the Helm chart. This tutorial will use the Codefresh documentation to set-up a Helm chart with the helm create command.
- Set-up a chart folder in your main repository:
mkdir charts - Change into the charts folder:
cd charts - Run the Helm command to create a chart template:
helm create example-chart
This will create the following directory in your main repository:
charts/example-chart/

templates/         # the chart template

charts/         # any chart dependencies

.helmignore         # files to ignore

Chart.yaml          # meta-information about the chart

Values.yaml         # default values for the chart template
To use our own application repository instead of the default repository provided, we have to replace the default repository and tag inside the values.yaml with our repository name.
image:

repository: anaisurlichs/react-article-display
All of our template files receive values from the values.yaml file. We will run the following command to access the template content in a format that is easier to read:
helm install --dry-run --debug example-chart ./charts/example-chart
Note, make sure that you are in the right project folder.
This will tell you the status of your chart install and return the computed values, hooks, and manifest:
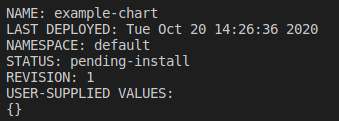
Once we verified that all the values are correct, we can run the following command to install our chart:
helm install example-chart ./charts/example-chart

The chart installation will set-up a pod in your Kubernetes cluster automatically. Now verify that your pod has been set-up and runs:
helm ls

To access our application from the Kubernetes cluster, we can either follow the steps displayed in the terminal from our NOTES.txt file, or forward the port from the pod to our local port:
kubectl port-forward 3000:80
In our case, the name of the pod would be example-chart-76c5d469f5-5t5nx; you can check the pod name by running
kubectl get pods
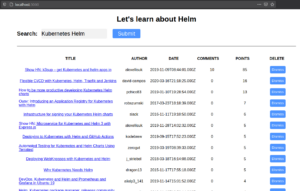
Now visit localhost:3000 and you should see your application running from within the Kubernetes Cluster
Combining Helm with Codefresh
Imagine running all the commands manually every time to make changes to your app. Our goal is to make this easier for you using Codefresh pipelines.
Codefresh includes comprehensive built-in support for Helm charts, building Docker images, and pushing them to Docker registries. Additionally, it even offers a private & free Helm repository with each account. Combined with a dedicated Kubernetes dashboard, Codefresh is a one-stop-shop for microservice development.
This section will show you how to set-up your Codefresh pipeline to make the best out of Helm.
Set-up codefresh.yml file
First, we will set-up our codefresh.yml file. The codefresh.yml file is used to build your Codefresh pipeline and allows you to customize the build steps in your pipeline. There are two ways that you could set-up the codefresh.yml file. Namely,
- Create the pipeline from scratch;
- Use the auto-generated pipeline as a starting point.
For the purpose of this tutorial, we will follow the first option and define our codefresh.yml file in our project folder.
To set-up the codefresh.yml file please run the following command in your main project folder:
touch codefresh.yml
Our codefresh.yml file will use the minimum set-up for this project but feel free to dive deeper and add freestyle steps in accordance with your needs.
version: "1.0"

stages:
 - "clone"
 - "build"
 - "test"
 - "deploy"
 steps:
 clone:
   title: "Cloning repository"
   type: "git-clone"
   repo: "anais-codefresh/react-article-display"
   revision: "${{CF_BRANCH}}"
   git: "github"
   stage: "clone"

 build:
   title: "Building Docker image"
   type: "build"
   image_name: "anaisurlichs/react-article-display"
   working_directory: "./react-article-display"
   tag: "${{CF_BRANCH_TAG_NORMALIZED}}"
   dockerfile: "Dockerfile"
   stage: "build"
Please make sure to adapt the following keys to your project:
image_name: "your Docker image name goes here"

working_directory: "change to your working directory"
Please add the following in your codefresh.yml file to use the Helm charts that you have defined in the previous step.
deploy:
   type: "helm"
   working_directory: "./react-article-display"
   arguments:
     action: "install"
     chart_name: "charts/example-chart"
     release_name: "example-chart"
     helm_version: 3.0.2
     kube_context: "anais-cluster@codefresh-sa"
   stage: "deploy"
For tutorial purposes, we will install the Helm chart directly from the filesystem of our pipeline. Usually you would first push the Helm chart to your Helm repository and then install.
Make sure that your chart_name is pointing to the chart name in your main repository, in our case this is “charts/example-chart”, and that your kube_context states the Kubernetes cluster connected to your Codefresh account that you will be using. If you do not have a Kubernetes cluster connected to Codefresh, now is the time to do that.
Next, we will push all of our changes to our GitHub repository. Once this is done, we will set-up our Codefres pipeline.
-
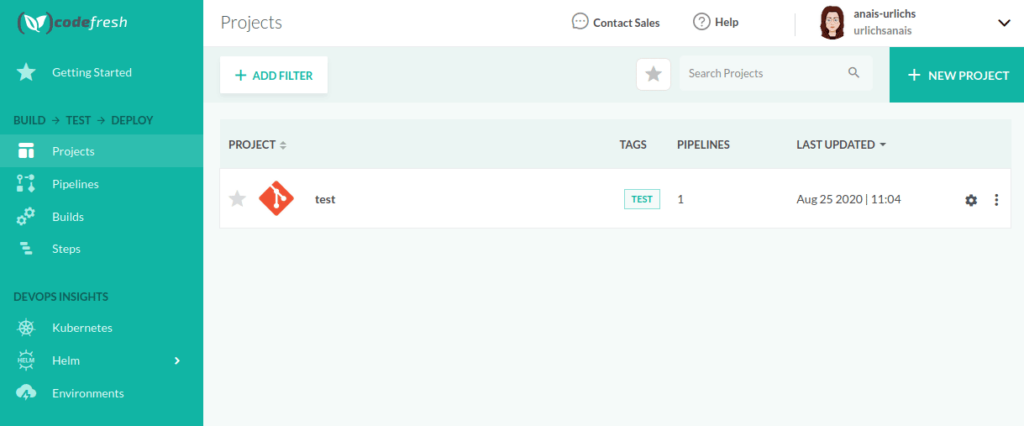
- In your Codefresh account, select “New Project” from the top right of your Dashboard in the projects tap:
-
- Next, follow the instructions to create your project.
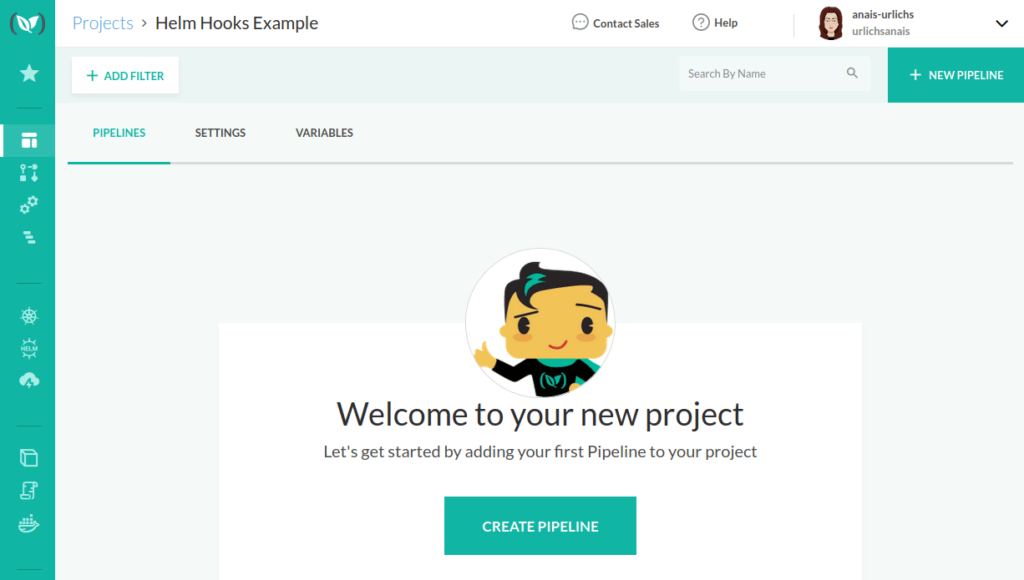
- Once you created your project, you will be redirected to your project section in your Dashboard:
-
- Go ahead and create a pipeline for your project. Assuming that you are connected with your GitHub account to Codefresh, it will ask you to select the repository that you want to create the pipeline for. Once you have provided the information, you will be redirected to the workflow, which displays the auto-generated codefresh.yml file. In our case, we will use the YAML from our repository instead.
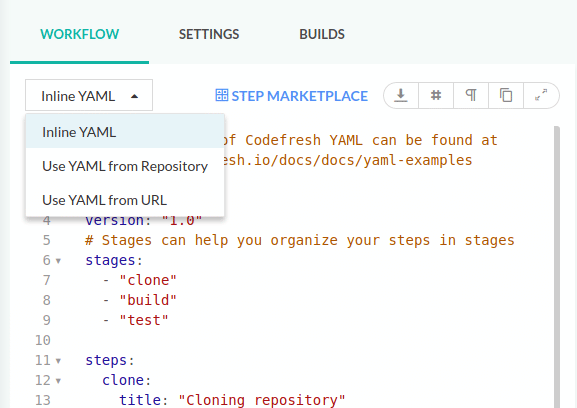
-
- Hit run at the bottom of the screen; which will direct you to the Codefresh step. You can follow the processing through the command line. Once done, you will see the output of our NOTES.txt file.
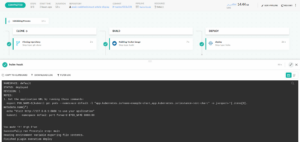
-
- Now the Helm chart is deployed to our Kubernetes Cluster using the Codefresh pipeline. To view the Helm Chart, access Helm > Releases within DEVOPS INSIGHTS. You should see something similar to the following. If not, please make sure that you have selected the right Helm version and Kubernetes cluster in the settings.

Summary
In this tutorial, we have looked at Helm, the difference between Operators and Helm to manage your Kubernetes cluster, and we set up our first Helm Chart. You should now have gathered a fundamental understanding of Helm and how you can use it to manage your Kubernetes resources. Additionally, if you followed the entire tutorial, you got your Codefresh pipeline up and running. Congratulations!
Please let us know in the comments whether this tutorial was helpful, you have any questions, suggestions, or useful links for the community to learn more about Helm.
New to Codefresh? Create Your Free Account today!
