Editor’s note – Codefresh and Microsoft will be hosting a webinar on best-practices for developing applications with Helm. RSVP here.
The Azure team recently announced hosted Helm repositories!
Codefresh worked closely with the Azure Container Registry team in this effort, sharing our experience and expertise in hosting Helm repositories.
Starting today, you can now access Azure Helm Repositories in Codefresh via native integration!
Check out the steps below for how to start using Azure Helm Repositories.
Creating a new repository
First create a new container registry in the Azure Portal, which now supports storing Helm charts and work as Helm chart repositories:
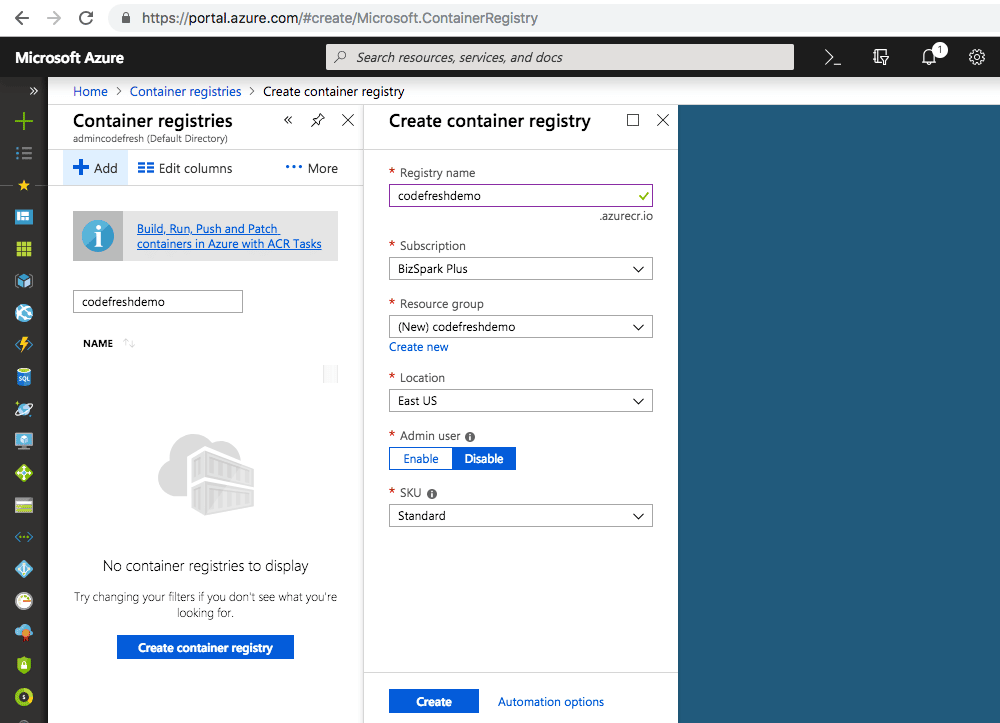
Wait for it to fully deploy before moving to the next steps.
Attaching repository to Codefresh
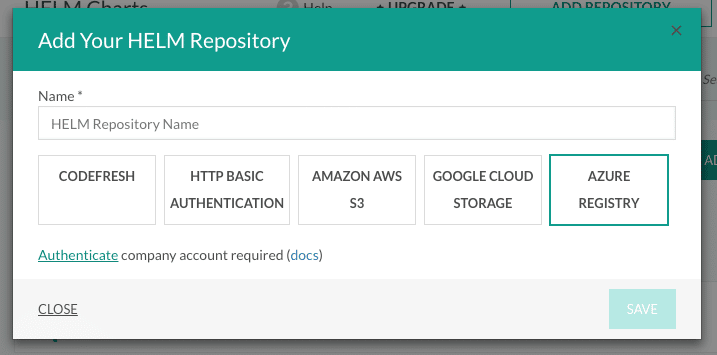
Next go to Codefresh, and go to Integrations > Helm, and click “Add Helm Repository”. Click “Azure Registry”:
Click “Authenticate”. This will launch a window asking permission for Codefresh app to access Azure resources:

Click “Accept”.
Note: if you have already authenticated for AKS integration, you can skip above.
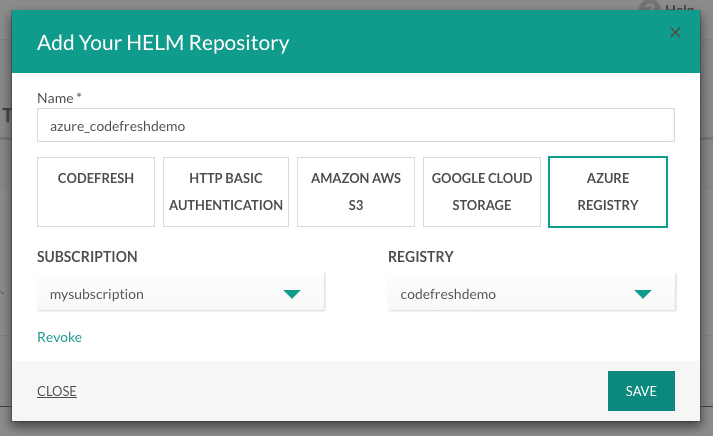
Choose your subscription, select the container registry you created above, and click “Save” to add it as a Helm repo in Codefresh:
Pushing a Helm chart to your repository
For the sake of example, let’s try copying the community HackMD chart into our repository.
Create a new pipeline in Codefresh.
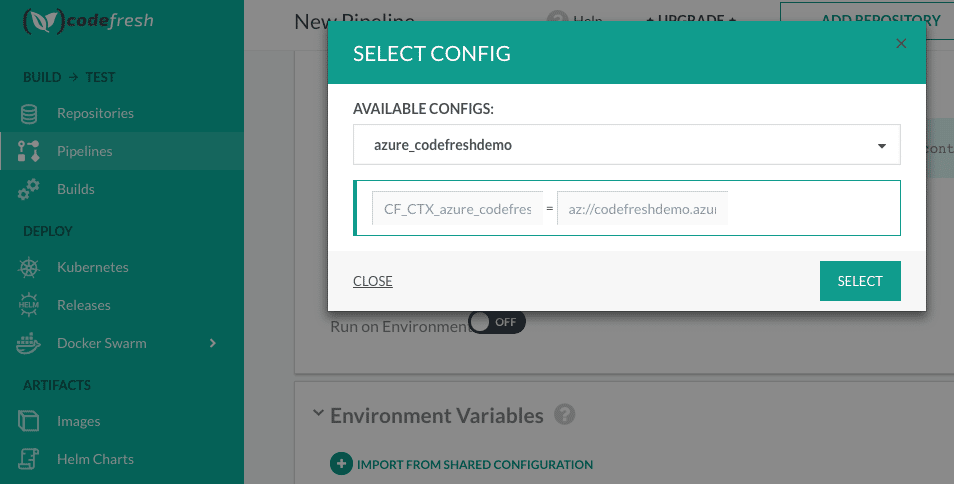
Import the Helm repo into the environment by clicking “Import From Shared Configuration” in the Environment Variables section:
Under Workflow, choose YAML, and select Inline YAML. Paste the following and click “Save”:
Next, click “Build” to kick off the upload:
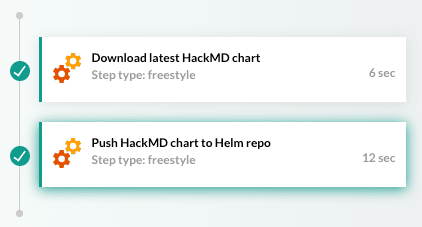
Once this pipeline completes successfully, the HackMD chart will be available in your Azure Helm repo.
Installing a Helm chart from your repository
Let’s now try installing the chart we just uploaded into our Kubernetes cluster.
Make a second pipeline for the install.
Once again, attach the Azure helm repo as we did for the first pipeline using “Import From Shared Configuration”.
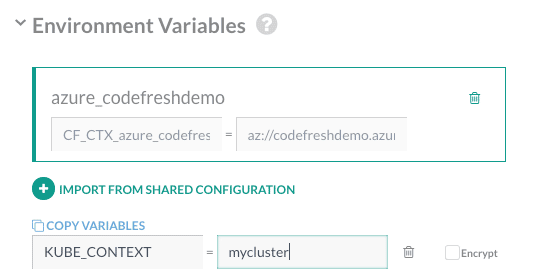
Next, make sure to set the KUBE_CONTEXT environment variable pointing to one of your connected Kubernetes clusters:
If you have not yet connected a Kubernetes cluster, please see the docs.
Use the following Inline YAML and click “Save”:
Next, click “Build” to kick off the installation:
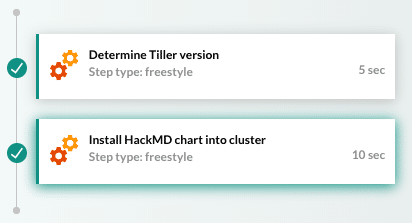
Once this pipeline completes successfully, the HackMD application will be installed in your cluster.
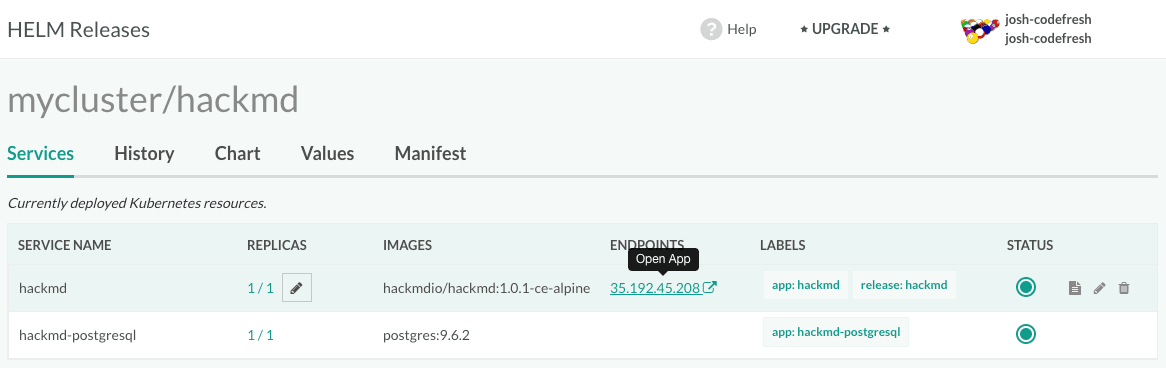
After a some time (give the service some time to start), go to the Helm Releases page and click on the “hackmd” release in your cluster:
Click on the endpoint listed above to access the HackMD application:
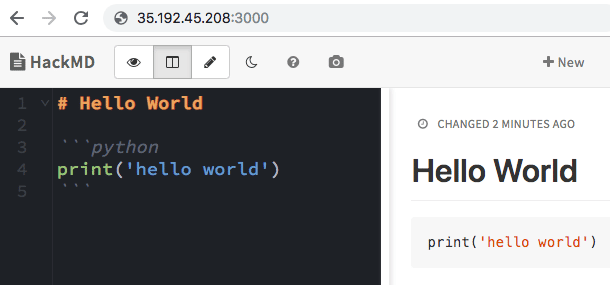
There you go! We are now making full use of our Azure Helm repository for publishing Helm charts and deploying them into Kubernetes.
New to Codefresh? Create Your Free Account Today!