Coveralls is a web service that allows users to track the code coverage of their application over time in order to optimize the effectiveness of their unit tests.
Once you are managing your application and associated resources within a CI/CD platform like Codefresh, you want to receive insights on the test coverage automatically with every pipeline build.
This post provides an overview of how this can be achieved with Coveralls and Codefresh. To make the best out of this post, make sure you have both a Coveralls and a Codefresh account set-up.
Overview of Coveralls
Coveralls has several features that allow you to optimize the coverage of your repositories, analyze trends, and see how changes in specific files have affected the overall project over time.
Some of the advantages of running code coverage reports with Coveralls:
- Set it up once and receive additional insight from code coverage reports with every build
- Coveralls support 22 different language integrations
- Access detailed information on the coverage of every file; Coveralls breaks down the information per file for additional insights
- The updates page, integrated within the UI, provides additional information on how individual commits to your project have accepted the code coverage
- Add a nice coverage badge to your project read-me to show everyone how well written your code is
- Little plus point: The maintainers behind Coveralls show their humour in the documentation (what jokes can you spot?)
Separately, Coveralls has a pretty comprehensive pricing model; whereby open-source projects are free. We have found that coveralls integrates seamlessly with our projects.
Let’s get started
Once signed-up to Coveralls, you will have to provide Coveralls with a git provider to access your repositories. The integration is required to generate repository-specific access tokens that will allow us to push the coverage reports to Coveralls. Ideally, you are using the same git provider in Coveralls as in Codefresh. If you are using the normal account, you can choose between either of the following git providers: GitHub, GitLab, or BitBucket. The enterprise account supports further options.
In this example, we are going to be using Coveralls in this node application. However, you could use your own application, as long as it is supported by Coveralls.
First, we have to make sure that our application is set-up correctly with a testing tool that produces coverage reports. To demonstrate the set-up we will first generate test coverage reports manually in our local environment and then optimize the process with Codefresh so that a coverage report is generated automatically with every pipeline build.
In our case, we are going to use jest. Alternatively, you could use Mocha in combination with several tools; more information is provided in their example. Have a look at their documentation for other languages to get an idea of which testing tools are supported.
Set-up testing and code coverage reports in our node repository
If your Node project does not have a testing tool installed, install jest:
npm install --save-dev jest
Next, we are going to add a file, called jest.config.js to our root project folder with the following content:
module.exports = {
 preset: 'ts-jest',
 testEnvironment: 'node',
};
To complete the configuration, we are going to add the following lines to our package.json file:
"jest": {
   "coverageDirectory": "./coverage/",
   "collectCoverage": true
 },
And add a script to run jest:
"scripts": {
   "test": "jest --coverage",
Now, when you run ’npm run test’, you should see an output similar to the following:

Once our application produces coverage reports, we have to add coveralls to our packages:
npm install coveralls --save-dev
Coveralls requires a script that takes standard input and sends it to coveralls.io to report your code coverage. Depending on the framework that you are using, you will have to add a different script to your application.
Any coverage reports can be forwarded that are within a lcov data format (including mocha‘s LCOV reporter). For this, we are going to set-up a “bin” folder, and within the folder a coveralls.js file that contains the following content:
#!/usr/bin/env node

'use strict';

const { handleInput } = require('..');

process.stdin.resume();
process.stdin.setEncoding('utf8');

let input = '';

process.stdin.on('data', chunk => {
 input += chunk;
});

process.stdin.on('end', () => {
 handleInput(input, err => {
   if (err) {
     throw err;
   }
 });
});
Lastly, we will have to change our testing script:
"test": "jest --coverage && coveralls < coverage/lcov.info",
Again, for further information on how to set-up Coveralls on your testing framework, please refer to their examples.
Set environment variables to connect to Coveralls
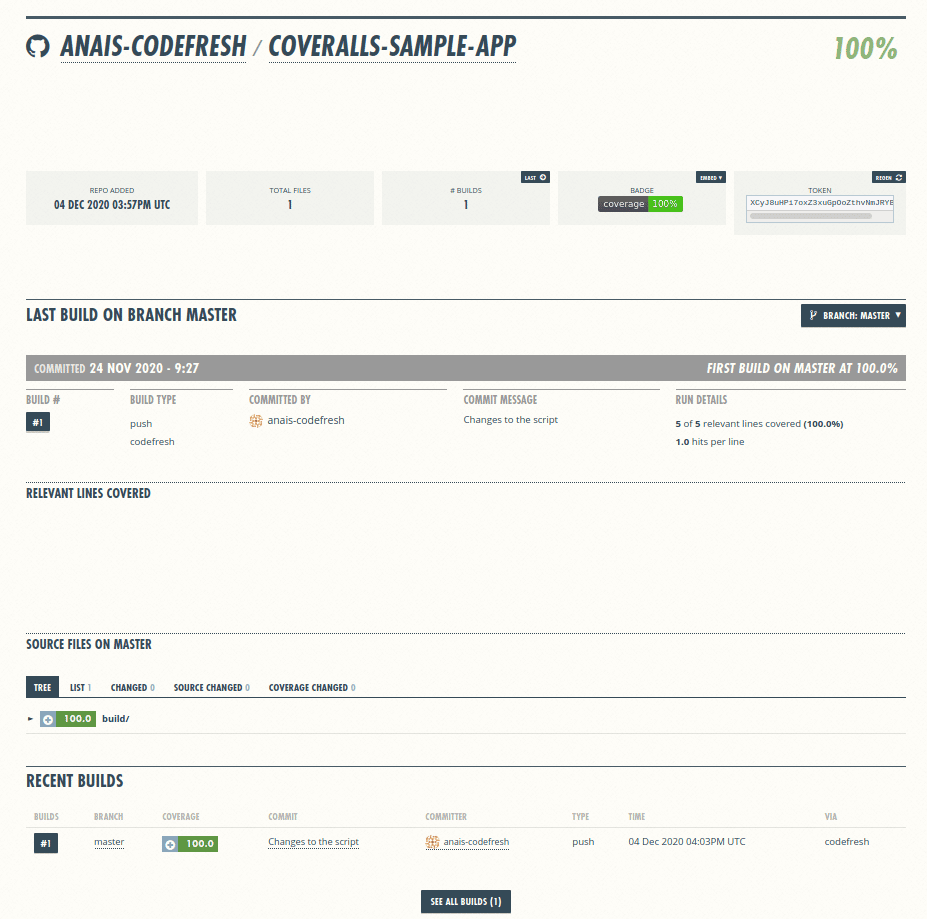
If you don’t have a Coveralls account yet, now is the time to set-one up. Once you are signed into Coveralls, you should either see a list of already connected repositories (like in my case), or an empty dashboard.
One last thing that we have to do before running the coverage report and sending it to Coveralls is to define the environment variables. Those will also become useful once we are using Coveralls in Codefresh.
export COVERALLS_SERVICE_NAME="codefresh"
export COVERALLS_GIT_BRANCH="insert the branch that you will be using with your application"
export COVERALLS_REPO_TOKEN="insert the secret repo token from coveralls.io"
Like so:

Connect your repository in Coveralls and receive a secret repository token
To create the secret repository token, head over to your Coveralls account and add the current repository:
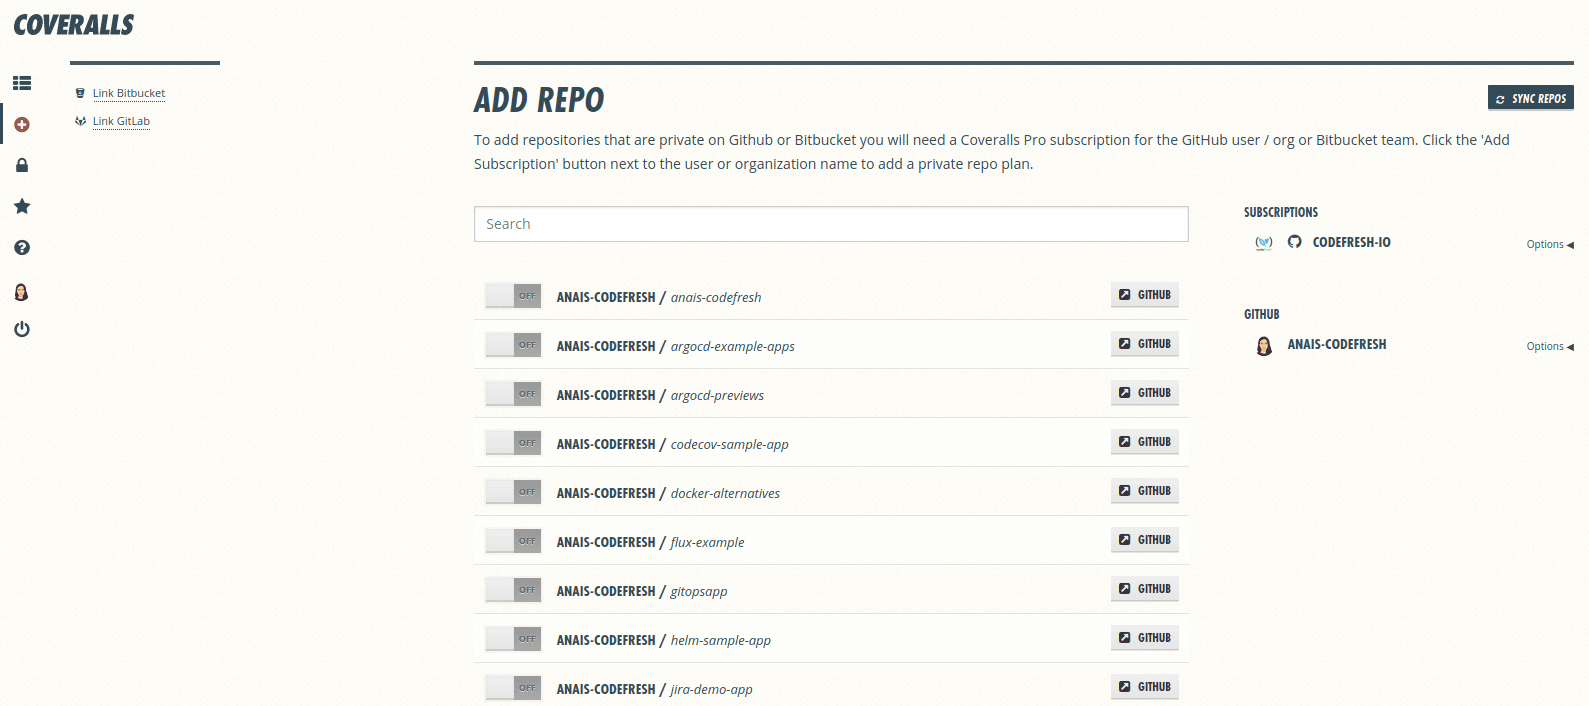
Once you turn on any of the repositories (box on the left side next to the repository), you will enable tracking of code coverage reports. It is then that you will see the secret repository token that has to be used within the environment variable above.
Connect your local instance with Coveralls
If you have been following along, go ahead and call the tests:
npm run test
Now refresh the Coveralls site of your repository to see the Code Coverage reports.
To unlock the full benefits of using Coveralls and to submit coverage reports automatically with every build, we are now setting up our Codefresh pipeline to do the work for us.
Using Coveralls in your Pipeline
You know the drill, if you don’t have a Codefresh account yet, let’s go ahead and create your free one. Once signed in, you should be able to create a project and within the project, we will now create our pipeline.
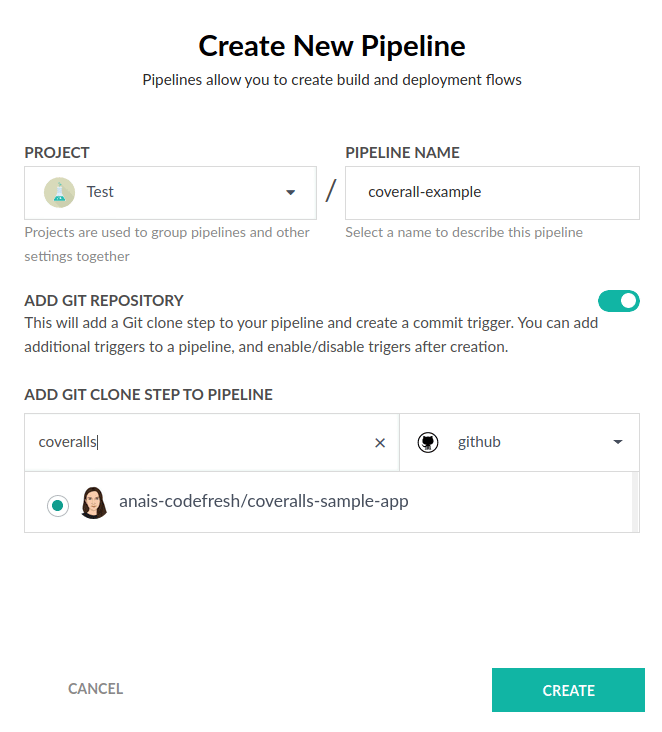
Once you ’create’ the pipeline, a standard codefresh.yml file is generated with three steps:
- The first step will clone your repository;
- The second step will both, build and push your repository to the container registry that you have connected with Codefresh;
- And the third step currently does not do much.
Thus, let’s go ahead and modify it.
   test:
    title: "Running test"
    type: "freestyle" # Run any command
    image: "node:15.2" # The image in which command will be executed
    working_directory: "${{clone}}" # Running command where code cloned
    commands:
      - "export COVERALLS_SERVICE_NAME=${{COVERALLS_SERVICE_NAME}}"
      - "export COVERALLS_GIT_BRANCH=${{CF_BRANCH}}"
      - "export COVERALLS_REPO_TOKEN=${{COVERALLS_REPO_TOKEN}}"
      - "npm install --save-dev jest"
      - "npm run test"
    stage: "test"
For reference, you can find the entire pipeline in the git repository.
As you can see, we specify several variables within this step. Those, which start with ’CF’ are Codefresh-specific steps and the value is automatically provided by Codefresh once you run the pipeline.
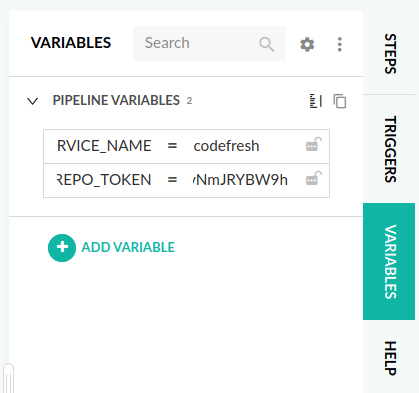
However, we have to tell Codefresh Coveralls specific variables. You could place the values directly within the step; however, since the secret repository access token should not get accidentally pushed to your public git repository, we will provide the variables within the variables section.
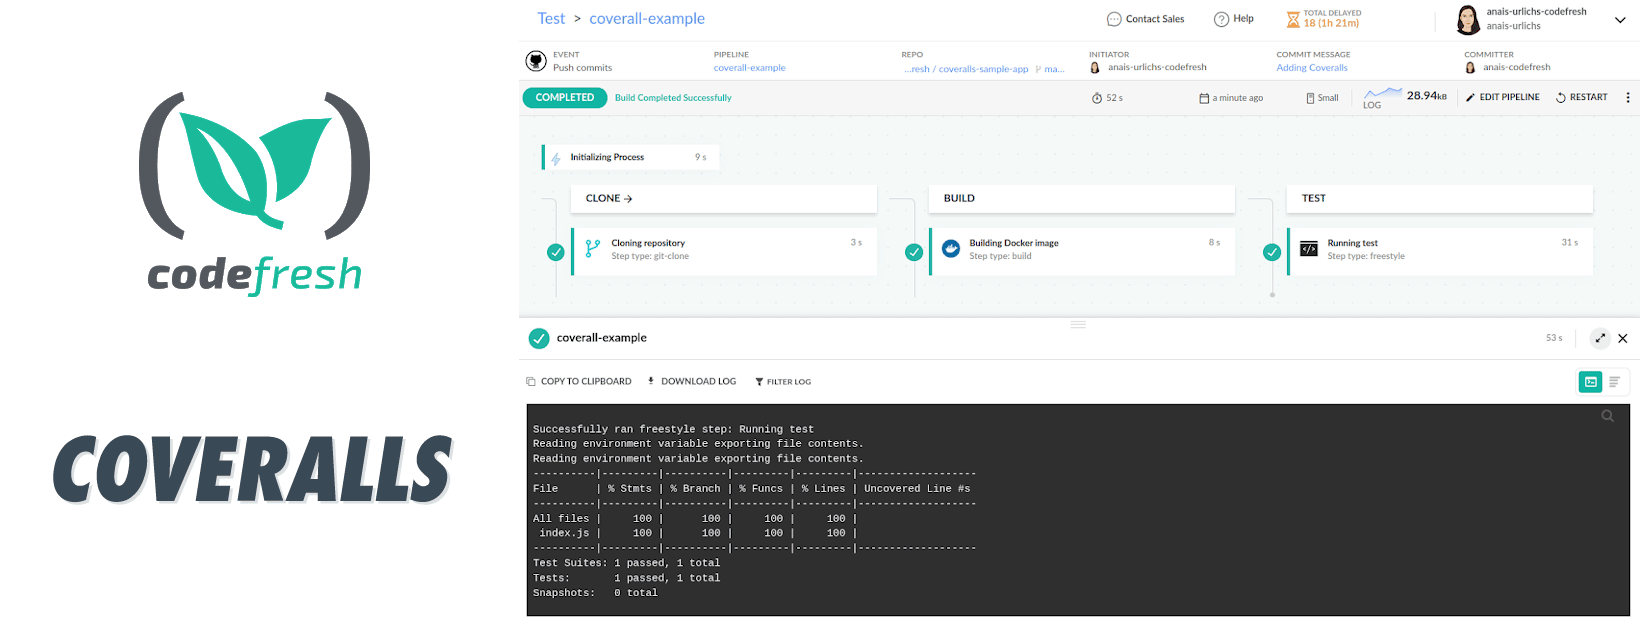
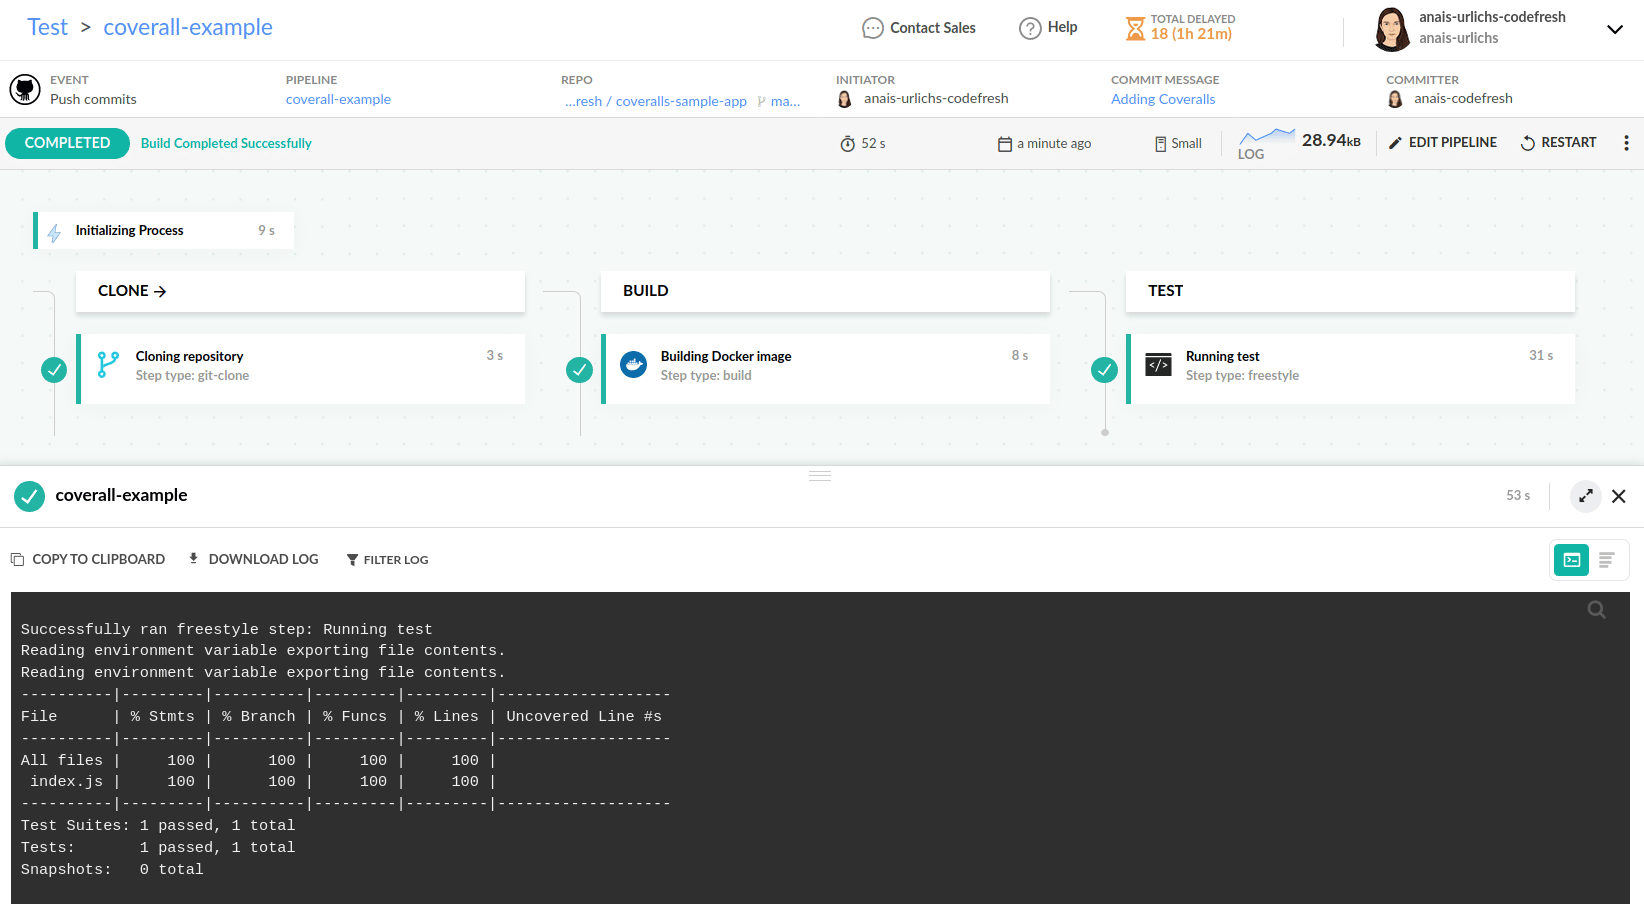
Let’s go ahead and run the pipeline. You can view the steps and commands executing within the output section of the pipeline.
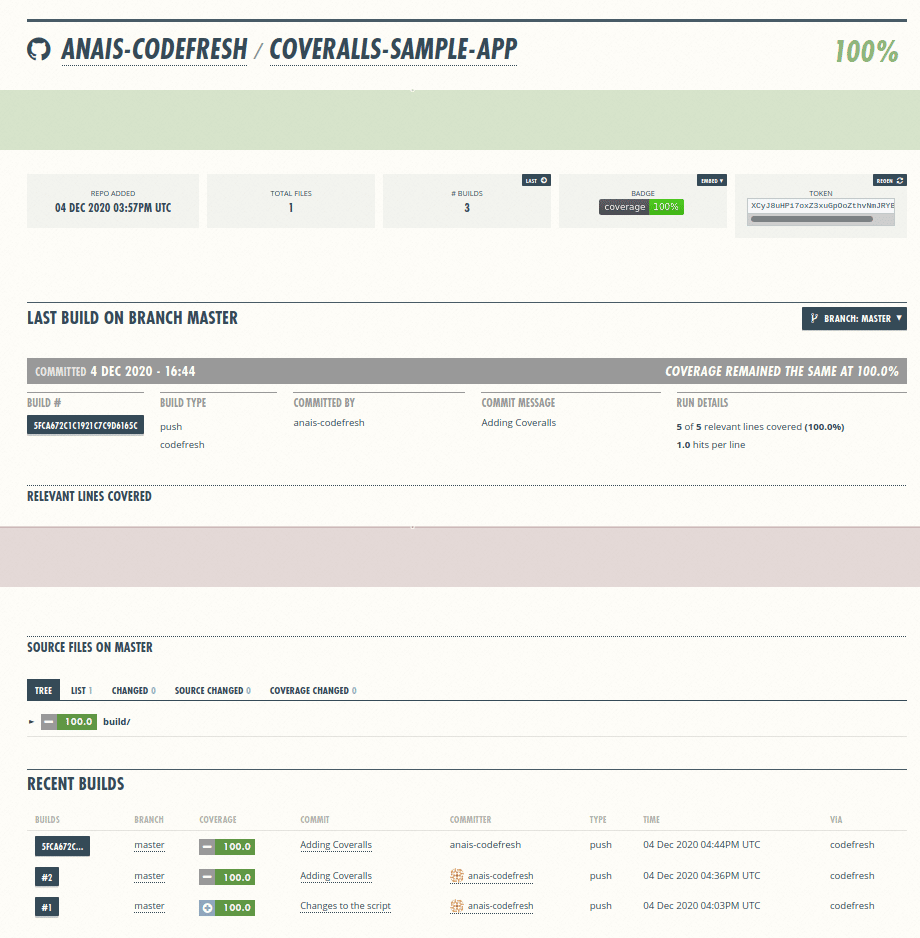
Moving over to Coveralls, we can now see our code coverage report.
Let’s Recap
In this post, we
- First saw an introduction to Coveralls, its features, and use cases;
- Then, we prepared our git repository;
- We set up our Coveralls and our Codefresh Account;
- Set-up our Codefresh pipeline;
- And lastly, ran our tests within Codefresh and pushed the coverage reports to Coveralls!
To connect Codefresh to Coveralls through your pipeline Create Your Free Codefresh Account today!
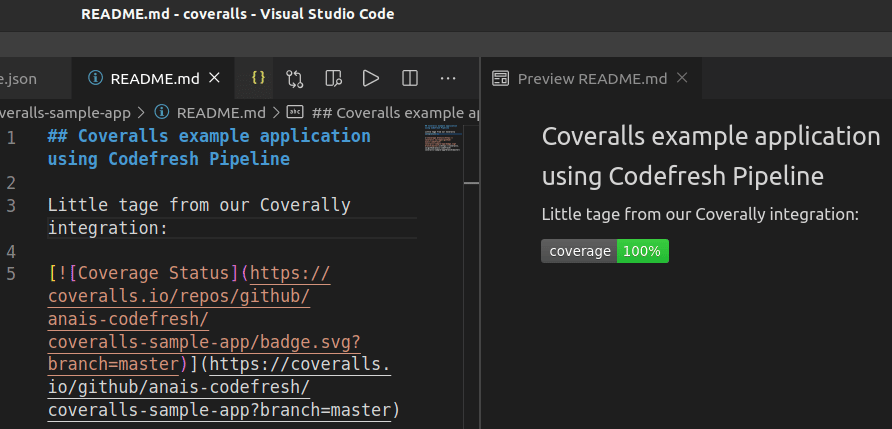
As a bonus, we are going to add our Coveralls code coverage button to our README
To do so, you can access various formats directly from the Coveralls UI, within your repository:
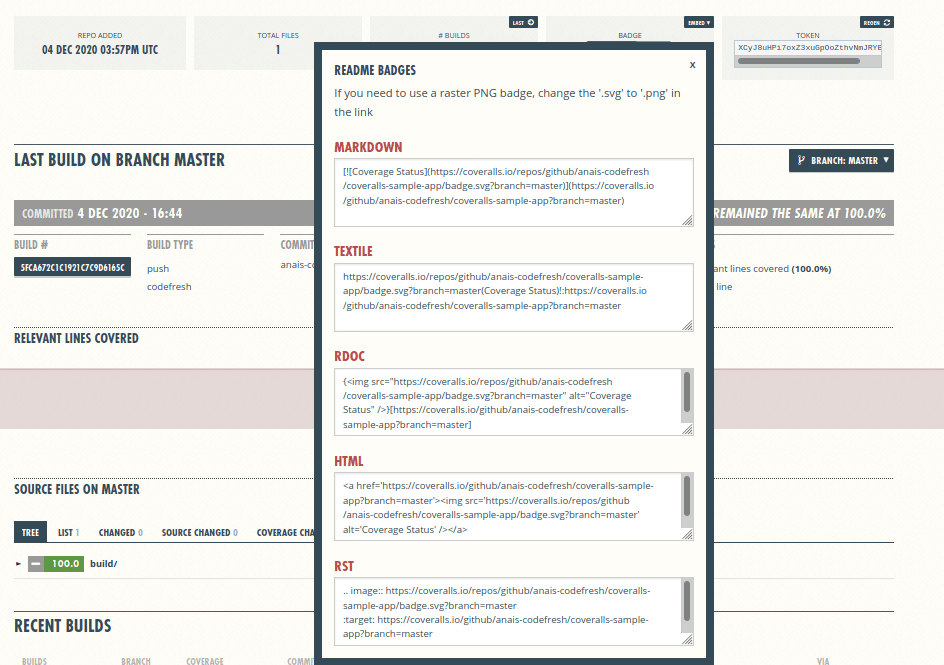
Adding it to our README, and tadaa: