In August 2020, Amazon announced Bottlerocket OS, a new open source Linux distribution that is built specifically for running container workloads. It comes out of the box with security hardening and support for transactional updates, allowing for greater ease in automating operating system updates, maintaining security compliance and reducing operational costs. Bottlerocket is designed to be able to run anywhere and, at launch, has a pre-built variant for Amazon EKS.
We are happy to announce that Codefresh now supports Bottlerocket on EKS!
For those who are unfamiliar, Codefresh is a deployment platform specifically built for containers and Kubernetes. You can use Codefresh to create CI/CD pipelines that take an application from source code all the way to production. It’s built with speed and scalability in mind so that you can run your builds in a fraction of the time. This is incredibly important today as the speed with which you’re able to release new features, capabilities and even hot-fixes to your customers, can directly affect the success of your business.
In this post we’ll show you how to address that need for speed and scale, leveraging Codefresh runners on EKS using Bottlerocket.
Before we dive into the how-to, let’s review some of the key Codefresh concepts.
The central component of the Codefresh Platform are pipelines. Pipelines are workflows composed from individual steps that take care of the whole software lifecycle (code compilation, packaging, container builds, security scans etc). They are container based, meaning that each step in the pipeline is an individual container that is launched on demand on the build node, once it is needed. This makes the maintenance of build nodes very simple in Codefresh, as there is nothing to install or upgrade (apart from the container runtime). Gone are the days when you had to maintain specific build tools on each build node and also had to battle with plugins and their dependencies.
The Codefresh runner is a standard Kubernetes application that converts any Kubernetes cluster, including those running in Amazon EKS, into a Codefresh runtime environment for your pipelines. It is managed and monitored like any other Kubernetes applications, meaning that you can reuse your Kubernetes expertise and knowledge to maintain it. If for example there is auto-scaling enabled in your Kubernetes cluster, then the Codefresh runner will gain autoscaling as well without any extra configuration.
The instructions below will walk you through the process of creating an EKS cluster using Bottlerocket nodes and installing the Codefresh Runner on it. This will allow us to then run Codefresh Pipelines on that cluster.
Let’s get started…
Prerequisites
To use Bottlerocket in Codefresh you need:
- A Codefresh account. You can use Bottlerocket in any tier (even the free one)
- An AWS account. Note that depending on the resources you create, your account will be billed, so make sure that you cleanup the resources you don’t need.
You also need the following CLIs:
- the aws CLI for accessing your AWS account from the command line
- eksctl for creating/managing your Kubernetes cluster.
- the Codefresh cli for installing the runner in the cluster.
- kubectl for working with Kubernetes applications
Creating a Kubernetes cluster in AWS using Bottlerocket nodes
You can see a Bottlerocket-based cluster configuration in the example eksctl config. The key point here is that it requires both the amiFamily and specific IAM Policies to allow the cluster nodes to function properly using Bottlerocket. In addition to that, we’ll add the specific config to enable the node group to leverage AWS Spot Instance.
1) Create an eksctl config file, and set the amiFamily to Bottlerocket in your node group. This tells eksctl to use the Bottlerocket EKS AMI for the nodes in the group.
amiFamily: Bottlerocket
2) Ensure that you have the required IAM policies specified for the Bottlerocket nodes.
     iam:
        attachPolicyARNs:
         - arn:aws:iam::aws:policy/AmazonEKSWorkerNodePolicy
         - arn:aws:iam::aws:policy/AmazonEKS_CNI_Policy
         - arn:aws:iam::aws:policy/AmazonEC2ContainerRegistryReadOnly
         - arn:aws:iam::aws:policy/AmazonSSMManagedInstanceCore
3) Add your Spot Fleet configuration to your node group.
    instancesDistribution:
      maxPrice: 0.017
      instanceTypes: ["t3.small", "t3.medium"] # At least two instance types should be specified
      onDemandBaseCapacity: 0
      onDemandPercentageAboveBaseCapacity: 50
      spotInstancePools: 2
In this configuration we’re using a combination of 50% On-Demand and Spot instances, two sizes of T3 instances and a maximum price of $0.017 USD per hour. You can learn more about these configuration options here.
4) Your config file should look like this:
apiVersion: eksctl.io/v1alpha5
kind: ClusterConfig
metadata:
  name: sales-dev-eks-bottlerocket
  region: us-west-2
vpc:
  id: vpc-02c5dbe54afc8ed28
  subnets:
    private:
      us-west-2a:
          id: "subnet-0bde2b07890685c46"
      us-west-2b:
          id: "subnet-0b1d9a2612885d5de"
      us-west-2c:
          id: "subnet-0c69908965e7a2dd7"
    public:
      us-west-2a:
          id: "subnet-07ce9945741de1d4d"
      us-west-2b:
          id: "subnet-0109e5fe671a1290c"
      us-west-2c:
          id: "subnet-0226033eab8e4f954"
nodeGroups:
  - name: ng-bottlerocket
    instanceType: m5.large
    desiredCapacity: 1
    privateNetworking: true
    amiFamily: Bottlerocket
    iam:
        attachPolicyARNs:
         - arn:aws:iam::aws:policy/AmazonEKSWorkerNodePolicy
         - arn:aws:iam::aws:policy/AmazonEKS_CNI_Policy
         - arn:aws:iam::aws:policy/AmazonEC2ContainerRegistryReadOnly
         - arn:aws:iam::aws:policy/AmazonSSMManagedInstanceCore
    instancesDistribution:
      maxPrice: 0.017
      instanceTypes: ["t3.small", "t3.medium"] # At least two instance types should be specified
      onDemandBaseCapacity: 0
      onDemandPercentageAboveBaseCapacity: 50
      spotInstancePools: 2
5) Update the vpc and subnets to match your own configuration and save the above file as eks-cluster.yaml, and create your EKS cluster by running the following command:
$ eksctl create cluster -f eks-cluster.yaml
6) Before installing the Codefresh Runner on your new EKS cluster, it is a good idea to rename the context of our cluster – this way the name of the runtime environment that will be created in our Codefresh account will have a more readable name. To do that, you can run the following command with the context name you want (We used sales-dev-eks-bottlerocket for our context name)
$ kubectl config rename-context sales-dev-eks-bottlerocket
Installing the Codefresh Runner in the Bottlerocket based AWS cluster
Now you can go ahead and install the Codefresh Runner on your EKS cluster.
- Install the Codefresh CLI with npm install -g codefresh
- setup authentication with codefresh auth create-context –api-key {API_KEY} (get a key from your user settings)
- and finally run the installation wizard with codefresh runner init.
The wizard will ask you if you would like to run a demo pipeline after install, choose “Yes”.
If everything went well with the install, you should see a console output that includes details regarding the demo pipeline status, links to documentation and some Codefresh ascii art.
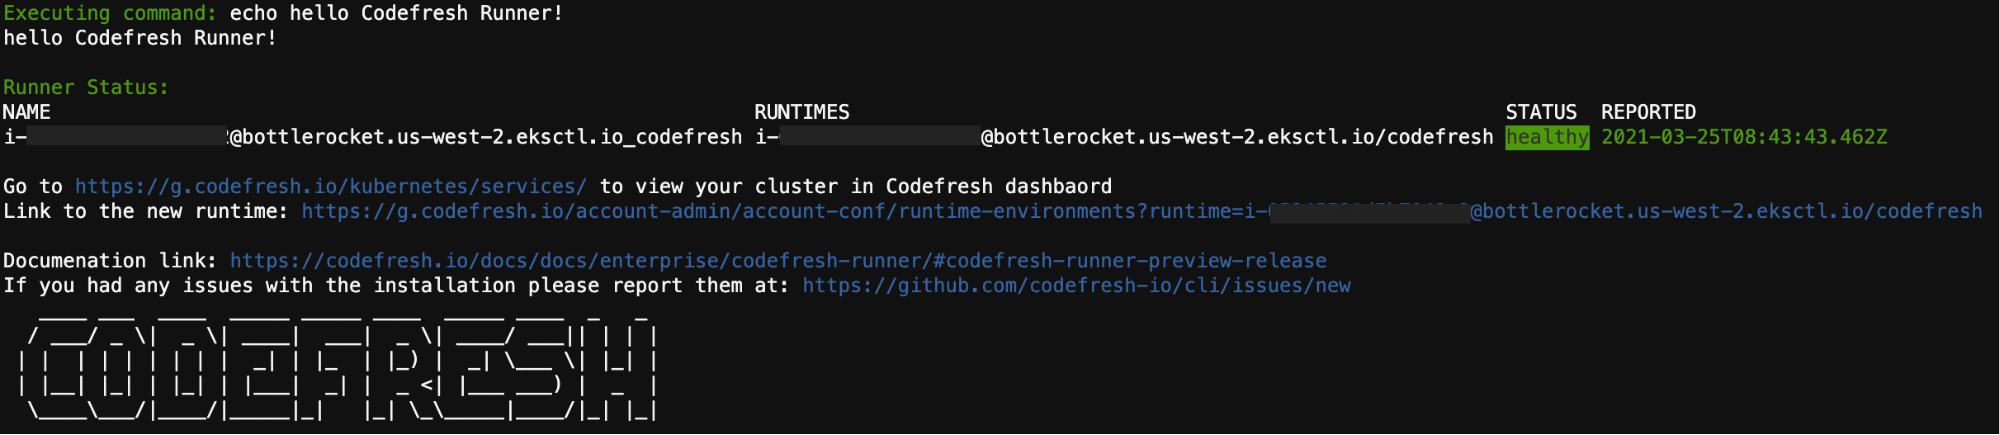
For more details see the runner documentation.
We now have the Codefresh Runner installed on our EKS cluster!
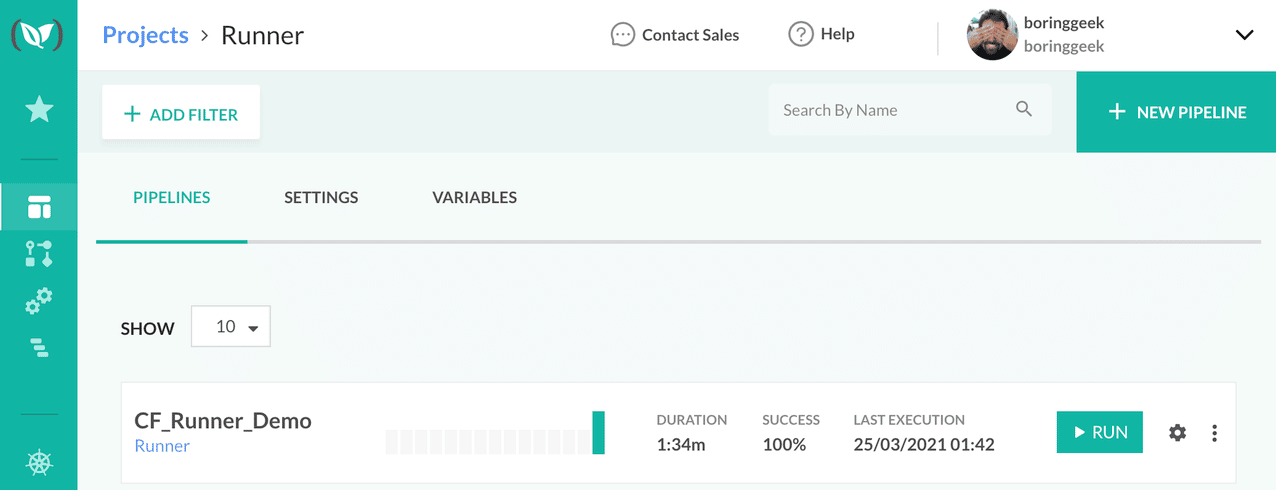
You should now be able to go back to the Codefresh console and select the “Runner” project that was created during the Runner install. From there you will see the Demo Pipeline that was created and executed.
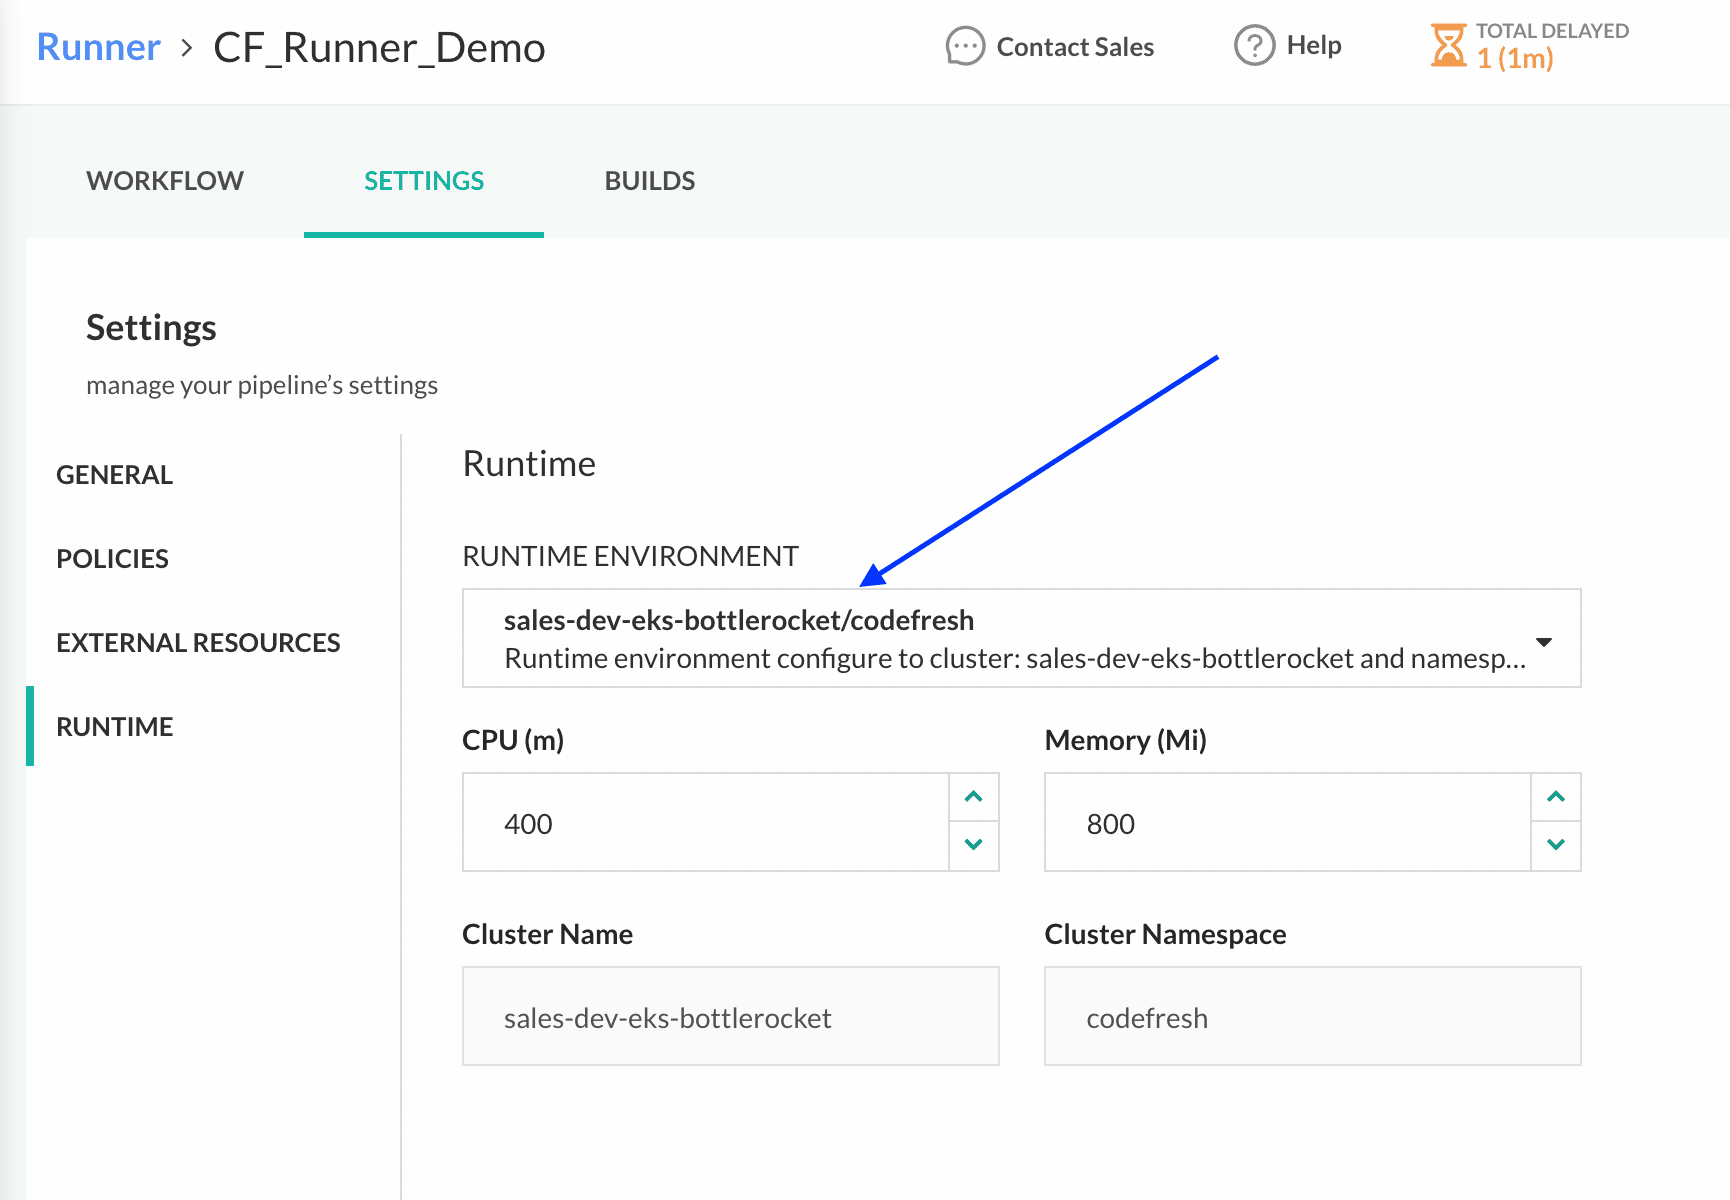
From there, you can click on the gear icon for the “CF_Runner_Demo” Pipeline which will open the Pipeline settings console. Clicking the “Runtime” option form the left menu will show you the new runtime environment that was created in your pipeline settings (see more details for using the runner):
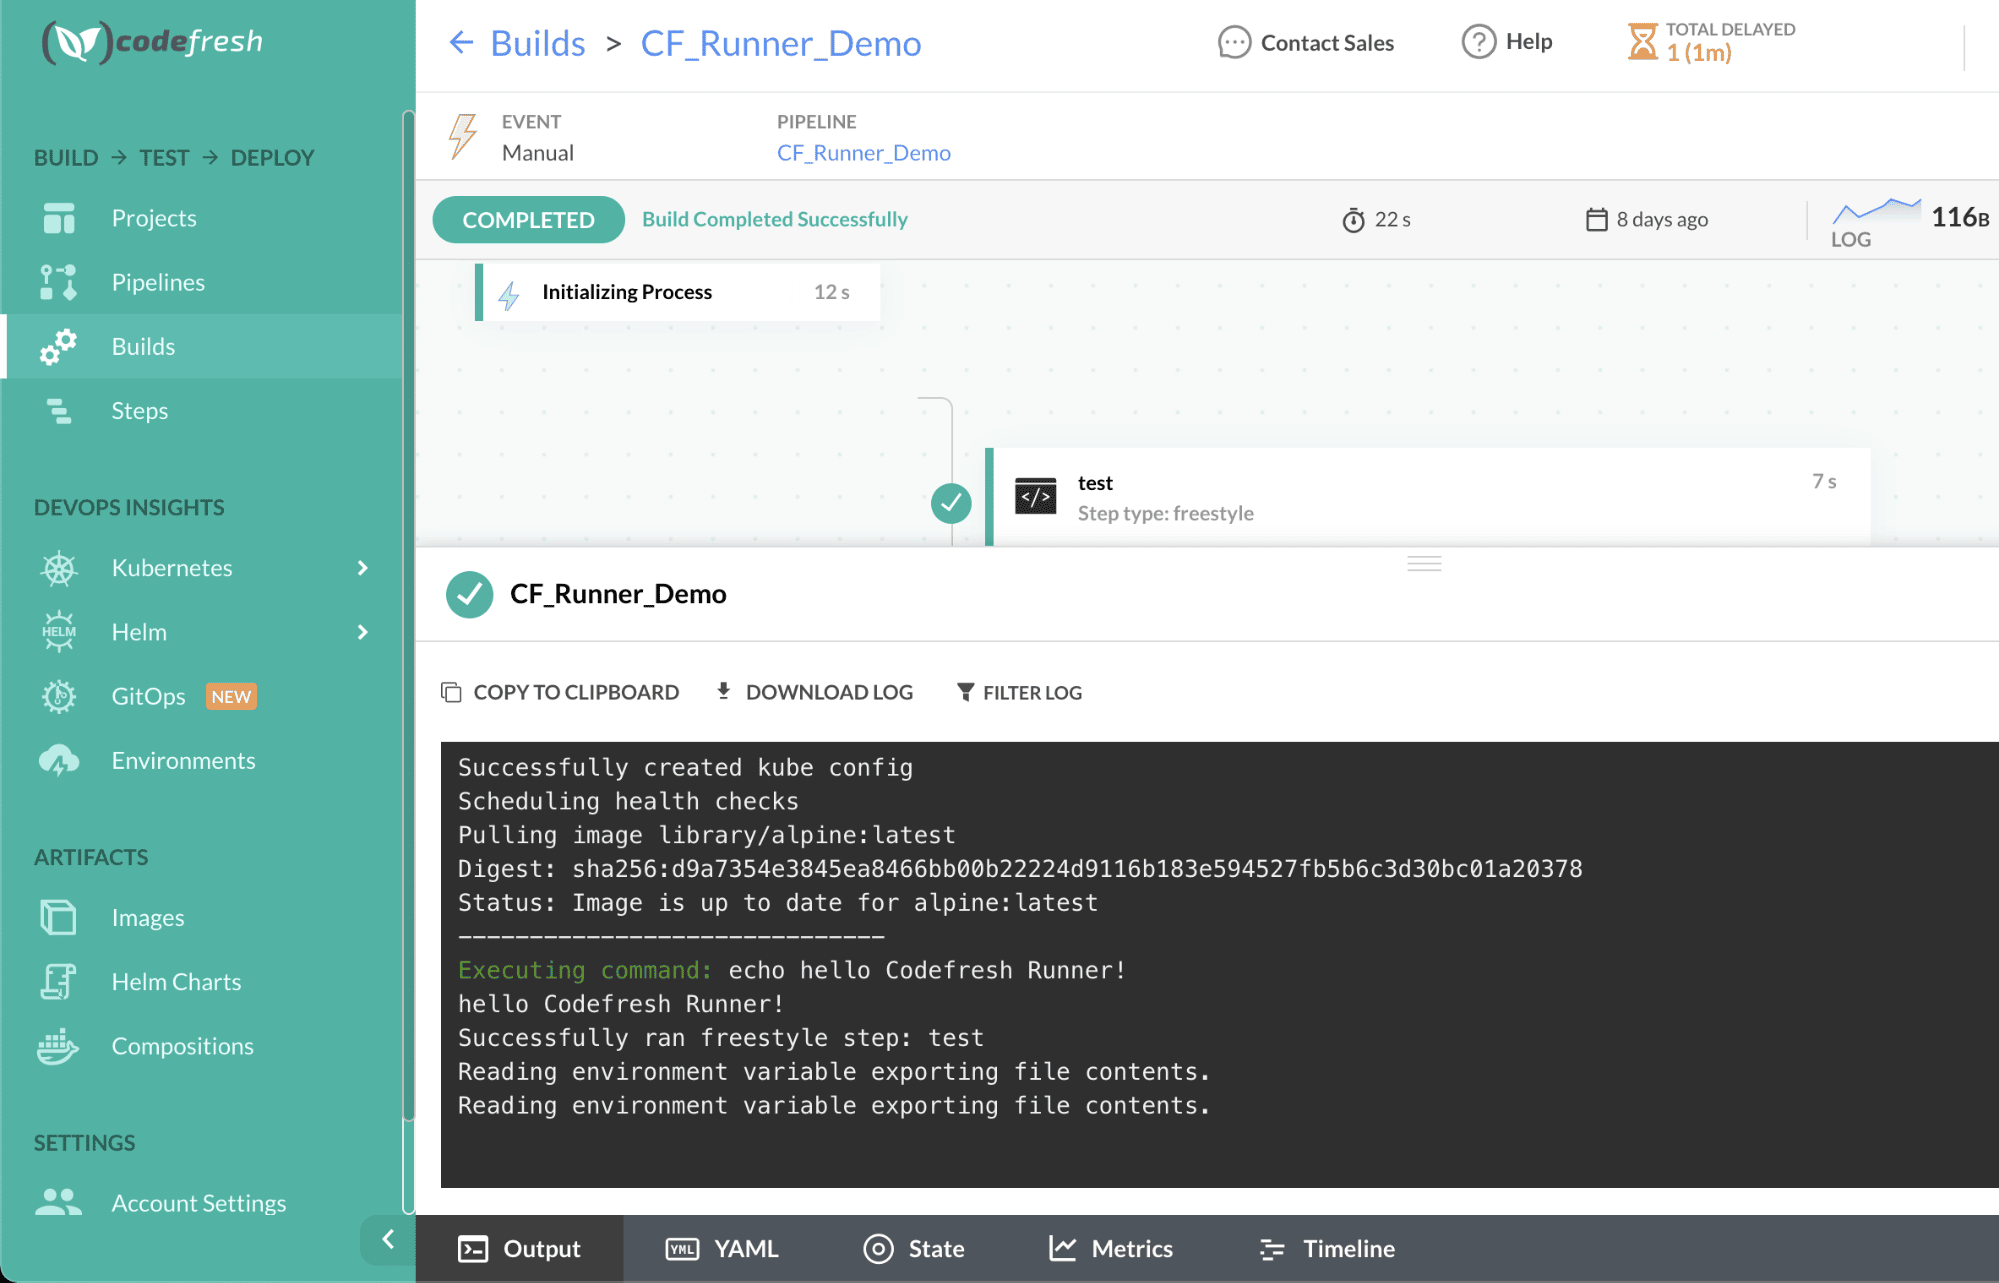
Going back to the “CF_Runner_Demo” build, you can click into it to see the details and then again to see the “test” step details as you see below:
That’s it! Any future builds of your pipeline will run on your Bottlerocket powered EKS cluster. By leveraging this combination of solutions, we’re not only able to scale quickly to meet the demands of your build pipelines, but do so in a way that simplifies management of the cluster and improves overall security . If you wanted to go a step further, you can also enable the Cluster Autoscaler on AWS, which will allow your cluster to automatically add additional cluster hosts in the event that your pipelines need additional capacity.
As an additional note: For those of you who are interested in or already using Codefresh Runners on EKS clusters using Amazon Linux 2 – this is still supported. You can repeat the installation process on an EKS cluster using Amazon Linux 2 nodes and then run your pipelines on either cluster. In fact you can even mix and match pipelines so that you can use both types of clusters in Codefresh. This allows you to gradually move workloads from one cluster to the next, allowing you to ease the adoption of Bottlerocket-based nodes.
Learn more about Codefresh and AWS at codefresh.io/aws.