In our previous article about Database migrations we explained why you should treat your databases with the same respect as your application source code. Database migrations should be fully automated and handled in a similar manner to applications (including history, rollbacks, traceability etc).
If you have adopted GitOps already in your organization, a natural question to ask would be if you can apply the GitOps principles in databases as well. The answer is that you can!
If you are not familiar with the GitOps principles , they suggest that instead of pushing updates manually to a system, you should have a software agent that pulls the desired state from git and then makes sure that the target resource matches what is described in Git. Kubernetes is a natural fit for GitOps, as not only it embraces declarative definitions in all forms, but also implements everything via operators that continuously monitor resources and change their state according to the desired outcome
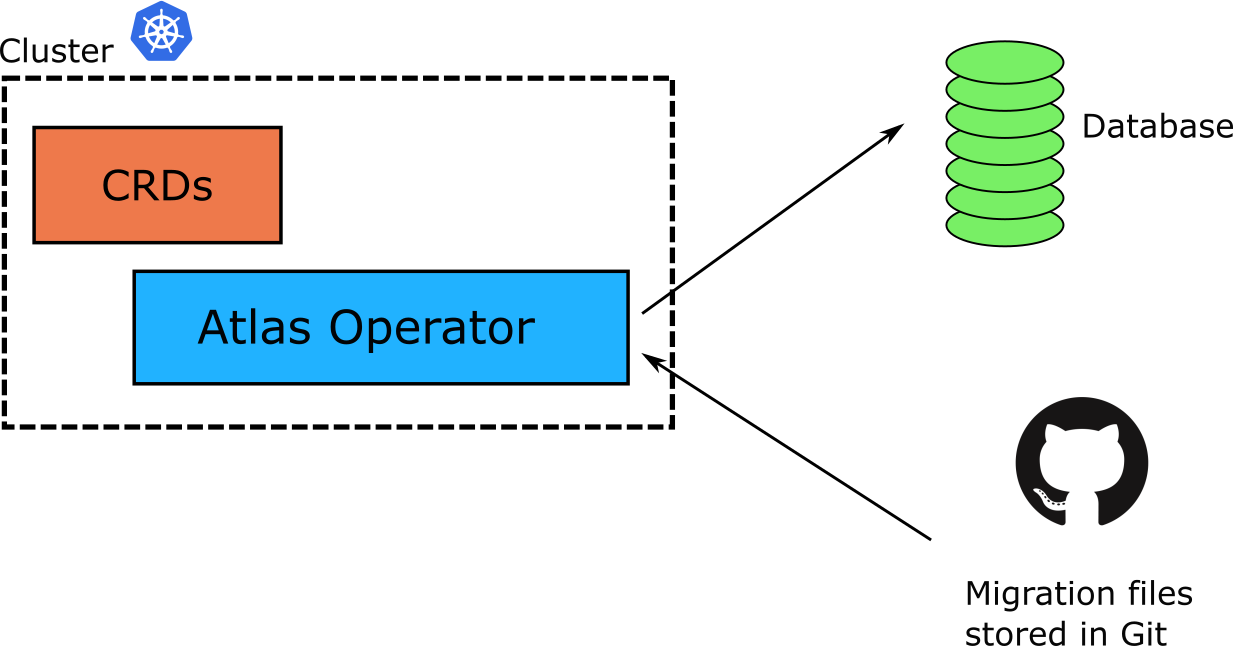
In the previous article we saw the classic way of updating a database using the Atlas CLI. Atlas has recently released a Kubernetes operator that brings the GitOps paradigm to Database migrations. The operator introduces new Custom Resources (CRDs) that define what needs to be done in a database, and then applies these changes to any connected database in a well-controlled manner.
Using a Kubernetes operator for Database migrations
Kubernetes itself already defines the resources needed for applications (pods, replicasets etc), but any other external resource must be modeled using a custom schema (CRD). First, let’s install the operator on a Kubernetes cluster
helm install atlas-operator oci://ghcr.io/ariga/charts/atlas-operator --namespace atlas-operator --create-namespace
The Atlas Operator introduces new resources in the cluster that model database migrations. Here is a quick example of describing a migration in a Kubernetes fashion
apiVersion: db.atlasgo.io/v1alpha1
kind: AtlasSchema
metadata:
  name: atlas-schema-local-sample
spec:
  urlFrom:
    secretKeyRef:
      key: url
      name: pg-credentials
  schema:
    sql: |
      CREATE TABLE "company"
      ("id" integer NOT NULL GENERATED ALWAYS AS IDENTITY (START WITH 10),
      "name" text NOT NULL, "description" text NULL,
      "created" date NOT NULL, "updated" date NOT NULL,
      "active" boolean NOT NULL DEFAULT true, PRIMARY KEY ("id"));
AtlasSchema is a new resource offered by the Operator. In this simple example, we have included SQL statements directly in the resource, but the Atlas operator supports several other options for how and where you describe your database migrations.
Before we can make this migration work, we also need to explain where to find the database. We’ll do this by creating a Kubernetes secret.
apiVersion: v1
kind: Secret
metadata:
  name: pg-credentials
type: Opaque
stringData:
  url: "postgres://mydb:[email protected]/mydb?search_path=public"
We are now ready to start the migration process by applying all our resources.
kubectl apply -f pg-credentials.yml
kubectl apply -f migration.yml
The operator will now start the migration. You can follow the logs of the operator pod to find out what is going on.
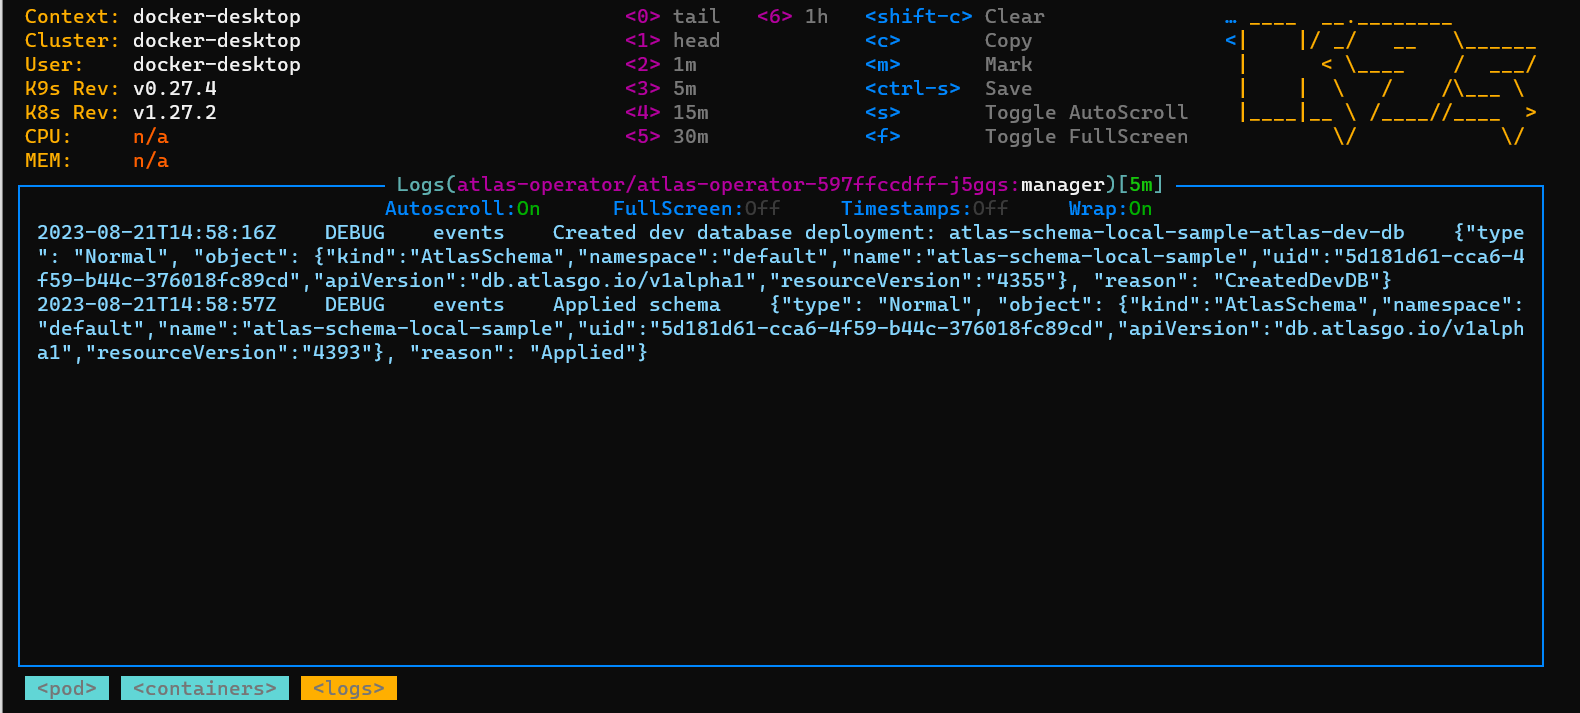
A very handy feature of the operator is that it will automatically launch a “dev” database in the same Kubernetes cluster and validate the SQL migrations there first before actually touching our real database. Isn’t that great? This means any errors in your files will be caught early without leaving the real database in an inconsistent state.
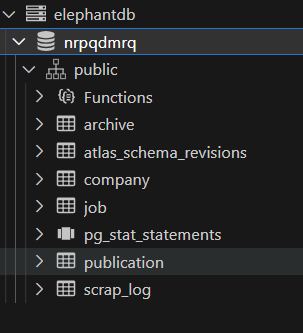
After a while, your database should be ready.

This is a great starting point, but we can improve it in several ways. First of all, looking at the logs of the controller to understand what is going on is a cumbersome task. Storing SQL files directly in a Kubernetes manifest is not always possible, especially for pre-existing databases.
Manually running kubectl commands also goes against the GitOps principles.
Connecting the operator to Atlas Cloud
The operator can work with several data representations for your migration files. As with the standard Atlas CLI you can use the operator with both versioned and declarative files. The most obvious challenge, however is using migration files directly in Kubernetes YAMLs. This can work great for greenfield projects, but in an enterprise environment, you probably already have a folder of SQL files you would like to use with the operator.
The Operator can be connected to your Atlas Cloud account. After you sign-up, you can create a migration directory in any git repository that you choose (just like we did in part one of this series)
Then create an authentication token and store it in another Kubernetes secret.
apiVersion: v1
kind: Secret
metadata:
  name: atlas-credentials
type: Opaque
stringData:
  token: "McwfAWqu553dfgT7x7gaCOdltfto/qdfgwerwerj25DiLi43RYYynDxh2ViC"
Apply this file with “kubectl apply -f atlas-credentials.yml”.
Then change the migration manifest to the following:
apiVersion: db.atlasgo.io/v1alpha1
kind: AtlasMigration
metadata:
  name: atlasmigration-cloud-sample
spec:
  urlFrom:
    secretKeyRef:
      key: url
      name: pg-credentials
  cloud:
    project: "demo" # Atlas Cloud project name
    tokenFrom:
      secretKeyRef:
        key: token
        name: atlas-credentials
  dir:
    remote:
      name: "demo" # Migration directory name in your atlas cloud project
This keeps the same database as before but this time instructs the operators to load all definitions for a directory called “demo” as defined in atlas cloud.
We can now apply the file with “kubectl apply -f migration-cloud.yml”. After a while, the migration will be finished, and your database should have all the required tables.
The beauty of using Atlas Cloud for storing your migration files is the great visibility on how your databases are managed. For example, you can see the history of your migration files right in the UI.
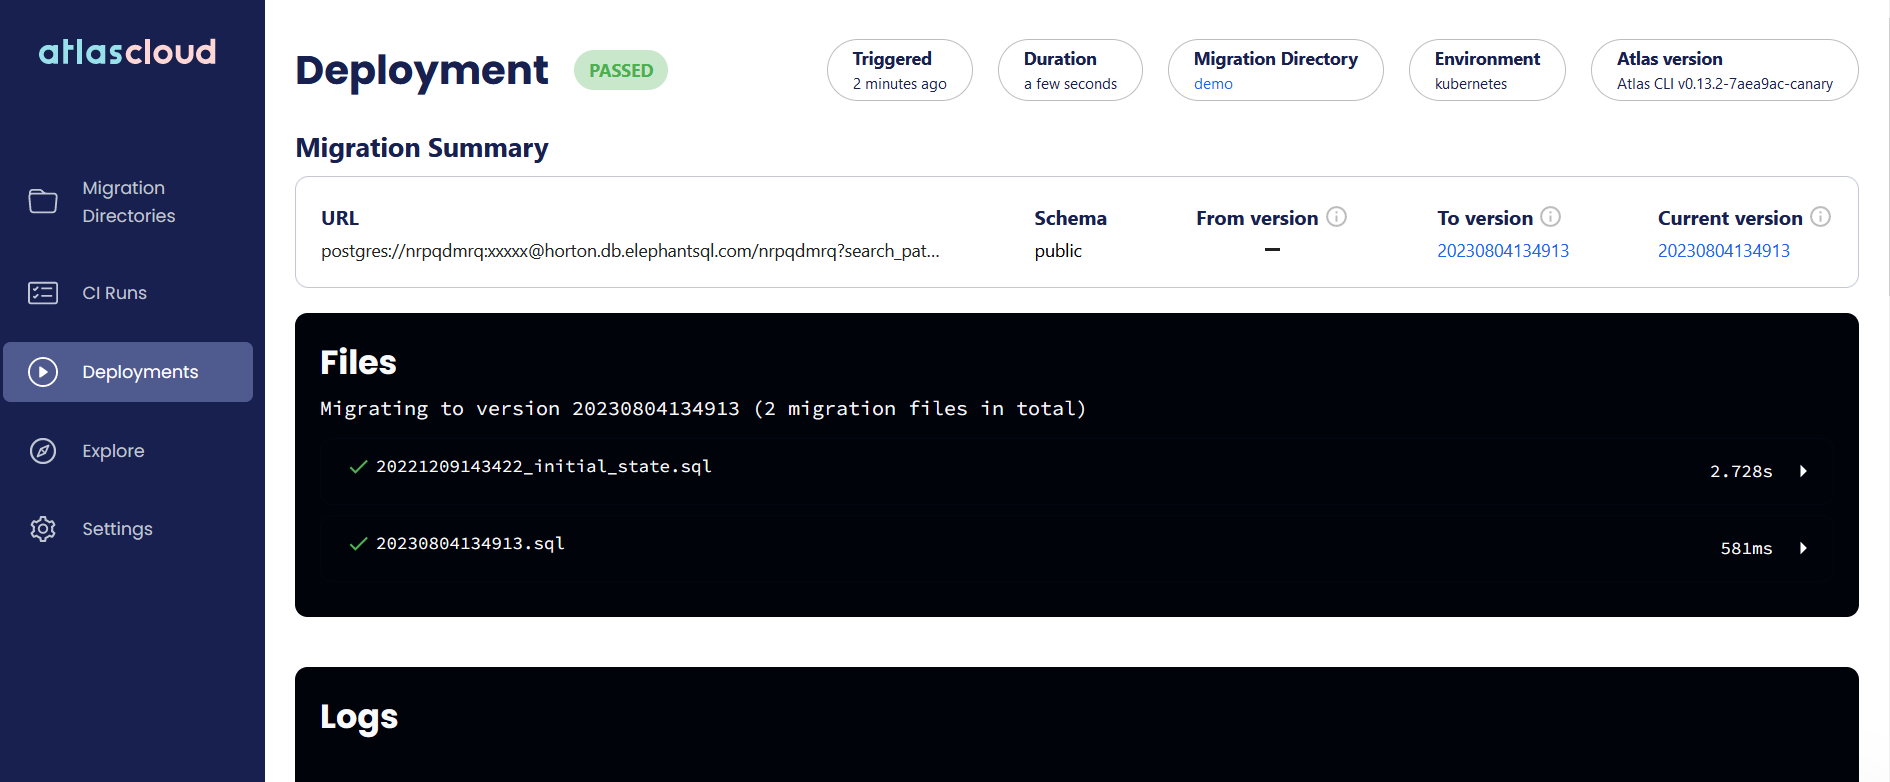
You can also see which database was affected by the migration.
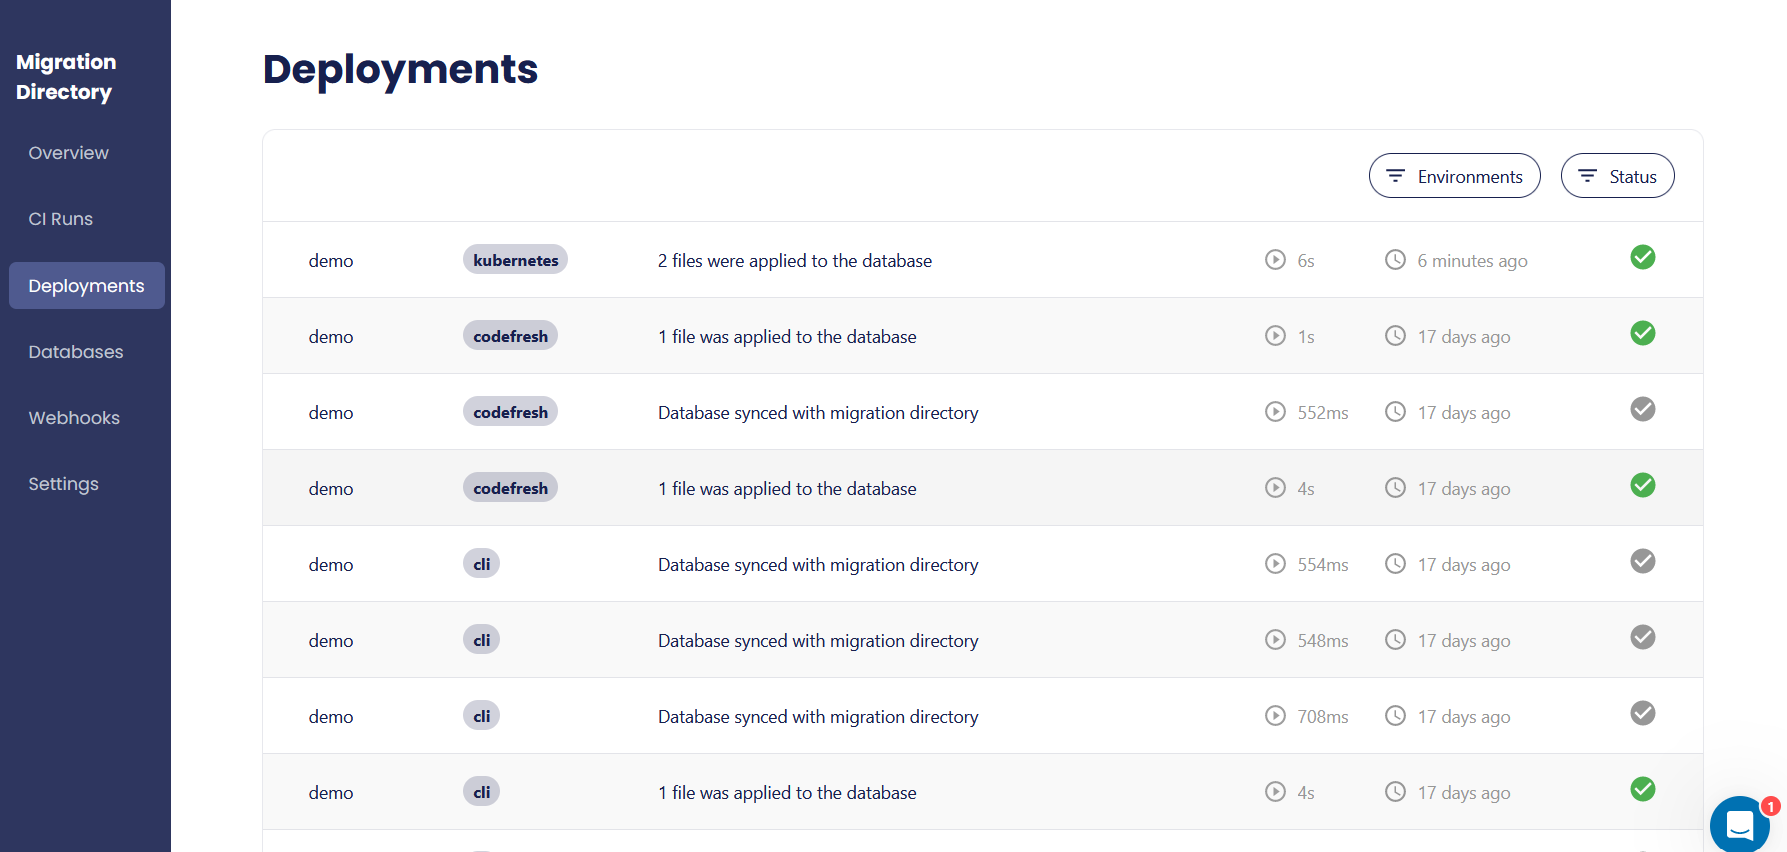
Notice the “kubernetes” tag in the first entry, making it clear that this database was touched by the operator, unlike the previous runs.
As before, you can also gain the benefits of everything else offered by Atlas Cloud, such as visualizing your schemas, looking at the history of your schemas, etc.
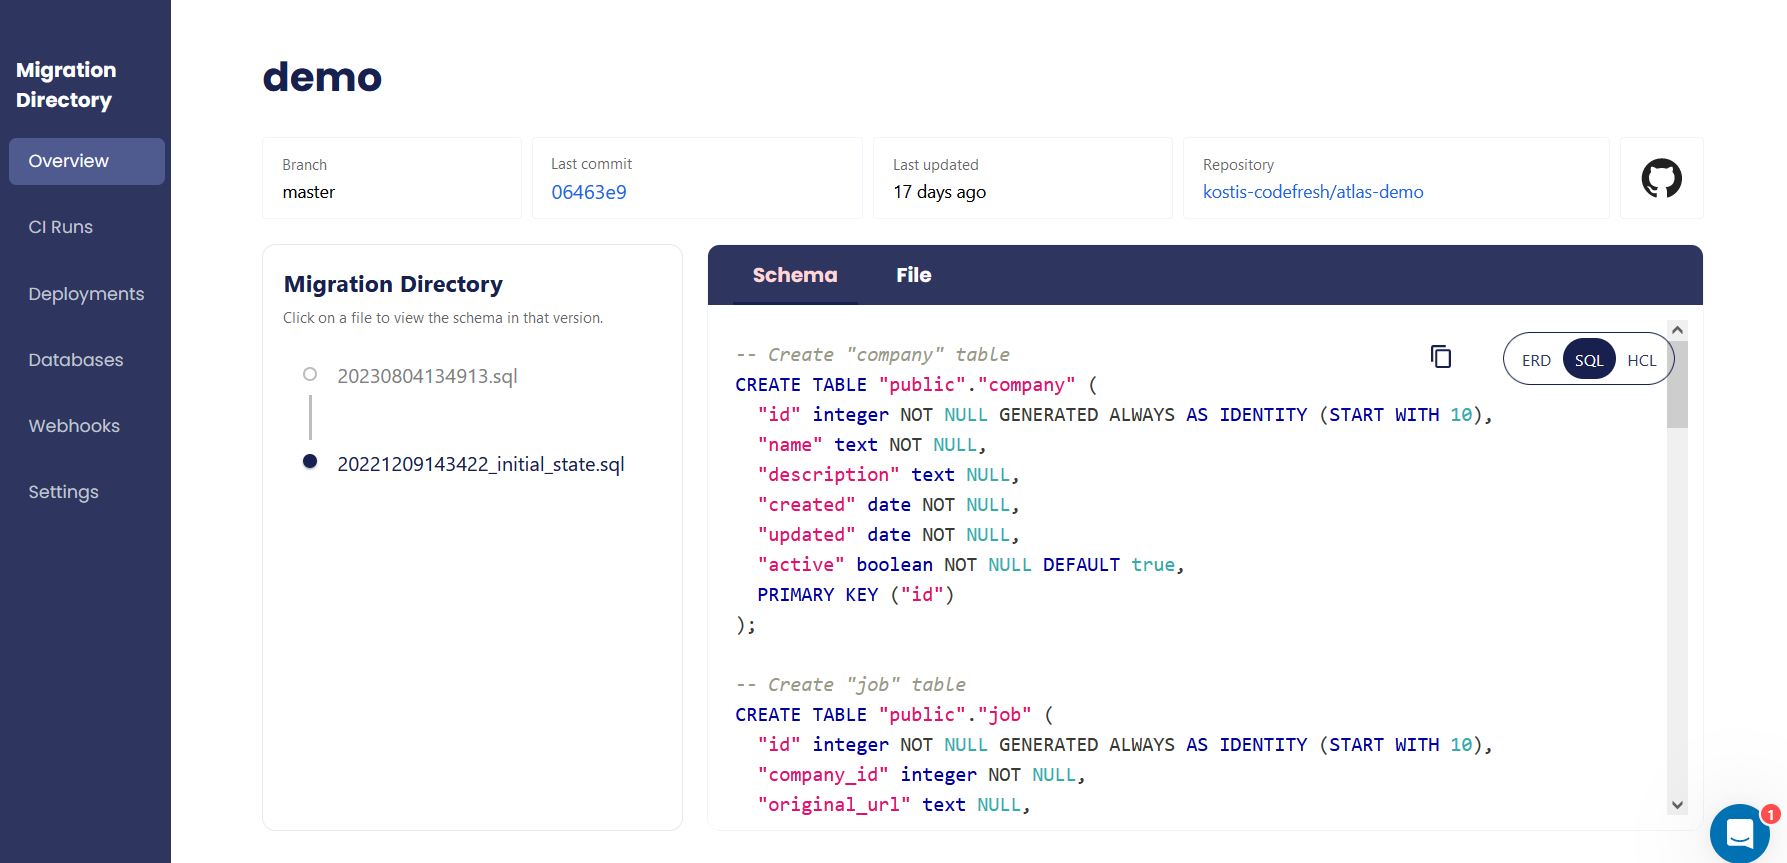
Using Atlas cloud is a great way to gain a complete understanding of how your databases evolve over time.
Storing everything in Git
Remember that one of the basic tenets of GitOps is to store everything in git (including database migrations) and never use kubectl manually as we did in the previous sections.
The first step is to commit all our files in our git repository. Unfortunately, we cannot do this straight away, as committing secrets (the database credentials and the atlas cloud token) is an anti-pattern.
We should either store the secrets somewhere else or encrypt them before putting them in git. There are several options for GitOps secrets, but in this simple tutorial, we will work with Sealed Secrets, which automatically ship with Codefresh installation. If you are not familiar with Sealed Secrets read our previous guide on how they work.
The steps we follow are
- Install the sealed secret controller in the same cluster as the Atlas operator
- Use the kubeseal CLI to encrypt our raw secrets
- Commit the encrypted secrets in Git.
We can easily encrypt both our secrets with
kubeseal -o yaml < cloud-credentials.yml > cloud-credentials-sealed.yml
kubeseal -o yaml < pg-credentials.yml > pg-credentials-sealed.yml
The resulting files are encrypted and we can commit both of them in git along with our migration manifest.
We are now ready to create a proper GitOps application for everything and stop using manual kubectl commands.
Managing migrations like any other GitOps application
We can finally use Codefresh to manage our database migration in a GitOps manner. First, let’s create an application with our git repository.
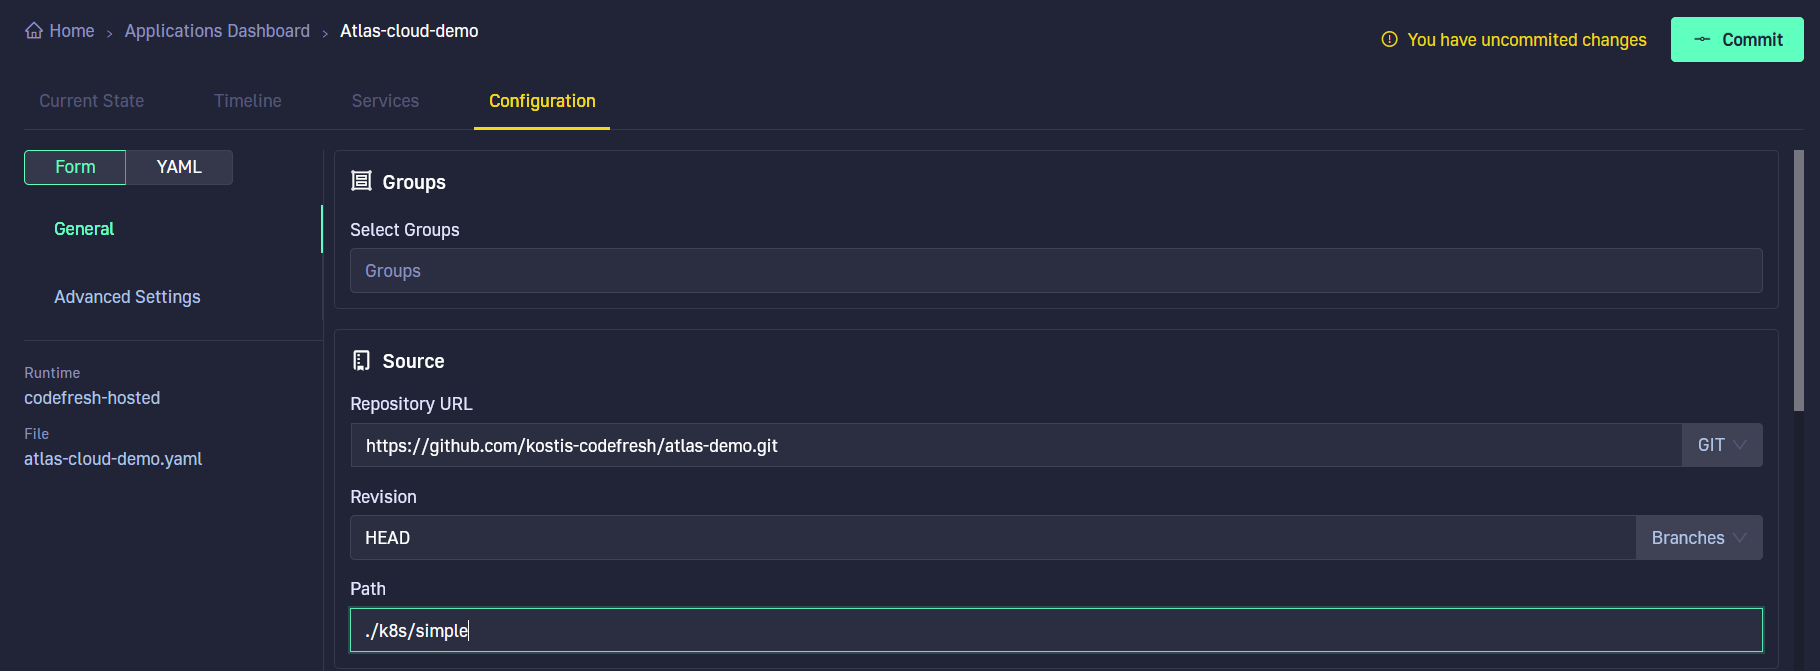
Notice that Codefresh enables better GitOps adoption. Every change we did in the UI resulted in a git commit behind the scenes. Even though we defined our application in a friendly UI, the confirmation button is a “Commit” that will create the Argo CD manifest and push it in the git repository monitored by the Codefresh GitOps runtime.
Once that is done, we can treat database migrations like any other Kubernetes application. Here, we can see the individual components of the application. Syncing the application performs a new database migration.
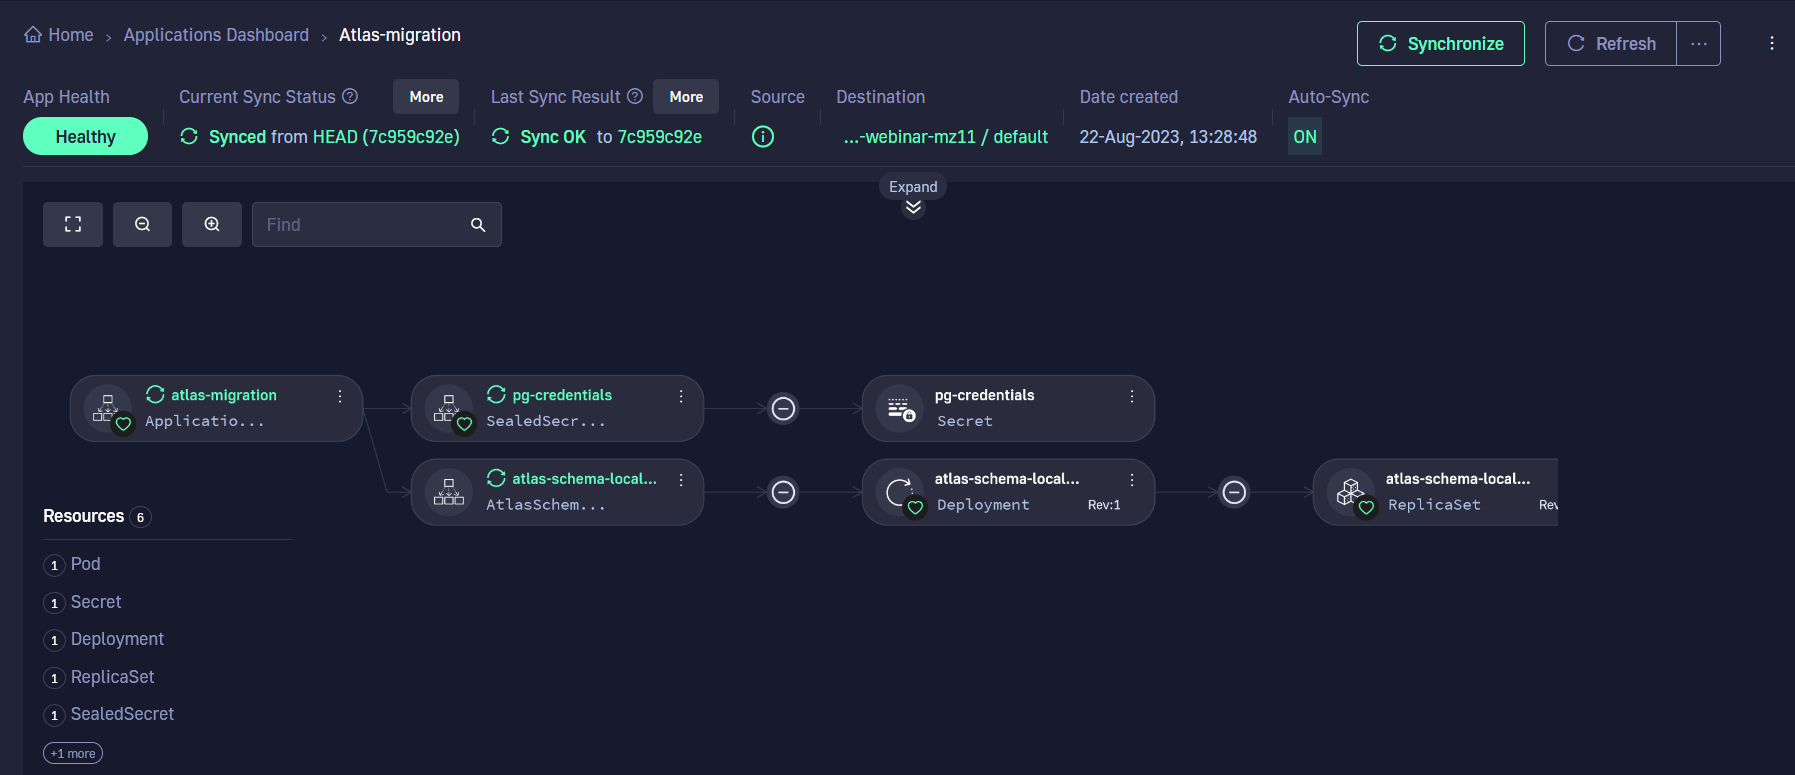
We can also see the difference between the live and desired state. This is very useful if you decide to keep the SQL files inside Kubernetes manifests.
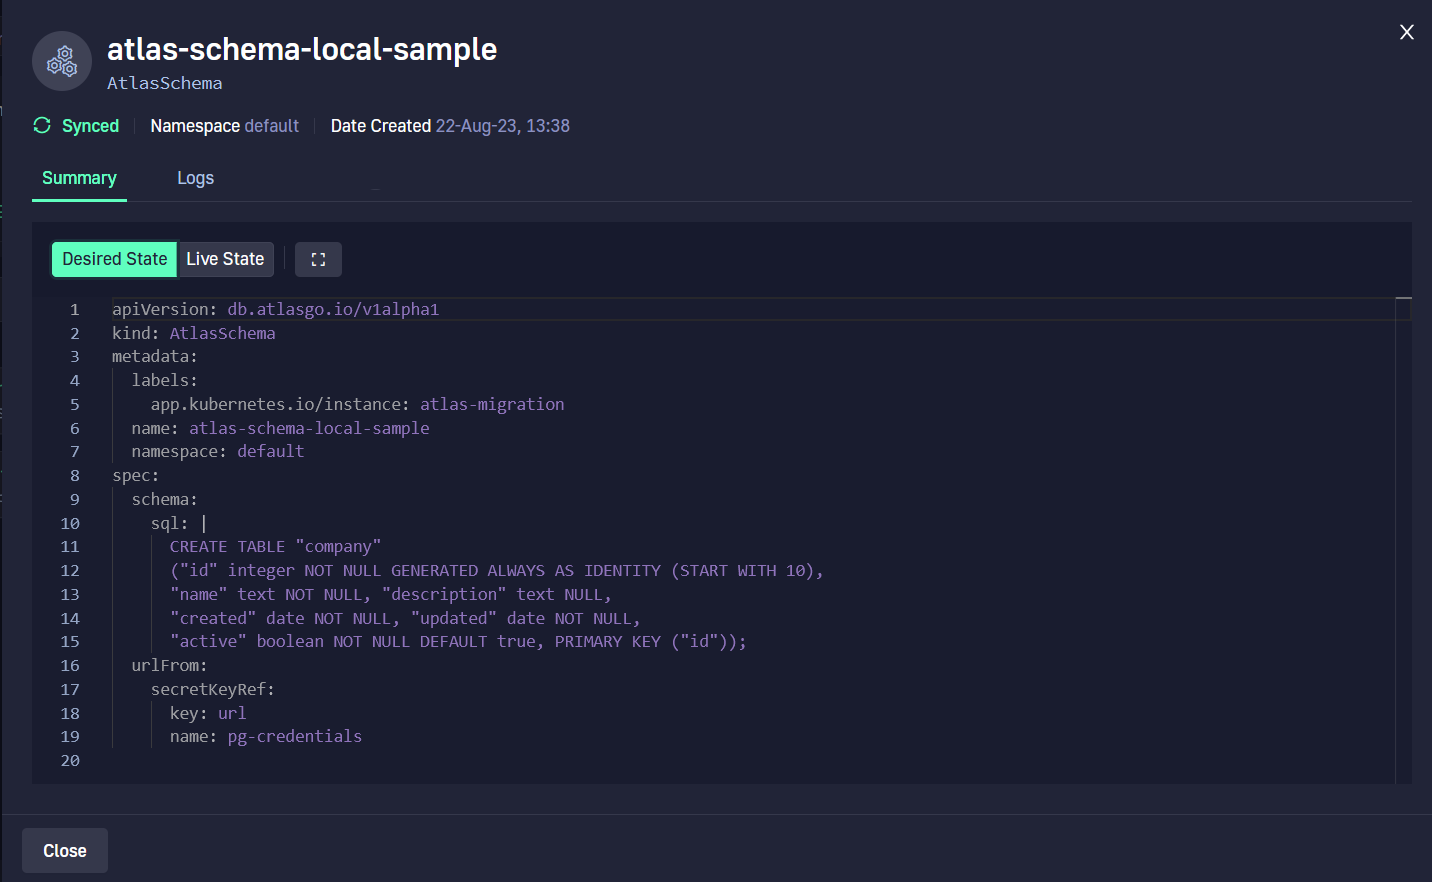
You can now manage your Database using just Kubernetes resources. How cool is that? 🙂
Using GitOps for both applications and databases
In this article we have seen how you can use the Atlas Kubernetes operator to handle database migrations using Kubernetes resources.
We have also seen how you can store all the secrets required in git using an encrypted format and, finally how you can manage everything using a Codefresh GitOps runtime.
Now that we have seen all the building blocks, in the next article we will explain how to create a complete end-to-end workflow for databases when it comes to preview environments and pull requests.
Learn more about Atlas cloud. If you are not using Codefresh yet, get started today by creating an account, and we would love to hear from you!