AWS CodeCommit is a managed source control service provided by Amazon. This blog post will show how to integrate a CodeCommit repository into a Codefresh pipeline.
AWS CodeCommit only allows workflows that trigger lambda functions so we need to use that to trigger Codefresh.
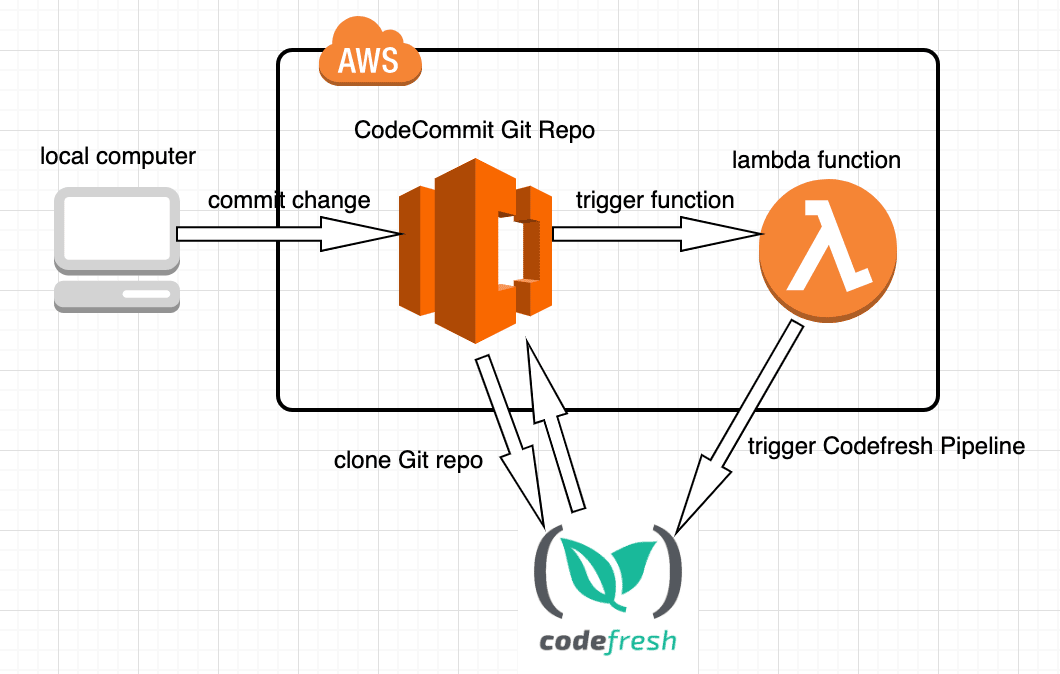
This is how we will do it:
Once we commit a change to our CodeCommit git repository, it will trigger an AWS Lambda function which will trigger a Codefresh pipeline. The Codefresh pipeline will then clone the repository and can perform any additional action like building my app, running tests and deployment.
Step 1 – creating a pipeline in Codefresh
As we are going to use a custom integration to AWS CodeCommit, we need to create a pipeline that isn’t tied to a repository. To do that, click on the ‘Pipelines’ view and then ‘NEW PIPELINE’:

In the ‘Settings’ section, give the pipeline a name.
In the ‘Variables’ section, add your GIT_USER and GIT_PASSWORD.

To clone the git repository, we will need to first Create Git Credentials for HTTPS Connections to CodeCommit.
We will pass some of our repository-related environment variables like the region, repository-name, and branch to Codefresh, as part of the Lambda function which we will create in the next step.
Our Codefresh YAML will look like this (the pipeline will use the cfstep-codecommit plugin):
version: '1.0'

steps:

  GitClone:
    image: codefreshplugins/cfstep-codecommit
    environment:
      - GIT_USER=${{GIT_USER}}
      - GIT_PASSWORD=${{GIT_PASSWORD}}
Step 2 – creating an AWS Lambda function
In this step, we need to create a simple function which will send an HTTPs request to Codefresh, utilizing the Codefresh API, to run our Codefresh pipeline.
We used Node.js in this example but you can use any programming language supported by AWS Lambda.
With Node.js, the easiest way to send an HTTPs request is using https.request.
We created the Node.js file locally, downloaded all the dependencies needed and then uploaded it as a ZIP file to AWS Lambda.
Note that we will need to send an Authorization header with the Codefresh API Key (you can create an API Key here).
We can pass both authorization and the pipeline name as environment variables in AWS Lambda:

As body variables, we will pass our repository-related environment variables like the region, repository name, and branch to Codefresh.
Using https.request, the function will look like this:
const https = require('https')

exports.handler = (event, context, callback) => {

var auth = process.env.AUTH;
var pipelineName = process.env.PIPELINE_NAME;

var repository = event.Records[0].eventSourceARN.split(":")[5];
var region = event.Records[0].eventSourceARN.split(":")[3];
var branch = event.Records[0].codecommit.references[0].ref.split("/")[2];

var body = {"variables": { "CF_BRANCH": branch, "CF_REPO_NAME": repository , "REGION": region}}

const options = {
  hostname: 'g.codefresh.io',
  port: 443,
  path: '/api/pipelines/run/' + pipelineName,
  method: 'POST',
  json: true,
  headers: {
    'Content-Type': 'application/json',
    'Authorization': auth
  }
};

const req = https.request(options, (res) => {
  console.log('statusCode: ${res.statusCode}')
});
req.write(JSON.stringify(body))
req.end();
};
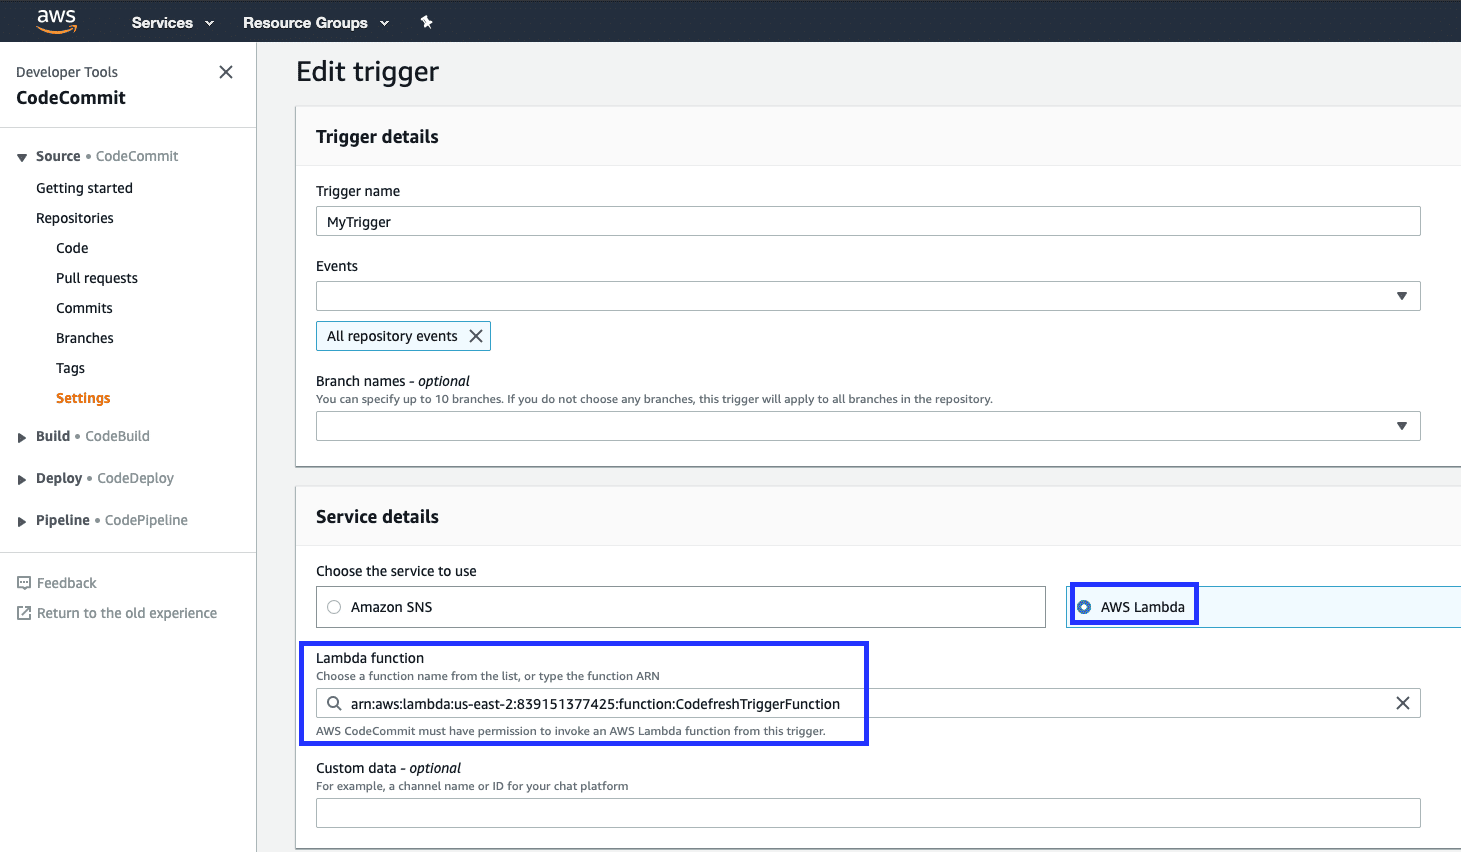
Step 3 – creating a trigger for our Lambda function in the CodeCommit repository
All is left to do now is create a trigger for the Lambda function (that we created in the previous step) in our CodeCommit repository.
That’s it! The Codefresh pipeline will now automatically run for any changes we make in our CodeCommit repository.
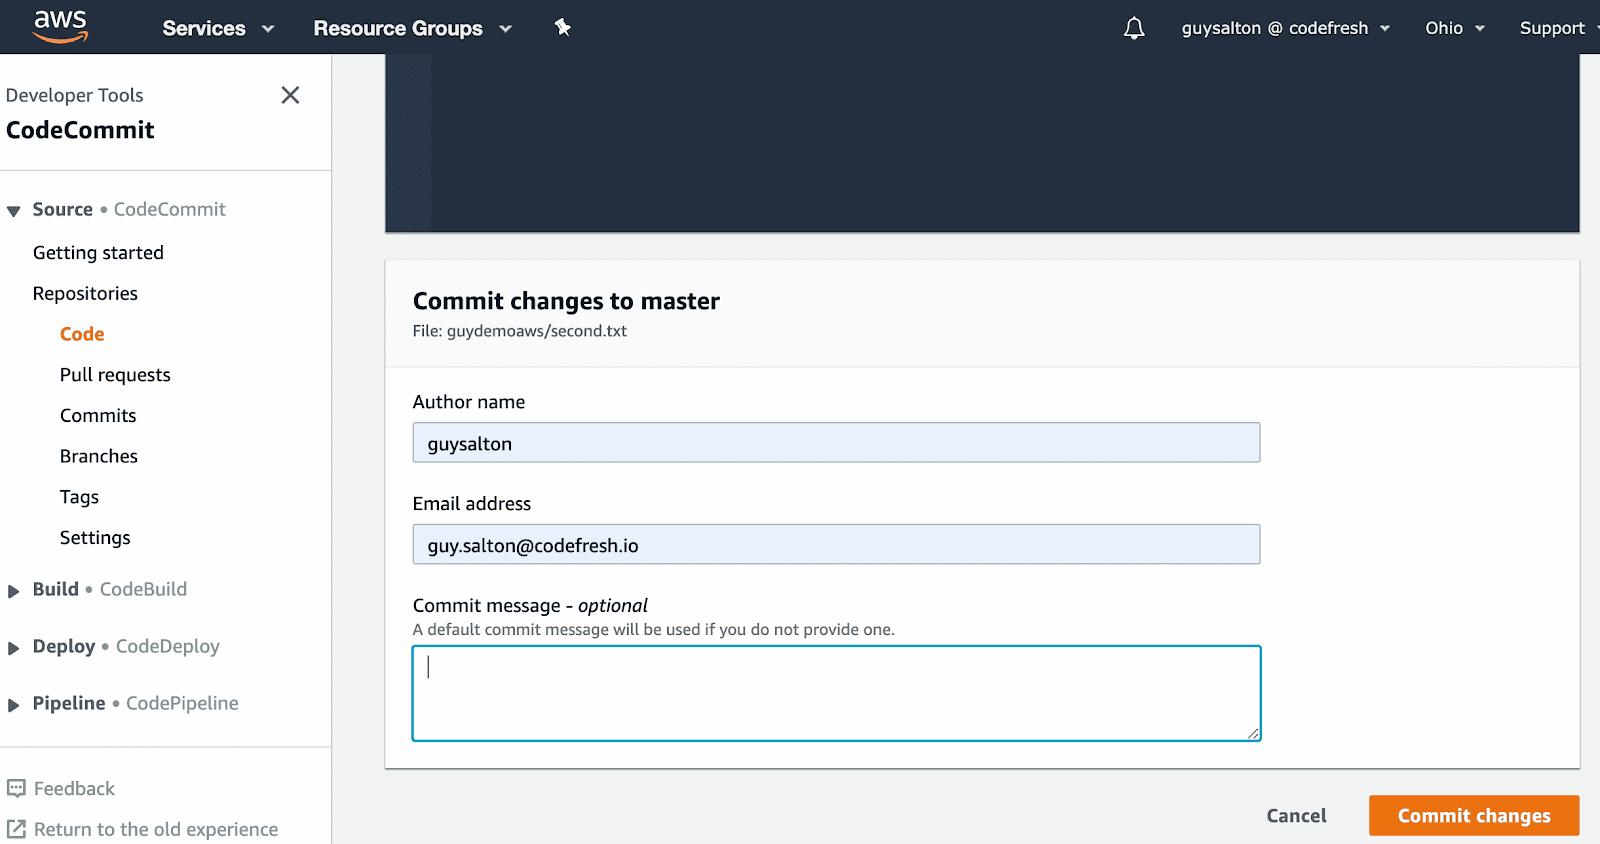
Step 4 – committing a change to the CodeCommit repository
Now that the trigger is configured, we can make any commit to our CodeCommit repository; any commit will trigger the Lambda function, which will send an API call to our Codefresh account to run our Codefresh pipeline.
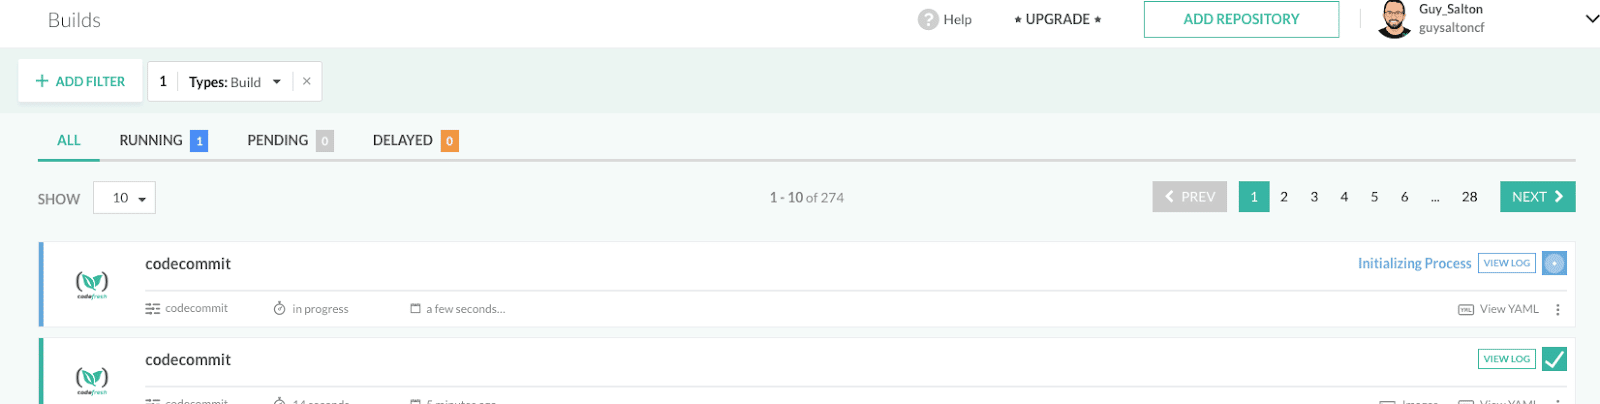
Once we commit the changes in CodeCommit, we can go to our Codefresh account and see that a new build had started:
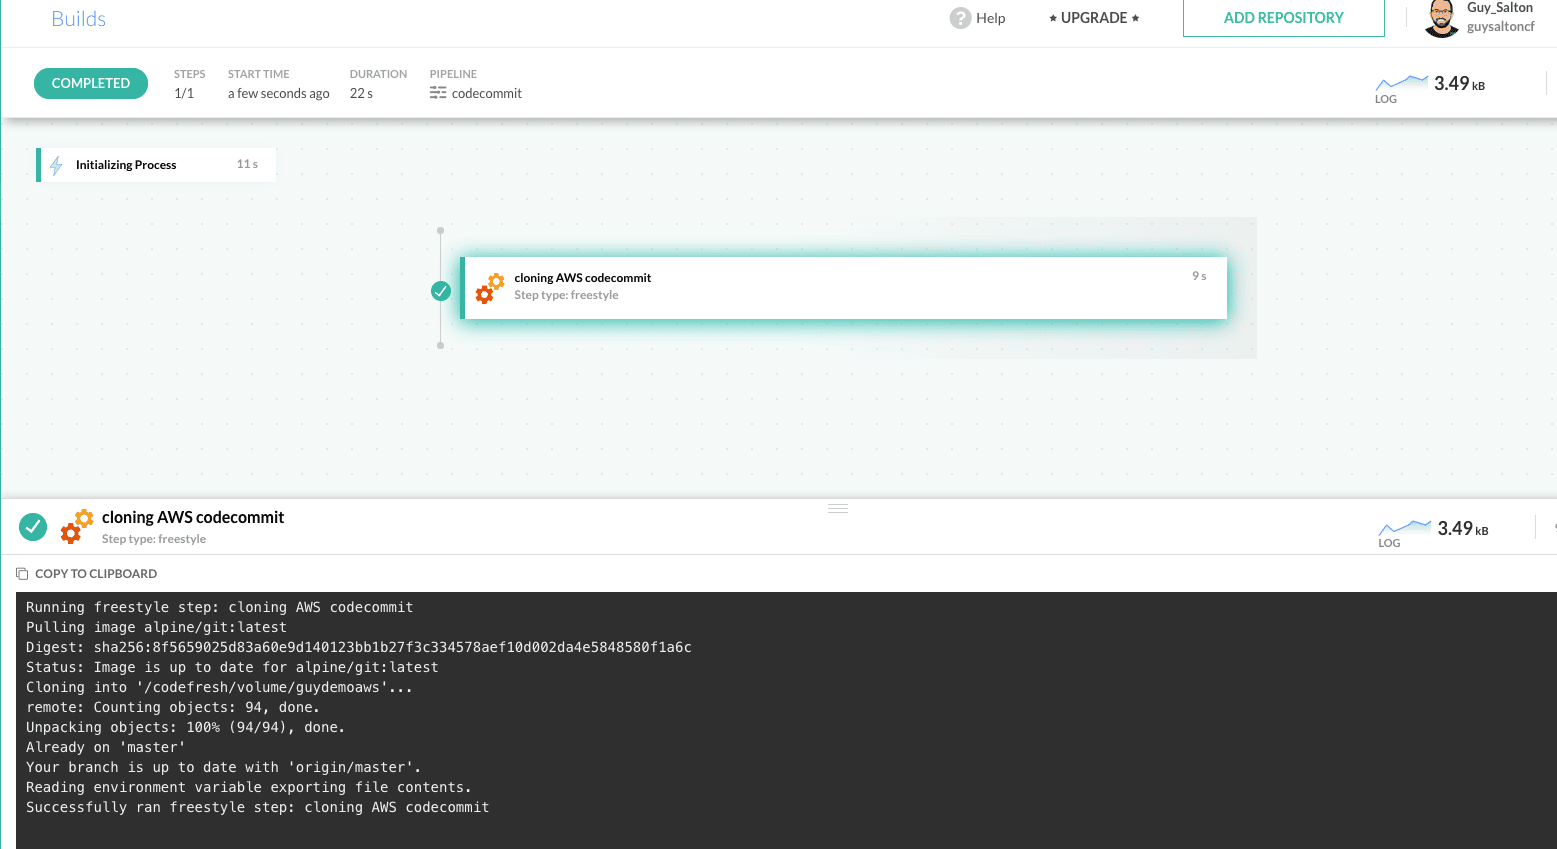
We can then click on this build and see that our CodeCommit repository was cloned successfully!
You can now add any further steps to this Codefresh pipeline to build your application, run any tests on it, push the Docker image to a registry, and then deploy your application!