What Is Kubernetes Helm?
Helm is a tool that simplifies the deployment, scaling, and management of applications on Kubernetes. Often described as a package manager for Kubernetes, it uses Helm charts—pre-configured templates that manage Kubernetes resources. This abstraction allows practitioners to deploy applications with a single Helm command, reducing the heavy lifting required in managing YAML files and kubectl commands.
Helm charts are blueprints that define all required components of a Kubernetes application, including deployments, services, and volumes in an easy-to-use template that accepts custom values. Since these charts are reusable, they save time and reduce errors by providing consistent and repeatable configurations. As a result, Helm accelerates application development and deployment and ensures consistency across different Kubernetes environments.
This is part of a series of articles about Kubernetes management.
How Does Helm Work?
In the past, Helm had two main components: the Helm CLI (command line interface) and a server-side component known as Tiller. In version 3, Helm 3 removed Tiller for enhanced security and simplified operations, and now relies solely on the Helm CLI.
When deploying an application with Helm, the user interacts with the Helm CLI to install a Helm chart, which is then converted into Kubernetes resource configurations. These configurations are then applied to the Kubernetes cluster. Helm also makes it possible to upgrade, rollback, and manage application versions with ease, thanks to its built-in versioning capability, using the concept of Helm Releases.
Read our guide to Kubernetes tools.
Why Use Helm in Kubernetes?
Helm offers several advantages for managing applications in Kubernetes, starting with its ability to simplify the deployment process. By using pre-configured Helm charts, teams can enforce best practices and standardize deployments across different environments. This reduces the potential for configuration drift and makes it easier to manage complex applications that have multiple dependencies.
Additionally, Helm supports versioning and rollback features, which are crucial for maintaining application stability. If a new feature or update causes issues, Helm allows teams to revert to a previous stable state effortlessly. The ability to package and distribute Kubernetes applications as Helm charts also facilitates better collaboration and sharing within and between teams, enhancing productivity and operational efficiency.
When to Use Helm
Helm is particularly useful when managing applications with complex configurations or multiple microservices. It abstracts away much of the complexity involved in defining Kubernetes resources through manual YAML files, making it highly effective for CI/CD pipelines.
If maintaining consistency across various environments is a priority, Helm’s templating and versioning features ensure that deployments remain uniform and can be easily rolled back if needed.
Helm is also useful for large teams. Using Helm charts, multiple team members can deploy applications in a reliable and repeatable manner. The standardization of Helm charts in an organization facilitates smoother transitions between development, staging, and production environments.
When Not to Use Helm
While Helm is useful, it may not excel in all scenarios, particularly in highly dynamic environments. For applications that require frequent, incremental updates or rapid scaling based on real-time data, Helm’s reliance on predefined charts may introduce unnecessary rigidity. In such cases, more dynamic, script-based solutions like Kubernetes Operators or custom scripts might be more appropriate for fine-grained control.
In addition, Helm can have a steep learning curve for those new to Kubernetes or container orchestration. Creating and customizing Helm charts requires a solid understanding of Kubernetes internals and resource management. For simpler applications or smaller teams, using plain Kubernetes manifests may be more straightforward and less resource-intensive. Helm may be overkill for simpler use cases.

TIPS FROM THE EXPERT
In my experience, here are tips that can help you better leverage Kubernetes Helm:
- Use Helmfile for multi-environment deployments: Helmfile allows you to define multiple Helm charts for different environments in a single file. It simplifies managing complex deployments across dev, staging, and prod by handling values and secrets specific to each environment in one place.
- Leverage Helm hooks for lifecycle management: Helm hooks let you run scripts or jobs at specific points during a release lifecycle, such as pre-install, post-upgrade, or pre-delete. This is ideal for tasks like database migrations or cleaning up resources.
- Implement chart testing with Helm test: Utilize the helm test command to automatically run integration tests on your application after deploying it. This can save time by catching deployment issues early in the CI/CD pipeline.
- Automate Helm chart releases with GitOps: Integrate Helm with a GitOps tool like ArgoCD to automatically apply chart updates whenever changes are pushed to the repository. This ensures continuous delivery and consistency across your environments.
- Optimize Helm charts for CI/CD pipelines: Reduce the size of your Helm charts by packaging only the necessary dependencies. Large charts can slow down CI/CD pipelines, so consider using tools like helm dep up to manage dependencies efficiently.
Quick Tutorial: Getting Started With Helm in Kubernetes
In this tutorial, you’ll learn how to get started with Helm, including its installation and basic usage within a Kubernetes environment.
Step 1: Installing Helm
To install Helm, you can choose between downloading binary releases or using the provided installer script. Here’s how to install Helm using both methods:
Installing Helm via binary release
Download the desired version of Helm:
wget https://get.helm.sh/helm-v3.15.1-linux-amd64.tar.gz
Unpack the downloaded file:
tar -zxvf helm-v3.15.1-linux-amd64.tar.gz
Move the helm binary to a directory in your PATH:
mv linux-amd64/helm /usr/local/bin/helm
Verify the installation by running:
helm version
Installing Helm via installer script
Helm also offers a convenient installer script that automates the installation process. Download the installer script:
curl -fsSL -o get_helm.sh https://raw.githubusercontent.com/helm/helm/main/scripts/get-helm-3
Make the script executable:
chmod 700 get_helm.sh
Run the script to install Helm:
./get_helm.sh
Confirm the installation:
helm version
Step 2: Searching for Helm Charts
Helm charts are pre-configured packages that define the resources needed for Kubernetes applications. You can search for available charts using Helm’s search commands:
Search for charts on Artifact Hub:
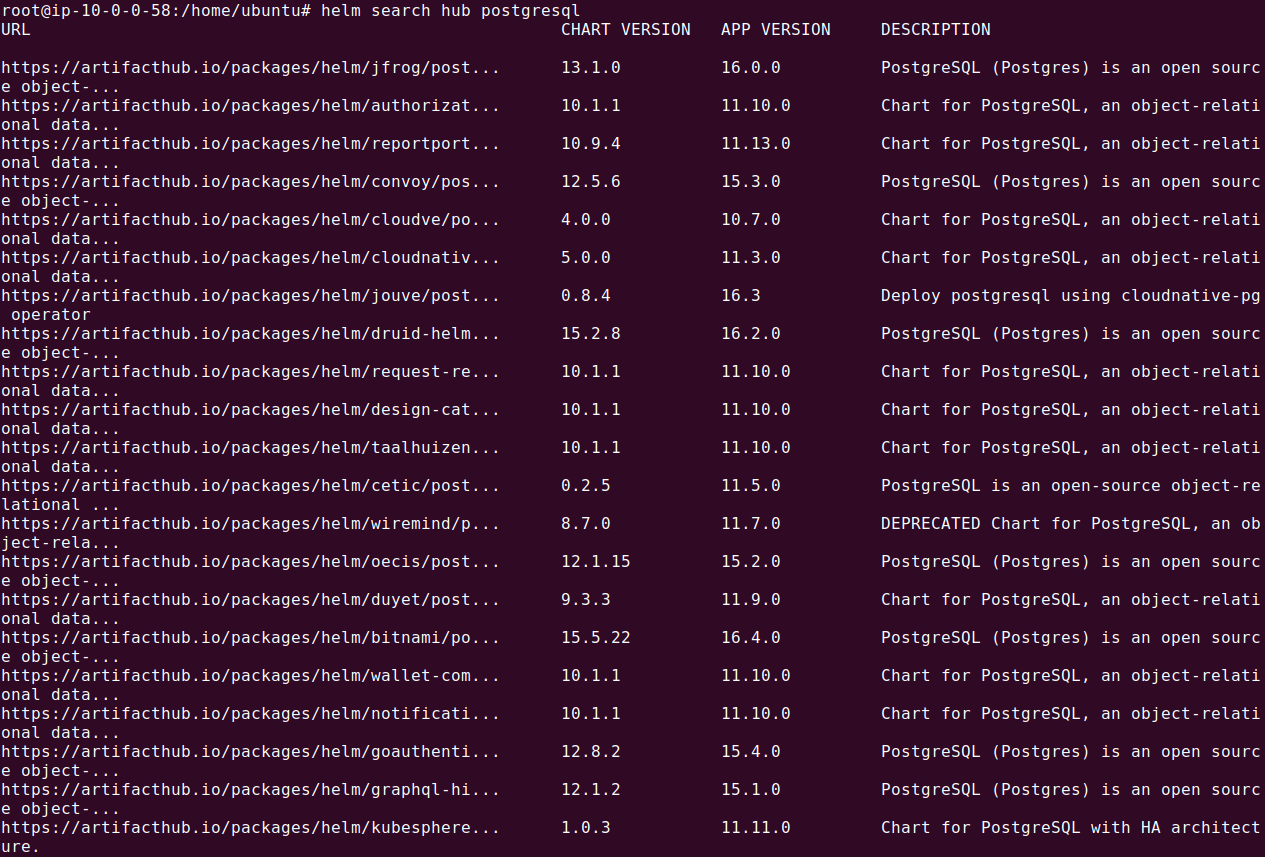
helm search hub postgresql
This command lists available Postgresql charts on Artifact Hub, along with their versions and descriptions.
Search for charts in specific repositories:
helm repo add bitnami https://charts.bitnami.com/bitnami

helm repo update
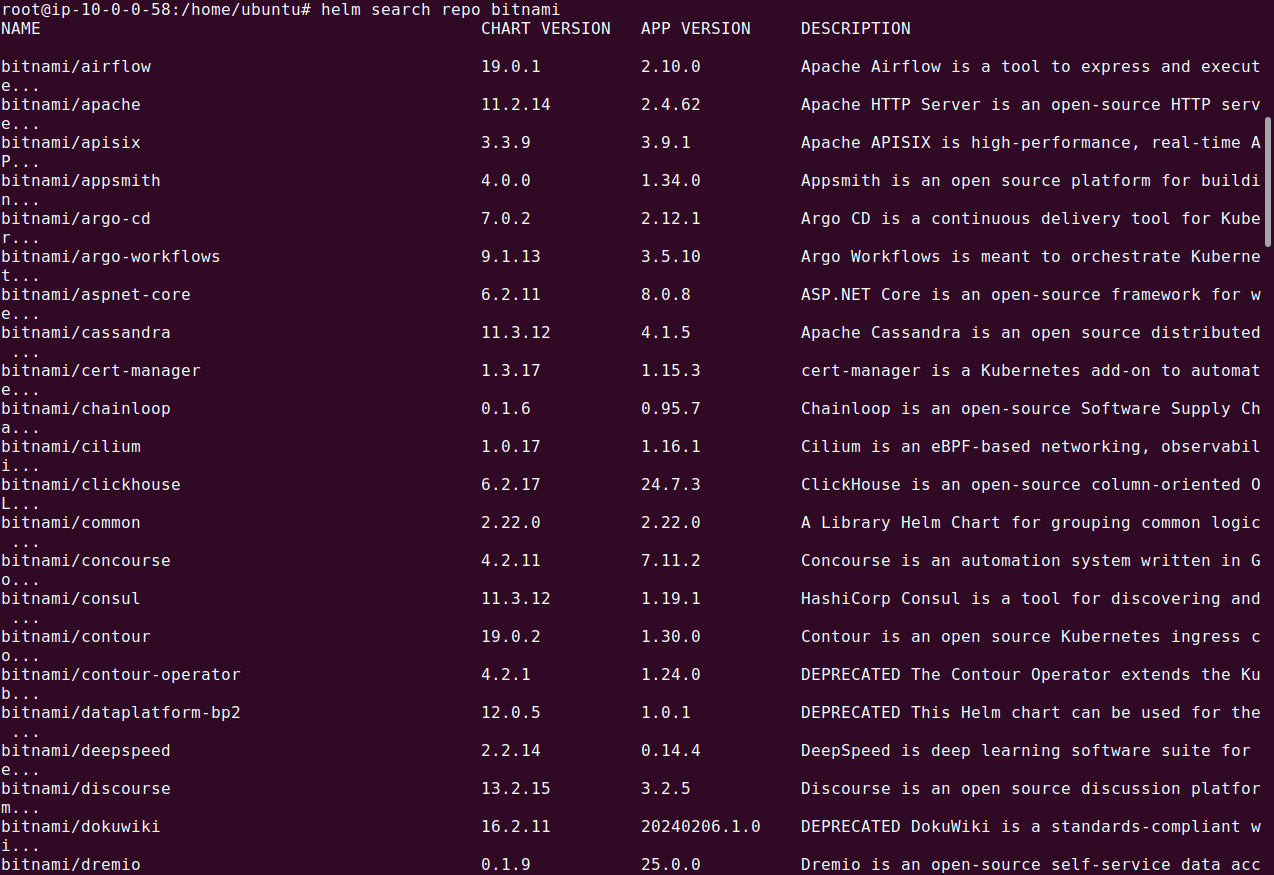
helm search repo bitnami
This command adds the Bitnami repository and searches for all available charts within it.
Step 3: Installing a Helm Chart
To install a Helm chart, use the helm install command. You need to provide a release name and the chart name:
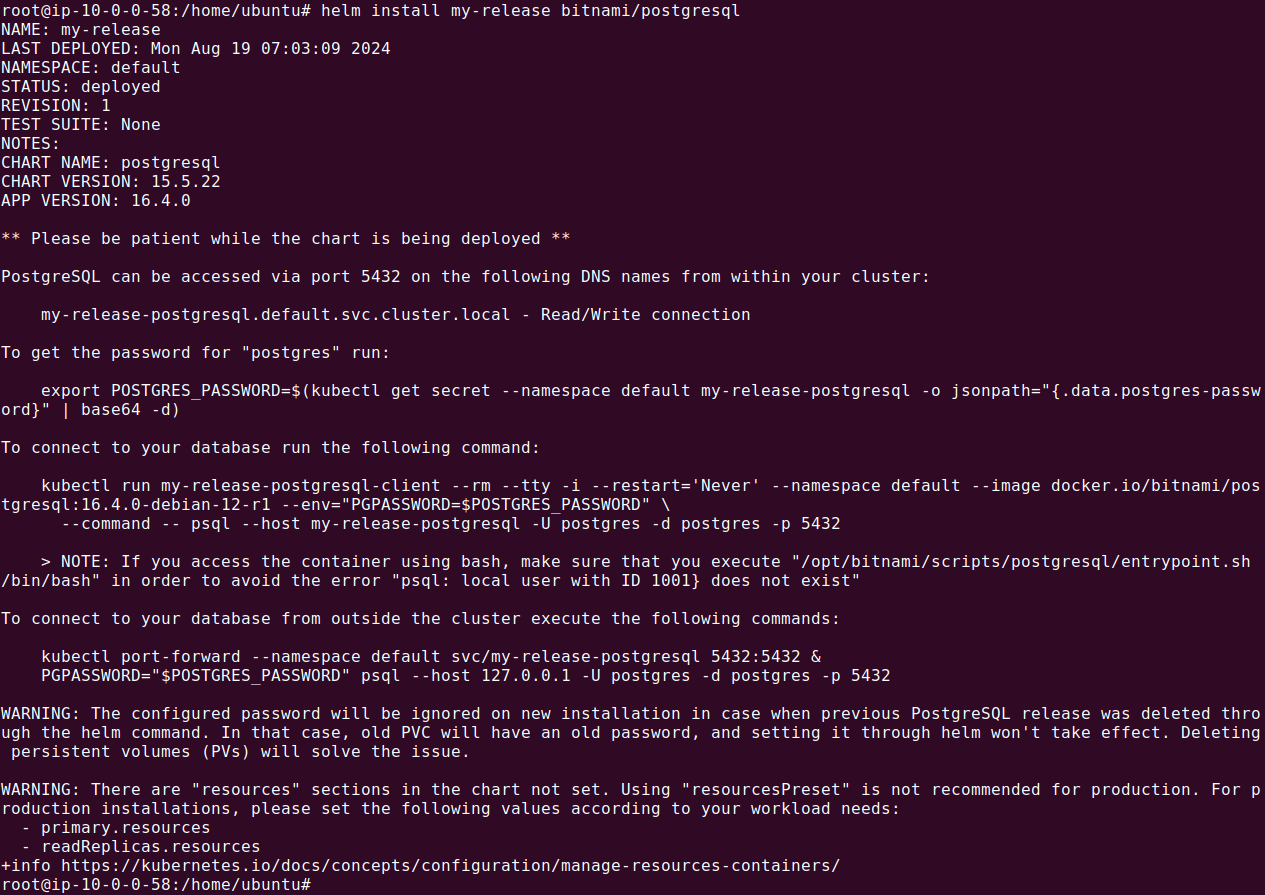
helm install my-release bitnami/postgresql
This command installs the WordPress chart from the Bitnami repository and names the release my-release.
Customizing the installation:
You can customize the chart’s configuration by passing a values file during installation. For instance, to set specific PostgreSQL database credentials:
Create a values.yaml file:
postgresql:
  auth:
    username: james
    password: my!Pass$
    db-name: my-postgres
Use the -f flag to specify your custom values:
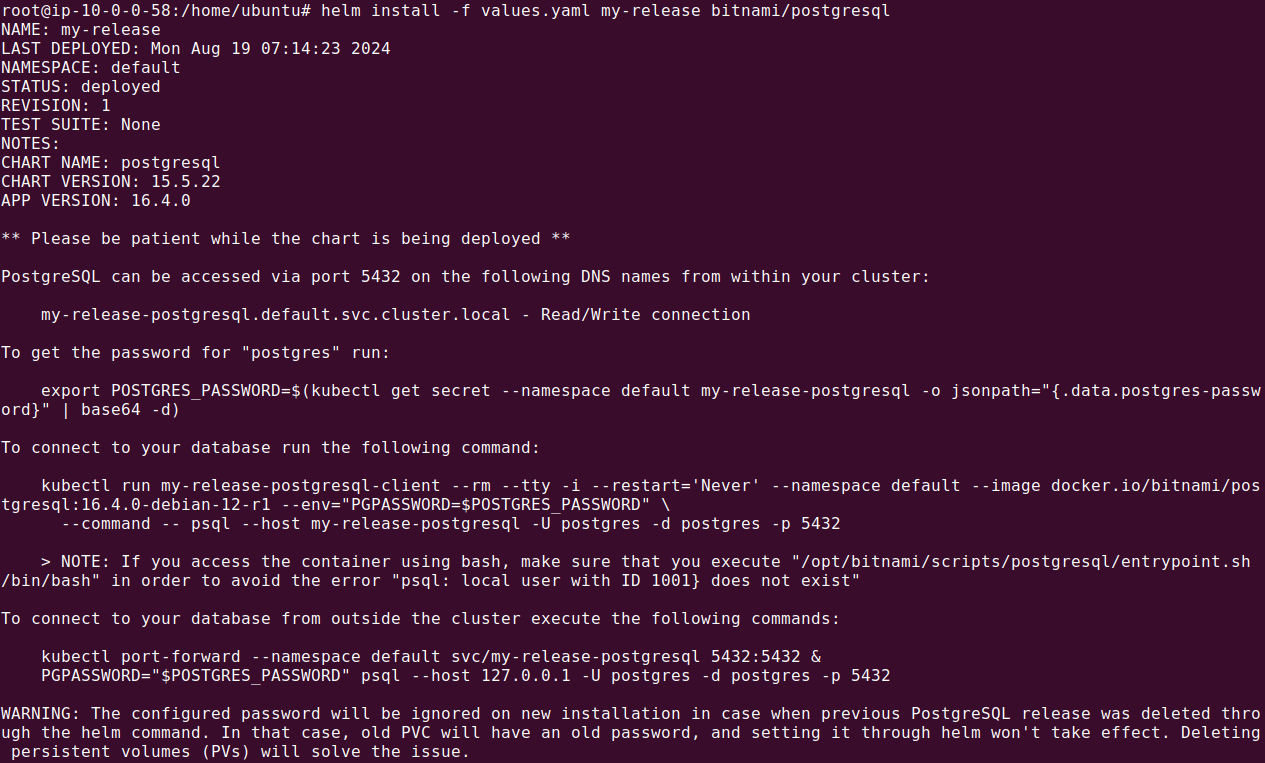
helm install -f values.yaml my-release bitnami/postgresql
This command installs the PostgreSQL chart with the specified credentials.
Step 4: Managing Helm Releases
Once a chart is installed, you can manage it using Helm’s upgrade, rollback, and status commands.
Upgrading a release:
Suppose you want to change the password of the user you have created previously. Let’s create a new YAML file called new-values.yaml with the following content:
postgresql:
  auth:
    username: james
    password: updaTeD!Pass$
    db-name: my-postgres
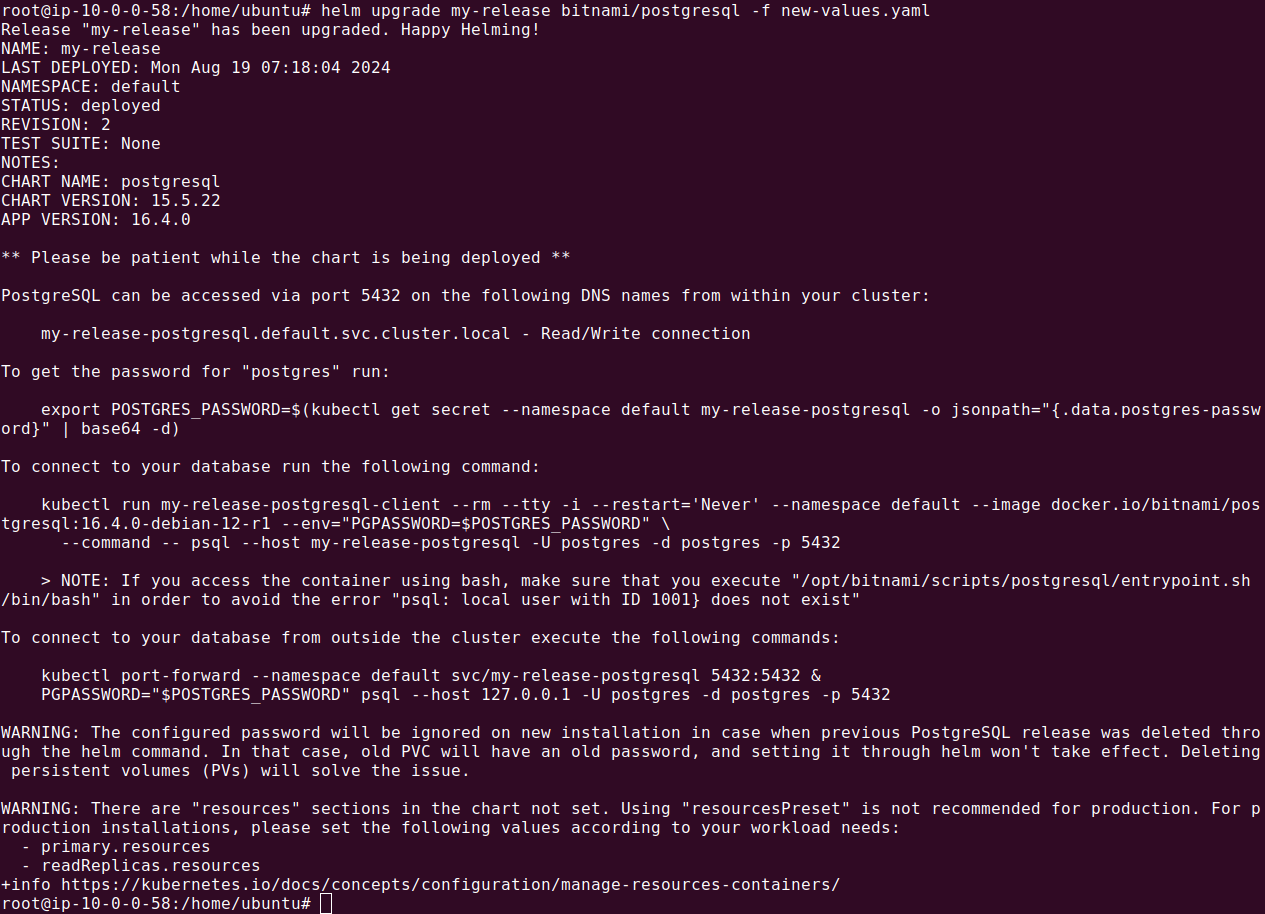
Now we can apply the updated configuration as:
helm upgrade my-release bitnami/postgresql -f new-values.yaml
This command upgrades my-release with new configuration options provided in new-values.yaml.
Rolling back a release:
helm rollback my-release 1
This command rolls back my-release to its first revision, undoing any changes made since then.
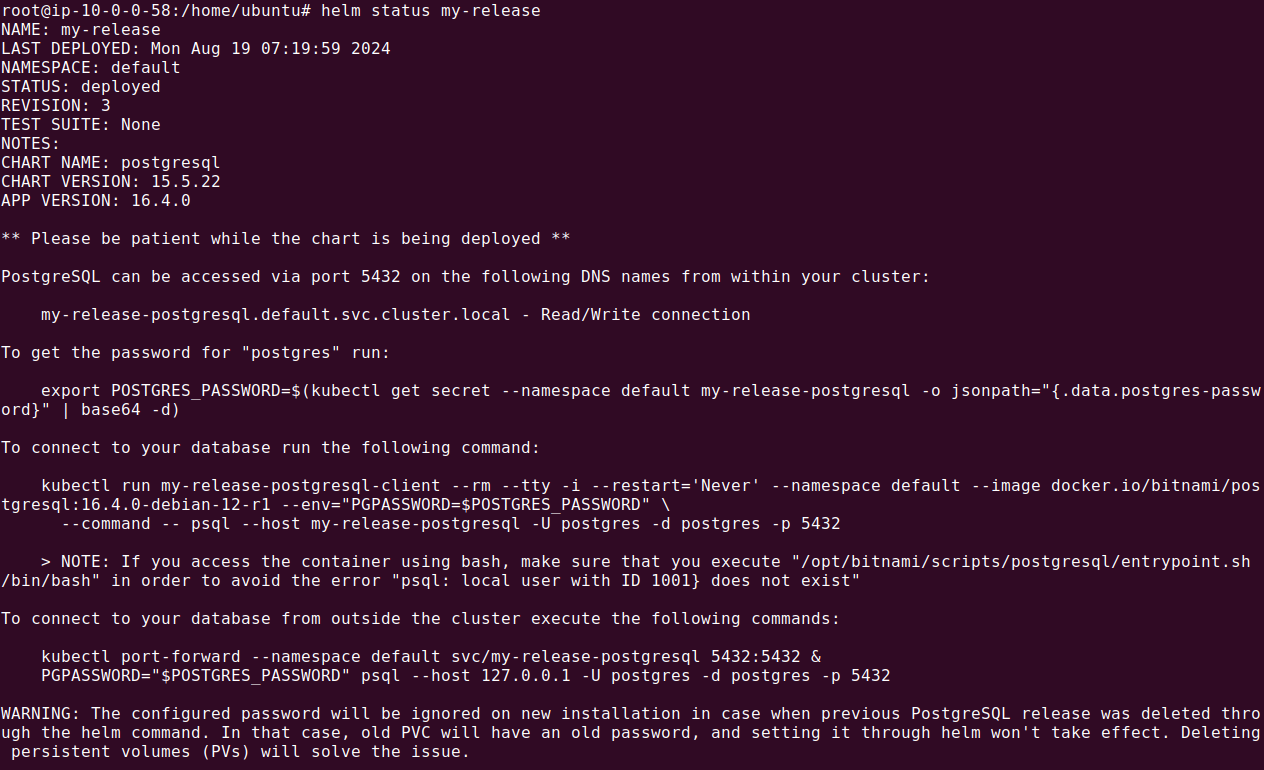
Checking the status of a release:
helm status my-release
This command shows the current status of the release, including any relevant notes and access URLs.
Learn More About Helm Chart Deployment with GitOps
Helm can be very helpful as a familiar component that can help teams transition from traditional workflows to GitOps. Here are additional articles that can help you use Helm charts with GitOps:
- Using Helm with GitOps – explores Helm, shows how Helm charts are mapped to Kubernetes manifests, and provides practical guidance for using Helm with GitOps.
- How to Simplify Your Kubernetes Helm Deployments – explains what to do if the Helm chart promotion process becomes complicated and difficult to automate. Learn a few Helm techniques that can make your process simpler and more robust.
- Using Help to Deploy a Kubernetes Application to Multiple Environments – shows how to use Helm to address a common deployment challenge – how to handle QA, staging, and production environments during the software lifecycle.
- Unlimited Preview Environments with Kubernetes Namespaces – shows how to create testing environments on demand for each pull request.

