This article has been submitted as part of our Blog for Good series. A big thank you to Saiyam Pathak for getting involved and submitting this article. On behalf of Saiyam, we donated $500 to BlackGirlsCode. Learn how you can get involved!
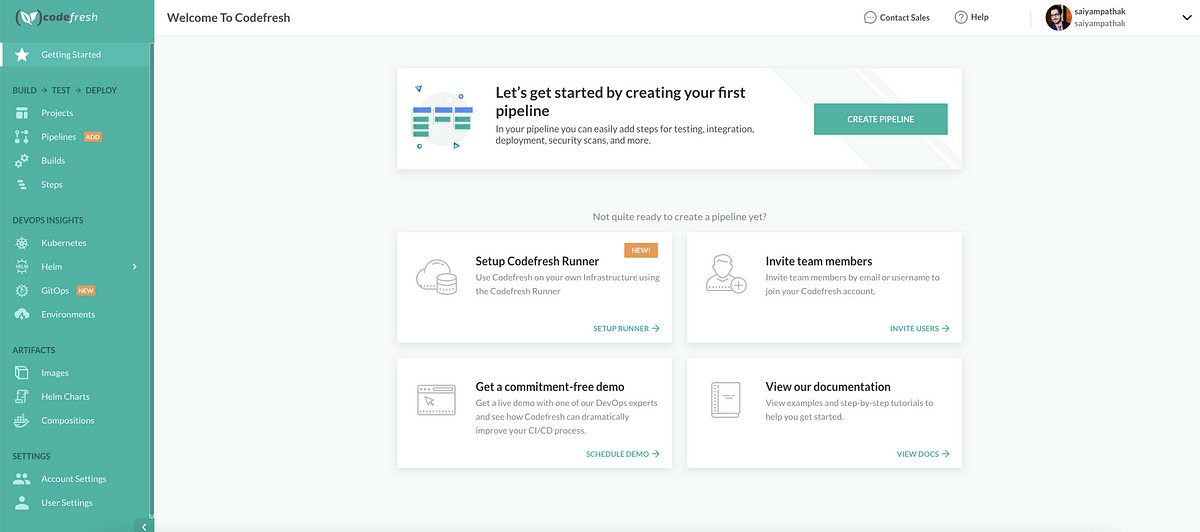
Getting Started
Codefresh is a DevOps automation platform with Kubernetes and Docker native tools and features. You can create powerful pipelines and utilize the provided dashboards by connecting different Kubernetes clusters and registries to receive further insights into your deployments. Additionally, by enabling GitOps for your repositories you can reach the highest level of confidence in your Kubernetes deployments.
To access Codefresh’s Kubernetes features, we have to connect a Kubernetes cluster to Codefresh. This tutorial will show you how to set up Civo Kubernetes.
We will show you how to:
- Create a Civo Kubernetes cluster;
- Set up a Codefresh account;
- Connect your Civo Kubernetes cluster to Codefresh;
- Create a service for Kubernetes;
- Create a pipeline and connect with your Git repository to auto-deploy on any commit.
Step1 Create Civo Kubernetes Cluster
In this tutorial, we’ll take advantage of Civo Kubernetes which is based on K3s. Civo makes it extremely easy to spin up a new cluster that allows you to experiment with new tools quickly. If you don’t yet have an account, sign up for early access.
Create a new cluster from the UI (you can also use Civo cli)
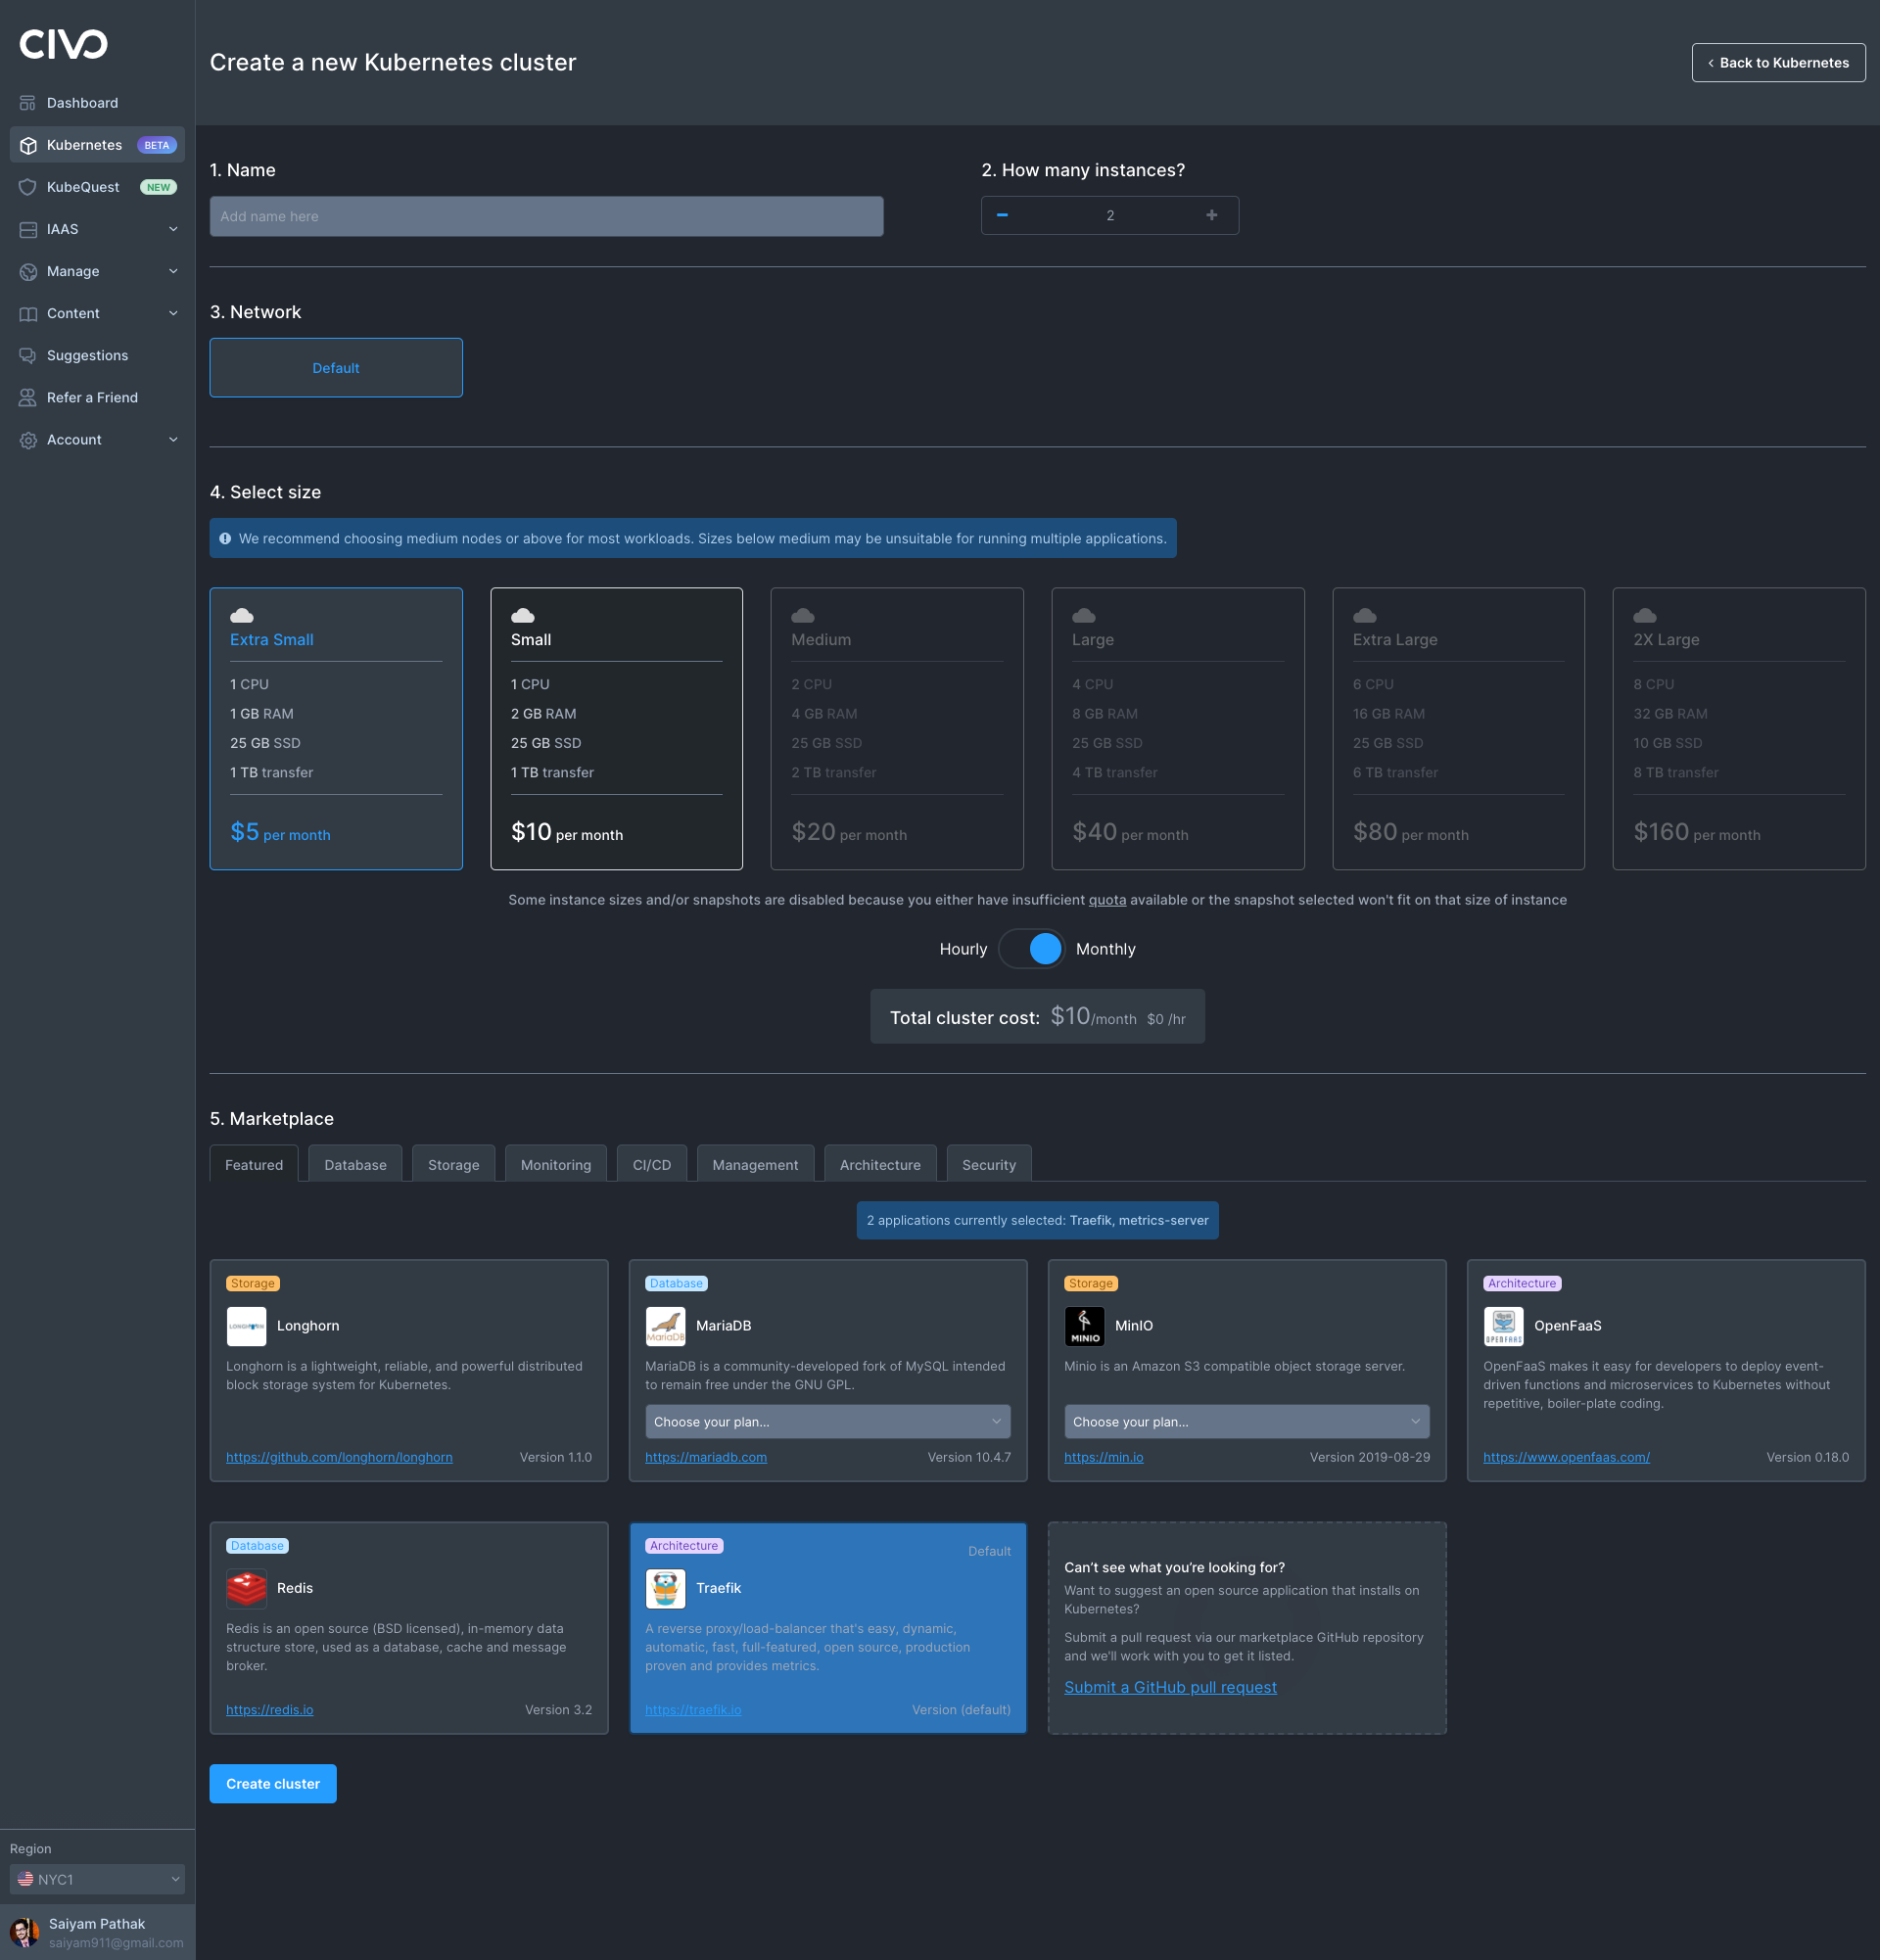
After that, you should see the cluster that has been created

Make sure you have kubectl installed, and the kubeconfig file for your cluster downloaded. You can merge the kubeconfig with the following command using the Civo cli:
$civo kubernetes config <civo-cluster-name> --save --merge --region NYC1
This will allow you to connect to your Kubernetes cluster. You can verify your set-up by running:
$ kubectl get nodes
NAME                        STATUS   ROLES                AGE      VERSION
k3s-chaos-9c5bf79e-master-31af Ready control-plane,master 3d20h v1.20.2+k3s1
k3s-chaos-9c5bf79e-node-0b5e Ready    none                3d20h v1.20.2+k3s1
k3s-chaos-9c5bf79e-node-d55e Ready    none                3d20h v1.20.2+k3s1
You should see the names of the nodes in your cluster displayed similar to the above.
Step2 Codefresh account creation
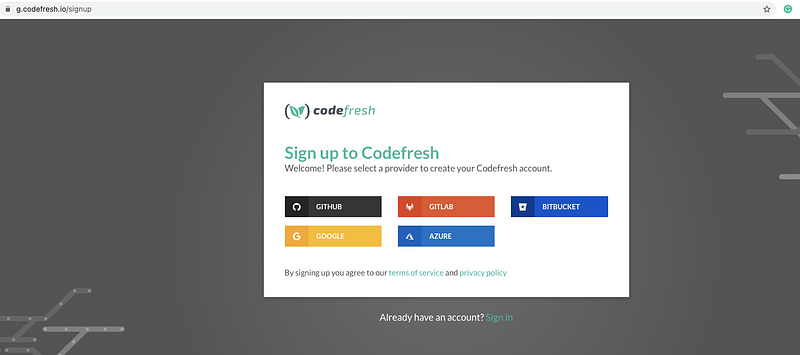
Go to the Codefresh signup page and sign up using GitHub, feel free to choose any other method.
Follow the steps:
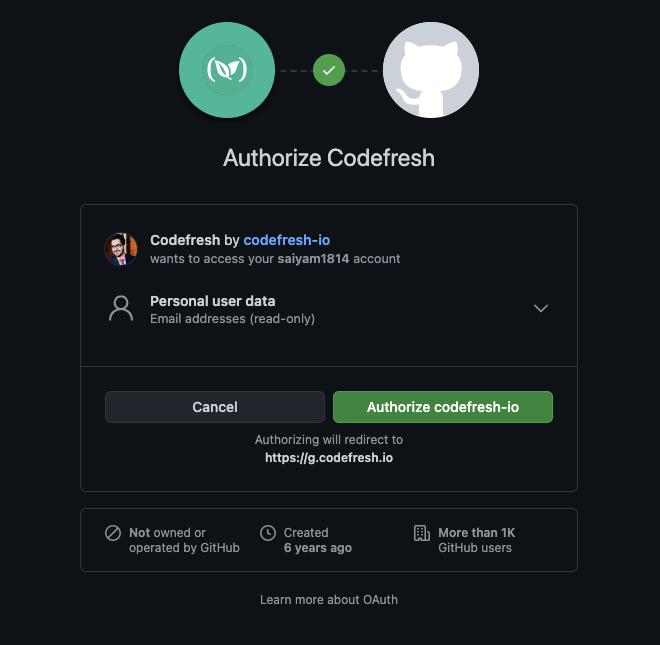
You will be logged in with your free two weeks trial activated!
Step3 Connect Civo Kubernetes to Codefresh
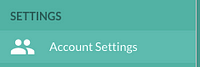
Go to your “Account Settings” in the bottom left of the menu bar. This will lead you to the integrations page, where you can connect to a new Kubernetes cluster under “Kubernetes”:

From Add provider select Custom Provider and click Add cluster
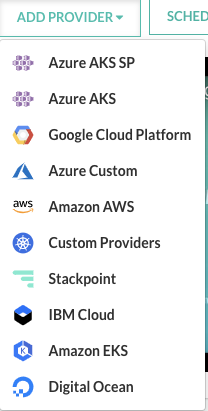
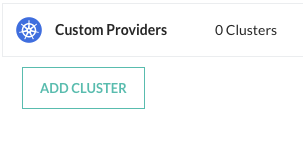
Once you add the cluster you need 3 things:
Host IP, certificate, and token which you can easily get via the following
commands:
- HostIp:
export CURRENT_CONTEXT=$(kubectl config current-context) && export CURRENT_CLUSTER=$(kubectl config view -o go-template="{{$curr_context := "$CURRENT_CONTEXT" }}{{range .contexts}}{{if eq .name $curr_context}}{{.context.cluster}}{{end}}{{end}}") && echo $(kubectl config view -o go-template="{{$cluster_context := "$CURRENT_CLUSTER"}}{{range .clusters}}{{if eq .name $cluster_context}}{{.cluster.server}}{{end}}{{end}}") - Certificate
echo $(kubectl get secret -o go-template='{{index .data "ca.crt" }}' $(kubectl get sa default -o go-template="{{range .secrets}}{{.name}}{{end}}"))

LS0tLS1CRUdJTiBDRVJUSUZJQ0FURS0tLS0tCk1JSUJkekNDQVIyZ0F3SUJBZ0lCQURBS0JnZ3Foa2pPUFFRREFqQWpNU0V3SHdZRFZRUUREQmhyTTNNdGMyVnkKZG1WeUxXTmhRREUyTVRZNE5ETXdOVFl3SGhjTk1qRXdNekkzTVRFd05ERTJXaGNOTXpFd016STFNVEV3TkRFMgpXakFqTVNFd0h3WURWUVFEREJock0zTXRjMlZ5ZG1WeUxXTmhRREUyTVRZNE5ETXdOVFl3V1RBVEJnY3Foa2pPClBRSUJCZ2dxaGtqT1BRTUJCd05DQUFRNGtrbFZrTWorZ0RLdG9IQnVDa3dzbi9ZWUZ4d2J5ZXE5eVdIck9BUXEKclBnQUxoVEhkTld4YTJld29rL09rTnZTcTQwUytqZFJNbU9UZEJkRGxjUjVvMEl3UURBT0JnTlZIUThCQWY4RQpCQU1DQXFRd0R3WURWUjBUQVFIL0JBVXdBd0VCL3pBZEJnTlZIUTRFRmdRVUlWbWZFMTlKTSt5MVByNVh0bEc3Ci9BVlR4NDR3Q2dZSUtvWkl6ajBFQXdJRFNBQXdSUUloQU1BV3NMbHBsQUhGWG01TkdkQWZDUmZLM3lrelRhT0sKTDlId3JDS1pYZzcxQWlCWjJVL1lObGdVMGVtZjJ1R1cyZzE5aW5NMkZlenF6NjN3MGxNWE5BM21TZz09Ci0tLS0tRU5EIENFUlRJRklDQVRFLS0tLS0K
- Token
echo $(kubectl get secret -o go-template='{{index .data "token" }}' $(kubectl get sa default -o go-template="{{range .secrets}}{{.name}}{{end}}"))

ZXlKaGJHY2lPaUpTVXpJMU5pSXNJbXRwWkNJNklsZFhTbUZVWnpCRWFqSkdRbEpRWjNjd1NFTlhSWEkxWlhkZldqQTRObGh5UW1sV01UWnhhSFI2ZDI4aWZRLmV5SnBjM01pT2lKcmRXSmxjbTVsZEdWekwzTmxjblpwWTJWaFkyTnZkVzUwSWl3aWEzVmlaWEp1WlhSbGN5NXBieTl6WlhKMmFXTmxZV05qYjNWdWRDOXVZVzFsYzNCaFkyVWlPaUprWldaaGRXeDBJaXdpYTNWaVpYSnVaWFJsY3k1cGJ5OXpaWEoyYVdObFlXTmpiM1Z1ZEM5elpXTnlaWFF1Ym1GdFpTSTZJbVJsWm1GMWJIUXRkRzlyWlc0dGN6aGtOR2NpTENKcmRXSmxjbTVsZEdWekxtbHZMM05sY25acFkyVmhZMk52ZFc1MEwzTmxjblpwWTJVdFlXTmpiM1Z1ZEM1dVlXMWxJam9pWkdWbVlYVnNkQ0lzSW10MVltVnlibVYwWlhNdWFXOHZjMlZ5ZG1salpXRmpZMjkxYm5RdmMyVnlkbWxqWlMxaFkyTnZkVzUwTG5WcFpDSTZJbUpoTmpBd1pUQTFMV0V4TjJFdE5HSXhNUzFpTXpJMUxXSmhZV1JoTWpBNVl6WmlPQ0lzSW5OMVlpSTZJbk41YzNSbGJUcHpaWEoyYVdObFlXTmpiM1Z1ZERwa1pXWmhkV3gwT21SbFptRjFiSFFpZlEudVpmRmZhVVdTbXZYZVNTZlNFZVYzVl9qbXNfTTBBd1pkQUxFaTE5M1N4bGFua0ZYYTE1UG1UWWpfdVJUMlpMVE1hQVM4TkxPbGVJMGVQUkZQTHF3TE9pU19GeTBmNGJKdFh0dUFqcHRETUxpV1ZSb0dFMFowVVRIMnlCV2VzQWVkd3ZWMXl3ZFE4cDg0N2Y3d0hxWTRzX2YzUFlzU3I5YVBneXRRbmgyYVMtd3ZTSklIc1VBd2FMaGtpdTU3ZUR0aWstTDNlbFAybGpWZzZQYm9wZjlzd2VUVkoydDl1YTY3OVgzWi1DMkRNbTA4ak5TX2ZkRU9CYlU3NlV6SnhKUDdCSEEtN1JTejVlZjY3VHh6VUZPRG1pMWpoNk1oamRFTHpuUkFoWXR6MmtnREJlLWNuMFNEMjBROHlHX1lYMDh6NzVQUEdTQXVQYUZ6dmZkTTdqYkVn
Additionally, make the default account the administrator (for this tutorial I am not creating a specific cluster role for Codefresh)
kubectl create clusterrolebinding default-admin --clusterrole cluster-admin --serviceaccount=default:default -n default

clusterrolebinding.rbac.authorization.k8s.io/default-admin created
Separately, you can choose to select a namespace to restrict Codefresh access to a specific namespace.
Above is the simplest way to connect an existing Civo Kubernetes cluster.
After entering all the information, click test connection and you should see a success message!

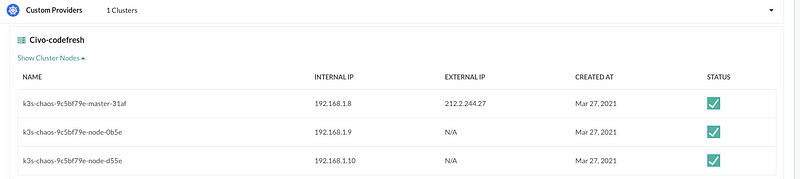
You can see that the cluster has been successfully added to Codefresh:
Step4 Add DockerHub registry and deploy Service to Kubernetes
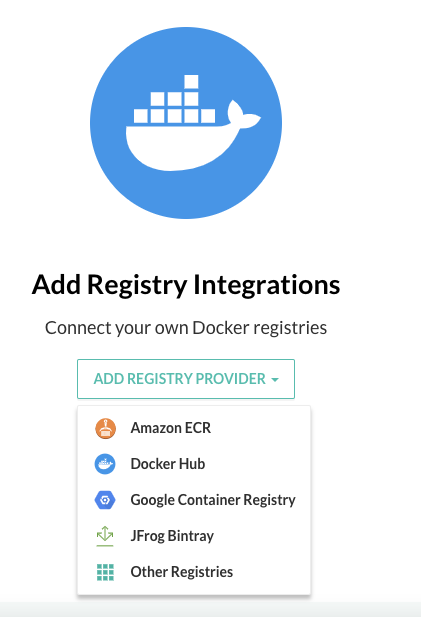
Next, we have to add a container registry to our Integrations under “Account Settings”:

Start configuring:
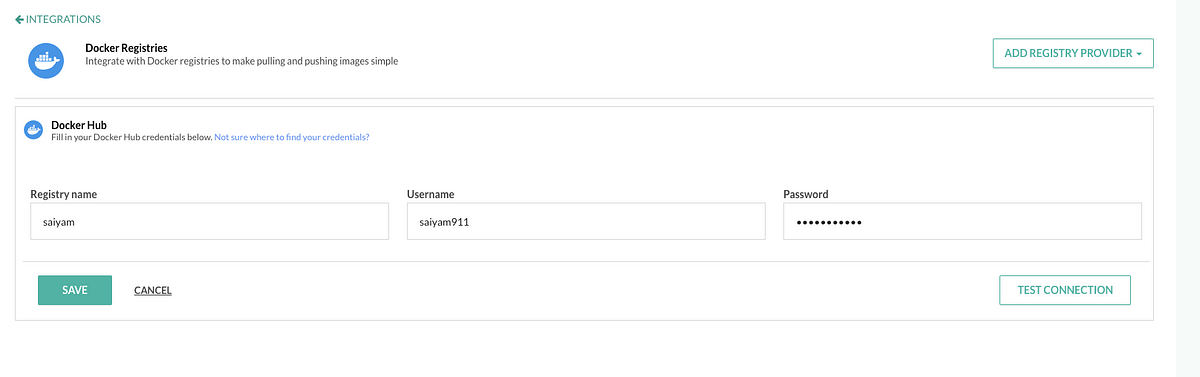
Provide valid credentials:

Once you have added the registry, you can create a service and deploy it to the cluster.
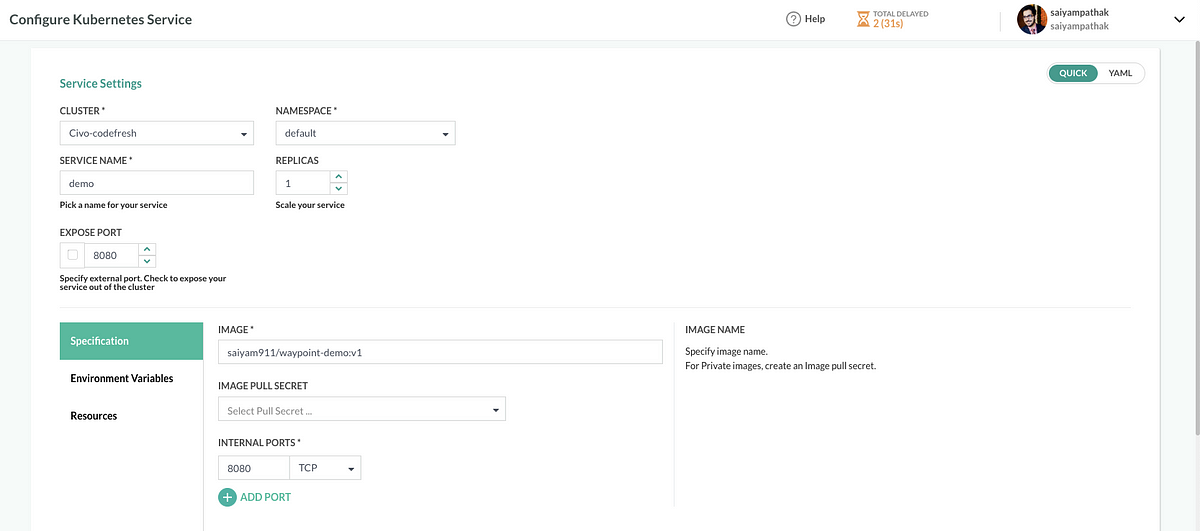
Go to the “Kubernetes” section from the “DevOps Insight” menu and add a service as shown below:
A few seconds later, you will see that the application is deployed to the cluster. You can check the current deployment through the Codefresh UI or using the following kubectl commands:
kubectl get pods
NAME                    READY   STATUS    RESTARTS   AGE
demo-6dfdd99cdb-vh74t   1/1     Running   0          108s
kubectl get deploy
NAME   READY   UP-TO-DATE   AVAILABLE   AGE
demo   1/1     1            1           114s
kubectl get svc
NAME         TYPE        CLUSTER-IP      EXTERNAL-IP   PORT(S)    AGE
demo         ClusterIP   10.43.191.224   none        8080/TCP   2m
Step5 Codefresh Pipeline Creation
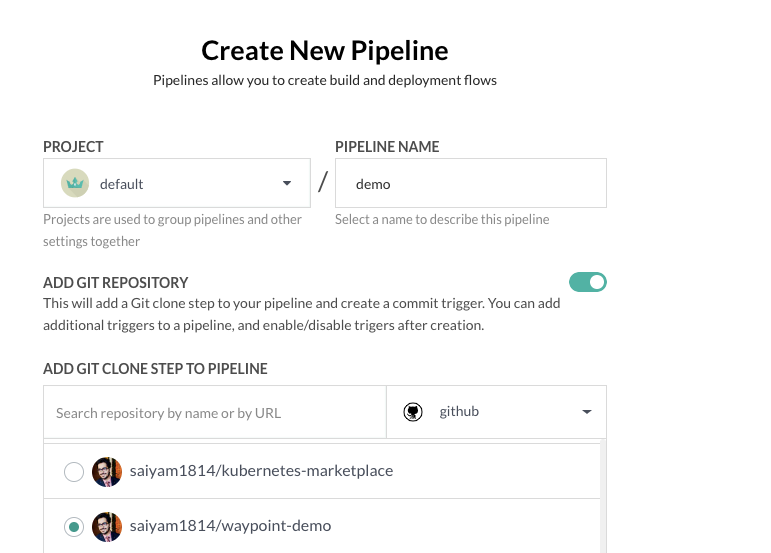
Once you have deployed the service onto the cluster you can now navigate to the “pipeline” section in your Codefresh account. This section will show you how to build and deploy to Kubernetes with every push to your Git branch.
Create a pipeline and select the Git repository that you want to use to deploy your application. Configure the pipeline like shown below:
Replace the existing YAML file with the YAML provided below:
version: "1.0"
# Stages can help you organize your steps in stages
stages:
  - "clone"
  - "build"
  - "deploy"

steps:
  clone:
    title: "Cloning repository"
    type: "git-clone"
    arguments:
      repo: 'saiyam1814/waypoint-demo'
      git: github
      revision: main
    stage: "clone"

  build:
    title: Building docker image
    type: build
    working_directory: "${{clone}}"
    arguments:
      image_name: 'saiyam911/waypoint-demo'
      tag: cf
    stage: build

  deploy:
    title: deploying to cluster
    type: deploy
    arguments:
      kind: kubernetes
      cluster: Civo-codefresh
      namespace: demo
      service: 'demo'
      candidate:
        image: ${{build}}
        registry: dockerhub
    stage: "deploy"
Save and run your pipeline with the default settings:
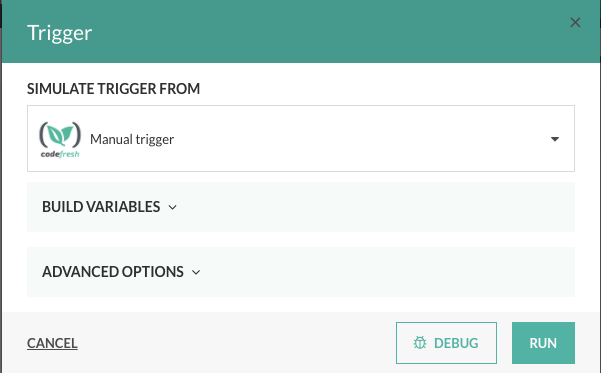
Once you hit RUN, the pipeline starts executing. After successful completion, you will be able to see the application deployed onto the Kubernetes cluster.
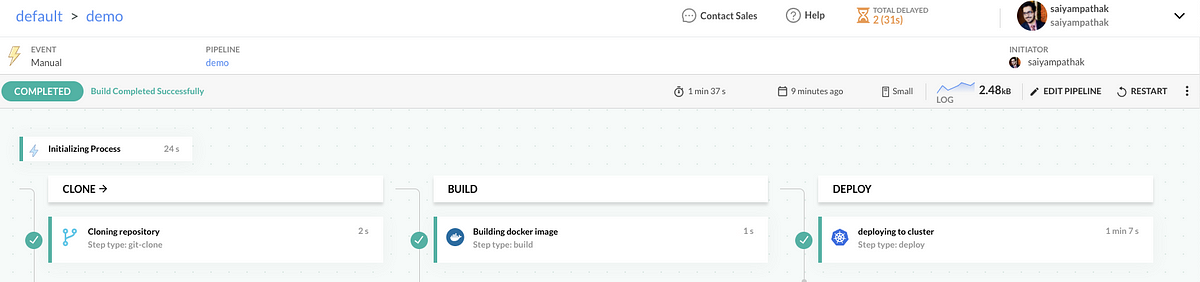
The final output of the pipeline will look similar to the output provided below:
Submitting a deployment to Kubernetes by
   kubectl --context Civo-codefresh --namespace default apply
Warning: kubectl apply should be used on resource created by either kubectl create --save-config or kubectl apply
deployment.apps/demo configured
Waiting for a successful deployment/demo status to namespace default ...
Waiting for deployment "demo" rollout to finish: 1 old replicas are pending termination...
Successfully ran freestyle step: deploying to cluster
Reading environment variable exporting file contents.
Waiting for deployment "demo" rollout to finish: 1 old replicas are pending termination...
deployment "demo" successfully rolled out
Separately, you can double-check on the Kubernetes Dashboard in Codefresh that the application has been deployed.

Lastly, visit the provided URL to view your application!!
Conclusion
With Codefresh you can easily connect Civo Kubernetes, deploy applications, and set up a GitOps pipeline to automate your Kubernetes deployment process!
About the author
This article has been a guest blog by Saiyam Pathak as part of the Codefresh Blog for Good series. More about Saiyam:
CNCF Ambassador
Youtube:
https://youtube.com/c/saiyam911
Twitter:
https://twitter.com/saiyampathak
Twitch:
https://twitch.tv.saiyampathak
Kubernetes
CKS book: https://gumroad.com/l/cksbook