In this guide we’ll learn about the Dockerfile. What it is, how to create one, and how to configure the basics to bring up your own Dockerized app.
What is a Dockerfile?
- A Dockerfile is a text configuration file written using a special syntax
- It describes step-by-step instructions of all the commands you need to run to assemble a Docker Image.
- The
docker buildcommand processes this file generating a Docker Image in your Local Image Cache, which you can then start-up using thedocker runcommand, or push to a permanent Image Repository.
Create a Dockerfile
Creating a Dockerfile is as easy as creating a new file named “Dockerfile” with your text editor of choice and defining some instructions. The name of the file
does not really matter. Dockerfile is the default name but you can use any filename that you want (and even have multiple dockerfiles in the same folder)
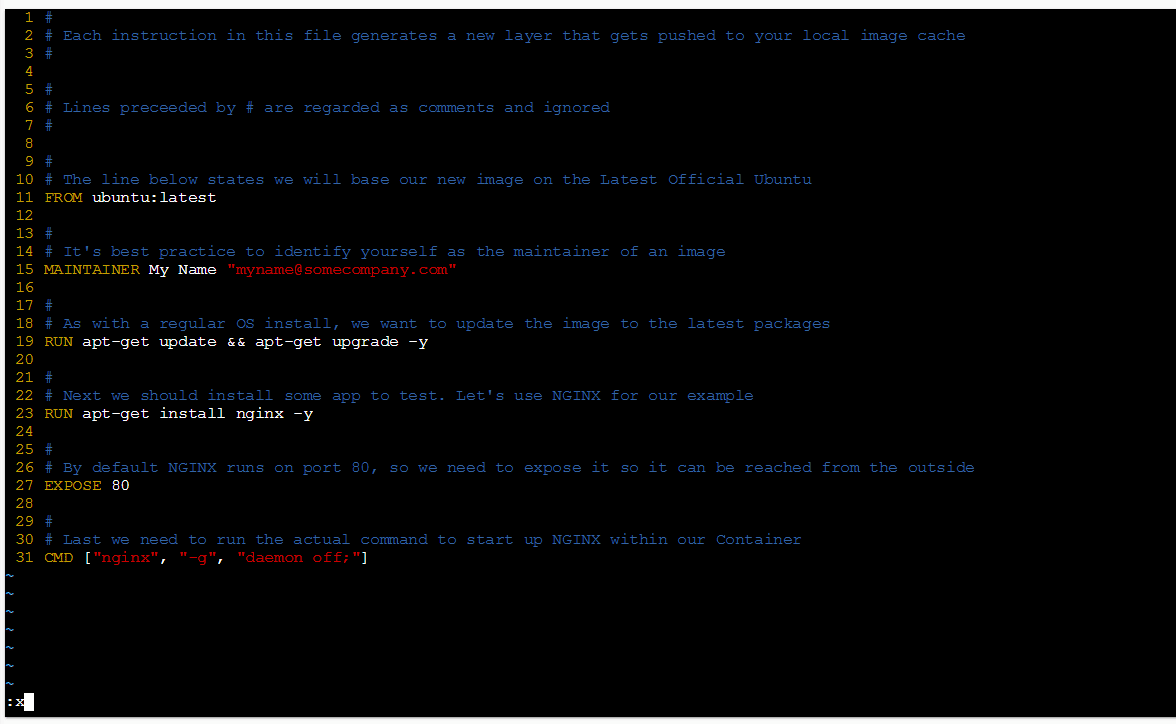
Simple Dockerfile for NGINX
#
# Each instruction in this file generates a new layer that gets pushed to your local image cache
#

#
# Lines preceeded by # are regarded as comments and ignored
#

#
# The line below states we will base our new image on the Latest Official Ubuntu
FROM ubuntu:latest

#
# Identify the maintainer of an image
LABEL maintainer="[email protected]"

#
# Update the image to the latest packages
RUN apt-get update && apt-get upgrade -y

#
# Install NGINX to test.
RUN apt-get install nginx -y

#
# Expose port 80
EXPOSE 80

#
# Last is the actual command to start up NGINX within our Container
CMD ["nginx", "-g", "daemon off;"]
Dockerfile Commands
- ADD – Defines files to copy from the Host file system onto the Container
- ADD ./local/config.file /etc/service/config.file
- CMD – This is the command that will run when the Container starts
- CMD [“nginx”, “-g”, “daemon off;”]
- ENTRYPOINT – Sets the default application used every time a Container is created from the Image. If used in conjunction with CMD, you can remove the application and just define the arguments there
- CMD Hello World!
- ENTRYPOINT echo
- ENV – Set/modify the environment variables within Containers created from the Image.
- ENV VERSION 1.0
- EXPOSE – Define which Container ports to expose
- EXPOSE 80
- FROM – Select the base image to build the new image on top of
- FROM ubuntu:latest
- LABEL maintainer – Optional field to let you identify yourself as the maintainer of this image. This is just a label (it used to be a dedicated Docker directive).
- LABEL [email protected]”
- RUN – Specify commands to make changes to your Image and subsequently the Containers started from this Image. This includes updating packages, installing software, adding users, creating an initial database, setting up certificates, etc. These are the commands you would run at the command line to install and configure your application. This is one of the most important dockerfile directives.
- RUN apt-get update && apt-get upgrade -y && apt-get install -y nginx && rm -rf /var/lib/apt/lists/*
- USER – Define the default User all commands will be run as within any Container created from your Image. It can be either a UID or username
- USER docker
- VOLUME – Creates a mount point within the Container linking it back to file systems accessible by the Docker Host. New Volumes get populated with the pre-existing contents of the specified location in the image. It is specially relevant to mention is that defining Volumes in a Dockerfile can lead to issues. Volumes should be managed with docker-compose or “docker run” commands. Volumes are optional. If your application does not have any state (and most web applications work like this) then you don’t need to use volumes.
- VOLUME /var/log
- WORKDIR – Define the default working directory for the command defined in the “ENTRYPOINT” or “CMD” instructions
- WORKDIR /home
Building and Testing Dockerfiles
There’s a free service that lets you quickly spin up Docker instances through a web interface called: “Play With Docker”
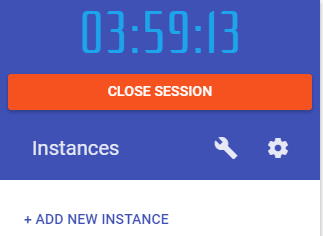
- First of all, head over to http://play-with-docker.com and start a new session. You need to create an account first.
- Once your session is active click on “Add New Instance”:
 3. A new instance will start with a Docker Engine ready to accept commands
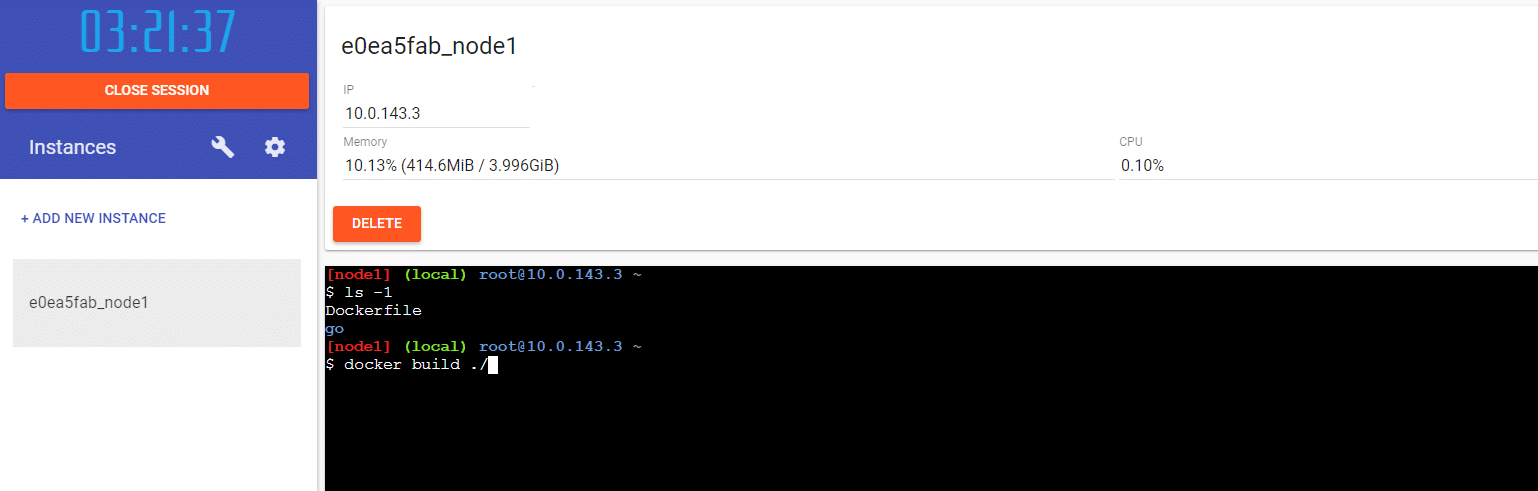
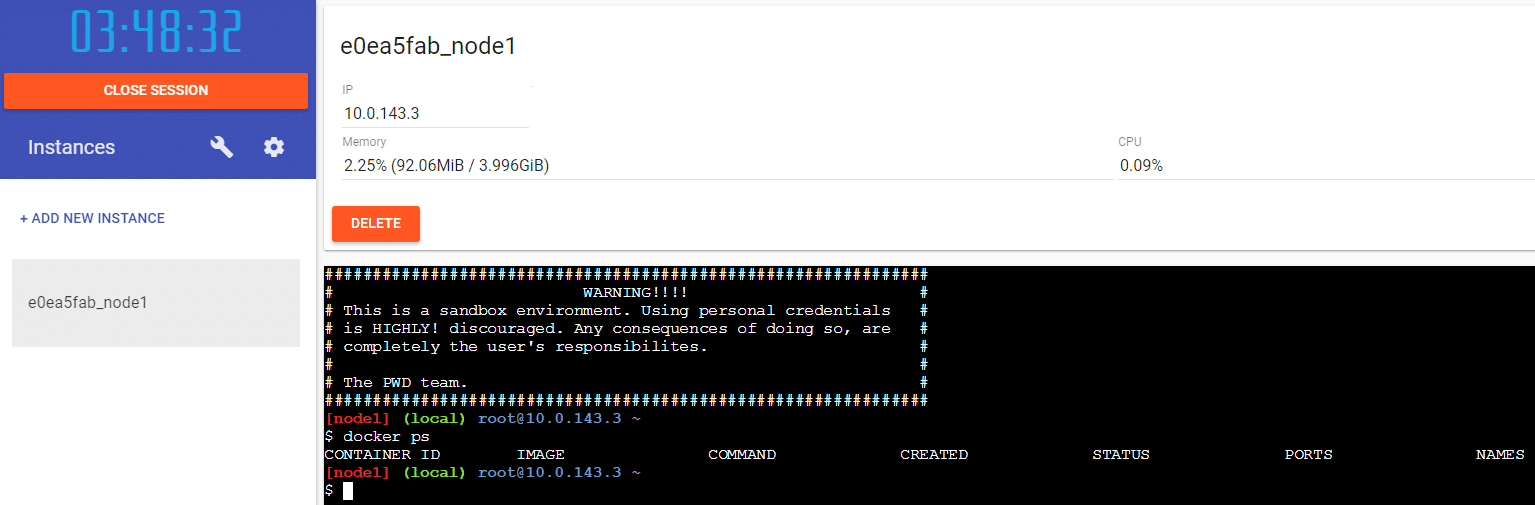 4. Next create/edit the Dockerfile. Run “vi Dockerfile”, press “i” to switch to “Insert Mode”, copy/paste the contents of our Dockerfile, press “Esc” to exit “Insert Mode”, and save+exit by typing “:x”
 5. Build the new image using the command
 docker build <path>. Path refers to the directory containing the Dockerfile.
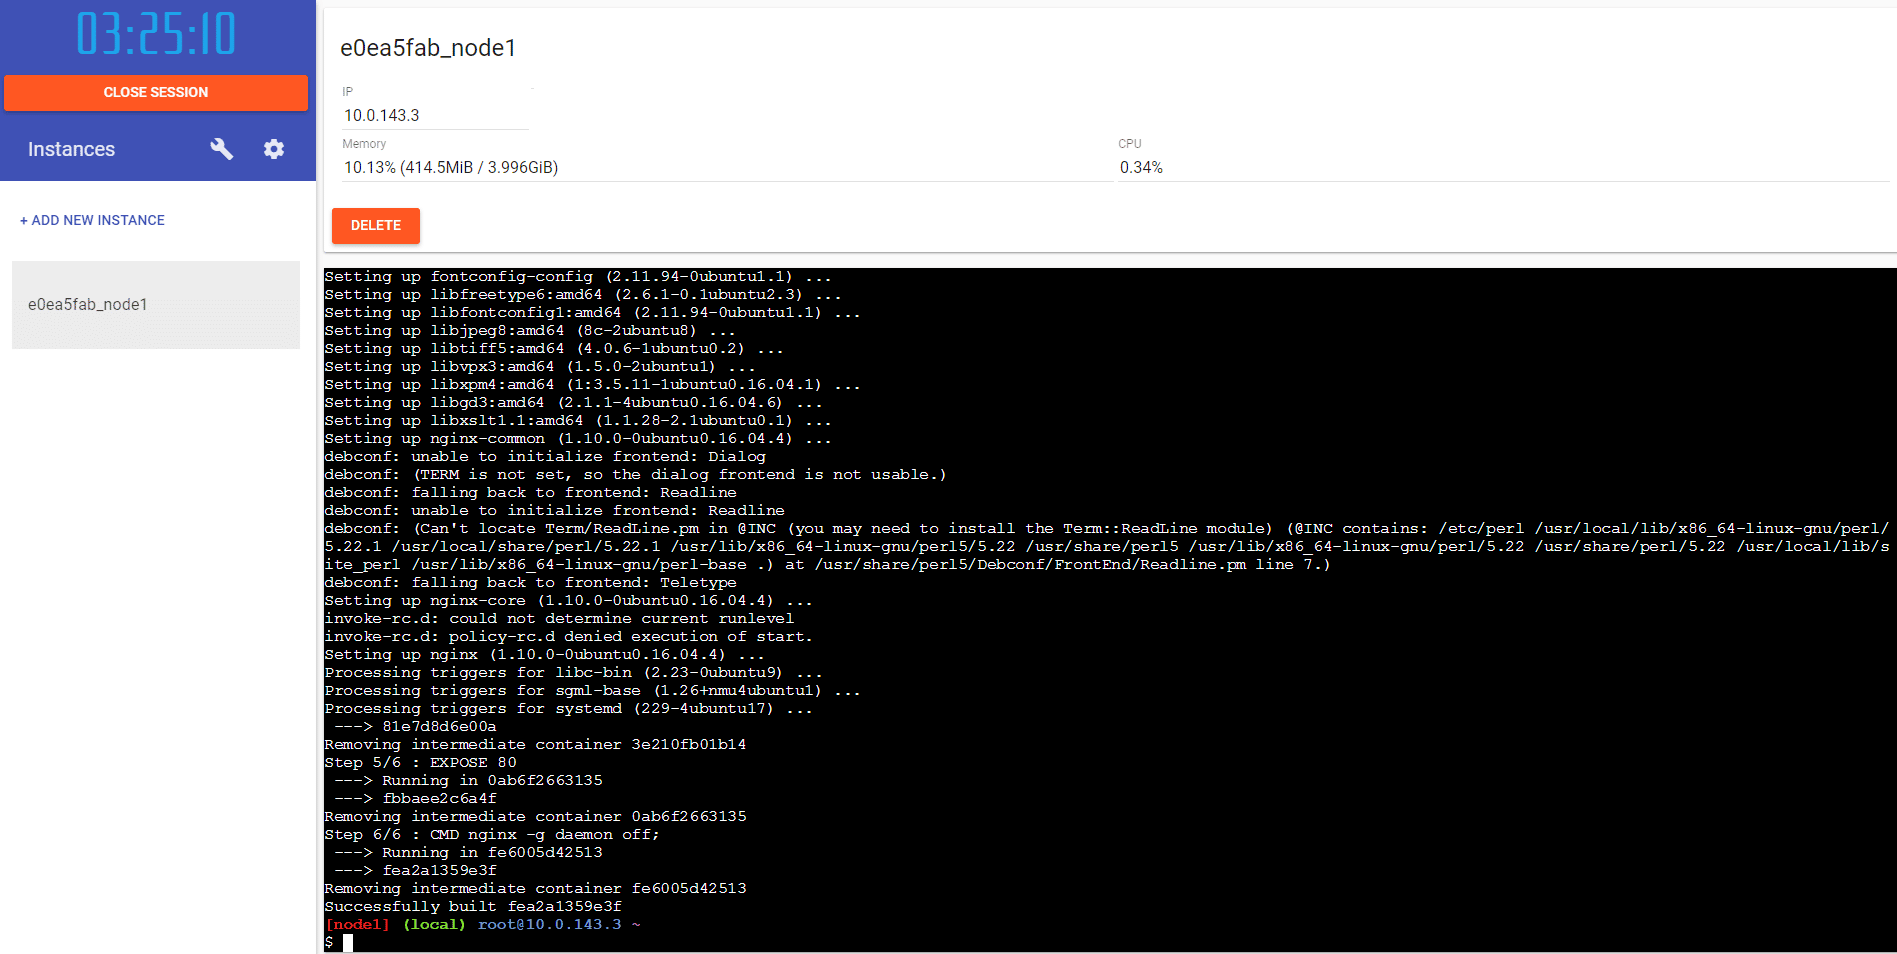
 6. At the end of the process you should see the message “Successfully built <image ID>”
 7. Start the new image and test connectivity to NGINX. Run the command
 docker run -p 80:80 <image ID>. The option -p 80:80 exposes the Container port 80 as the Host port 80 to the world
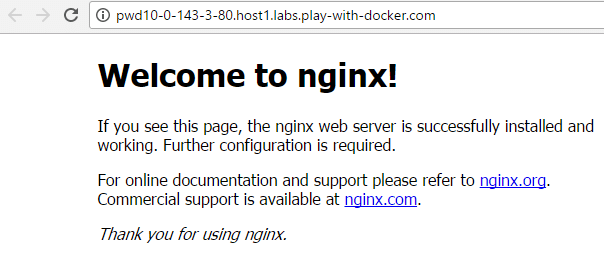
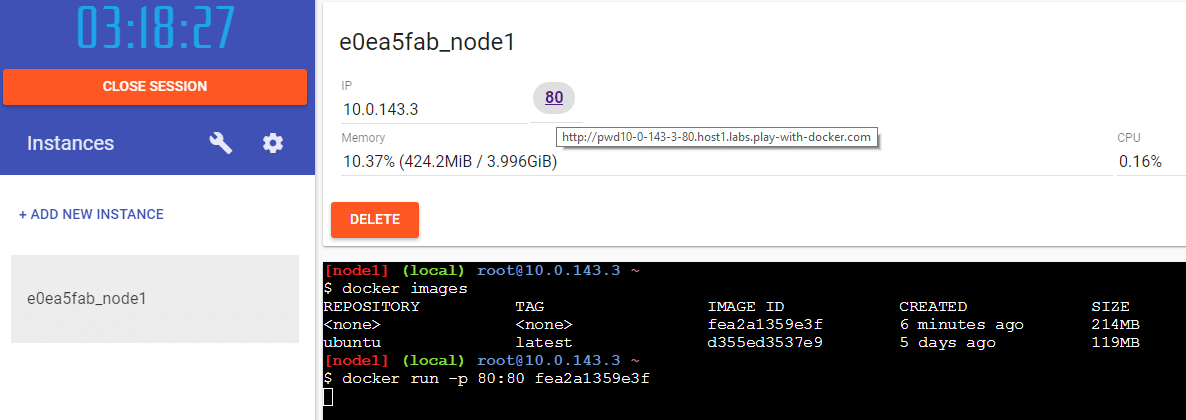 8. As a result a port 80 link should have become active next to the IP. Click on it to access your NGINX service
Building Docker images for your own applications
In the previous section we have seen an example Docker image for nginx. But what if you want to package your own application in a Docker image?
In this case you can create a Dockerfile in the same folder as your source code. Then put instructions in the dockerfile that mirror what you do locally on your workstation to compile/package the code.
The first step should be to find a public docker images that uses your programming language. Some examples are:
Once you find a proper base image you can use it to package your own application. Here is an example for Python
FROM python:3.6.4-alpine3.6
ENV FLASK_APP=minitwit

COPY . /app
WORKDIR /app

RUN pip install --editable .
RUN flask initdb

EXPOSE 5000

CMD [ "flask", "run", "--host=0.0.0.0" ]
Here is another example for Node.js
FROM node:10

WORKDIR /usr/src/app

# Install app dependencies
COPY package*.json ./

RUN npm install

# Bundle app source
COPY . .

EXPOSE 8080
CMD [ "node", "server.js" ]
How to create an optimized Docker image from your dockerfile
Once you become familiar with building docker images you also need to pay attention to two more topics
- Creating docker images with the smallest file size possible
- Using multi-stage builds in order to package only what is actually needed
For the first subject be sure to check out our Docker layer tutorial. For multi-stage builds see also our dedicated tutorial.
If you want to know all the best practices about creating and using dockerfiles in you team see our in-depth docker best practices guide.
Here is an example with a Node application that is using multi-stage builds:
FROM node:8.16 as build-deps
WORKDIR /usr/src/app
COPY package.json yarn.lock ./
RUN yarn
COPY . ./
RUN yarn build

FROM nginx:1.12-alpine
COPY --from=build-deps /usr/src/app/build /usr/share/nginx/html
EXPOSE 80
CMD ["nginx", "-g", "daemon off;"]
Go have fun building your own Images!
For more examples of Dockerfile templates, login to Codefresh (it’s free), click add Repository and checkout the many templates and examples.
Ready to try Codefresh, the CI/CD platform for Docker/Kubernetes/Helm? Create Your Free Account Today!