If you are trying to learn your way around CI/CD, you might notice that there are mostly two categories of resources:
- High-level overviews of what CI/CD is and why you need it. These are great for when you are getting started but do not cover anything about day two operations or how to optimize an existing process.
- Detailed tutorials that cover only a specific aspect of CI/CD (e.g., just unit testing or just deployment) using specific programming languages and tools.
We believe that there is a gap between those two extremes. We are missing a proper guide that sits between those two categories by talking about best practices, but not in an abstract way. If you always wanted to read a guide about CI/CD that explains not just the “why” but also the “how” to apply best practices, then this guide is for you.
We will describe all the basic foundations of effective CI/CD workflows, but instead of talking only in generic terms, we will explain all the technicalities behind each best practice and more importantly, how it can affect you if you don’t adopt it.
Setting Priorities
Several companies try to jump on the DevOps bandwagon without having mastered the basics first. You will soon realize that several problems which appear during the CI/CD process are usually pre-existing process problems that only became visible when that company tried to follow best practices in CI/CD pipelines.
The table below summarizes the requirements discussed in the rest of the guide. We also split the requirements according to priority:
Critical requirements are essential to have before adopting DevOps or picking a solution for CI/CD. You should address them first. If you don’t, then they will block the process later down the road.
Requirements with High priority are still important to address, but you can fix them while you are adopting a CI/CD platform
Requirements with Medium priority can be addressed in the long run. Even though they will improve your deployment process, you can work around them until you find a proper solution.
| Number | Best practice | Category | Importance |
|---|---|---|---|
| 1 | All project assets are in source control | Artifacts | Critical |
| 2 | A single artifact is produced for all environments | Artifacts | High |
| 3 | Artifacts move within pipelines (and not source revisions) | Artifacts | High |
| 4 | Development happens with short-lived branches (one per feature) | Build | High |
| 5 | Builds can be performed in a single step | Build | High |
| 6 | Builds are fast (less than 5 minutes) | Build | Medium |
| 7 | Store your dependencies | Build | High |
| 8 | Tests are automated | Testing | High |
| 9 | Tests are fast | Testing | High |
| 10 | Tests auto clean their side effects | Testing | High |
| 11 | Multiple test suites exist | Testing | Medium |
| 12 | Test environments on demand | Testing | Medium |
| 13 | Running test suites concurrently | Testing | Medium |
| 14 | Security scanning is part of the process | Quality and Audit | High |
| 15 | Quality scanning/Code reviews are part of the process | Quality and Audit | Medium |
| 16 | Database updates have their lifecycle | Databases | High |
| 17 | Database updates are automated | Databases | High |
| 18 | Database updates are forward and backward compatible | Databases | High |
| 19 | Deployments happen via a single path (CI/CD server) | Deployments | Critical |
| 20 | Deployments happen gradually in stages | Deployments | High |
| 21 | Metrics and logs can detect a bad deployment | Deployments | High |
| 22 | Automatic rollbacks are in place | Deployments | Medium |
| 23 | Staging matches production | Deployments | Medium |
Best Practice 1 – Place Everything Under Source Control
Artifact management is perhaps the most important characteristic of a pipeline. At its most basic level, a pipeline creates binary/package artifacts from source code and deploys them to the appropriate infrastructure that powers the application that is being deployed.
The single most important rule to follow regarding assets and source code is the following:
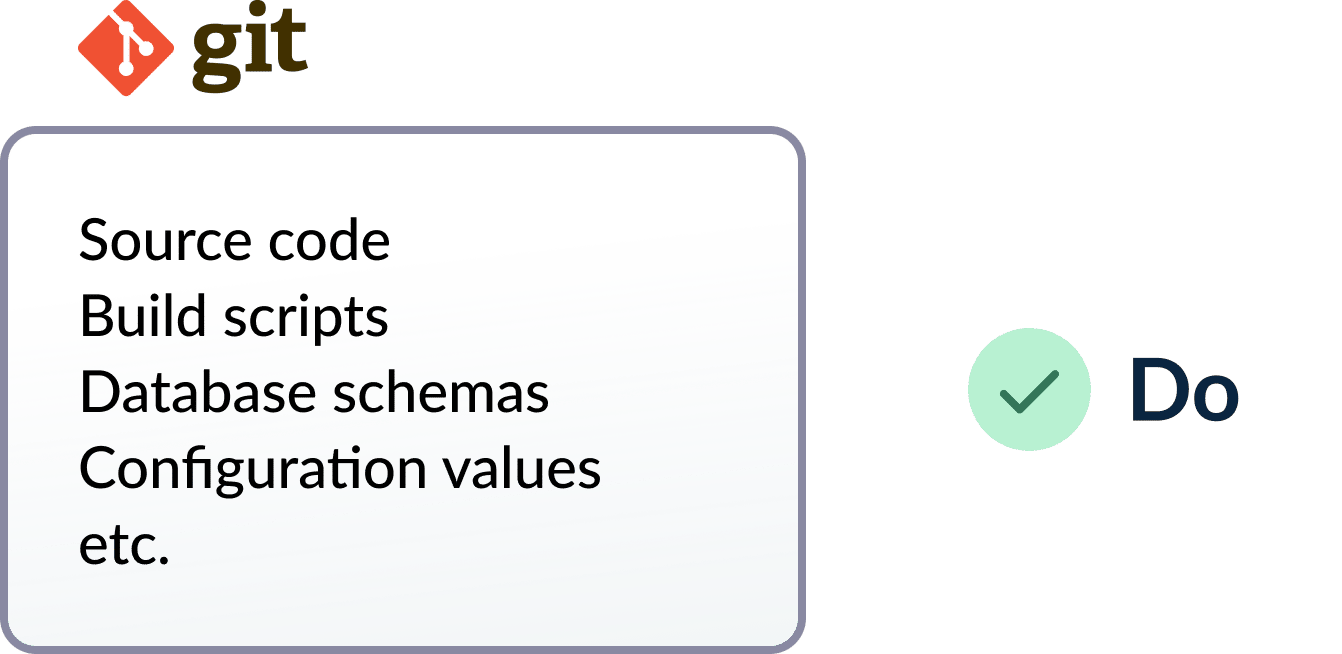
All files that constitute an application should be managed using source control.
Unfortunately, even though this rule seems pretty basic, there are a lot of organizations out there that fail to follow it. Traditionally, developers are using version control systems only for the source code of an application but leave out other supporting files such as installation scripts, configuration values, or test data.
Everything that takes part in the application lifecycle should be checked into source control. This includes but is not limited to:
- Source code
- Build scripts
- Pipeline definition
- Configuration values
- Tests and test data
- Database schemas
- Database update scripts
- Infrastructure definition scripts
- Cleanup/installation/purging scripts
- Associated documentation
The end goal is that anybody can check out everything that relates to an application and can recreate it locally or in any other alternative environment.
A common anti-pattern we see is deployments happening with a special script that is available only on a specific machine or on the workstation of a specific team member, or even an attachment in a wiki page, and so on.
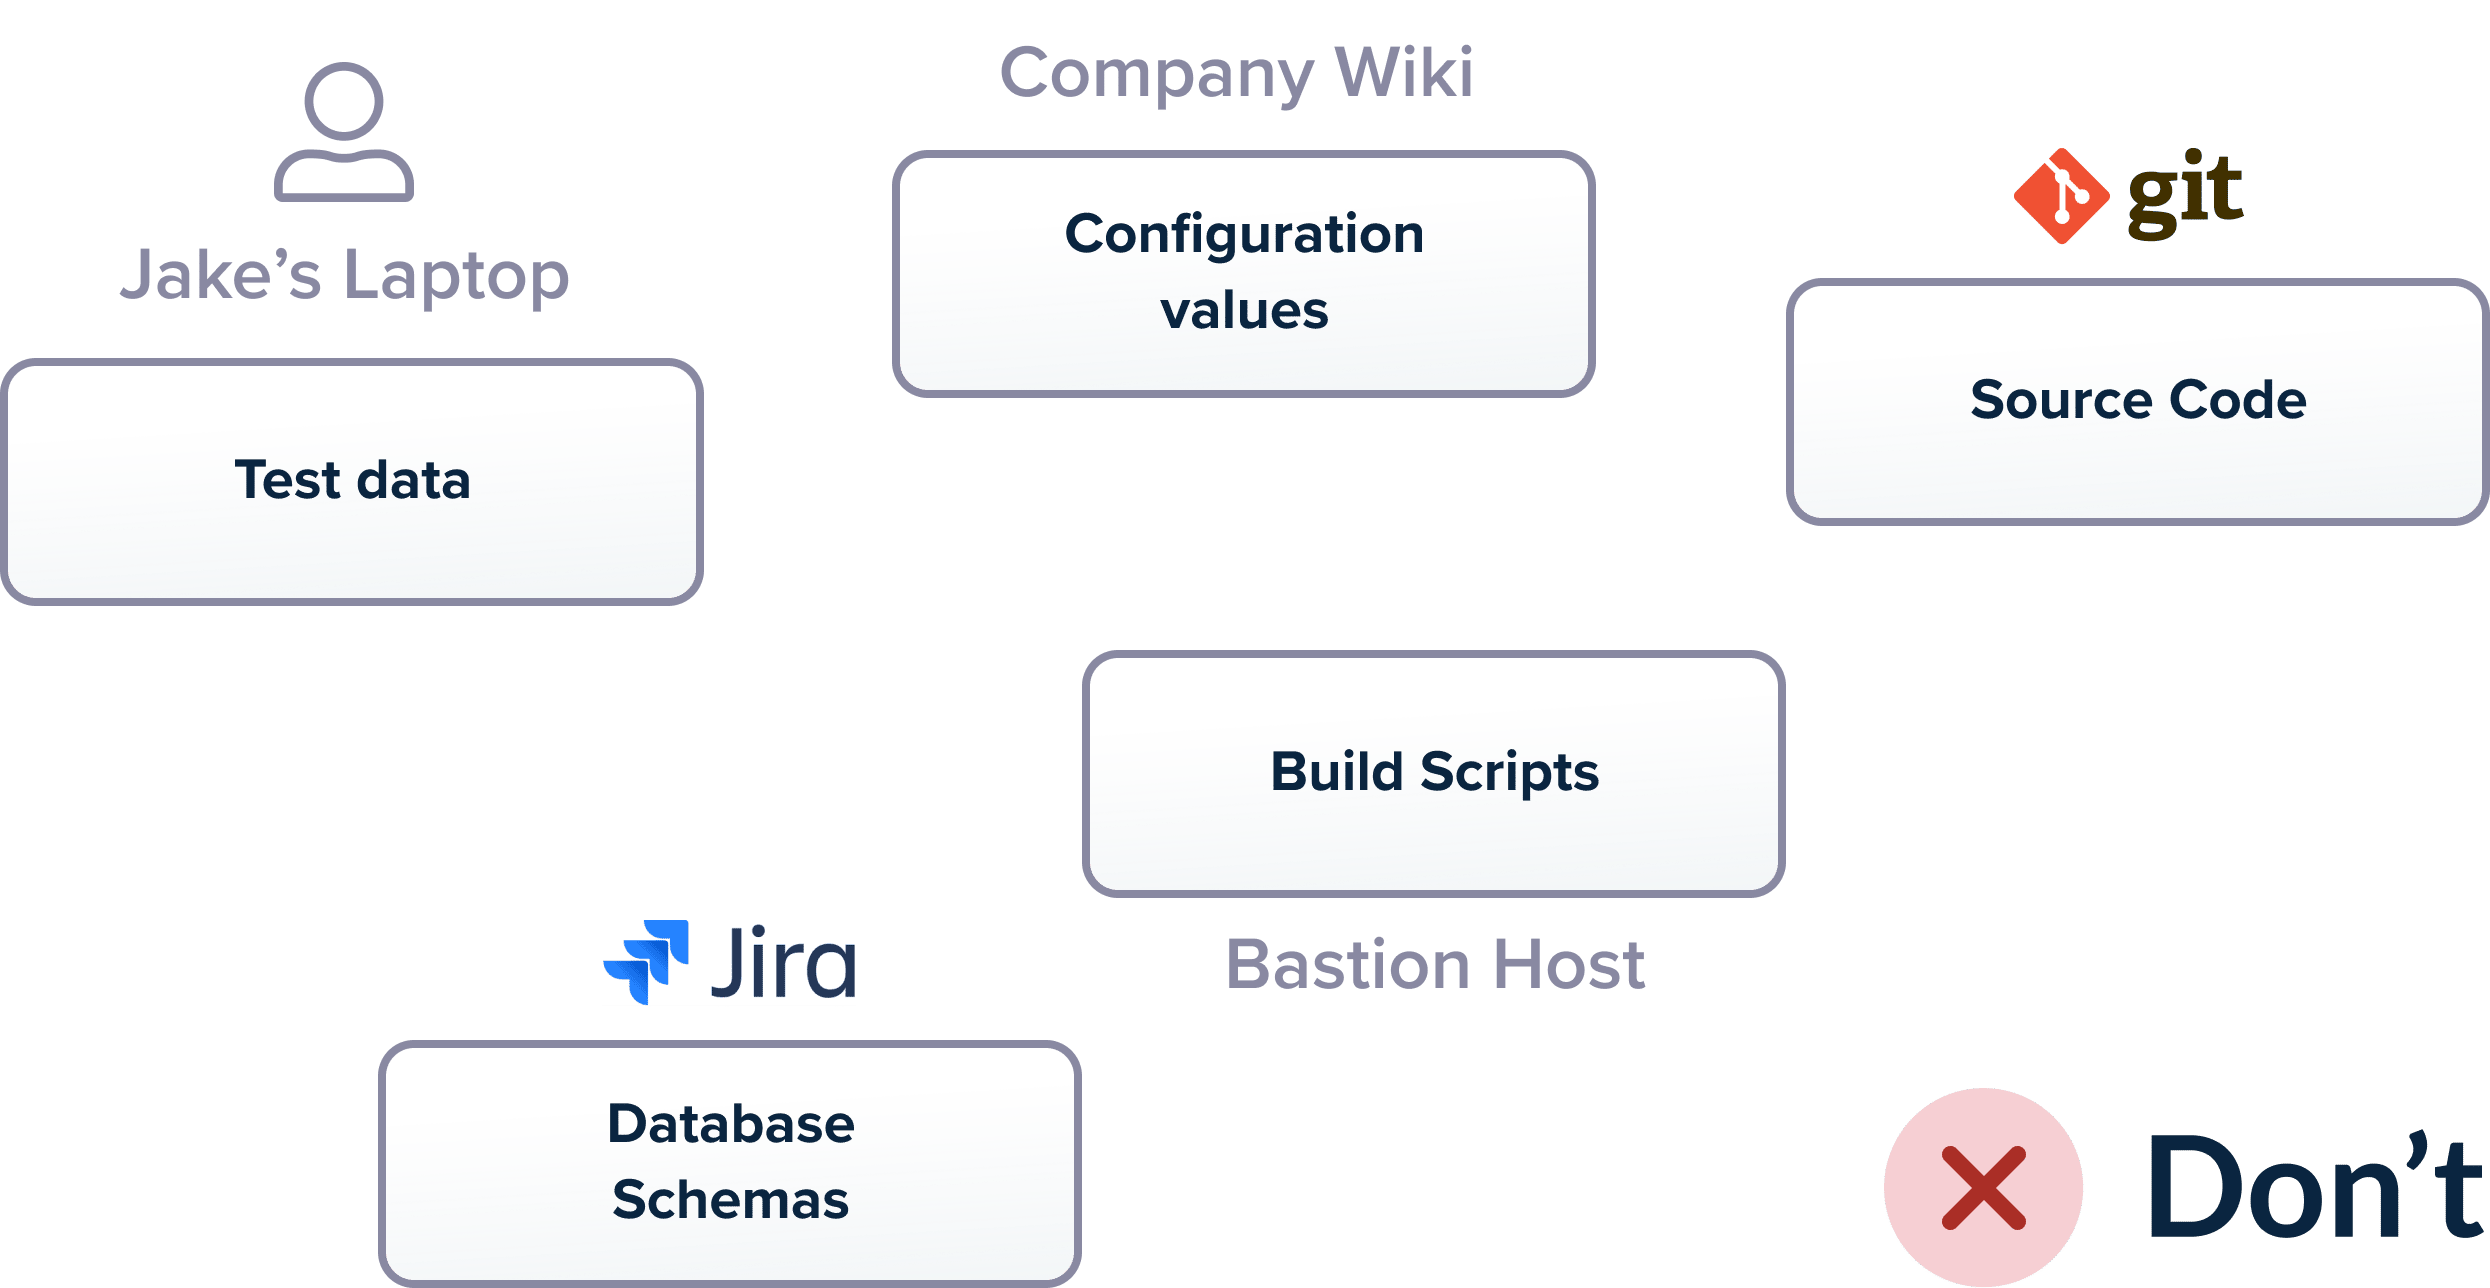
Version control also means that all these resources are audited and have a detailed history of all changes. If you want to see how the application looked 6 months ago, you can easily use the facilities of your version control system to obtain that information.
Note that even though all these resources should be versioned control, it doesn’t have to be in the same repository. Whether you use multiple repositories or a single one, is a decision that needs careful consideration and has not a definitive answer. The important part however is to make sure that everything is indeed version controlled.
Even though GitOps is the emerging practice of using Git operations for promotions and deployments, you don’t need to follow GitOps specifically to follow this best practice. Having historical and auditing information for your project assets is always a good thing, regardless of the actual software paradigm that you follow.
Best Practice 2 – Create a Single package/binary/container for All Environments
One of the main functionalities of a CI/CD pipeline is to verify that a new feature is fit for deployment to production. This happens gradually as every step in a pipeline is essentially performing additional checks for that feature.
For this paradigm to work, however, you need to make sure that what is being tested and prodded within a pipeline is also the same thing that gets deployed. In practice, this means that a feature/release should be packaged once and be deployed to all successive environments in the same manner.

Unfortunately, a lot of organizations fall into the common trap of creating different artifacts for dev/staging/prod environments because they haven’t mastered yet a common infrastructure for configuration. This implies that they deploy a slightly different version of what was tested during the pipeline. Configuration discrepancies and last-minute changes are some of the biggest culprits when it comes to failed deployments, and having a different package per environment exacerbates this problem.
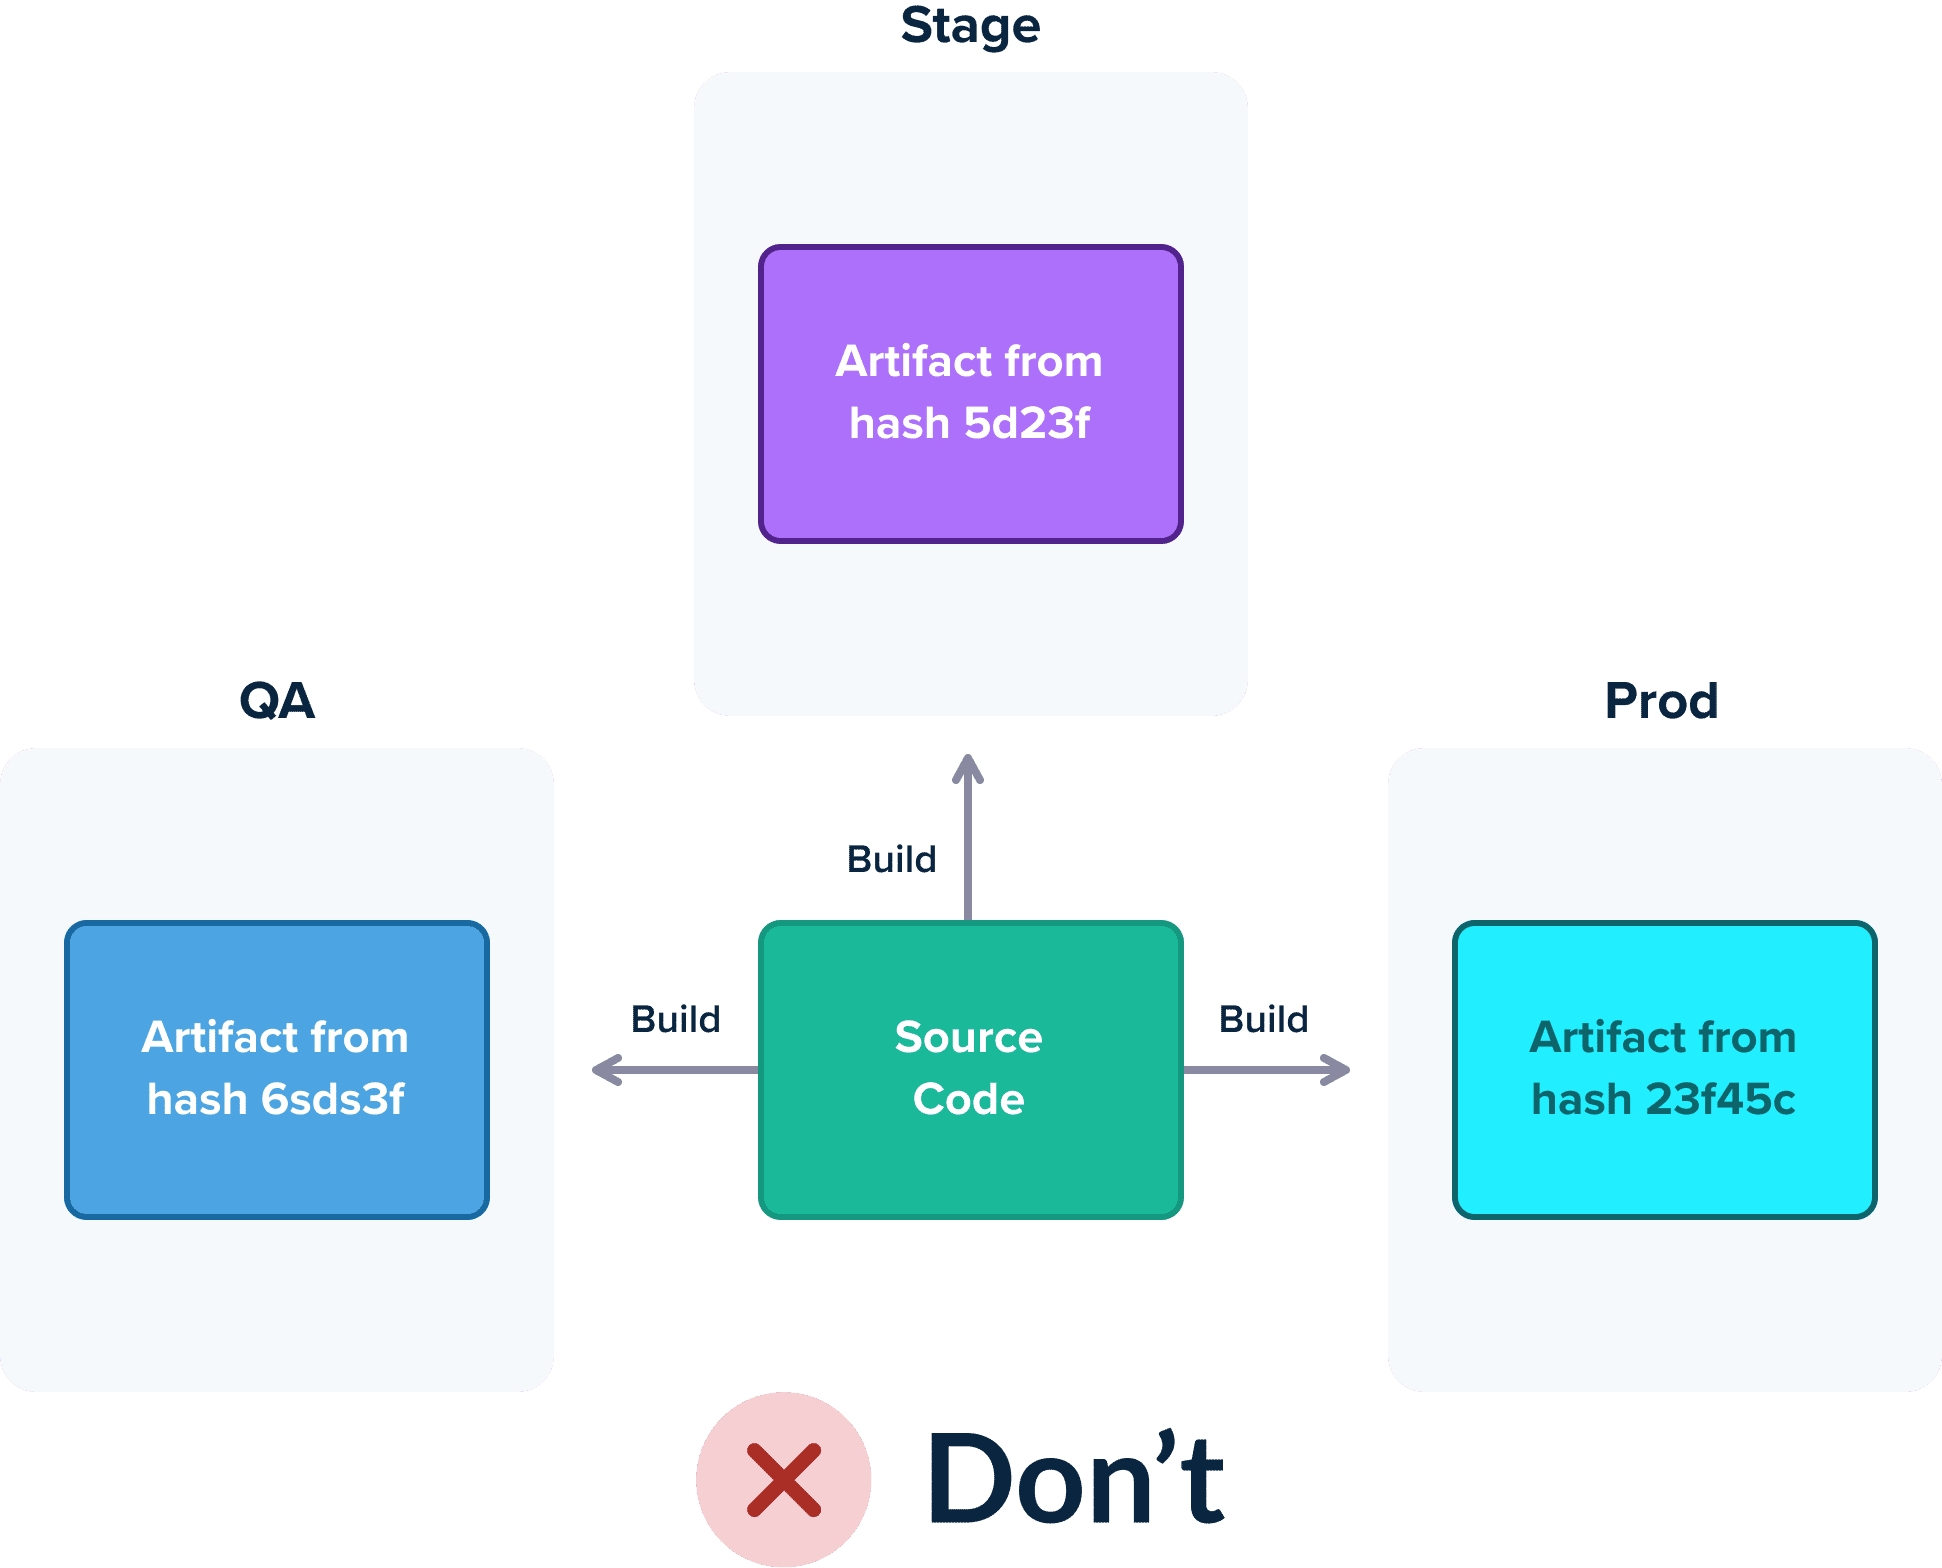
Instead of creating multiple versions per environment, the accepted practice is to have a single artifact that only changes configuration between different environments. With the appearance of containers and the ability to create a self-sufficient package of an application in the form of Docker images, there is no excuse for not following this practice.
Regarding configuration there are two approaches:
- The binary artifact/container has all configurations embedded inside it and changes the active one according to the running environment (easy to start, but not very flexible. We don’t recommend this approach)
- The container has no configuration at all. It fetches needed configuration during runtime on demand using a discovery mechanism such as a key/value database, a filesystem volume, a service discovery mechanism, etc. (the recommended approach)
The result is the guarantee where the exact binary/package that is deployed in production is also the one that was tested in the pipeline.
Best Practice 3 – Artifacts, not Git Commits, should travel within a Pipeline
A corollary to the previous point (the same artifact/package should be deployed in all environments) is the fact that a deployment artifact should be built only once.
The whole concept around containers (and VM images in the past) is to have immutable artifacts. An application is built only once with the latest feature or features that will soon be released.
Once that artifact is built, it should move from each pipeline step to the next as an unchanged entity. Containers are the perfect vehicle for this immutability as they allow you to create an image only once (at the beginning of the pipeline) and promote it towards production with each successive pipeline step.
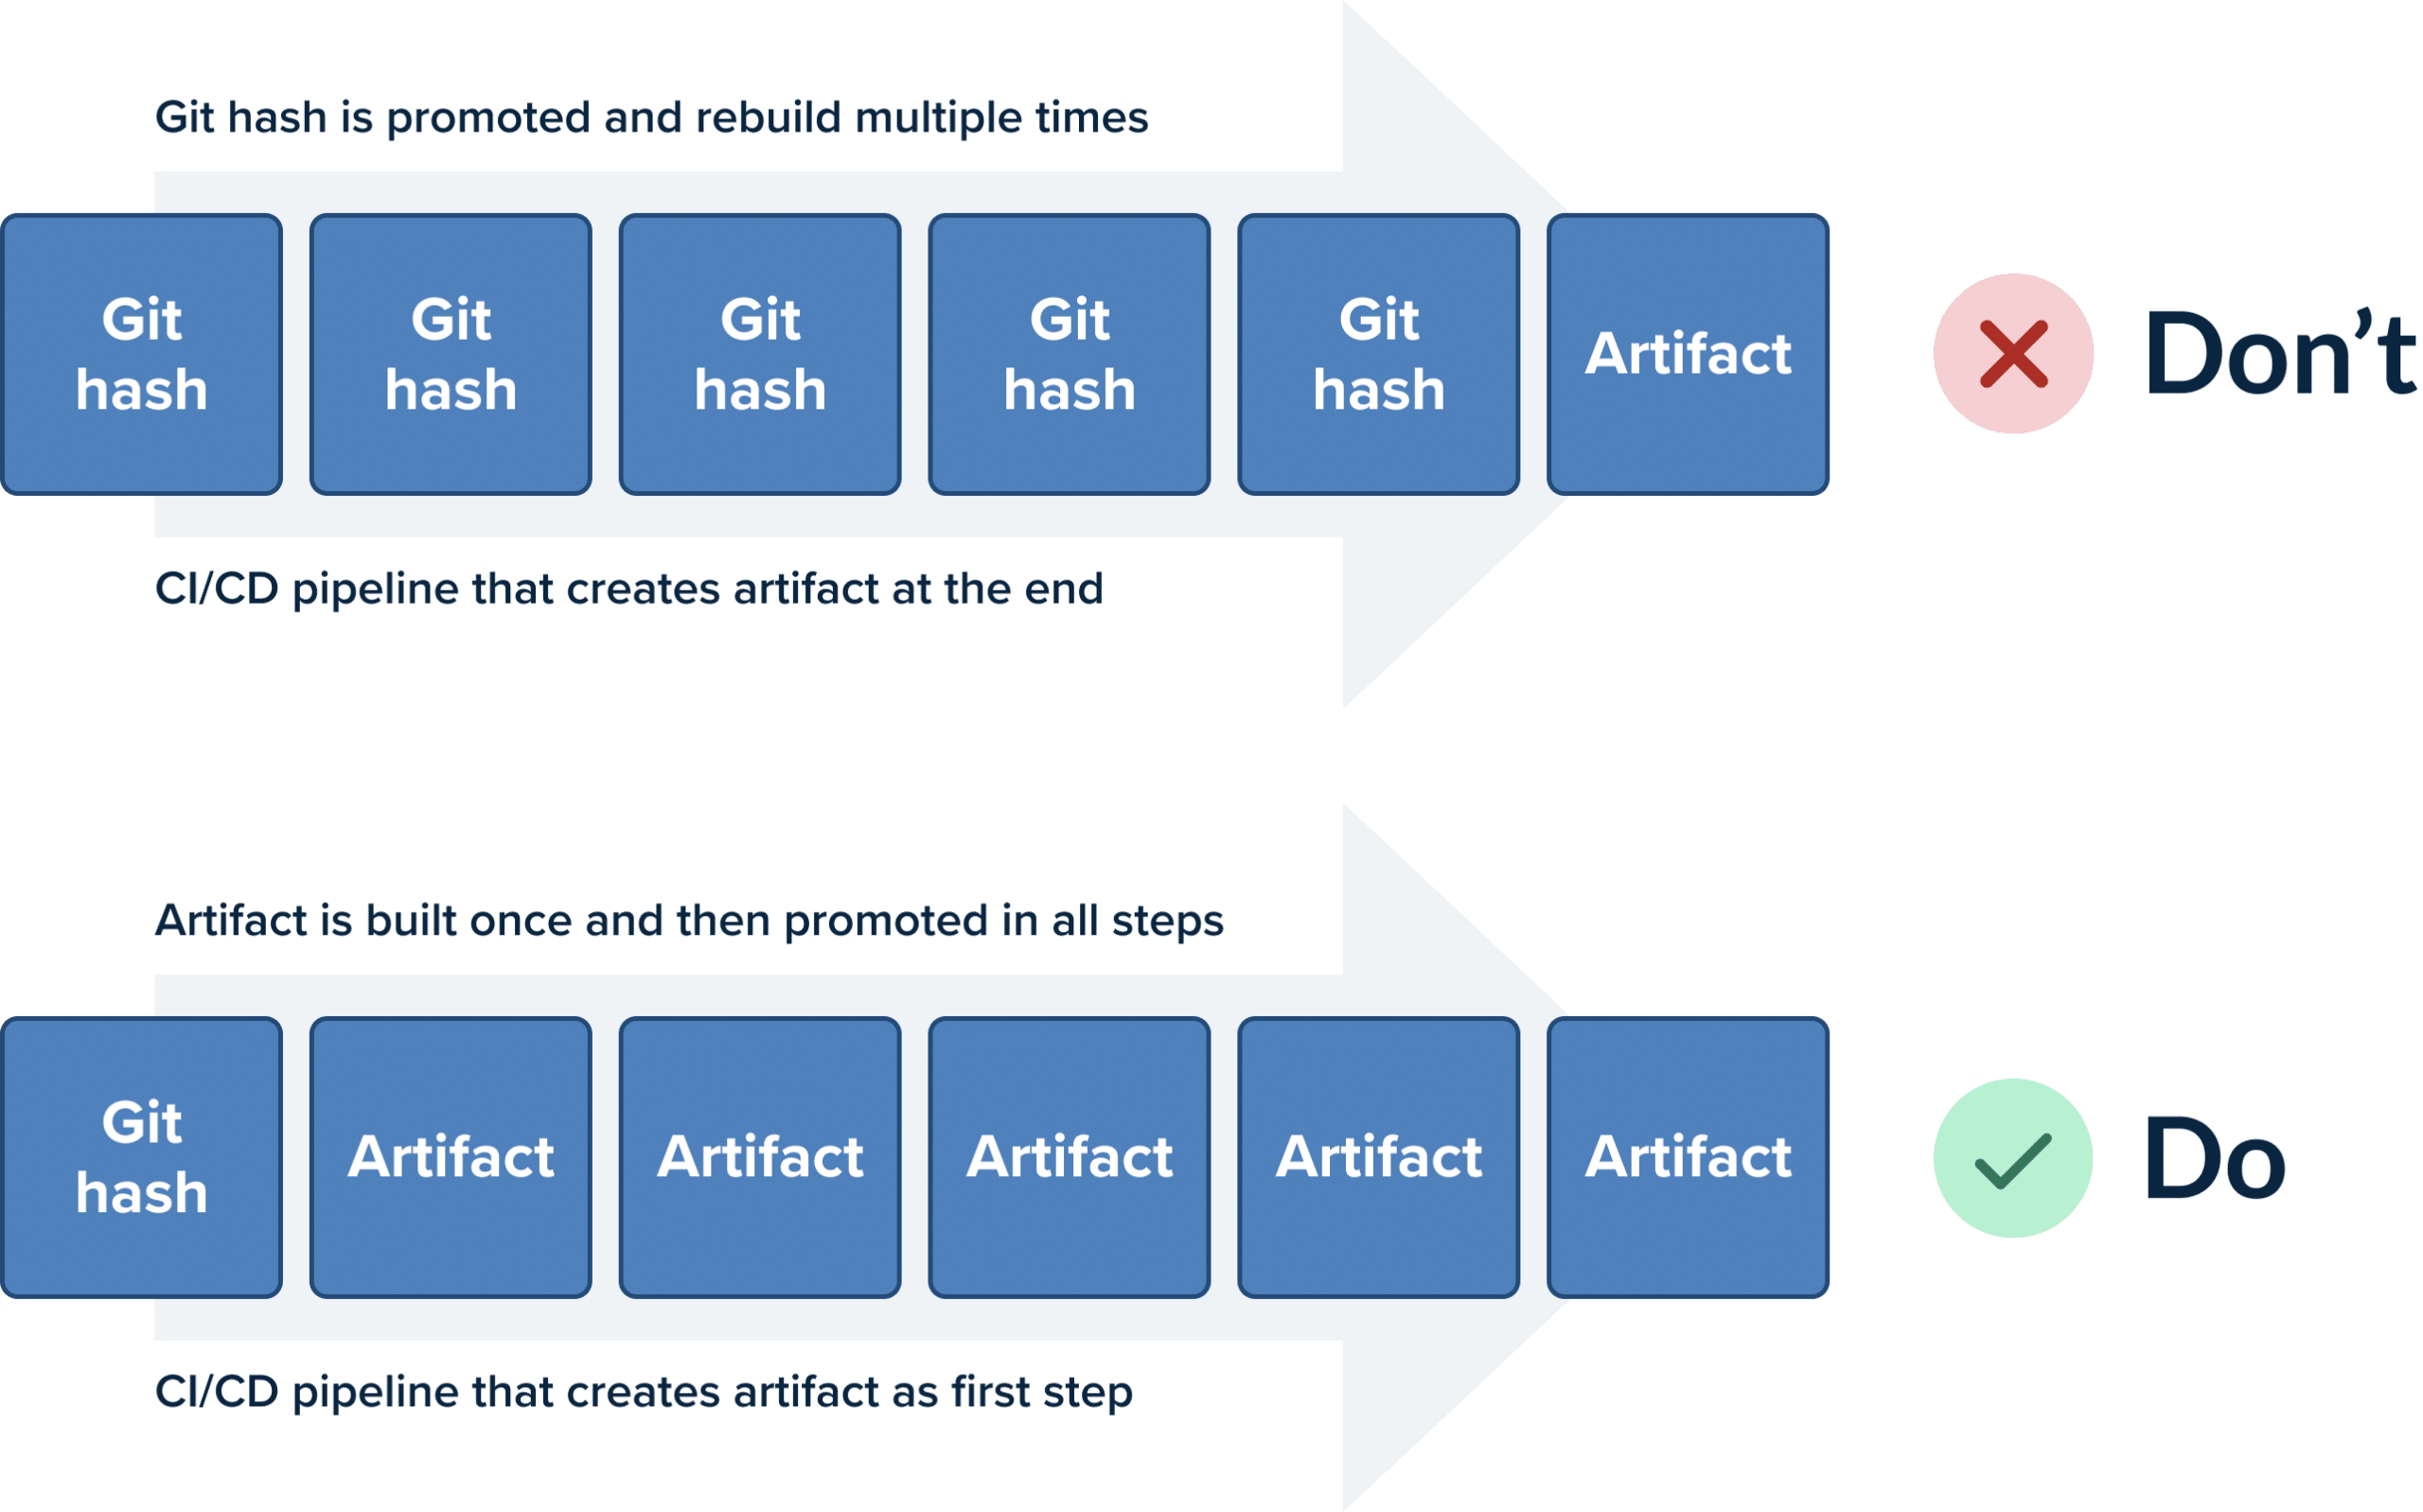
Unfortunately, the common anti-pattern seen here is companies promoting commits instead of container images. A source code commit is traveling in the pipeline stages and each step is being rebuilt by checking out the source code again and again.
This is a bad practice for two main reasons. First of all, it makes the pipeline very slow as packaging and compiling software is a very lengthy process and repeating it at each step is a waste of time and resources.
Secondly, it breaks the previous rule. Recompiling a code commit at every pipeline step leaves the window open for resulting in a different artifact than before. You lose the guarantee that what is deploying in production is the same thing that was tested in the pipeline.
Best Practice 4 – Use short-lived Branches for each feature
A sound pipeline has several quality gates (such as unit tests or security scans) that test the quality of a feature and its applicability to production deployments. In a development environment with a high velocity (and a big development team), not all features are expected to reach production right away. Some features may even clash with each other at their initial deployment version.
To allow for fine-grained quality gating between features, a pipeline should have the power to veto individual features and be able to select only a subset of them for production deployment. The easiest way to obtain this guarantee is following the feature-per-branch methodology where short-lived features (i.e. that can fit within a single development sprint) correspond to individual source control branches.
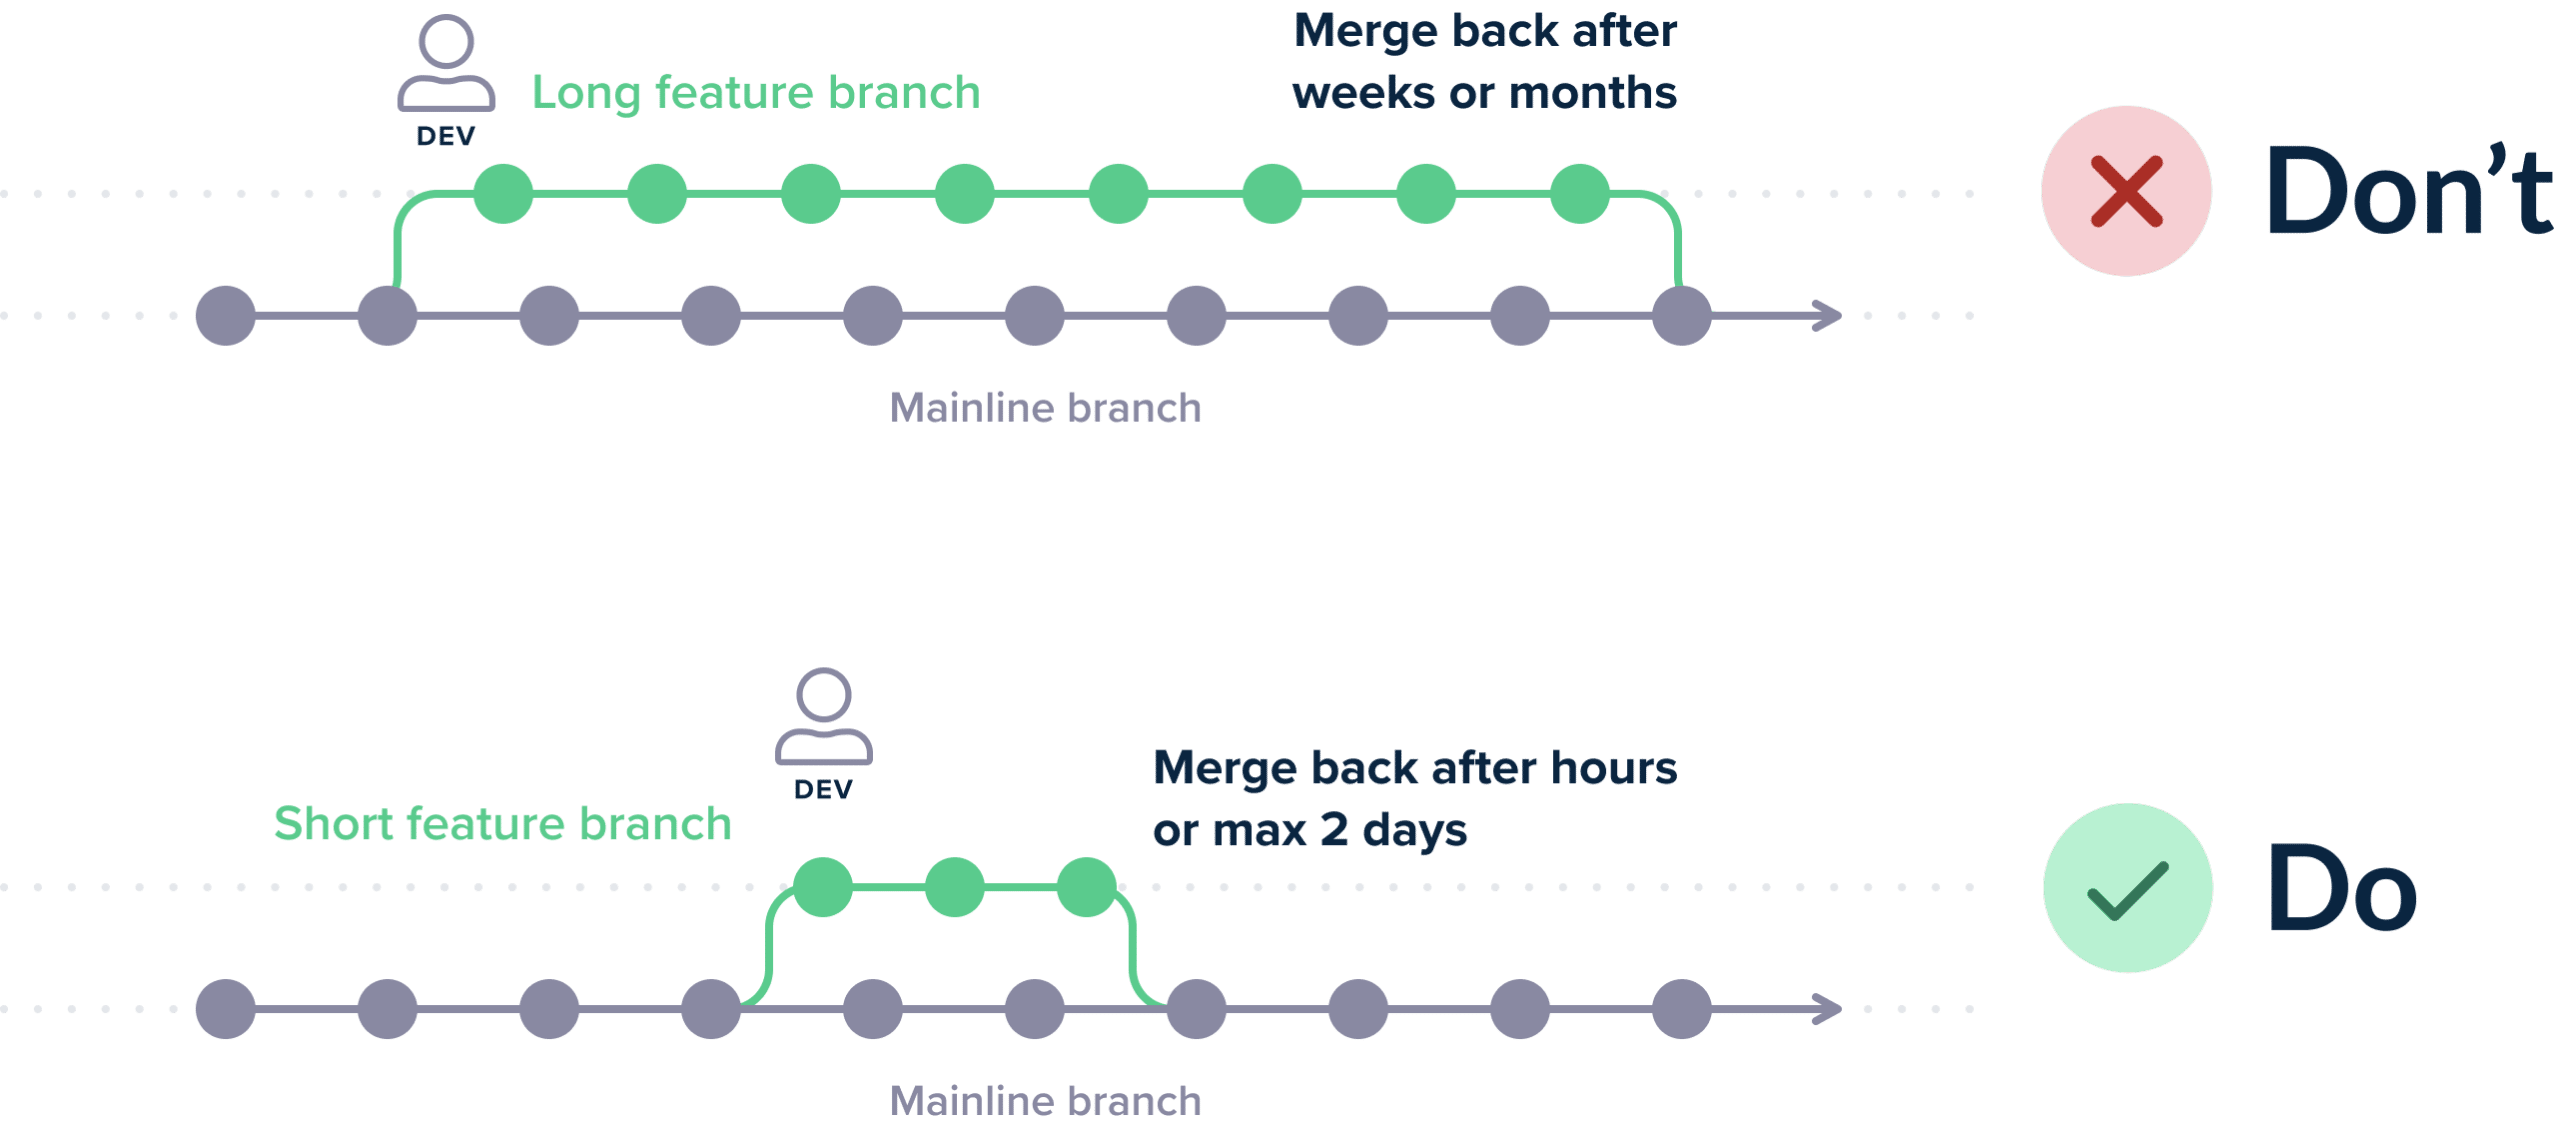
This makes the pipeline design very simple as everything revolves around individual features. Running test suites against a code branch tests only the new feature. Security scanning of a branch reveals problems with a new feature.
Project stakeholders are then able to deploy and rollback individual features or block complete branches from even being merged into the mainline code.
Unfortunately, there are still companies that have long-lived feature branches that collect multiple and unrelated features in a single batch. This not only makes merging a pain but also becomes problematic in case a single feature is found to have issues (as it is difficult to revert it individually).
The evolution of short-lived branches is to follow trunk-based development and feature toggles. This can be your endgame but only if you have mastered short-lived branches first.
Best Practice 5 – A basic build should take a single step
CI/CD pipelines are all about automation. It is very easy to automate something that already was very easy to run in the first place.
Ideally, a simple build of a project should be a single command. That command usually calls the build system or a script (e.g., bash, PowerShell) that is responsible for taking the source code, running some basic tests, and packaging the final artifact/container.
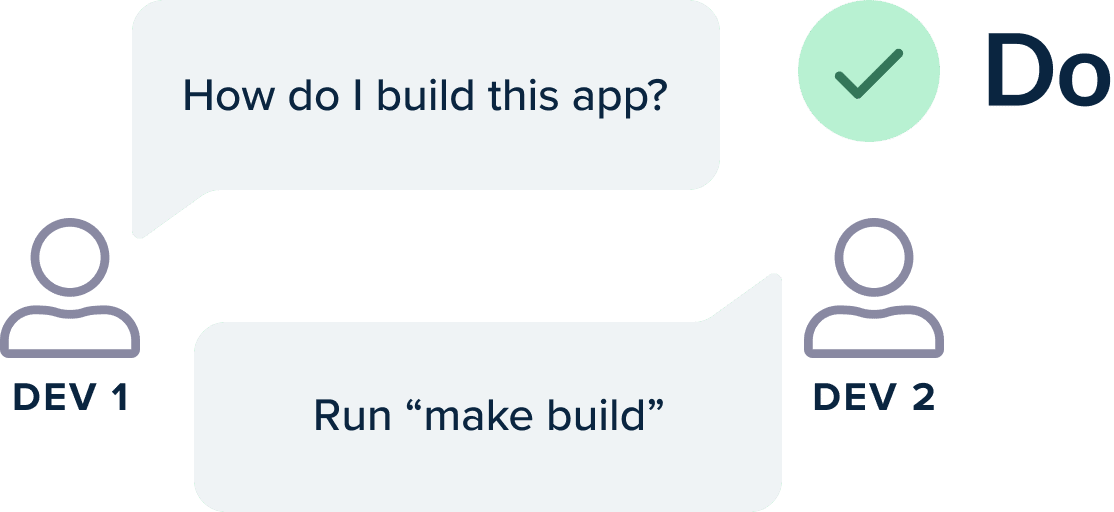
It is ok if more advanced checks (such as load testing) need additional steps. The basic build, however (that results in a deployable artifact) should only involve a single command. A new developer should be able to check out a brand new copy of the source code, execute this single command and get immediately a deployable artifact.
The same approach is true for deployments (deployments should happen with a single command)
Then if you need to create any pipeline you can simply insert that single step in any part of the pipeline.
Unfortunately, there are still companies that suffer from many manual steps to get a basic build running. Downloading extra files, changing properties, and in general having big checklists that need to be followed are steps that should be automated within that very same script.
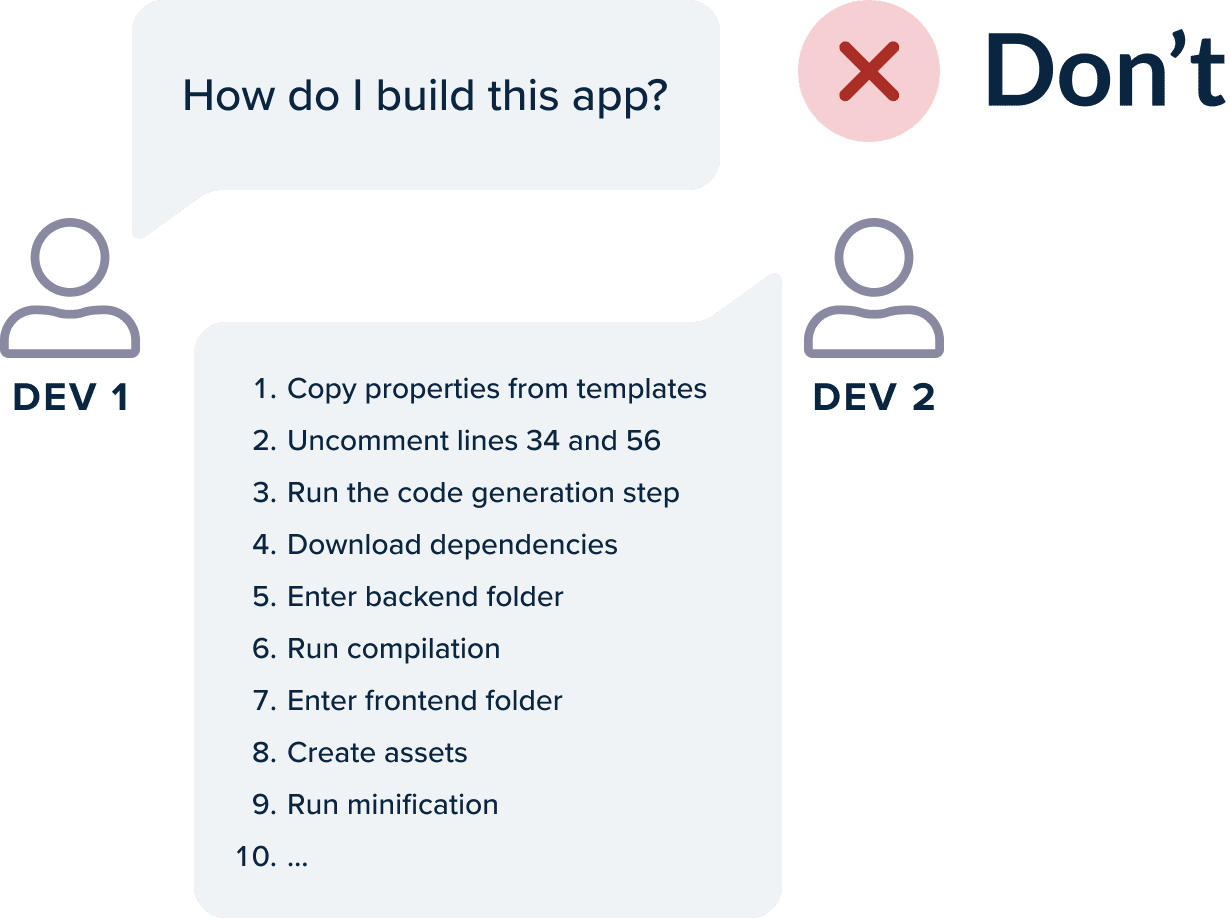
If a new hire in your development team needs more than 15 minutes for the basic build (after checking out the code in their workstation) then you almost certainly suffer from this problem.
A well-built CI/CD pipeline just repeats what is already possible on the local workstation. The basic build and deploy process should be already well oiled before being moved into a CI/CD platform.
Best Practice 6 – Basic Builds are Fast (5 – 10 minutes)
Having a fast build is a big advantage for both developers and operators/sysadmins.
Developers are happy when the feedback loop between a commit and its side effects is as short as possible. It is very easy to fix a bug in the code that you just committed as it is very fresh on your mind. Having to wait for one hour before developers can detect failed builds is a very frustrating experience.
Builds should be fast both in the CI platform and in the local station. At any given point in time, multiple features are trying to enter the code mainline. The CI server can be easily overwhelmed if building them takes a lot of time.
Operators also gain huge benefits from fast builds. Pushing hot fixes in production or rolling back to previous releases is always a stressful experience. The shorter this experience is the better. Rollbacks that take 30 minutes are much more difficult to work with than those that take three minutes.
In summary, a basic build should be really fast. Ideally less than five minutes. If it takes more than 10 minutes, your team should investigate the causes and shorten that time. Modern build systems have great caching mechanisms.
- Library dependencies should be fetched from an internal proxy repository instead of the internet
- Avoid the use of code generators unless otherwise needed
- Split your unit (fast) and integration tests (slow) and only use unit tests for the basic build
- Fine-tune your container images to take full advantage of the Docker layer caching
Getting faster builds is also one of the reasons that you should explore if you are moving to microservices.
Best Practice 7 – Store/Cache Your Dependencies
It’s all over the news. The left-pad incident. The dependency confusion hack. While both incidents have great security implications, the truth is that storing your dependencies is also a very important tenet that is fundamental to the stability of your builds.
Every considerable piece of code uses external dependencies in the form of libraries or associated tools. Your code should of course be always stored in Git. But all external libraries should be also stored by you in some sort of artifact repository.
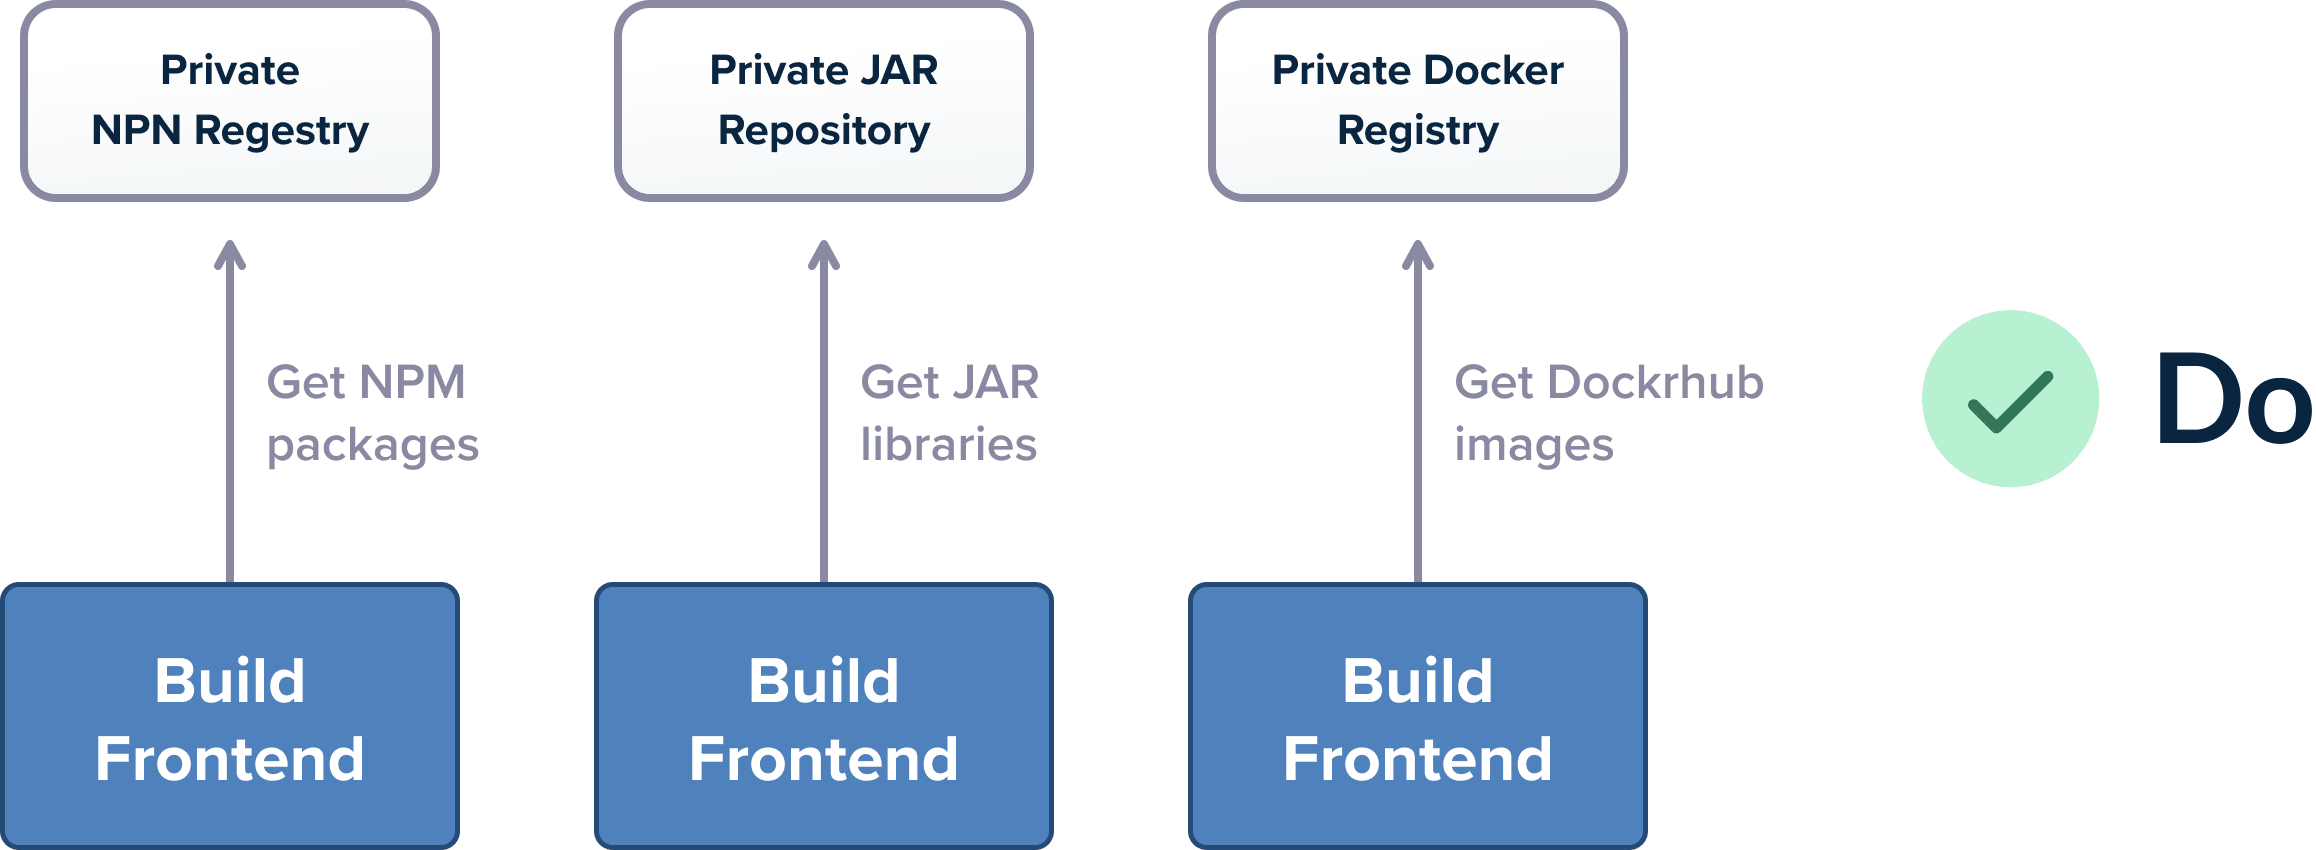
Spend some time to collect our dependencies and understand where they are coming from. Apart from code libraries, other not-so-obvious moving parts are needed by a complete build as your base docker images or any command-line utilities that are needed for your builds.
The best way to test your build for stability is to completely cut off internet access in your build servers (essentially simulating an air-gapped environment). Try to kick off a pipeline build where all your internal services (git, databases, artifact storage, container registry) are available, but nothing else from the public internet is accessible, and see what happens.
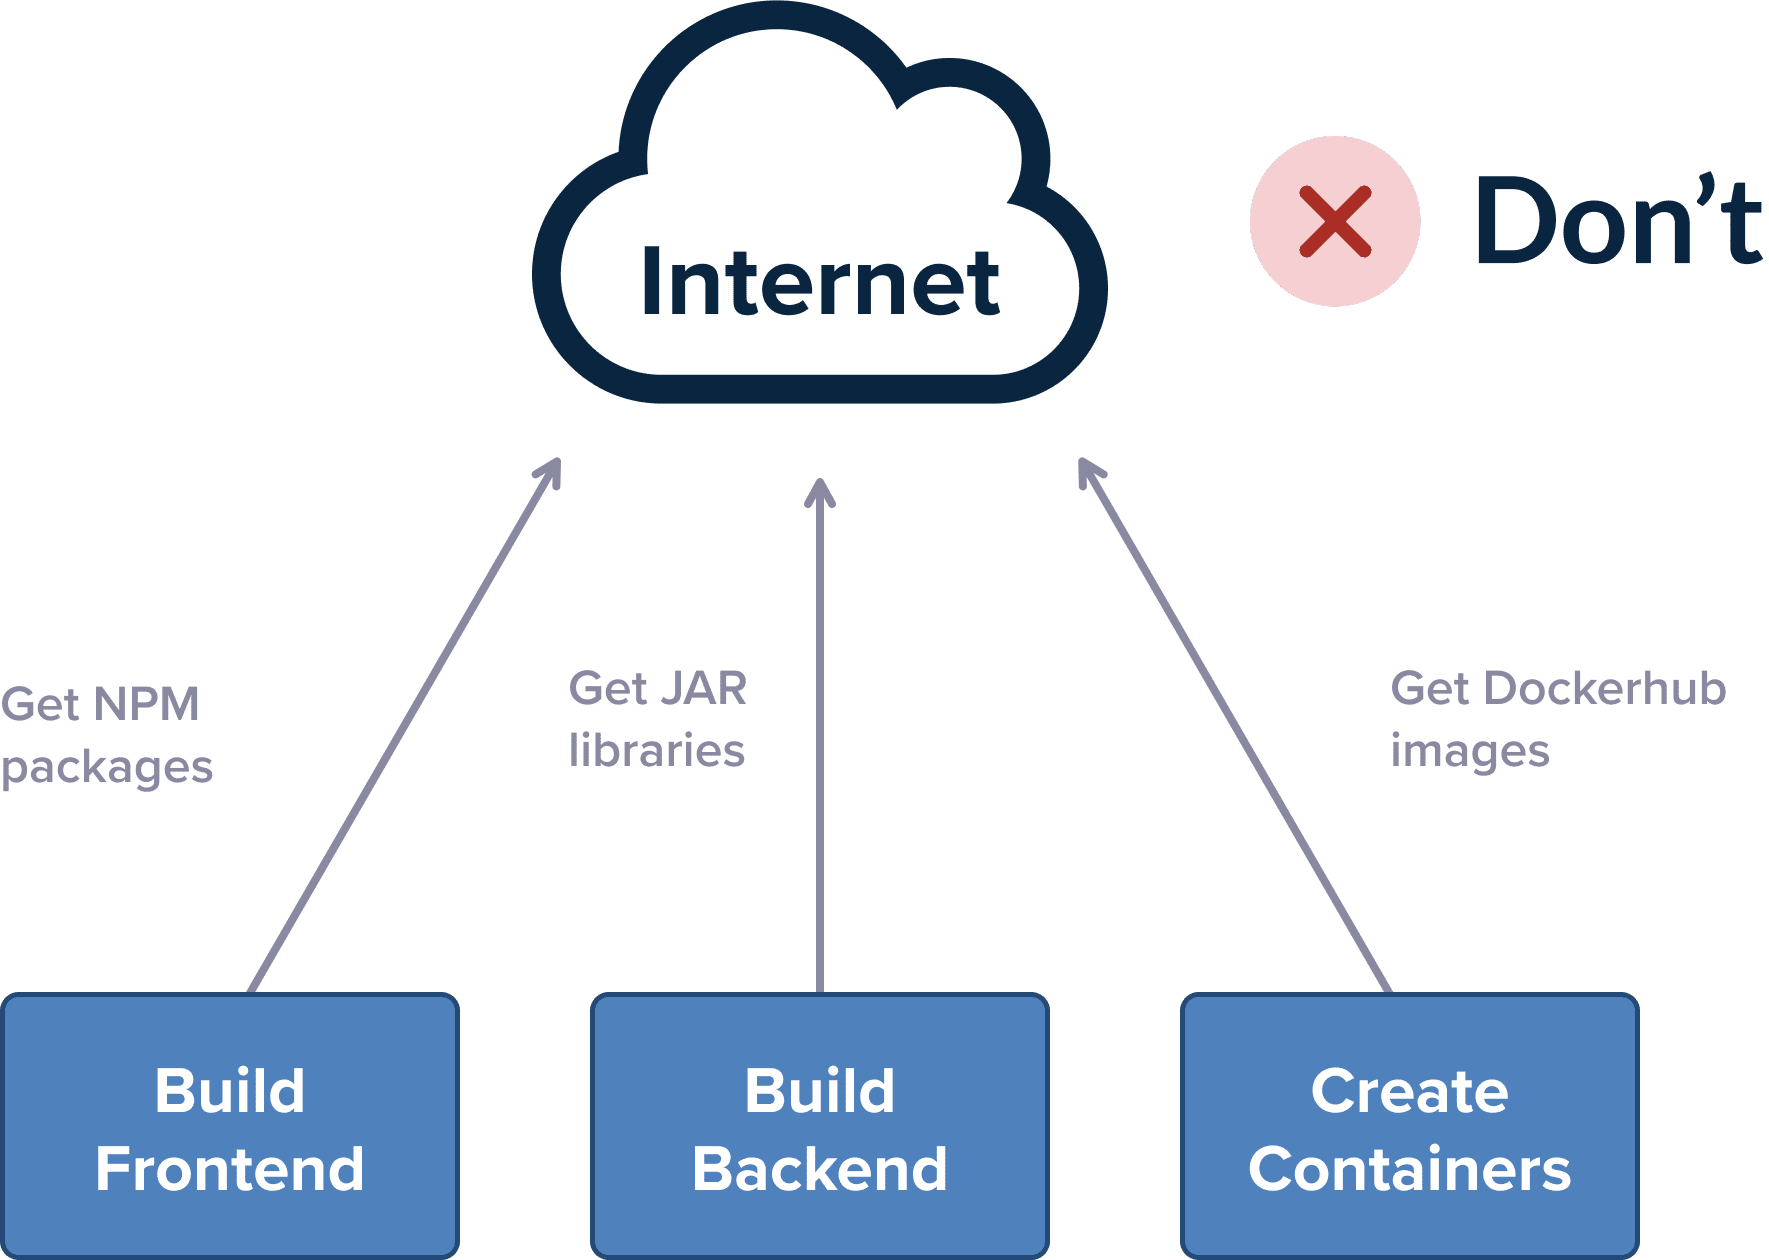
If your build complains about a missing dependency, imagine that the same thing will happen in a real incident if that particular external resource is also down.
Continued on part2. You can download all 3 parts in a single PDF as an ebook.
Cover photo by Unsplash.
