At Codefresh, we know that any CI/CD solution must be attractive to both developers and operators (SREs). One of the major advantages of Codefresh is the graphical user interface that includes dashboards for Kubernetes and Helm deployments. These graphical dashboards are very useful to developers who are just getting started with deployments and pipelines.
We realize, however, that SREs love automation and the capability to script everything without opening the GUI. To this end, Codefresh has the option to create pipelines in a completely automated manner. We have already seen one such approach in the first part of this series where pipeline specifications exist in a separate location in the filesystem outside of the folders that contain the source code.
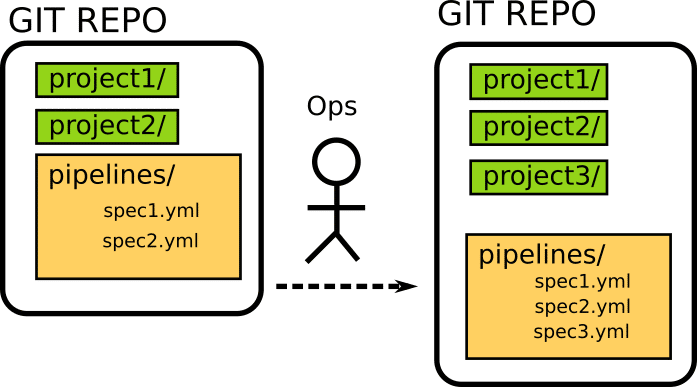
In this blog post, we will see an alternative approach where the pipeline specification is in the same folder as the code it manages.
Creating Codefresh pipelines automatically after project creation
Imagine that you are working for the operations/SRE team of a big company. Developers are constantly creating new projects and ideally, you would like their pipelines to be created in a completely automated manner. Even though you could use the Codefresh GUI to create any pipeline for a new project by hand, a smarter way would be to make Codefresh work for you and create pipelines on the spot for new projects.
To accomplish this we will create a “Pipeline creator” pipeline. This pipeline is creating pipelines according to their specification file. Therefore, the sequence of events is the following:
- A developer commits a new project folder
- An SRE (or the same developer) also commits a specification file for a pipeline
- In a completely automated manner, Codefresh reads the pipeline specification and creates a pipeline responsible for the new project
- Anytime a developer commits a change to the project from now on, the project is automatically built with Codefresh
In all of these steps, the Codefresh UI is NOT used. Even the “pipeline creator” pipeline is created outside of the GUI.
The building blocks for our automation process are the same ones we used in the first part of the series.
- The integrated mono-repo support in Codefresh
- The ability to define complete Codefresh pipelines (including triggers) in a pipeline specification file
- The ability to read pipeline specifications via the Codefresh CLI
We have seen the details of these basic blocks in the previous blog post, so we are not going to describe them in detail here.
A Codefresh pipeline for creating pipelines
You can find all the code in the sample project at https://github.com/kostis-codefresh/dynamic-pipelines
First, we will start with the most crucial part of the whole process. The pipeline creator. Here is the spec.
version: '1.0'
kind: pipeline
metadata:
  name: dynamic-pipelines/pipeline-creator
  description: "Pipeline creator for pipeline-spec.yml files"
  deprecate: {}
  project: dynamic-pipelines
spec:
  triggers:
    - type: git
      repo: kostis-codefresh/dynamic-pipelines
      events:
        - push
      branchRegex: /.*/gi
      modifiedFilesGlob: '**/pipeline-spec.yml'
      provider: github
      name: my-trigger
      context: github-1
  contexts: []
  variables: []
  steps:
    main_clone:
      title: 'Cloning main repository...'
      type: git-clone
      repo: '${{CF_REPO_OWNER}}/${{CF_REPO_NAME}}'
      revision: '${{CF_REVISION}}'
      git: github-1
    pipelineCreator:
      title: Setting up a new pipeline programatically
      image: codefresh/cli
      commands:
        - echo Creating a pipeline from $CF_BRANCH/pipeline-spec.yml
        - codefresh create pipeline -f $CF_BRANCH/pipeline-spec.yml
  stages: []
This specification file has two very important lines. The first one is the line:
modifiedFilesGlob: '**/pipeline-spec.yml'
This line comes from the monorepo support and essentially instructs this pipeline to run only “when a file named pipeline-spec.yml is changed in any folder”. The name we chose is arbitrary as Codefresh pipeline specifications can be named with any name that makes sense to you. This line guarantees that the pipeline creator will only run when a pipeline specification is modified. We don’t want to run the pipeline creator when a normal (i.e. code) commit happens in the repository.
The second important line is the last one:
codefresh create pipeline -f $CF_BRANCH/pipeline-spec.yml
Here we call the Codefresh CLI and create the pipeline that will actually compile the project. There are multiple ways to locate the file that contains the pipeline, but for illustration purposes, we make the convention that the branch name is also the name of the project.
If for example a new project is created that is named my-project, the SRE can do the following:
- Create a branch from master named “my-project”
- Add a directory called my-project
- Add a pipeline specification under my-project/pipeline-spec.yml
- Commit and push everything
Then the pipeline creator will read the spec and create the pipeline.
Setting up the pipeline creator
Now that we have the specification for the pipeline creator we are ready to activate it by calling the Codefresh CLI (i.e. using the same method of creating pipelines as the creator itself).
codefresh create pipeline -f pipeline-creator-spec.yml
The pipeline creator now exists in Codefresh and will be triggered for any builds that match the glob expression we have seen in the previous part.
You can visit the Codefresh UI to verify that everything is as expected.
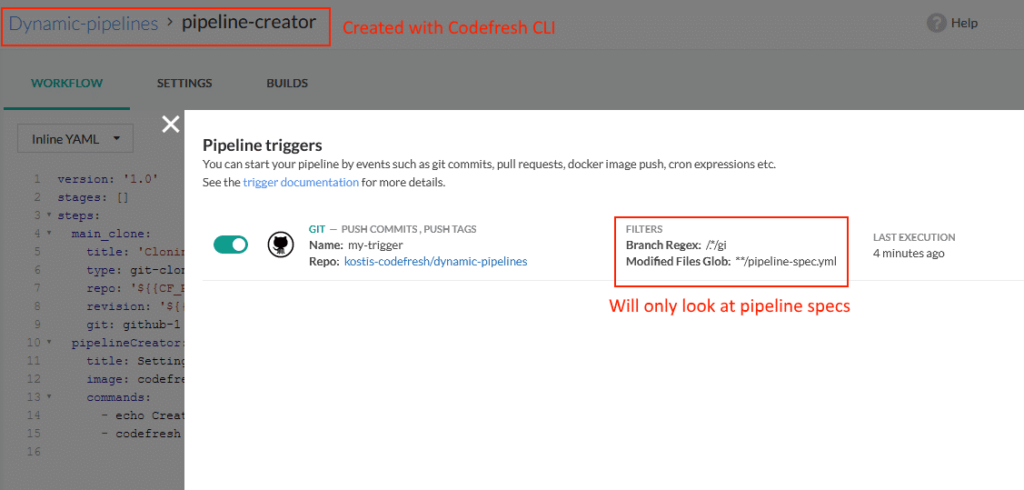
Notice also the trigger that clearly shows that the pipeline creator will only run if a pipeline-spec file (in any directory) is among the modified files.
Adding a new project
Now that the pipeline creator is setup we are ready to add a project. To do this we will create a subfolder (e.g. my-go-app) and add the source code and the pipeline specification for that project. Here is an example:
version: '1.0'
kind: pipeline
metadata:
  name: dynamic-pipelines/my-go-app-pipeline
  description: "Docker creation for sample GO app"
  deprecate: {}
  project: dynamic-pipelines
spec:
  triggers:
    - type: git
      repo: kostis-codefresh/dynamic-pipelines
      events:
        - push
      branchRegex: /.*/gi
      modifiedFilesGlob: 'my-go-app/**'
      provider: github
      name: my-trigger
      context: github-1
  contexts: []
  variables:
    - key: PORT
      value: '8080'
  steps:
    main_clone:
      title: 'Cloning main repository...'
      type: git-clone
      repo: '${{CF_REPO_OWNER}}/${{CF_REPO_NAME}}'
      revision: '${{CF_REVISION}}'
      git: github-1
    build_my_image:
      title: Building Docker Image
      type: build
      image_name: my-monorepo-go-app
      working_directory: ./my-go-app
      tag: '${{CF_BRANCH_TAG_NORMALIZED}}-${{CF_SHORT_REVISION}}'
      dockerfile: Dockerfile
  stages: []
The pipeline itself is very simple. It only creates a Docker image (see the build_my_image step at the bottom of the file).
The important point here is the trigger. This pipeline will run only if the files changes are under the folder ‘my-go-app/**. This makes sure that this pipeline will only deal with that particular project and nothing else. Commits that run in other project folders will be ignored.
We now reach the magic moment. To create the pipeline for this project an SRE/developer only needs to:
- Create a branch named my-go-app
- Commit and push the code plus the specification
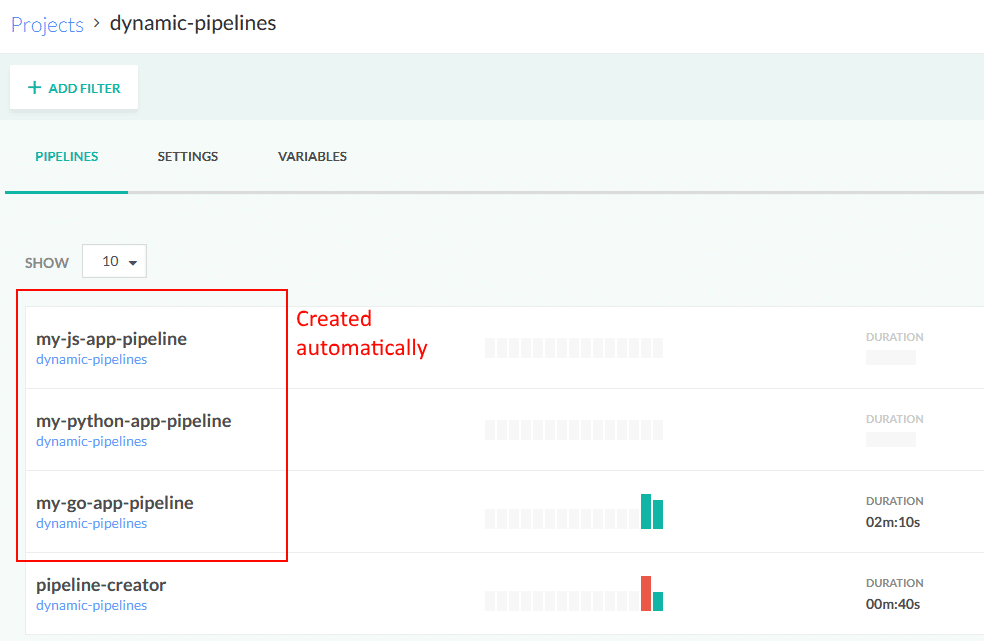
That’s it! No other special action is needed. The only interaction for developers/operators to get a pipeline running is via the GIT repo. The pipeline creator described in the previous section will detect this commit and automagically create a specific pipeline for the Golang project. The person that made the commit does not even need a Codefresh account!
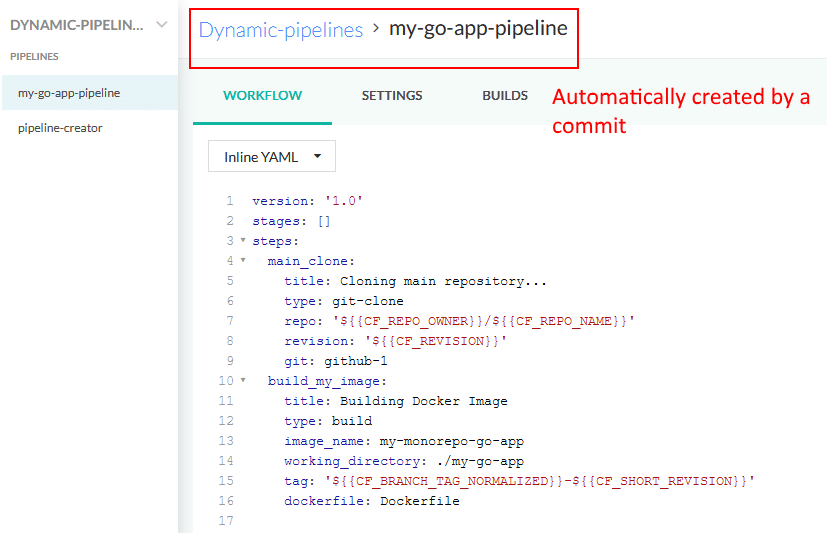
Now any commit that happens inside the Go project, will trigger this pipeline (in our case it just creates a Docker image)
With this approach, anybody can keep adding projects along with their pipelines. The example monorepo has 3 projects. Here is the file layout:
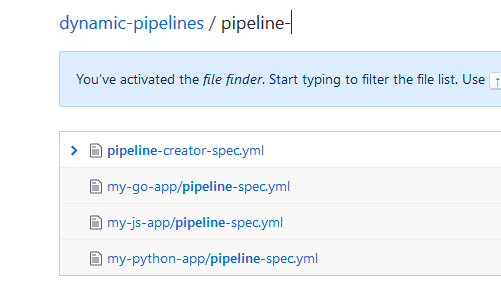
And here is the view inside Codefresh:
Future improvements
In this second part of the series, we have seen how you can automatically create pipelines for multiple projects just by committing their pipeline specifications. In future posts, we will also explore the following approaches…
For illustration purposes, we used the convention where the name of the project is also the name of the branch that contains the pipeline. This makes the pipeline creator simple to understand but is not always practical. A better approach would have been to have a script that looks at all the folders of the project and locates the spec that was changed. This would also make it possible to create more than one pipeline with a single commit.
Also for illustration purposes, we assume that each project comes with its own pipeline spec. An alternative approach would be to have a simple codefresh.yml inside and then have the pipeline-creator convert it to a spec on the fly. This would make the creation of pipelines easier for developers that are familiar with Codefresh YAML but not the full spec. For bigger organizations, it would also be possible to have a templating mechanism for pipeline specifications that gathers a collection of global and “approved” pipelines and changes only the values specific to a project.
Finally, the present article shows only what happens when a project is initially created and the pipeline appears in the Codefresh GUI for the first time. A smarter approach would be to also recreate existing pipelines, so that the operator can change several settings after the initial pipeline creation.
New to Codefresh? Create Your Free Account Today!
