Triggering Elastic Beanstalk Deployment Using Codefresh
This post discusses how to set up continuous deployment (CD) of a Dockerized Node.js application to Amazon Elastic Beanstalk, using a Codefresh YAML file. As a developer, you want the process of moving your application to production to be as automated as possible. If you use a platform such as AWS Elastic Beanstalk to deploy your application, Codefresh can help you to completely automate the process of unit testing, building, and deployment.
By using Codefresh together with Elastic Beanstalk, you can set up this automated process with the following steps:
- Configure Your Repository: Fork the code to your repository, and set up a Codefresh service for it, so Codefresh will be notified whenever you commit your code.
- Build and Test a Docker Image: Create a YAML file to automatically unit test and build your image, and launch it in a Docker container.
- Create an Environment in AWS: Set up the AWS environment where you want to deploy the application, and create the descriptor file.
- Perform a Manual Deployment, to verify your AWS configuration is correct.
- Configure the Environment Variables, for the values needed as input parameters for the automatic deployment.
- Add a Trigger to the YAML File, which will automatically deploy the application to Elastic Beanstalk.
- Commit Your Code, and watch it run automatically.
These steps are described in detail below.
Once you have completed these steps, every time you commit your code, Codefresh will automatically unit test, build, and deploy your application to Elastic Beanstalk, without any manual intervention.
We welcome your comments or questions below.
Definitions:
| AWS | Amazon Web Services – A collection of cloud-based web services, including Elastic Beanstalk. |
| CD | Continuous Deployment – An approach where software is deployed in short cycles, so the latest version is always available. CD includes a process for building, testing, and deploying the software quickly and reliably, so it can be done whenever a change is made. |
| CI | Continuous Integration – An approach where the code versions from all developers working on the software are merged several times a day. |
| CLI | Command Line Interface |
| Elastic Beanstalk | A platform provided by Amazon Web Services to quickly deploy and manage an application in the cloud, and automatically set up the infrastructure, including capacity provisioning, load balancing, scaling, and health monitoring. Elastic Beanstalk currently supports Docker containers, in addition to other technologies. |
| YAML | The language used for Codefresh files. The file extension is .yml or .yaml. |
Configure the Codefresh Service
This section describes how to use Codefresh to create the Docker image that you can deploy to Elastic Beanstalk. This includes configuring the repository for your code, and building the image.
The examples in this article use a “Hello World” application written in Express.js. To try it out, you can fork this sample code to your repository, or use your own code. The sample code is located at https://github.com/expressjs/express.
Note: It is assumed that you already have a Codefresh account, and have a basic familiarity with Codefresh. If you don’t have an account, you can get one free forever here.
Configure Your Repository
You must set up a service in Codefresh for your repository. This enables Codefresh to receive a notification each time you commit, so it can begin the automated process. For details about configuring a repository in Codefresh, see https://codhttps://codefresh.io/docs/.
Build a YAML file
To build and unit test your Docker image, in Codefresh, create a Codefresh YAML file called codefresh.yml, which contains the required directives. For details about building an image in Codefresh, see https://codefresh.io/docs/docs/codefresh-yaml/what-is-the-codefresh-yaml/.
Below is an example of a codefresh.yml file. It includes the following steps:
- Directs the build engine to execute unit tests on the code base.
- Builds a Docker image named codefresh/express.
- Pushes the image to the Docker hub registry.
Note: If you are using your own code, use your service name instead of express.
version:
'1.0'
steps:
unit-test-step:
  image: node:latest
  working-directory: ${{initial-clone}}
  commands:
      - npm install
      - npm test
build-step:
  type: build
  image-name: codefresh/express
push to registry:
  type: push
  candidate: ${{build-step}}
  tag: latest
Configure Amazon Web Services
This section describes how to configure an AWS environment that can be used for an automatic deployment. This includes creating the environment, setting up the deployment descriptor file, and performing a manual deployment, to verify the configuration is correct.
Note: It is assumed that you already have an AWS account and have some familiarity with AWS and Elastic Beanstalk.
Create an Environment in AWS
To deploy code to Elastic Beanstalk, you have to create the AWS environment where you want it to be deployed.
Procedure
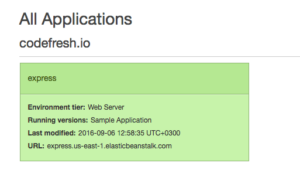
In AWS, create an environment and give it a name that makes sense for your project, for example, myApp-staging, myApp-production, myApp-QA, etc.For details about creating an AWS environment, see: http://docs.aws.amazon.com/elasticbeanstalk/latest/dg/GettingStarted.html.
Figure 1 AWS Environment
Configure a deployment descriptor file for this environment. This file is usually called Dockerfile.AWS.json. It defines the deployment settings for your application.
For our example, the descriptor file could be as follows:
{
 "AWSEBDockerrunVersion": "1",
 "Image": {
   "Name": "codefresh/express:latest",
   "Update": "true"
 },
 "Ports": [
   {
     "ContainerPort": "8080"
   }
 ]
}
Perform a Manual Deployment
To verify that all of the configuration settings in your descriptor file are correct, perform the first deployment manually, as follows:
Procedure
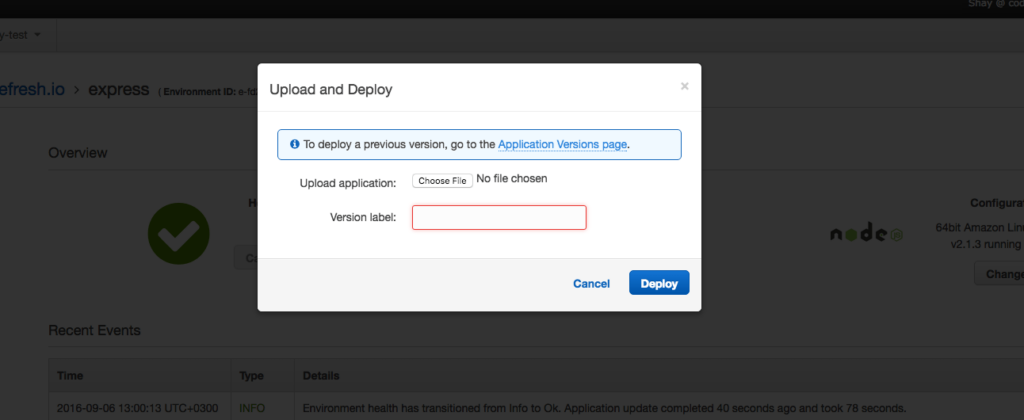
In AWS, choose Elastic Beanstalk and click on your environment.
- Click Upload and Deploy.
- Click in the Upload application field, and select your descriptor file.
- Click Deploy.
Figure 2 Upload and Deploy Window
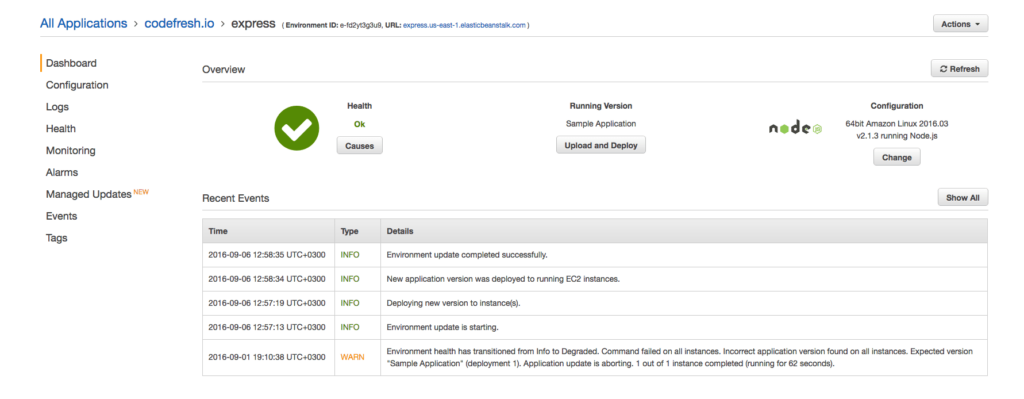
If the file is configured correctly, the deployment will produce results similar to those displayed below.
Figure 3 Deployment Results
Set Up the Automatic Deployment
Using AWS CLI, you can trigger a deployment to Elastic Beanstalk by using the AWS Update Environment command. Thus, in Codefresh, you can add a step containing this command to your codefresh.yml file. If you have configured Codefresh to rebuild your image every time you commit your code, this command will also be executed. Your code will then be automatically deployed to Elastic Beanstalk each time you commit.
To set up this trigger, you must configure environment variables in Codefresh for the input parameters required by the Update Environment command, and enter the command, including its parameters, into the YAML file. You can then commit your code, and watch it run.
Configure the Environment Variables
- The AWS Update Environment command requires the following input parameters:
- Your AWS credentials, which include Access Key ID, Secret Access Key, and Region.
- The AWS environment where you want to deploy the application.
- Version information for the application.
The AWS credentials are sensitive data which should not be hard-coded into a descriptor file, because it could be a security risk. Therefore, you should configure Codefresh environment variables for these values, and encrypt them, as explained below. You can also set up variables for other command parameters, although there is no need to encrypt them.
The variable names are then used as the input parameters for the command in the YAML file, instead of the actual values. Codefresh will insert the correct values into the command line at run-time.
Procedure
Set up your Access Key ID and Secret Access Key as described in http://docs.aws.amazon.com/AWSSimpleQueueService/latest/SQSGettingStartedGuide/AWSCredentials.html.
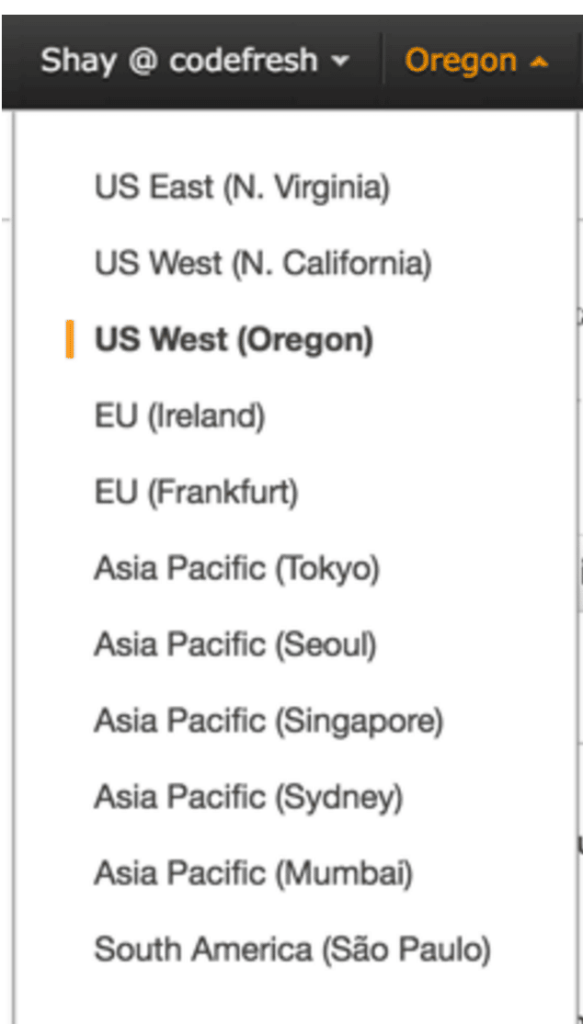
In AWS, click on the Region tab in the upper right corner to determine your Region. In the figure below, the region is us-west-2.
Figure 4 Region Tab
In AWS, click on the application version tab to determine the version label of the application you want to deploy. This tab lists all the versions that can be deployed, as shown.
Figure 5 Application Versions
In Codefresh, choose your service and pipeline and Click on the “Environment Variables” tab to configure environment variables, as shown.
Figure 6 Encrypting Variables
The variables you need to configure are listed in Table 1 below. Configure each of the variables as follows:
- In the KEY field, enter the variable name exactly as shown below.
- In the VALUE field, enter the information described below.
- If indicated, select the Encrypt checkbox.
- Click Add.
The required variables are:
| Key (Name) | Value | Encrypt? |
| ACCESS_KEY_ID | Access Key ID from step 1 | Yes |
| SECRET_ACCESS_KEY_ID | Secret Access Key from step 1 | Yes |
| REGION | Region from Region tab in step 2 | No |
| ENV_NAME | The name you assigned the environment you created in Section 3.1 | No |
| VERSION | Version label from Application Version tab in step 3 | No |
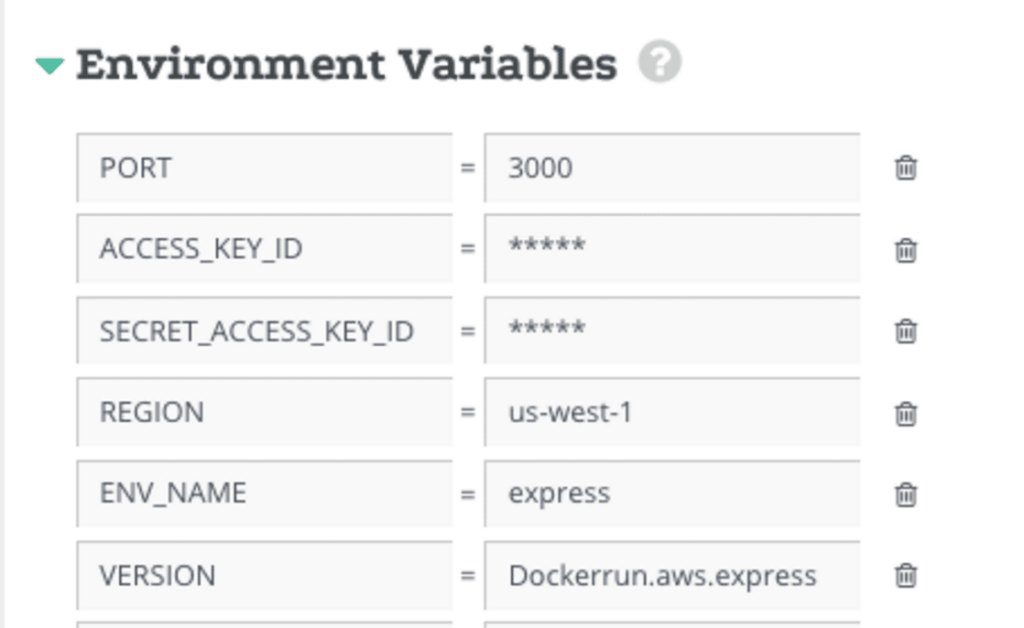
In Codefresh choose your service and Click on the “Environment Variables” tab to view the list of environment variables, as shown. Note that the encrypted variables are displayed as *****.
Figure 7 Environment Variables
Add a Trigger to the YAML File
When you have set up your environment variables, you can add the AWS Update Environment command to your codefresh.yml file, to trigger the automatic deployment to Elastic Beanstalk.
The Update Environment command must be run through an image that contains the AWS CLI. In this example, we use the image garland/aws-cli-docker/latest (located at https://hub.docker.com/r/garland/aws-cli-docker/). Therefore, this image must be included in the YAML file.
Add the following code to your codefresh.yml file:
elastic-beanstalk:
image: garland/aws-cli-docker:latest
commands:
  - aws configure set aws_access_key_id ${{ACCESS_KEY_ID}}
  - aws configure set aws_secret_access_key ${{SECRET_ACCESS_KEY_ID}}
  - aws configure set region ${{REGION}}
  - aws elasticbeanstalk update-environment --environment-name ${{ENV_NAME}} --version-label ${{VERSION}}
For more information about configuring credentials, see the following links:
- http://docs.aws.amazon.com/cli/latest/userguide/cli-chap-getting-started.html
- http://docs.aws.amazon.com/cli/latest/topic/config-vars.html
Deploy on a Specific Branch
If you want to run the deployment only on a specific branch of your image, modify the code so it appears as shown:
elastic-beanstalk:
  image: garland/aws-cli-docker:latest
  commands:>-
    sh -c  "[ ${{CF_BRANCH}} == master ] &&
    aws configure set aws_access_key_id ${{ACCESS_KEY_ID}} &&
    aws configure set aws_secret_access_key ${{SECRET_ACCESS_KEY_ID}} &&
    aws configure set region ${{REGION}} &&
    aws elasticbeanstalk update-environment --environment-name ${{ENV_NAME}} --version-label ${{VERSION}} "
Notes:
- The addition of >- in the line beginning with commands: enables running multiple commands.
- To deploy a different branch of the code, in the line beginning with sh, replace master with the branch you want to deploy.
Commit Your Code
Your automated deployment method is now set up. To trigger a deployment to Elastic Beanstalk, all you need to do is commit your code. Each time you commit, if the build is successful, Codefresh will automatically push the code to the AWS Elastic Beanstalk environment.
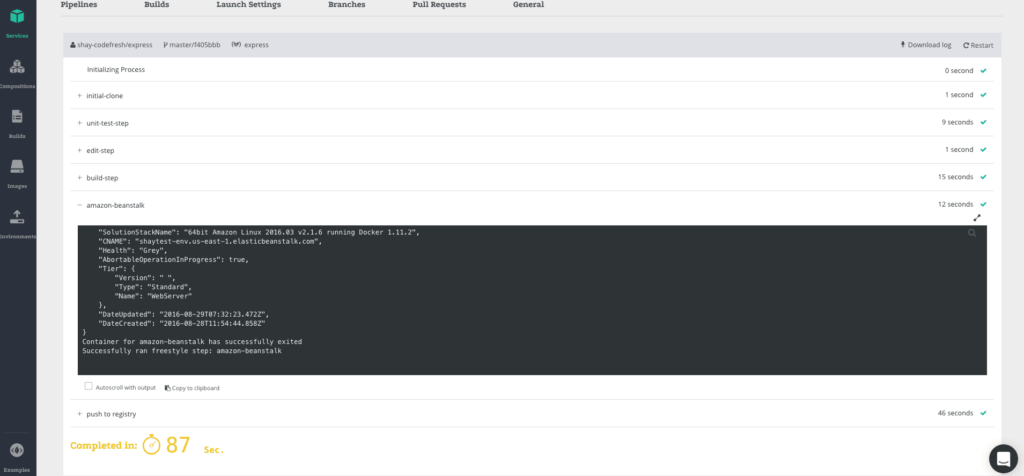
In Codefresh, you can watch the build logs and under deployment step view the details of the deployment to Elastic Beanstalk.
Figure 8 Codefresh Console – Deploying to Elastic Beanstalk
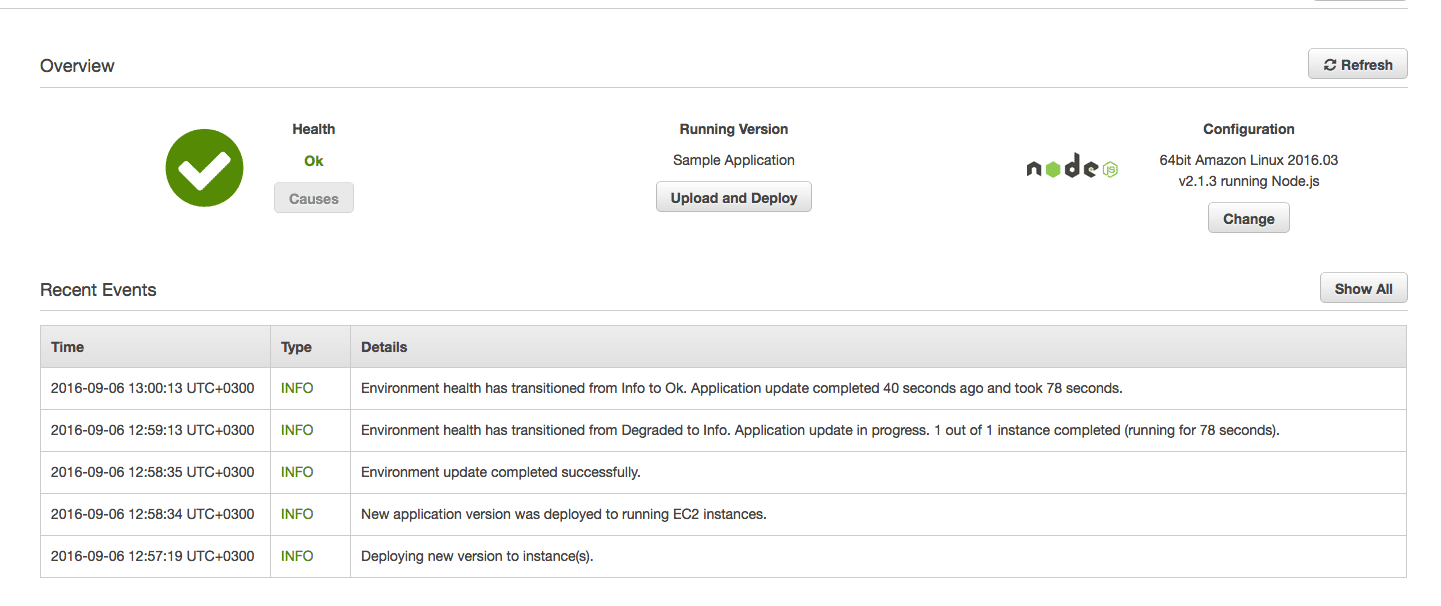
In AWS Elastic Beanstalk, you can also click on your environment to view the details of the deployment.
Figure 9 Elastic Beanstalk – Automatic Deployment
Success!
You have completed setting up a full, Dockerized CI/CD process using Codefresh together with AWS Elastic Beanstalk. This process can easily be set up for all your applications, to run every time you commit, on every branch.
References
Github Repository:
https://github.com/shay-codefresh/express/blob/elasticbeanstalk/codefresh.yml
Github express Repository:
https://github.com/expressjs/express
garland/aws-cli-docker:latest
https://hub.docker.com/r/garland/aws-cli-docker/
Codefresh YAML Files
https://codefresh.io/docs/docs/codefresh-yaml/what-is-the-codefresh-yaml/
Amazon Web Services Setup
http://docs.aws.amazon.com/elasticbeanstalk/latest/dg/GettingStarted.html
Amazon Web Services Credentials:
http://docs.aws.amazon.com/cli/latest/userguide/cli-chap-getting-started.html
http://docs.aws.amazon.com/cli/latest/topic/config-vars.html
Forked express Repository with YAML file example:
https://github.com/shay-codefresh/express/tree/elasticbeanstalk

