
This article is part of our series “Codefresh in the Wild” which shows how we picked public open-source projects and deployed them to Kubernetes with our own pipelines. The results are public at https://github.com/hauskaffee/codefresh-example-homepage
This week’s pick is starbase-80, a Kubernetes “homepage” application. We will use various tools such as GitHub, Docker, AWS, Codefresh, Argo CD, Terraform. This article chronicles how we integrated all those tools together in order to build an end-to-end deployment workflow.
Introduction
You are at work, at home, in an office, or at the local coffee shop. You are knocking out those tickets left and right. While doing this, you read or hear buzzwords like GitOps, DevOps, CI, CD, Kubernetes, and many more. You are learning at a high level what things are but have yet to do everything together. Then it hit you and said, “Hey, I can do GitOps!” As a professional user of Google, you get started with your Journey to GitOps.
First things first, we need a project to build and deploy. While going through awesome-selfhosted/awesome-selfhosted, we chose not clickable-jordan/starbase-80 as our project. We cloned the repo, created a new one under our GitHub account, changed the URLs to the new repo, and pushed the code. Now we have a project to work with.
Secondly, we need to set up our infrastructure. Instead of clicking around and manually setting things up, we want to use Infrastructure as Code (IaC). We decided to use Terraform to manage our infrastructure and set everything up. This way, the code can live in Git, and we can destroy and recreate it while we go through this journey.
Now that we have decided to use Terraform, we need a Kubernetes cluster. We are familiar with AWS and think, “Why not EKS?” as our Kubernetes cluster. With that, we sign up for Terraform Cloud and set the Variables needed for AWS and other variables. After troubleshooting, we have a working EKS Cluster up and running. We prepare the Terraform code and commit everything to Git.
module "eks" {
  source  = "terraform-aws-modules/eks/aws"
  version = ">= 19.21.0"


  cluster_name                          	= lower("${var.owner}-k8s-${random_id.generated.id}")
  cluster_version                       	= 1.28
  cluster_endpoint_public_access        	= true
  iam_role_use_name_prefix              	= false
  node_security_group_use_name_prefix   	= false
  cluster_encryption_policy_use_name_prefix = false


  vpc_id 	= module.vpc.vpc_id
  subnet_ids = concat(module.vpc.private_subnets, module.vpc.public_subnets)
 [..snip..]
}
Now that we have the cluster up and running, we need a way to build and test our code. We decided to use this awesome product called Codefresh 🙂 We want an easy way to build and test your application. We are in luck. Codefresh has a Terraform provider to set up our pipeline. We set up your pipeline and deploy via Terraform.
As we are reviewing Codefresh docs, we notice that there is a GitOps product! We also notice there are Hybrid Solutions to their CI and GitOps products. These runtimes will make your day if you need a GitOps solution after building your application. We deploy the CI and GitOps runtimes to our cluster via Terraform and the Helm Provider.
resource "helm_release" "gitops_runtime" {
  name         	= "cf-gitops-runtime"
  repository   	= "oci://quay.io/codefresh"
  chart        	= "gitops-runtime"
  version      	= "0.4.1"
  namespace    	= "cf-gitops"
  create_namespace = true
  timeout      	= 600
  wait_for_jobs	= true
  [..snip..]
}
YAY! Now, we have a Kubernetes cluster, a pipeline to build and test our app, and runtimes for both Classic and GitOps solutions. We have now mastered Terraform and IaC and are ready to work on our project to build and deploy it.
Performing the first deployment
While looking at the source code at notclickable-jordan/starbase-80, we know we need to deploy the app to Kubernetes. It’s a good thing there is a Dockerfile to help us containerize the application.
- We review the code and start building out the Codefresh pipeline YAML we specified in our Terraform code for the pipeline.
- We get the image built and pushed to Docker Hub.
- After that, we want to ensure no critical vulnerabilities exist in our container. So, we update the dependencies versions in package.json and the base image tag.
After testing, the application still builds and works correctly.
Now, the fun part: how will we deploy the application? We can do this with plain manifests or use a templating engine like Helm. For this guide we decided to use Helm, as it is an easier way to deploy with customizable values. If we need to change the image tag, environment variables, or configs, this is an easy way to do it without needing to rebuild the app. The Helm chart we created can be found at https://github.com/hauskaffee/codefresh-example-homepage/tree/main/helm
Deploying will be easy. The good thing with Codefresh GitOps is that we can use the ArgoCD Application manifest to deploy the helm chart to our cluster. Also, we can specify different values for different environments. This means that multiple teams can customize the same Helm chart for creating different custom homepages according to their own needs.
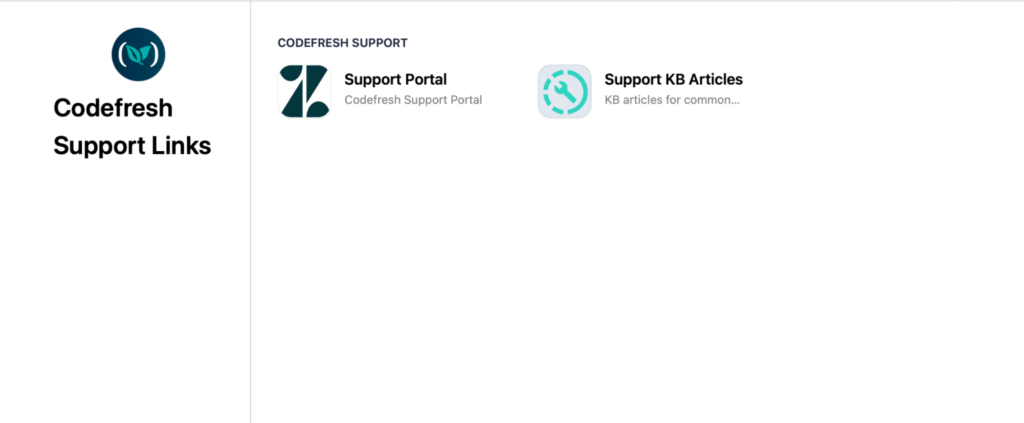
After we work out the details, we finally have the application ready. Here is how it looks once it is deployed:
And here is the Argo CD application manifest that we created
apiVersion: argoproj.io/v1alpha1
kind: Application
metadata:
  name: example-homepage-app
  finalizers:
	- resources-finalizer.argocd.argoproj.io/foreground
spec:
  project: default
  source:
	path: helm
	repoURL: https://github.com/codefresh-support/example-homepage
	targetRevision: main
	helm:
  	parameters:
    	- name: image.tag
      	value: 79dbf2a
    	- name: env.title
      	value: Codefresh Support Links
  	values: |
    	config:
      	- category: Codefresh Support
        	services:
          	- name: Support Portal
            	uri: https://support.codefresh.io
            	description: Codefresh Support Portal
            	icon: zendesk
          	- name: Support KB Articles
            	uri: https://codefresh.io/docs/docs/kb/common-issues/
            	description: KB articles for common issues and more
            	icon: mdi-progress-wrench
            	iconColor: teal-400
  destination:
	name: in-cluster
	namespace: example-homepage
  syncPolicy:
	automated:
  	prune: true
  	selfHeal: true
  	allowEmpty: false
	syncOptions:
  	- PrunePropagationPolicy=foreground
  	- Replace=true
  	- PruneLast=false
  	- Validate=true
  	- CreateNamespace=true
  	- ApplyOutOfSyncOnly=false
  	- ServerSideApply=true
  	- RespectIgnoreDifferences=false
The Helm values are just a quick example for our own needs linking to the Codefresh support Portal and our Knowledge Base.
Automating GitOps deployments
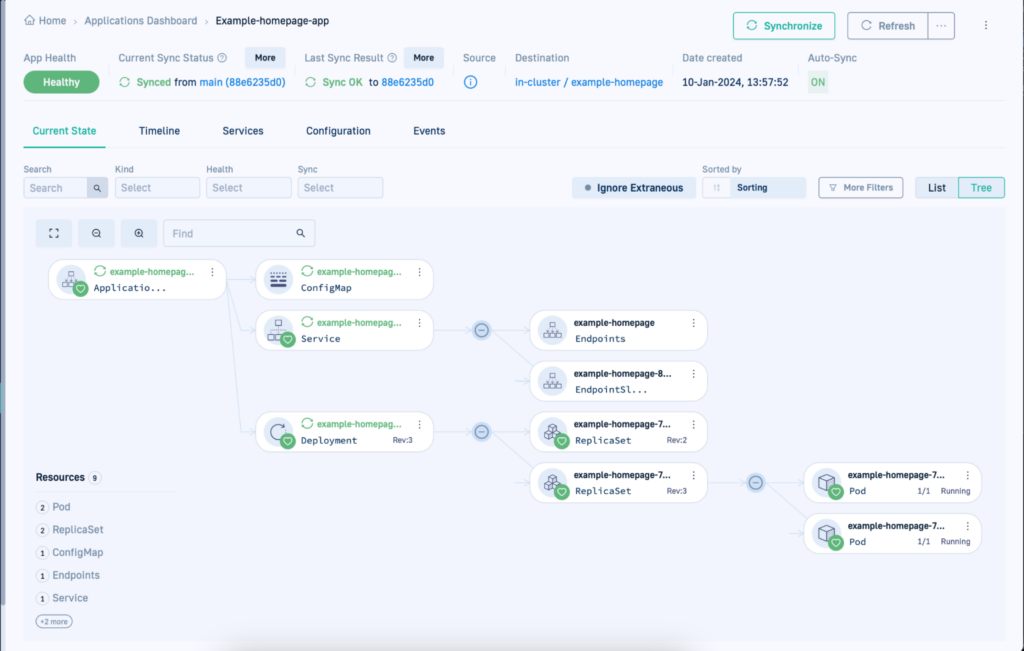
So far, so good. We have all the components working individually. Now, we need to connect them. So we decided to work backwards from ArgoCD. Since we have the GitOps Runtime, we have a Git Source to the runtime that points to our “cd” directory in our Git repository. This directory contains our ArgoCD application to deploy the helm chart you created. After creating the Git Source, we notice the application deployed successfully.
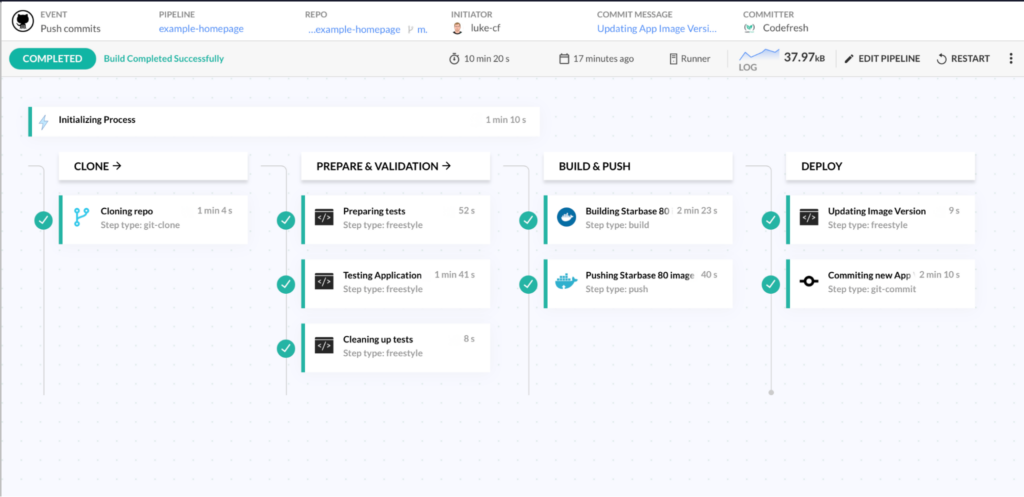
Now, we need to find a way to update the application for new images. We decided to use a Continuous Integration Pipeline to update the application when it runs. Since we are working with YAML files, we will use “yq” to edit these files. Then, once edited, the pipeline will commit back to the repo with the updates to the application. We have tested and triggered the pipeline via Git, and it works.
The only thing left is now to fine-tune the pipeline. We refactored how things work for the application and made it easier to update the homepage. Also, we added a test to the pipeline to ensure it builds correctly. We also added a Slack notification to inform our team of build failures. Now, we have a Pipeline for the CI part, and the GitOps Platform automatically handles CD.
Now that the journey is over, what do we do now? Of course, we review everything, make changes, add new items, and repeat. We now know how things work and learn a little more about CI and also more about ArgoCD.
Takeaways
While going through this journey, we have learned a lot. From troubleshooting to rabbit holes of research. But below are the main things that come to mind.
Infrastructure as Code
When using IaC, it was nice to make sure we could create, destroy, and update in one place. Going through UIs and manually doing everything multiple times can be time-consuming. When doing the AWS Infrastructure, this helped us reset our cluster while troubleshooting issues, and we needed a fresh start. It was quicker than determining the commands for the CLI and navigating the UI. Take the extra time to use IaC, saving time in the long run.
Helm
Using Helm charts is easy, but setting one up can take time. Knowing the syntax and how it works takes time, like learning new things. Once you get the hang of it, it makes things easier. Having variables in your Kubernetes manifest and configurations makes it easier to deploy the application. Like IaC, you have something that can be repeatedly created and destroyed.
Pipelines
We spent the most time creating a pipeline. Yes, the basics of cloning and building an image are easy, but knowing what to do for tests, trying to edit files in place, knowing what to ignore, etc, can take time. We spent a while learning “yq” and figuring out how to do yaml replacements. After a rabbit hole of searching, it was so easy to do.
GitOps
Having everything in Git ( there are exceptions ) is a lifesaver. Being in support and searching thought logs on who changed what at what time can be tiresome. With everything in Git, it makes it easier to know all this in a single location. Who made an Infra change? Check the commit history for that repo. Who broke the application deployment? Check the commit history of who changed the application manifest.
In Conclusion
Below are the repos we used for the Terraform code and the application. There is a guarantee that they have changed since this article. We continue learning new things and making changes as we go.
- codefresh-infra: Terraform Code for AWS, Codefresh Runtimes, and Codefresh Pipelines.
 GitHub – hauskaffee/codefresh-infra: Using Terraform to manage infra and runtimes
 - codefresh-example-homepage: Code from notclickable-jordan/starbase-80 with my modifications.GitHub – hauskaffee/codefresh-example-homepage: Creating an Homepage on Kubernetes based on notclickable-jordan/starbase-80
Photo by Mylon Ollila on Unsplash