What would you say if I would tell you that you can be as productive with the cheapest laptop as with the one you already have? Would you believe me if I would say that there is no need for you to install an IDE, compilers, CLIs, Docker, and whatever else you might have on your laptop? How about having a full development environment created whenever you need it instead of dealing with virtual machines and whatever else might be fulfilling your development needs? What if I say that all you need is a browser and that it doesn’t matter whether you have a laptop, desktop, Chromebook, or a tablet? On top of all that, I will even claim that you can be more productive without all those things.
Your answer to all those questions might be that you already know all that because you watched Gitpod – Instant Development Environment Setup. If you didn’t, stop reading this article, watch that video, and then come back. Today we’re going to go beyond the introduction to Gitpod. We are going to combine browser-based development with GitOps and continuous delivery. With a single click, we will configure Argo CD to monitor a Git repository that defines the desired state of our production environment. Similarly, we will get Codefresh pipelines that will handle the orchestration of all the steps required for full automation triggered by pushing changes to application repositories.
Now, you might be thinking that you are already familiar with all that because you watched Argo CD: Applying GitOps Principles To Manage Production Environment In Kubernetes and because you are already using Codefresh pipelines. But this is something completely different. What I’m offering is to get all that and whatever else you might need with a single click of a button and without anything installed, configured, or running on your laptop. If that did not spark interest, nothing will.
The only thing I expect from you is a Kubernetes cluster that we’ll use to simulate a production environment and Argo CD installed inside the Namespace argocd. If it is in a different Namespace, you will have to make changes to the files project.yaml and apps.yaml in the gitpod-production repo we’ll explore soon.
I’ll also expect you to be registered in Gitpod, that you already configured it to communicate with your GitHub organization, and that you installed Gitpod Chrome Extension. I’m sure that you already have that set up because, as I already mentioned, I’m sure that you watched Gitpod – Instant Development Environment Setup and you understand that browser might be the only tool you need for software development.
With the pleasantries out of the way, let’s dive into creating a full development environment, including continuous delivery automation based on GitOps principles.
We’ll start with only a few repositories and end up with our application running in production, and we’ll do that with only a few clicks.
If you already followed some of my previous work, you probably heard me saying that “UIs are evil, that IDEs are OK, and that almost everything should be defined as code and operated from a terminal.” If you did hear me saying those things, you are probably thinking that I caught some strange disease that affects my brain. Fear not! My brain is fine or, at least, not any more damaged than it was before. I’m aware of what I was saying in the past. I am not changing my mind about those subjects. Stating that “all we need is a browser” does not mean that I’m now proposing drag&drop and click-based development; quite the contrary. We’ll click a button or two, and everything else will be the same or significantly improved.
Finally, after a short detour into my mental state, let’s move into the practical parts of this article and start doing stuff instead of debating.
Creating a Production Development Environment
Since we want to apply GitOps principles to managing environments, let’s start by forking a sample repository that contains a definition of a production environment.
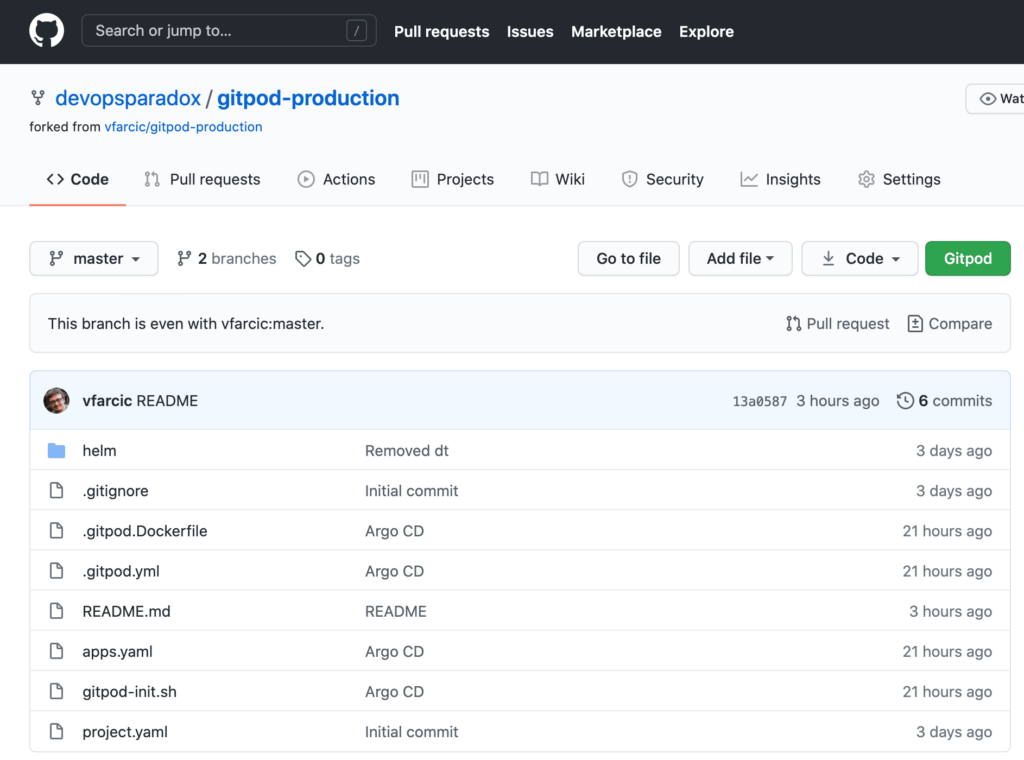
Please open the vfarcic/gitpod-production repo and fork it.
Inside the repository, you’ll find the helm/templates directory with the definitions of the applications we want to have in production. There is only one right now (devops-paradox.yaml), but that will change soon.
All the commands used from this post are available in the gitpod.sh Gist. Use it to follow the exercises. There is no shame in copy & paste.
We are about to experience a “magical” moment. But, before we do, we’ll need to provide a bit of help. Gitpod will make a few changes to the cluster and, for that, it will need to be able to access it. We’ll provide the information it needs through an environment variable.
If you are using GKE, your Kube config might have an absolute path to gcloud. As an example, mine is /usr/local/Caskroom/google-cloud-sdk/latest/google-cloud-sdk/bin/gcloud. If that is your case, please edit the config by replacing the absolute path with gcloud. The workspace we are about to create will have gcloud included in the PATH. If you are not proficient with Kubernetes, the config file is, by default, located in $HOME/.kube/config.
Execute the command that follows from your terminal to retrieve the current Kube config.
kubectl config view --flatten | base64
Copy the output of the previous command and go to the Gitpod settings screen. Enter KUBECONFIG_CONTENT as the variable name and paste the copied value. Remember to click the confirm button on the right-hand side (icon of a checkmark) to persist the variable.
Additionally, if you are using Amazon Elastic Kubernetes Serivce (EKS), you will also need to add variables AWS_ACCESS_KEY_ID and AWS_SECRET_ACCESS_KEY.
That’s it. We have a repository that defines our production environment, and we provided Gitpod with the variables it needs. All that’s left is to go back to the forked repository in GitHub and click the green Gitpod button.
If you do not see the Gitpod button, you probably forgot to install the Chrome extension. If that’s the case, please head to Gitpod Chrome Extension. Alternatively, especially if Chrome is not your browser of choice, you can prefix the repository URL with https://gitpod.io/#. In my case, the full URL would be https://gitpod.io/#https://github.com/devopsparadox/argocd-production.
A few moments later, we should be redirected to the newly created Gitpod workspace with everything we might need to work with that repository.
For example, we can execute the commands that follow in the terminal located at the bottom.
kubectl --namespace production
    get namespaces

kubectl --namespace production
    get pods
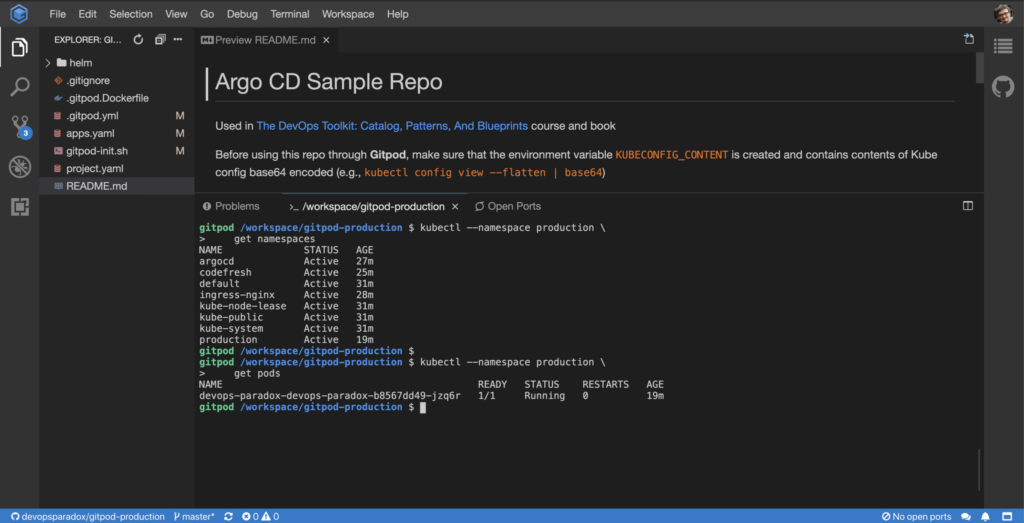
Those commands demonstrated that kubectl is already installed and that it is configured to communicate with our cluster.
The output of the first command should show the Namespaces in your cluster. What makes it “special” is that there is a new Namespace called production. That was created for us a few moments ago. Similarly, the latter command should show that the newly created Namespace already has an application deployed. That’s the one that is defined inside the helm/templates directory in that repository.
We got that application running inside the cluster because the process initiated during the creation of the workspace sent a request to Argo CD to create the app of apps that defines the desired state of the production environment.
We got quite a few other things, but we are not going to comment on them. First of all, we already established that you are familiar with Gitpod because you watched Gitpod – Instant Development Environment Setup. Similarly, I am sure that this is not your first contact with Argo CD. I hope you watched Argo CD: Applying GitOps Principles To Manage Production Environment In Kubernetes so that I do not need to go through the basics right now.
I encourage you to explore the files .gitpod.yml and .gitpod.Dockerfile. All the “magic” is defined there. But do not do it straight away. Right now, I want us to create a workspace for one of the demo applications. We’ll use that opportunity to dive a bit deeper into the “magic” behind the workspaces I defined.
Creating an Application Development Environment
Now that our production environment is defined in the Git repository and that we have a development workspace to do whatever we might need to do in production, we can turn our attention to an application workspace.
Please open vfarcic/gitpod-demo-cf and fork the repository.
The README.md file of the newly forked repo provides the information we need to create a Gitpod workspace.
Feel free to switch to the edit mode, and you’ll see that the blue Open in Gitpod button is just a link to the repository prefixed with https://gitpod.io/#.
Now, in the case of that application, I assumed that you already have a Codefresh account. If you do not, please visit codefresh.io to register. It’s free (for life), so there’s nothing to lose and a lot to gain. Also, I assumed that you already set up the integration with Docker Hub and named it docker-hub. If you haven’t, please visit Integrate DockerHub in Codefresh pipelines.
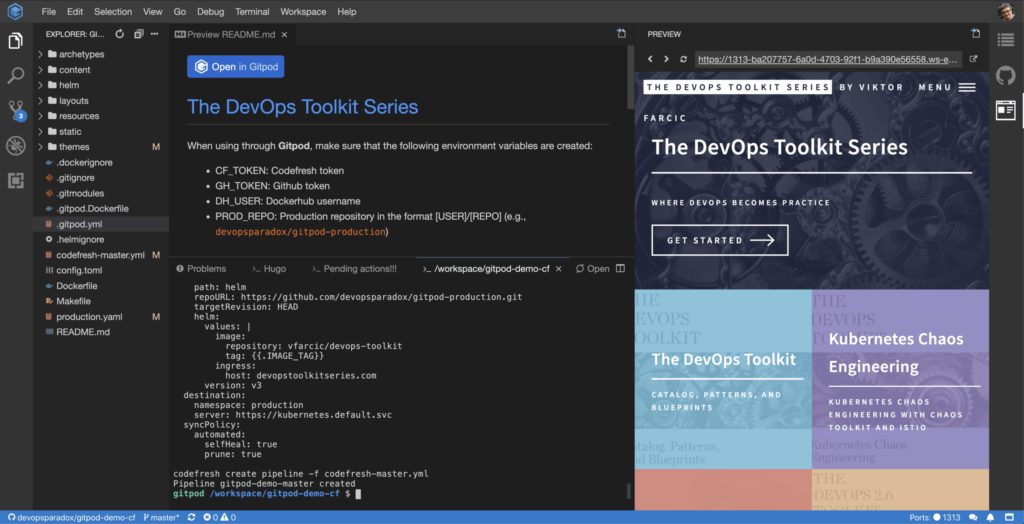
Finally, we’ll need a few environment variables. Open gitpod.io/settings and create them in the same way as the one we needed for the gitpod-production repo. The variables are as follows.
- CF_TOKEN with the Codefresh token (visit Codefresh: Create Tokens if you do not have one).
- GH_TOKEN with the GitHub token (visit GitHub: Creating a personal access token if you do not have one).
- DH_USER with the Docker Hub username.
- PROD_REPO with the production repository we forked earlier and in the format [USER]/[REPO] (e.g.,
devopsparadox/gitpod-production)
Now that we have the variables in place, all that’s left is to go back to the repository we just forked and click the green Gitpod button or prefix the repository URL with https://gitpod.io/# if you do not have the Chrome extension.
A few moments later, we should have a workspace for developing the application defined in that repository. Since we might want to interact with Codefresh pipelines, the codefresh CLI is already installed. Moreover, it already created the pipeline that will be triggered every time we push a change to the master branch.
Since the repository contains a Hugo application, a hugo server is already running and monitoring changes. It will recompile the app every time we change the source code available in that Gitpod workspace.
We also got a preview of the application opened on the right-hand side of the screen.
Finally, it reconfigured the definition of the Argo CD application that will be used for deploying the app to production.
All in all, we got everything we might need to work on that application. Everything we would usually need when developing on a laptop is already available and configured in that workspace. Nevertheless, the process went further than that. We got a Codefresh pipeline that will perform continuous delivery steps whenever we push changes to GitHub, and we have Argo CD that will ultimately deploy new releases to production. The best thing is that we got all that by forking a few repos and clicking Gitpod buttons.
We will soon explore how all that “magic” happened. For now, there is one thing missing. The Codefresh pipeline that was created for us needs the value of the variable GITHUB_TOKEN. That could have been automated as part of Gitpod workspace creation, but I left it out as a security measure.
Please open Codefresh pipelines, select the newly created gitpod-demo-master pipeline, add the value of the variable GITHUB_TOKEN, and SAVE the changes.
That’s it. Now we are truly finished, and the only thing left is to start working on the application. But, before we do that, let’s take a quick look at the few files that enable the “magic”.
Please go back to the Gitpod workspace.
The UI of the workspace is almost entirely occupied with Theia. If you are already using Visual Studio Code, you’ll notice that Theia is very similar. The significant difference between the two is that Theia belongs to Eclipse Foundation, making it vendor-neutral. There are other differences, but from the user’s perspective, they are almost the same. With Gitpod, we are getting an instance of Theia accessible through the browser in every workspace we create.
By default, we have files on the left-hand side, editor and terminals in the middle, and the preview of the application on the right.
Everything Gitpod needed to create the workspace is in .gitpod.yml and .gitpod.Dockerfile.
Please open .gitpod.yml, and you should see YAML that follows in the editor.
image:
  file: .gitpod.Dockerfile

tasks:
  - init: make init
  - command: hugo server --baseUrl $(gp url 1313) --appendPort=false
    name: Hugo
    openMode: tab-before
  - command: echo "Make sure to add the GITHUB_TOKEN variable to the Codefresh pipeline devops-toolkit-master"
    name: Pending actions!!!

ports:
  - port: 1313
    onOpen: open-preview
That YAML file defines what and when should something happen. During the initialization phase, we are running make init target that defines all the commands required for setting up the tools we need. Feel free to open Makefile and see the target in more detail.
Further on, we are executing hugo server that runs and reloads the application that is currently available in the preview window.
Finally, there is an echo command reminding us that we should add the GITHUB_TOKEN variable to the Codefresh pipeline. We already did that, so we can ignore that message.
Each of the tasks is executed in a separate terminal session. That’s why we can see tabs like Hugo, Pending actions!!!, and the path of the current context at the bottom. The latter is the session in which the init instructions were executed and which we can use to run any other commands we might need during development. We could just as well start additional terminal sessions through the top-hand menu.
All in all, .gitpod.yml defines what should be executed depending on the phase of the lifecycle of the workspace. But, for all those tasks to be successful, we needed a few tools.
Gitpod workspace is essentially a container running in Cloud, and we can control which image is used to spin it up. The exact definition is in a typical Dockerfile, except that Gitpod assumes that it is named .gitpod.Dockerfile. Please open it by double-clicking .gitpod.Dockerfile from the list of files available in the left-hand menu.
The content of the file is as follows.
FROM gitpod/workspace-full

RUN brew install hugo
RUN mkdir -p /home/gitpod/codefresh/bin
RUN curl -L -o codefresh.tar.gz https://github.com/codefresh-io/cli/releases/download/v0.73.22/codefresh-v0.73.22-linux-x64.tar.gz
RUN tar -xvzf codefresh.tar.gz -C /home/gitpod/codefresh/bin
RUN chmod +x /home/gitpod/codefresh/bin/codefresh
RUN rm codefresh.tar.gz
ENV PATH $PATH:/home/gitpod/codefresh/bin
If you already used Dockerfile to define container images, what you see in front should be familiar. The image is based on the “standard” Gitpod workspace image (gitpod/workspace-full), which already packs the most commonly used tools (e.g., git, zip, code completion scrips, jq, vim, etc.). We are extending that base image with the additional tools we need. Specifically, we added hugo and codefresh CLIs.
All that’s left is to simulate development as a way of confirming that everything works as expected.
Combining Development With Continuous Delivery And GitOps
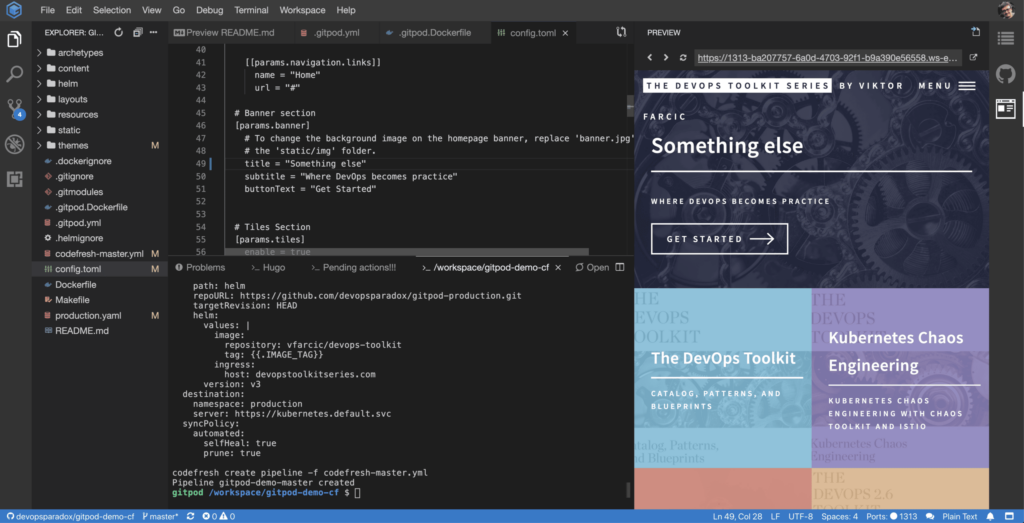
Please open config.toml file and change the title inside the [params.banner] section. Make sure to save the changes and click the refresh icon in the top-left section of the preview.
Voila! The preview was updated, and the title of the application is whatever you changed it to. In my case, the new title is now Something else, as you can see in the screenshot below.
Now, let’s imagine that we are finished writing code, previewing changes, unit testing, and doing whatever else we usually do. We’ll pretend that we finished working on a new feature and push the changes to the GitHub repo.
git add .

git commit -m "New title"

git push
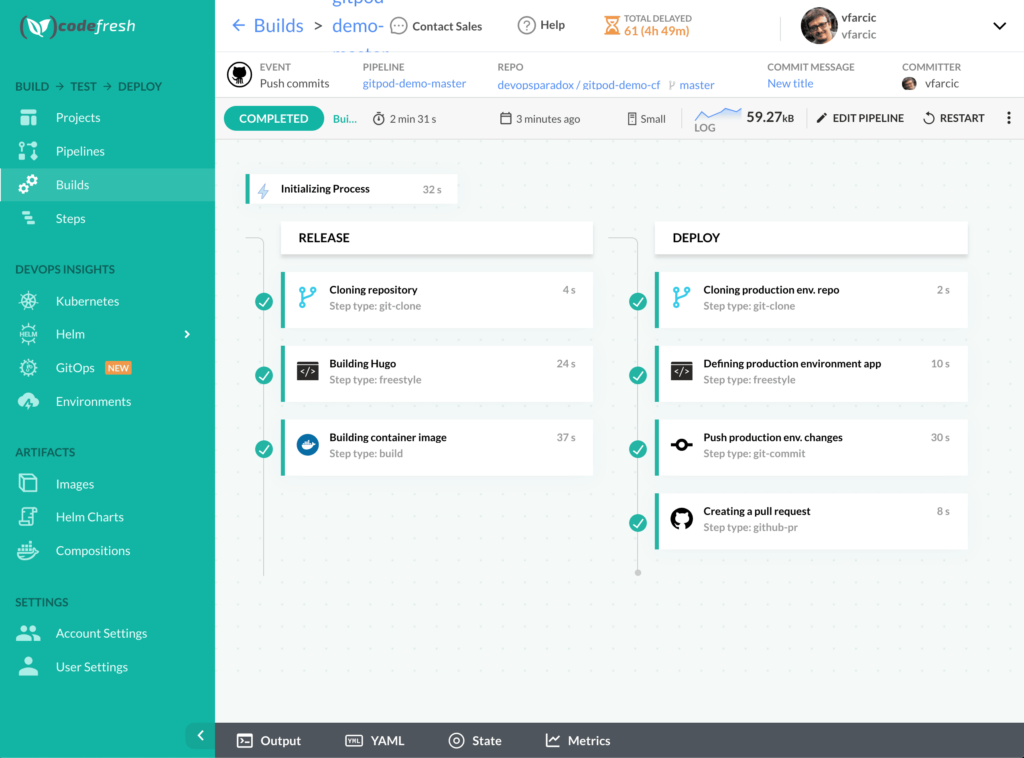
That triggered a Codefresh pipeline, which should clone the application code, build the app and the container image, push it to Docker Hub, and modify the desired state of production by making changes to the gitpod-production repo.
We can see the progress of the pipeline by opening codefresh.io, navigating to Builds from the left-hand menu, and selecting the latest one.
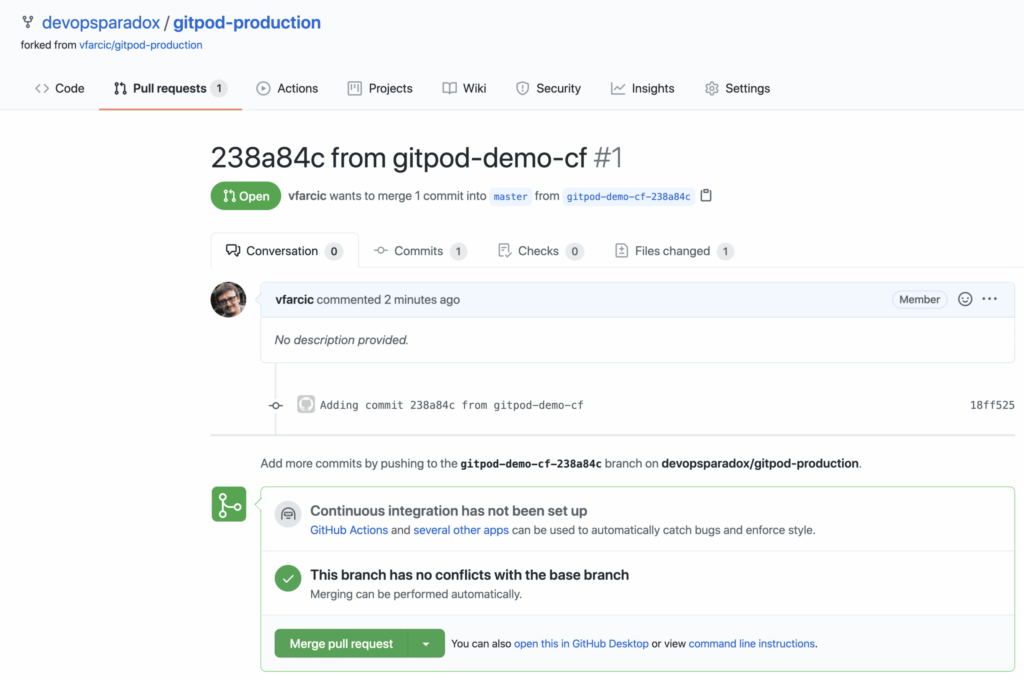
Once the pipeline build is finished, we should have a new pull request in the gitpod-production. That means that we are practicing continuous delivery that results in a release deployable to production and waiting for manual confirmation, which, in this case, consists of merging the PR. If the pipeline pushed changes directly to the mainline, it would be continuous deployment, which would result in a new release running in production without any manual confirmation.
Please go to the forked gitpod-production repository, select the Pull requests tab, and enter inside the newly created PR.
Feel free to explore the changes, make comments, and do whatever else you might be doing before merging PRs to the mainline. Merge it once you’re done “playing”, go back to the gitpod-production Gitpod workspace, and execute the command that follows.
kubectl --namespace production
    get pods
The output should be similar to the one that follows.
NAME                              READY STATUS  RESTARTS AGE
devops-paradox-devops-paradox-... 1/1   Running 0        45m
devops-toolkit-devops-toolkit-... 1/1   Running 0        49s
If you still see only devops-paradox, you might need to give Argo CD a bit more time to detect changes in the repo and synchronize. Wait for a few moments and re-run the previous command.
We can see that Argo CD detected the changes to the production repo and deployed the new application. We closed the circle. We are victorious. Hurray!
All that’s left is for you to keep “playing” inside the two Gitpod workspaces we created. You should be able to explore the details I forgot to mention on your own.