Quick start: Creating environments
Explore how environments empower application promotion and deployment
Environments quick start
In this quick start, we’ll create different environments that map to the typical stages of the software development lifecycle (SDLC). Environments provide structure for organizing applications and managing promotions.
We’ll do the following:
- Create three different environments,
dev,qa, andprod. - Map them to a cluster, typically the one where the GitOps Runtime is installed.
- Define namespaces within the cluster for each environment, ensuring clear separation between development, testing, and production.
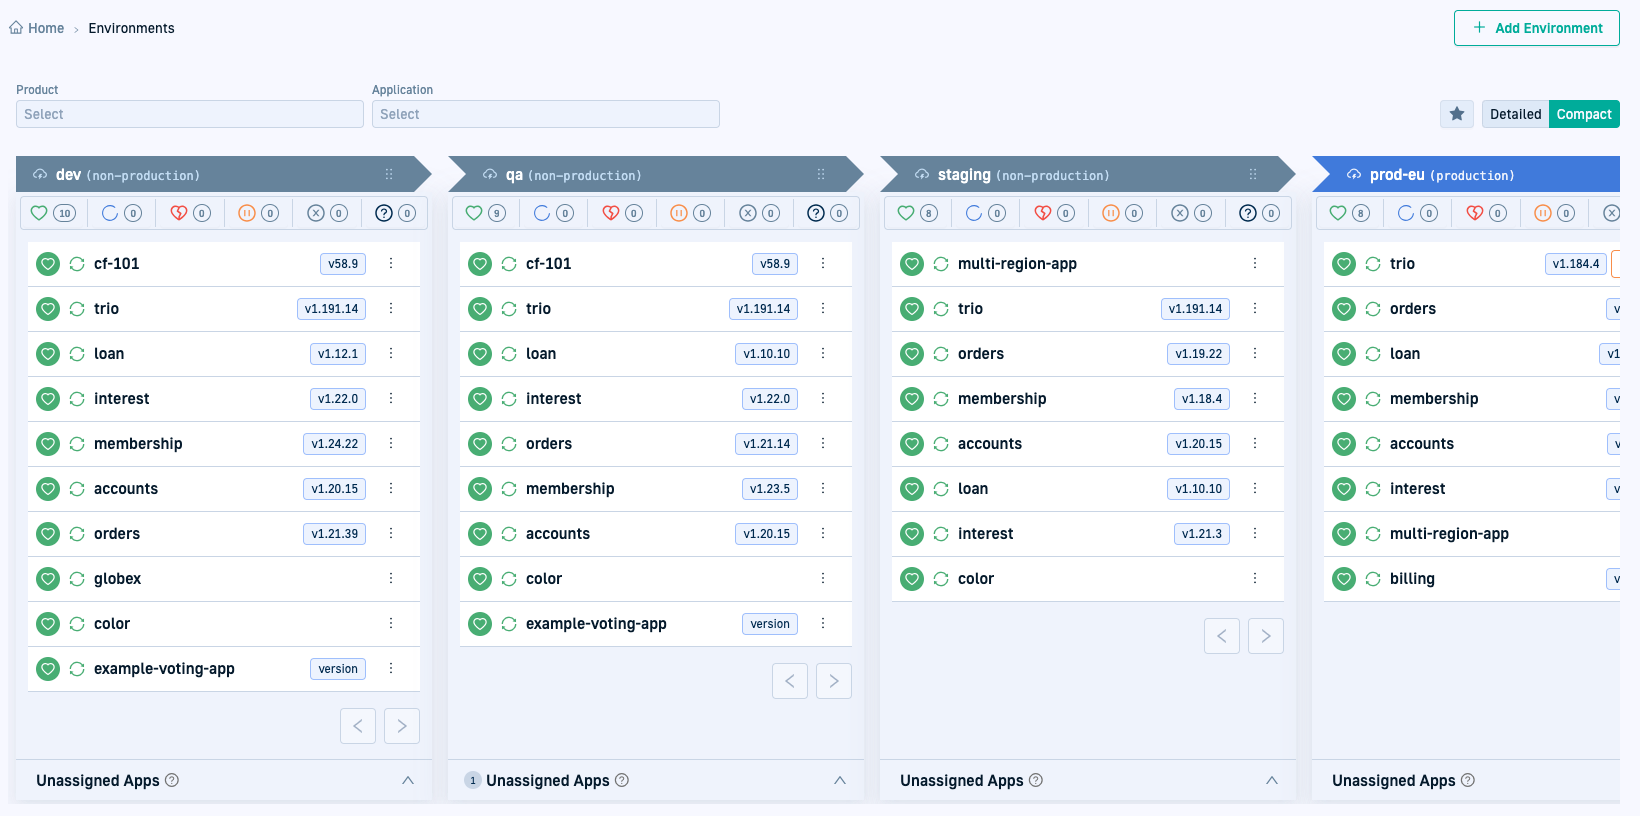
Products and their applications are displayed in the environments, providing visibility into where each version is deployed.
Why create environments?
Environments are key to managing and promoting applications effectively.
They provide a structured, intuitive way to answer the question: What’s running where?
Environments help you:
- Mirror your SDLC: Align applications with their development stages, providing clarity and structure.
- Simplify promotions: Easily move applications through stages, ensuring consistency.
For detailed information, see Environments.
Requirements
Create an environment
Let’s go ahead and create an environment. Setting up environments is as simple as mapping the environment to one or more clusters and namespaces.
For this quick start, we’ll create three environments: dev, qa, and prod on the cluster where you installed the GitOps Runtime.
We’ll map the environments to in-cluster, associate each with a different namespace, to which we’ll promote the applications.
Step-by-step
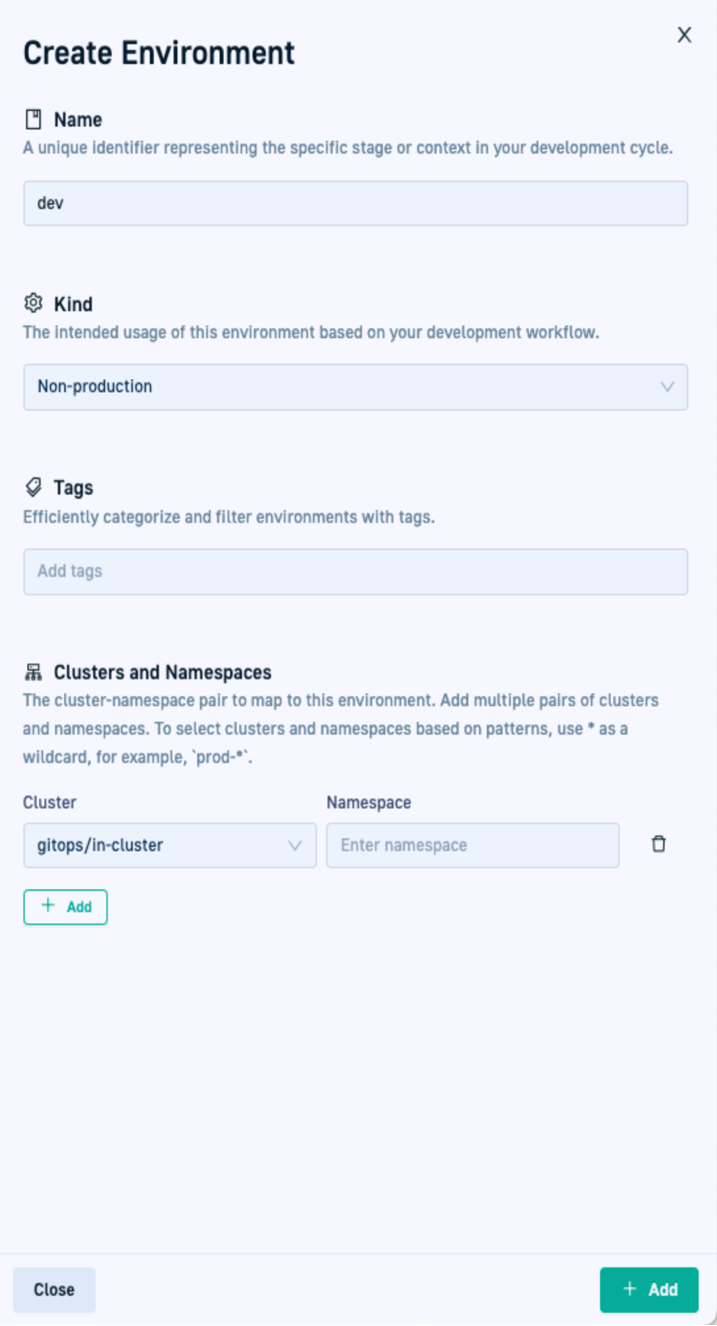
- In the Codefresh UI, from the sidebar, select Environments, and then click Add Environment.
- Define the following:
- Name: A unique name for your environment, which is meaningful in the context of your development and deployment cycle.
For the first environment, we’ll use
dev. - Kind: The purpose of the environment. Select Non-production where typically development, testing, and staging versions of applications are deployed.
The Kind property also defines the rules for promotions and ABAC (Attribute Based Access Control) permissions. - Clusters and Namespaces: Map the environment to the cluster with the GitOps Runtime.
For the quick start, we’ll map the environment to thein-clusterand thedemo-devnamespace. The namespace is associated with thedevenvironment, and thedemoapplications we’ll add later on.
- Name: A unique name for your environment, which is meaningful in the context of your development and deployment cycle.
For the first environment, we’ll use
- Click Add.
The environment is displayed in the Environments dashboard. - Repeat step 1 through step 3 to create the two other environments:
qaandprod.
For the quick start, we’ll again map these environments toin-clusterand associate them with thedemo-qaanddemo-prodnamespaces respectively, for thedemoapps we created earlier.
View Environments dashboard
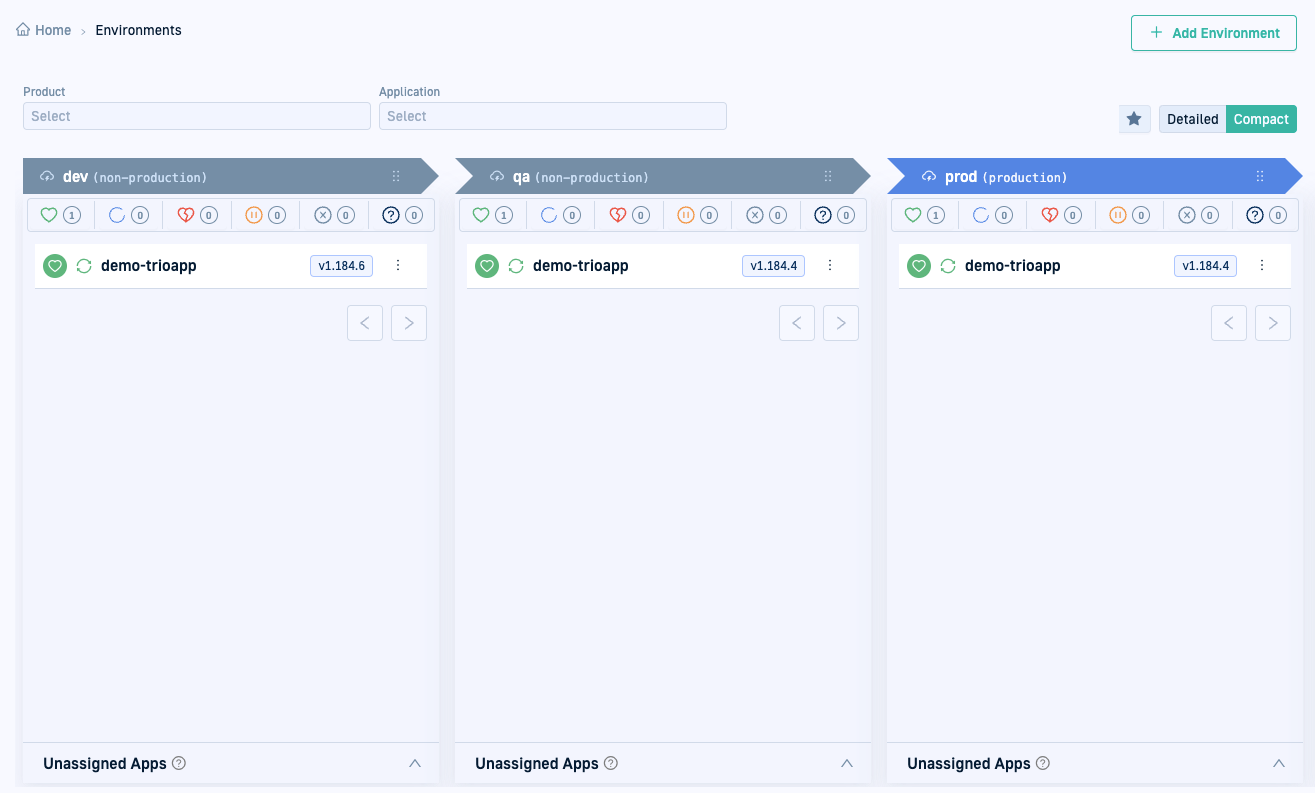
Check the Environments dashboard to see how the environments are populated with the applications you created. Here’s an example of the Environments dashboard with the three environments, and the products and their applications in the clusters and namespaces mapped to them.
- From the sidebar, select Environments.
Each environment displays the product you created. For example,
demo-trioapp. - Mouse over the product name in each environment to see the associated applications. For example,
demo-trioapp-dev,demo-trioapp-qa, anddemo-trioapp-prod.
What’s next
Now that you’ve set up environments, and the other entities required for GitOps-based promotions, you can trigger promotions to move application versions across environments.
We’ll start with a simple drag-and-drop promotion.


