Quick start: Creating products and applications
Create Argo CD applications and group them within products
Applications quick start
In this quick start we’ll create applications — the fundamental building blocks of software delivery.
Applications are Argo CD applications that represent Kubernetes resources deployed and managed through GitOps principles.
Applications, products, and environments, complete the core entities needed for GitOps promotions.
We’ll do the following:
- Create three applications
- Create a product for the applications
- Explore the Product Dashboard
For detailed information, see Argo CD applications.
Products in GitOps
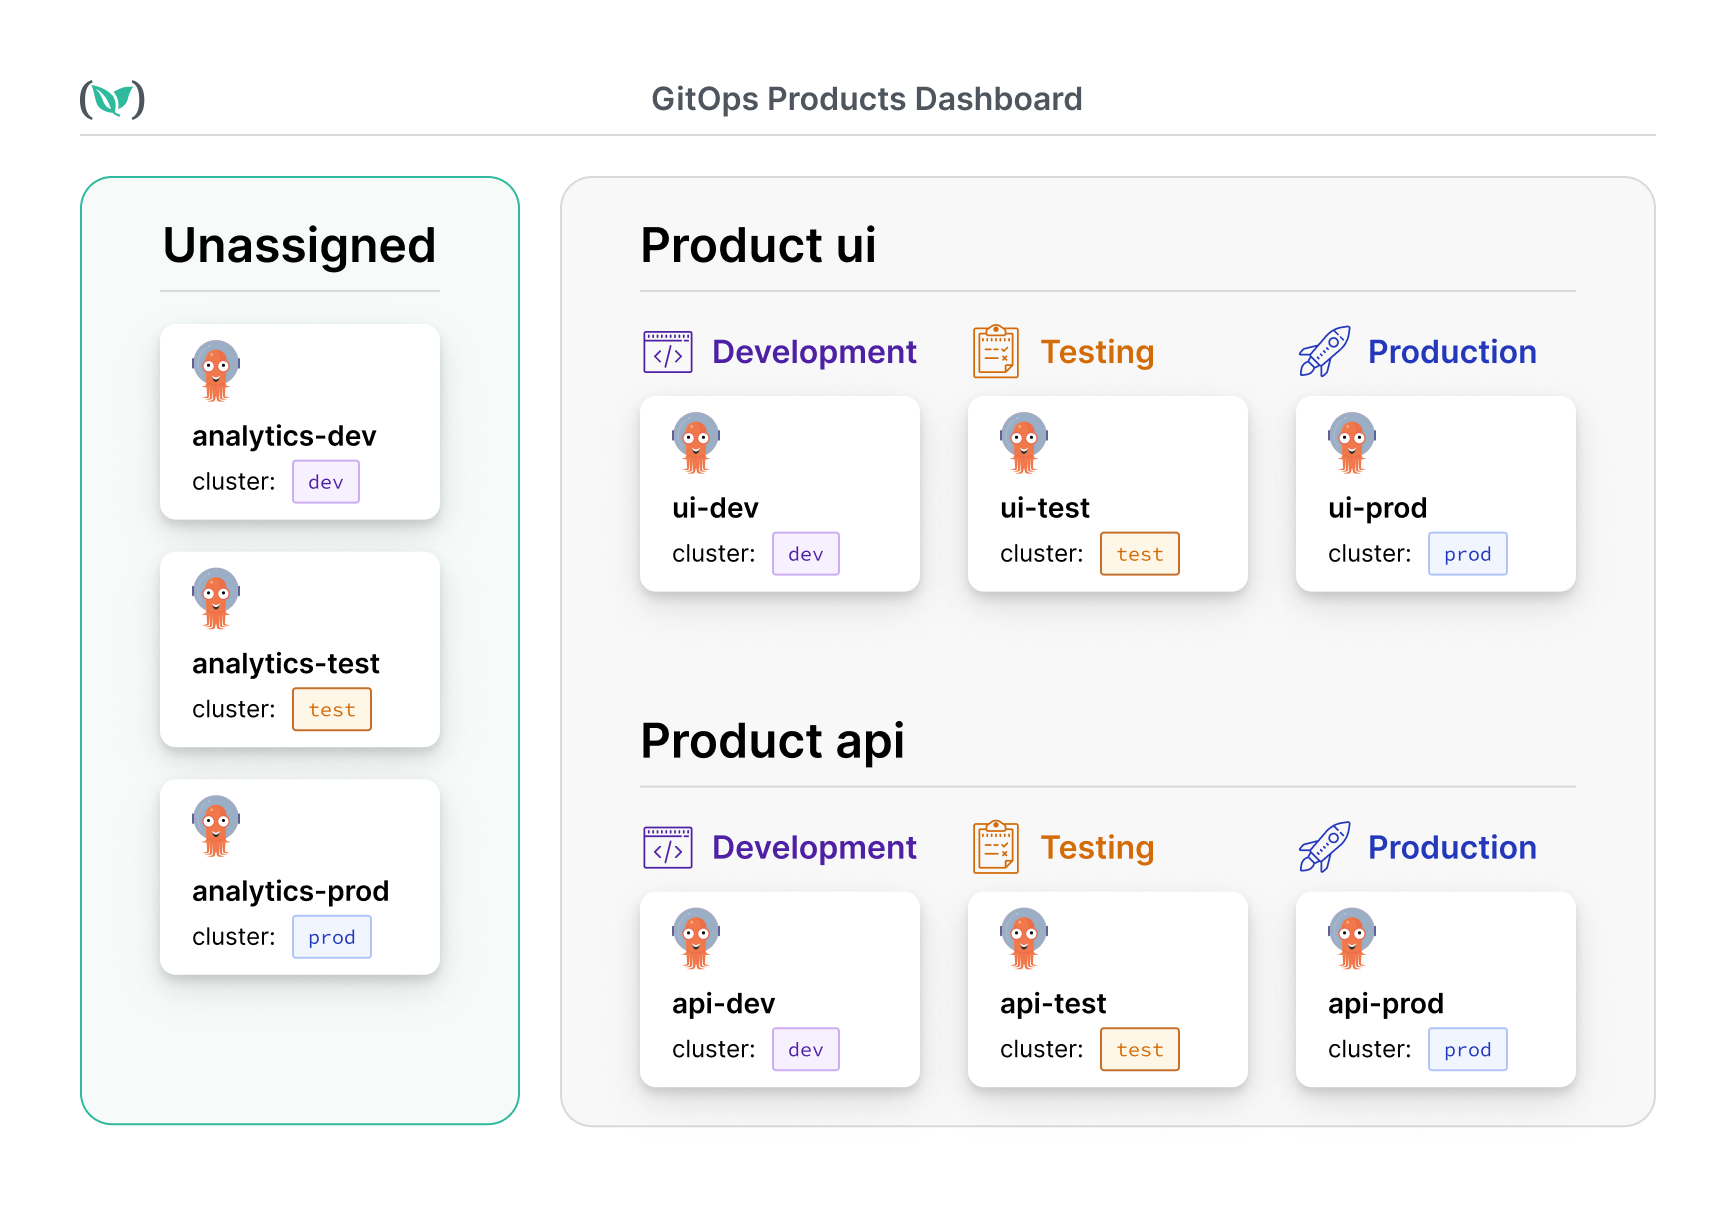
Products are one of the three core entities for promotions in Codefresh GitOps, bridging the gap between environments and applications. They also amplify the capabilities of applications by grouping and managing them as cohesive units.
For detailed information, see Products.
Why create products?
Here are a few reasons why you would want to create products to manage your applications.
-
Bridging applications and environments: By grouping related applications within a product, you ensure visibility and control over their deployment paths, keeping all components in sync as they move through environments together. Products reflect how developers perceive applications (such as microservices)- not as separate entities across environments, but as a single entity with minor configuration differences.
-
Unified application promotion and deployment: Managing multiple individual Argo CD applications across various environments can be complex. Products streamline this process by grouping related applications, enabling more efficient and cohesive management and promotion.
Example Git repo
To follow along, use the example GitHub repository which contains the application configuration manifests. These manifests are preconfigured to help you deploy the applications easily to their respective environments.
Demo applications folder
The demo-applications folder in the same repository provides preconfigured Helm charts for creating the applications. Each subfolder corresponds to a specific application and includes:
Chart.yaml: Defines the application version (appVersion) and dependencies.values.yaml: Contains environment-specific configurations.- Other Helm files: Provide a complete Helm chart structure for deploying the application.
How to use the files
When you create the application, to use the resources, select the folder corresponding to the target environment. For example, trioapp-dev for development.
Requirements
- GitOps Runtime
- Git Source to store application manifests
Create your first application
Create the first application to correspond to the version of the application you want in the development environment.
For the quick start, we’ll do the following:
- Create the
demo-trioapp-devapplication - Create a product for this application, the
demo-triopappproduct - Configure other required application configuration settings
- Commit the application to a Git Source
Step-by-step
- In the Codefresh UI, from the sidebar, select GitOps Apps.
- Click Add Application on the top-right.
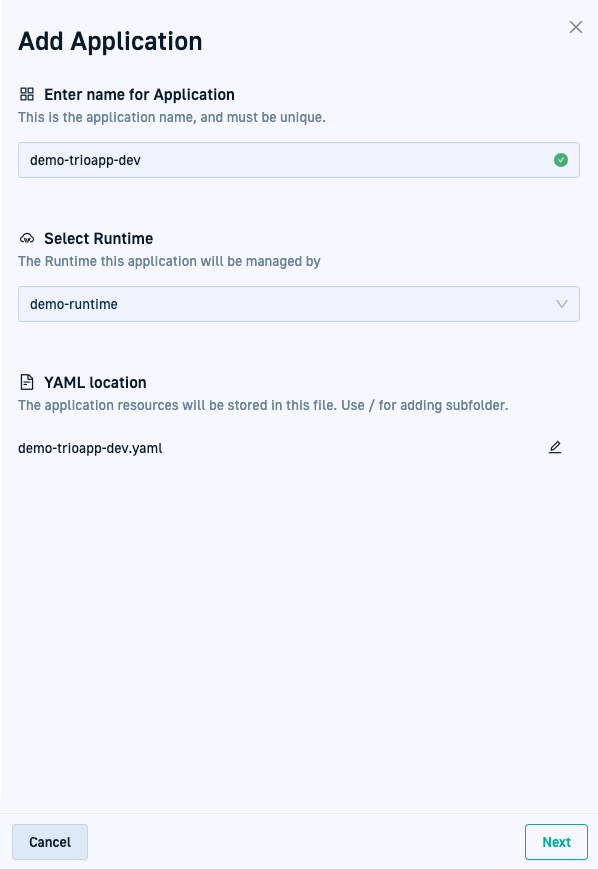
- In the Add Application panel, add definitions for the application:
- Application name:
demo-trioapp-devfor our first application.
We added-devto the application name to differentiate it from the otherdemo-trioappapplications we’ll create. - Runtime: The GitOps Runtime you installed to associate with the application,
demo-runtimefor the quick start. - Name for YAML file: The name of the application’s configuration manifest, assigned on commit to Git. By default, the manifest is assigned the application name.
You can click the Edit icon and change the name if you want to.
- Application name:
NOTE
You cannot change the application definitions once you continue to the Configuration settings.
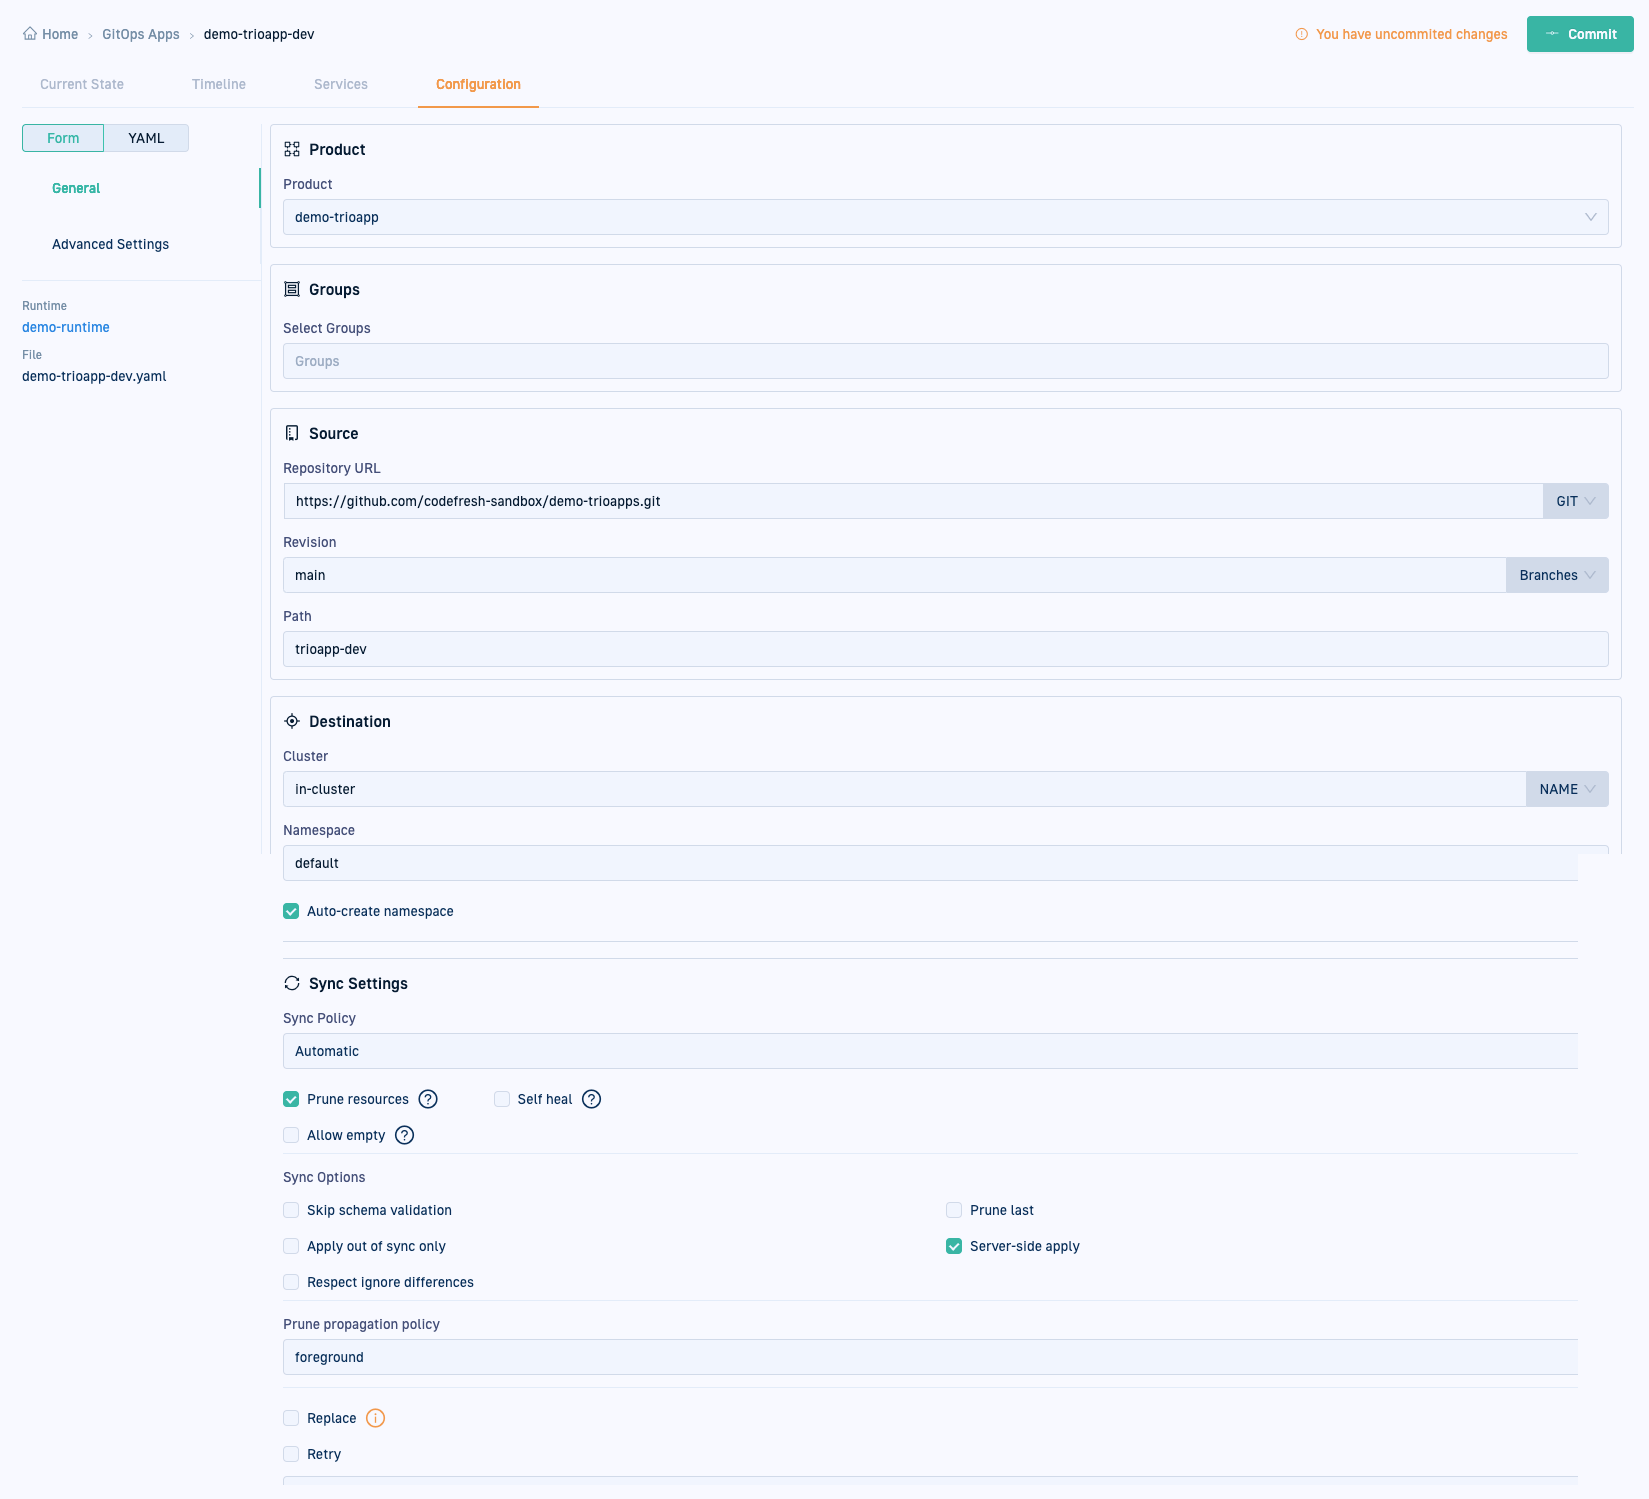
- Click Next to go to the Configuration tab. By default you are in Form mode. You can toggle between Form and YAML modes as you define the application’s configuration settings.
- In the General settings for the application, first create a new product for the application:
- Click the Product dropdown, and then click Add Product.
- Type the name of the product, for example,
demo-trioapp.
The product is tagged with the label New, and the application is automatically assigned to the product.
- Define the other required General settings for the application:
- Repository URL: The URL to the repo in Git where you created the YAML resource files for the application.
For the example Git repo, use this repository URL: https://github.com/codefresh-sandbox/codefresh-quickstart-demo - Revision: The branch in Git with the resource files. For example,
main. - Path: The folder in the Git repository with the resource files for the application.
In the follow along Git repo, if you are creating the development version of the application, the path should point to the resource files indemo-applications/trioapp-devin example repo - Namespace: Define a namespace in the environment where you are creating the application. For example,
demo-dev. - Auto-create namespace: If you defined a namespace which doesn’t already, select this option to ensure that the namespace is automatically created.
- Sync Policy:
Change to Automatic if needed.
Select Prune resources to automatically remove unused resources.
Select Self-heal to alway enforces a sync to the desired state in Git, if and when there is a change to the actual state in the cluster.
- Repository URL: The URL to the repo in Git where you created the YAML resource files for the application.
- Retain the default Advanced Settings.
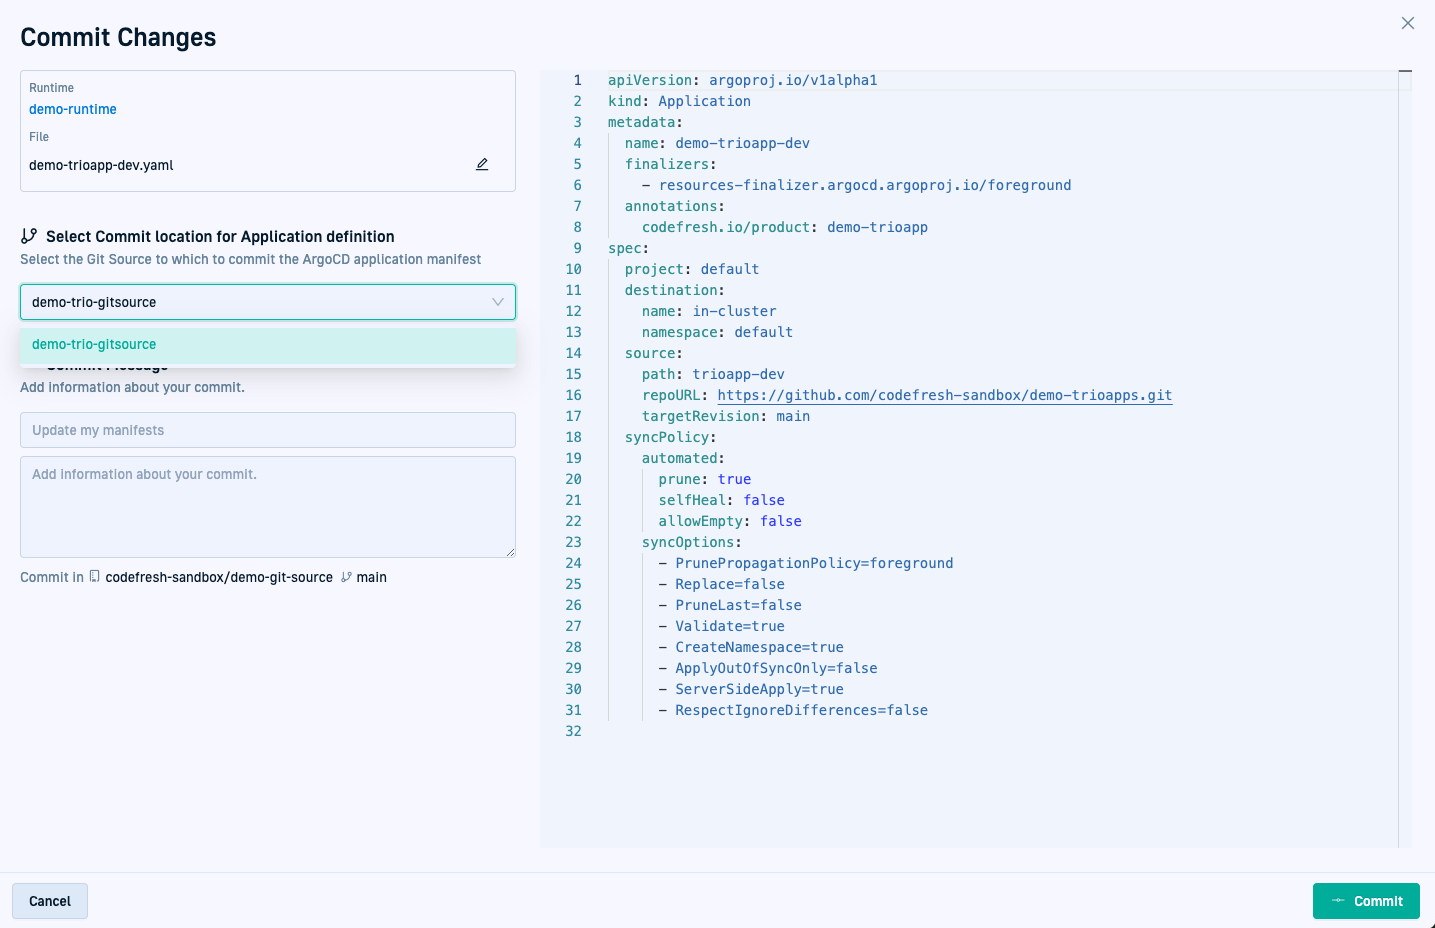
The only setting to note here is that we are creating a Helm application. - To commit all changes, click Commit.
The Commit form is displayed with the application’s definitions on the left, and the read-only version of the manifest with the configuration settings you defined on the right. - Select the Git Source you added to the Runtime, which is the Git repository to which to commit the application’s manifest.
For example, the Git Source which we created earlier, thedemo-trio-gitsource.
- Add a commit message and then click Commit at the bottom-right of the panel.
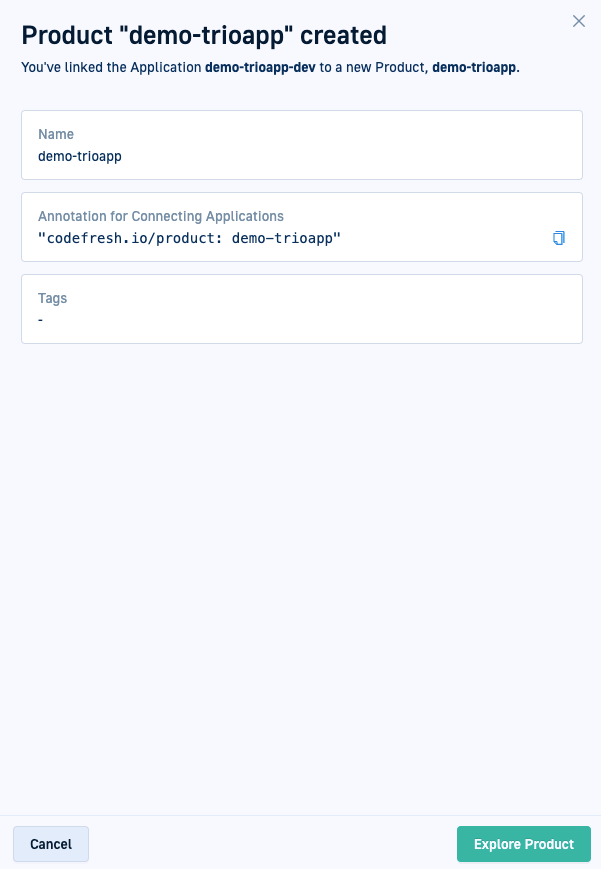
- A summary screen is displayed for the new product,
demo-trioapp, including the annotation that links the application to the product. - Clicking Explore Product takes you to the Product Dashboard.
We’ll create the testing and production versions of the application, and then explore the Product Dashboard.
- A summary screen is displayed for the new product,
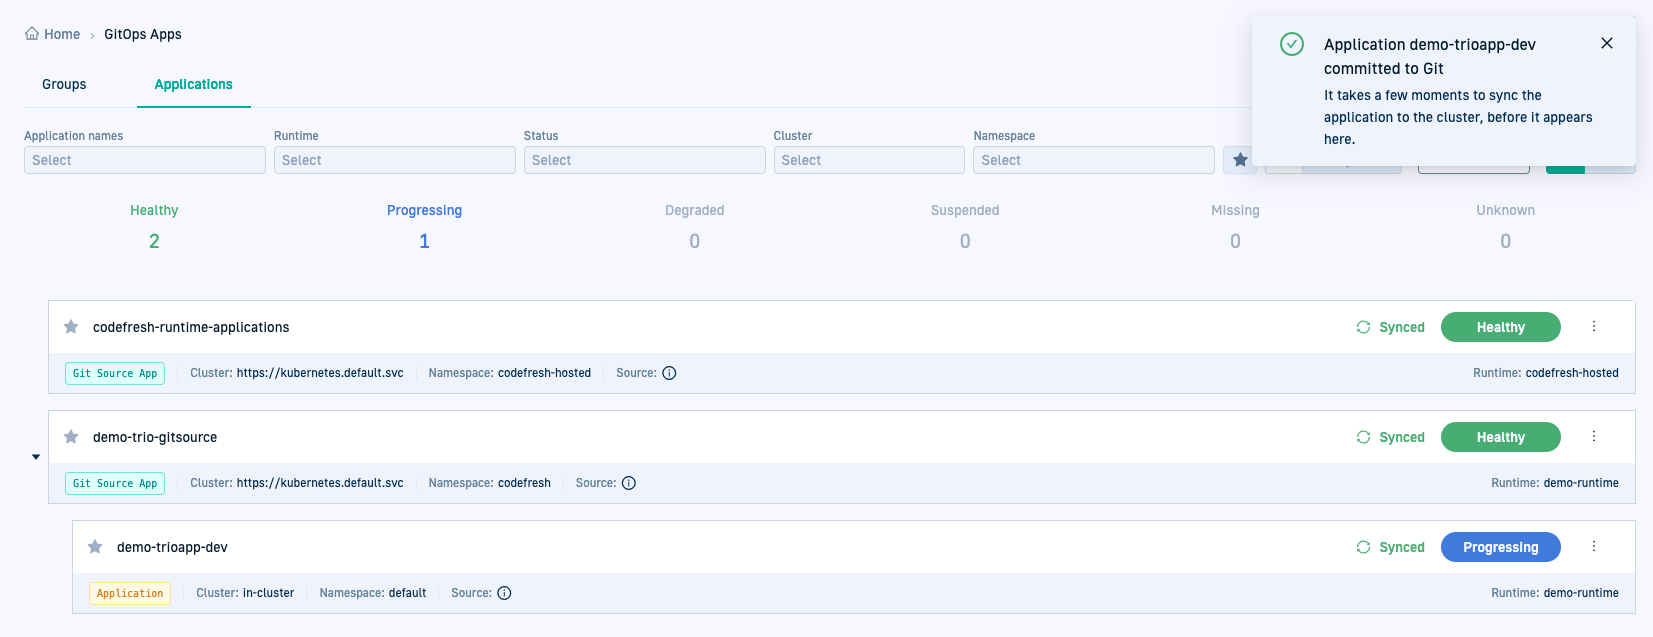
- View the new application in the GitOps Apps dashboard.
You may have to wait for a few seconds until the application is synced to the cluster for it to be displayed in the dashboard.
- Continue with Create additional applications.
YAML manifest for development version of application
Here’s an example of the YAML manifest generated for the demo-trioapp-dev application.
apiVersion: argoproj.io/v1alpha1
kind: Application
metadata:
  name: demo-trioapp-dev
  finalizers:
    - resources-finalizer.argocd.argoproj.io/foreground
  annotations:
    codefresh.io/product: demo-trioapp
spec:
  project: default
  destination:
    name: in-cluster
    namespace: demo-dev
  source:
    path: demo-applications/trioapp-dev
    repoURL: https://github.com/codefresh-sandbox/codefresh-quickstart-demo.git
    targetRevision: main
  syncPolicy:
    automated:
      prune: true
      selfHeal: true
      allowEmpty: false
    syncOptions:
      - PrunePropagationPolicy=foreground
      - Replace=false
      - PruneLast=false
      - Validate=true
      - CreateNamespace=true
      - ApplyOutOfSyncOnly=false
      - ServerSideApply=true
      - RespectIgnoreDifferences=false
Create additional applications
Follow the steps in Create your first application to create two more applications, representing the testing and production versions in the application lifecyle.
Remember to also select the same product for each application as you create it.
Important
When creating the two additional applications, make sure to update the following settings accordingly:
- Path: The folder in the Git repository with the resource files for the application.
In the example Git repo, for the testing and production versions of the application, the path should point to the application’s resource files indemo-applications/trioapp-qaanddemo-applications/trioapp-prodfolders in demo-applications - Namespace: Define different namespaces in the different environments where you are creating the applications. For example,
demo-qaanddemo-prod.
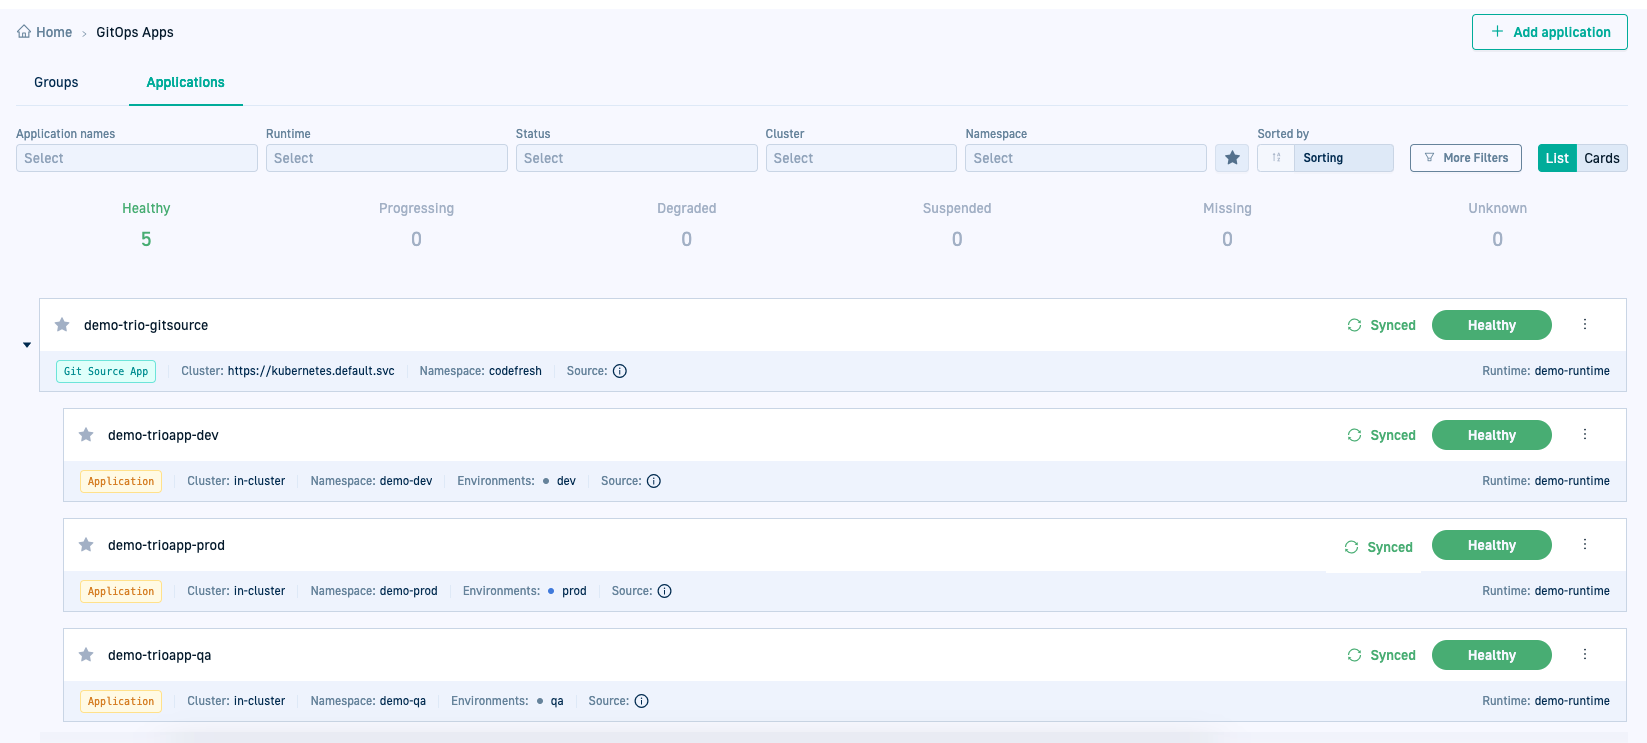
Here’s a view of the GitOps Apps dashboard with all the three applications linked to their Git Source.
YAML manifest for testing version of application
Here’s an example of the YAML manifest generated for the demo-trioapp-qa application.
apiVersion: argoproj.io/v1alpha1
kind: Application
metadata:
  name: demo-trioapp-qa
  finalizers:
    - resources-finalizer.argocd.argoproj.io/foreground
  annotations:
    codefresh.io/product: demo-trioapp
spec:
  project: default
  destination:
    name: in-cluster
    namespace: demo-qa
  source:
    path: demo-applications/trioapp-qa
    repoURL: https://github.com/codefresh-sandbox/codefresh-quickstart-demo.git
    targetRevision: main
  syncPolicy:
    automated:
      prune: true
      selfHeal: true
      allowEmpty: false
    syncOptions:
      - PrunePropagationPolicy=foreground
      - Replace=false
      - PruneLast=false
      - Validate=true
      - CreateNamespace=true
      - ApplyOutOfSyncOnly=false
      - ServerSideApply=true
      - RespectIgnoreDifferences=false
YAML manifest for production version of application
Here’s an example of the YAML manifest generated for the demo-trioapp-prod application.
apiVersion: argoproj.io/v1alpha1
kind: Application
metadata:
  name: demo-trioapp-prod
  finalizers:
    - resources-finalizer.argocd.argoproj.io/foreground
  annotations:
    codefresh.io/product: demo-trioapp
spec:
  project: default
  destination:
    name: in-cluster
    namespace: demo-prod
  source:
    path: demo-applications/trioapp-prod
    repoURL: https://github.com/codefresh-sandbox/codefresh-quickstart-demo.git
    targetRevision: main
  syncPolicy:
    automated:
      prune: true
      selfHeal: true
      allowEmpty: false
    syncOptions:
      - PrunePropagationPolicy=foreground
      - Replace=false
      - PruneLast=false
      - Validate=true
      - CreateNamespace=true
      - ApplyOutOfSyncOnly=false
      - ServerSideApply=true
      - RespectIgnoreDifferences=false
Explore the Product Dashboard
Now that we have created the three applications for the demo-trioapp product, let’s explore the Product Dashboard for the same.
The Product Dashboard provides a centralized view of your product’s applications across environments, including release versions, dependencies, and insights from Kubernetes, Git, and issue-tracking tools.
- From the sidebar, select Products, and then click the name of the product. For example
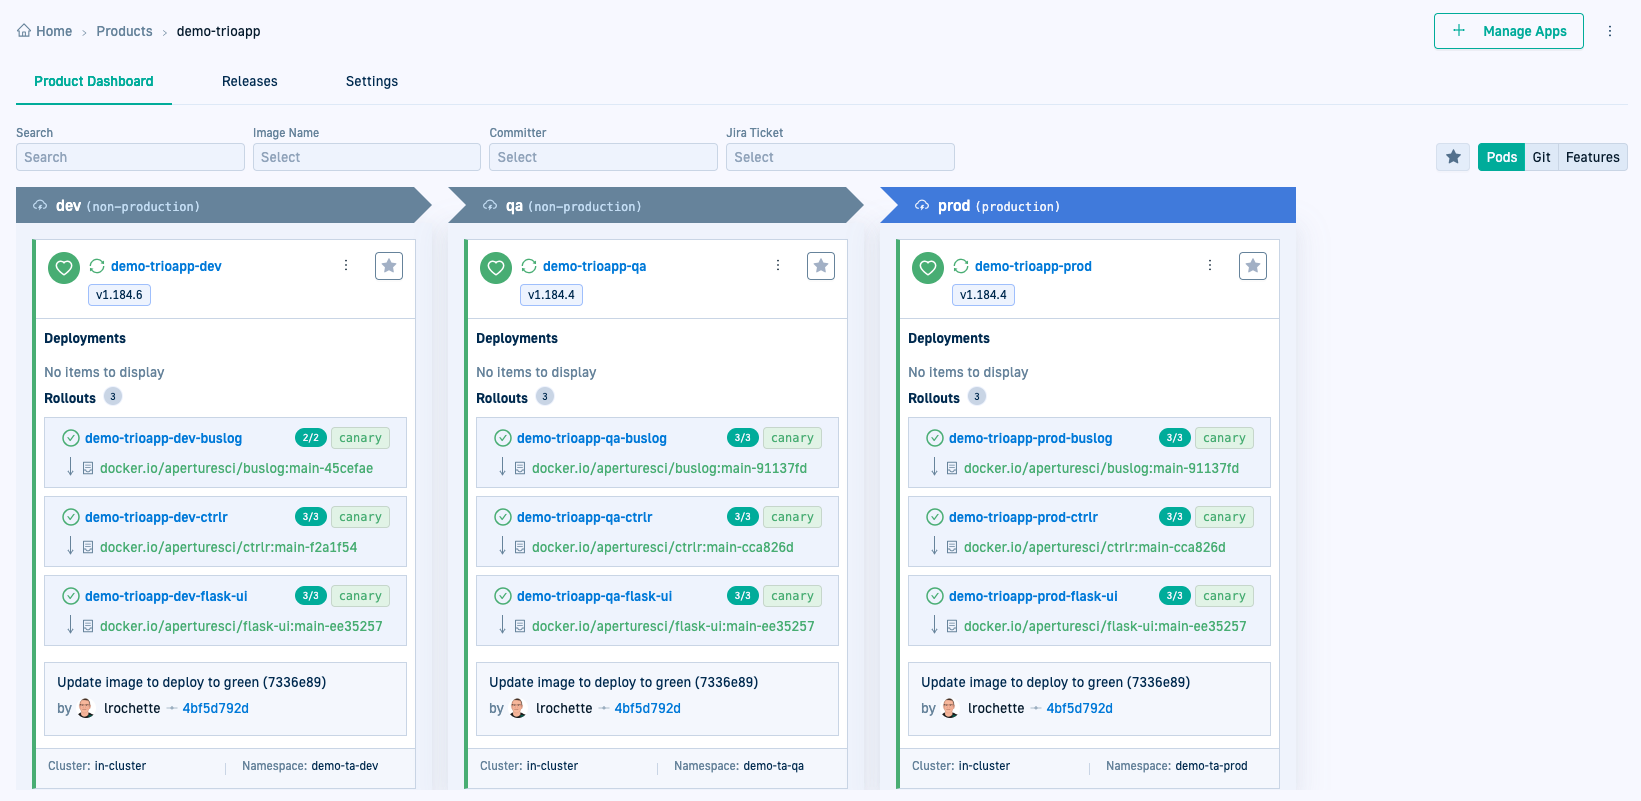
demo-trioapp. Here’s an example of the Product Dashboard fordemo-trioappwith the applications we created for the quick start.
Key features to focus on
- Release versions: Quickly identify which version of an application is deployed in each environment to maintain consistency or troubleshoot issues. For detailed information, see Configuring app version for promotions.
- Dependency insights: Compare dependency versions across environments to detect inconsistencies or verify production readiness.
-
Integrated application insights: Use Git commit history, Kubernetes data, and feature mappings to evaluate changes, troubleshoot, and plan promotions.
For the Git and Features tabs to work seamlessly, ensure your CI/CD systems are integrated.
If you have CI platforms/tools already in place, be it Codefresh pipelines, GitHub Actions, or Jenkins, you can integrate them with Codefresh GitOps. The same applies to issue-tracking tools like Jira.
For setup instructions, see Image enrichments with GitOps integrations.
What’s next?
We’ll create the final entity essential for promoting and deploying applications: Environments.
Environments represent stages in your software development lifecycle, providing a structured way to track and manage your applications.
Let’s continue by creating environments.
