Create `codefresh-guestbook` Argo CD application
Let’s start by creating a simple Argo CD application, codefresh-guestbook, in the Codefresh UI.
We’ll create the application without resources and then define/add resources in the next step.
For detailed information, see Creating Argo CD applications.
How to
- In the Codefresh UI, from Ops in the sidebar, select GitOps Apps dashboard.
- Select Add Application on the top-right.
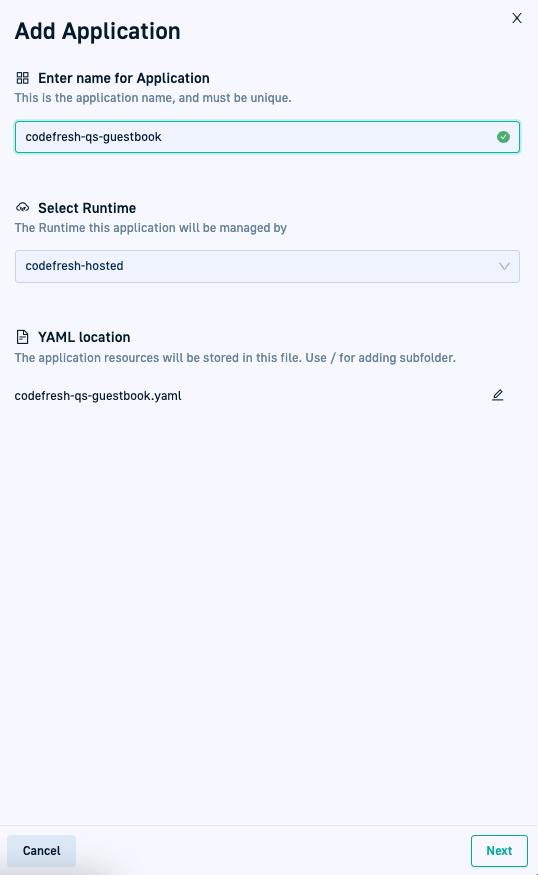
- In the Add Application panel, add definitions for the application:
- Application name:
codefresh-guestbookfor the quick start. - Runtime: The runtime to associate with the application,
hosted-runtimefor the quick start. - Name for YAML file: The name of the application’s configuration manifest, assigned on commit to Git. By default, the manifest is assigned the application name.
You can click the Edit icon and change the name, if needed.
- Application name:
NOTE
You cannot change the application definitions once you continue to the Configuration settings.
- Select Next to go to the Configuration tab.
By default you are in Form mode. You can toggle between the Form and YAML modes as you define the application’s configuration settings. - Define the General settings for the application:
- Repository URL: The URL to the repo in Git where you created the YAML resource files for the application.
- Revision: The branch in Git with the resource files.
- Path: The folder in Git with the resource files.
- Namespace: Optional. For the quick start, we’ll create a namespace for the application, entitled
quick-start. - Sync Policy: Change to Automatic, and select Prune resources to automatically remove unused resources.
- Sync Options: If you defined a namespace, select Auto-create namespace to ensure that the namespace is created if it doesn’t exist.
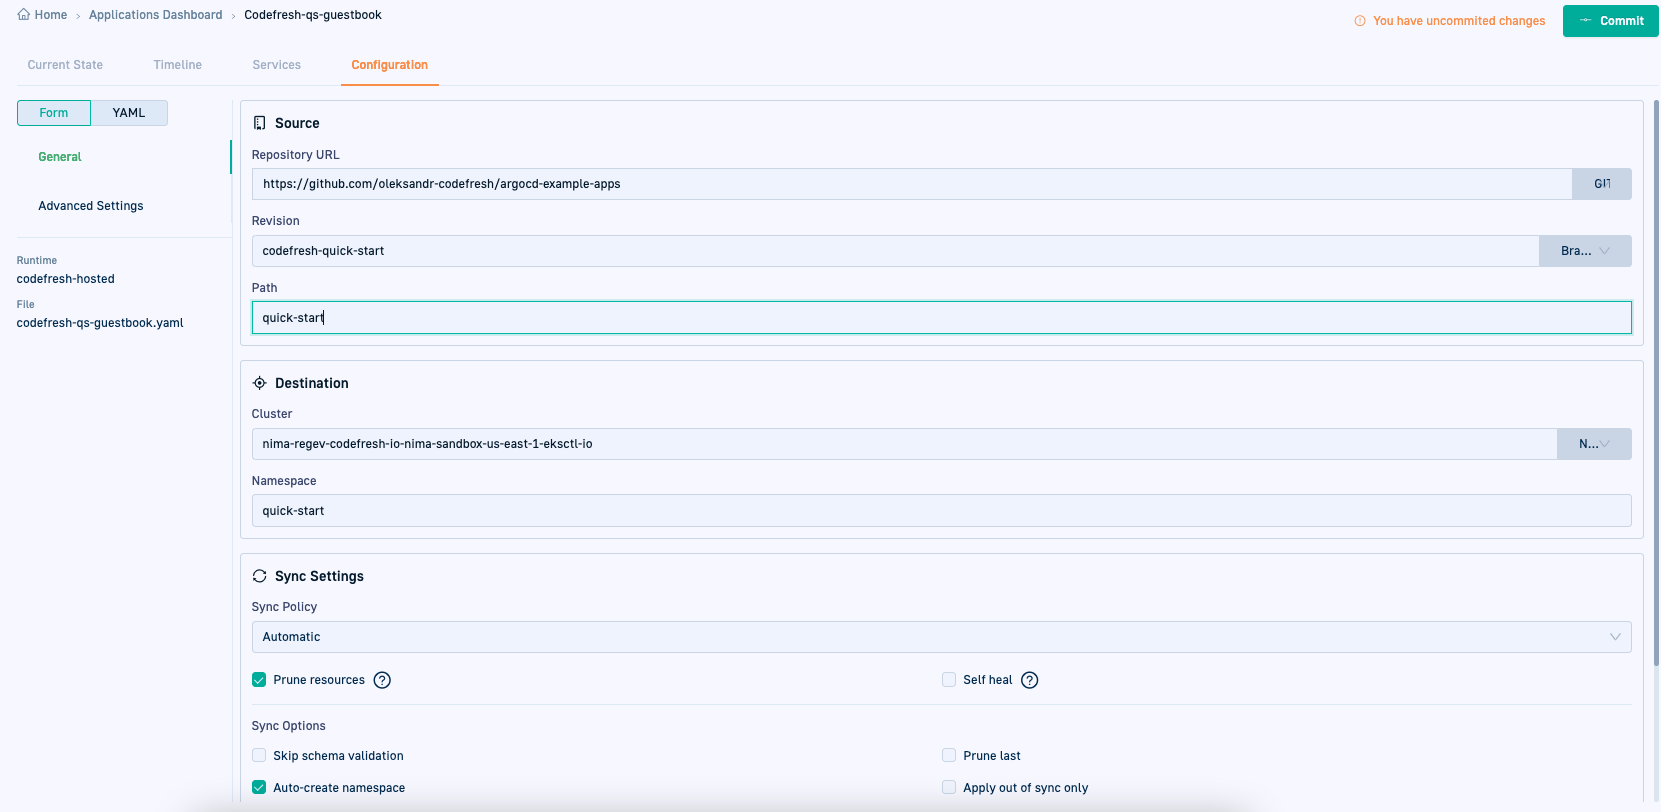
- Retain the default Advanced Settings.
- To commit all your changes, select Commit.
The Commit form is displayed with the application’s definitions on the left, and the read-only version of the manifest with the configuration settings you defined on the right. - Select the Git Source to which to commit.
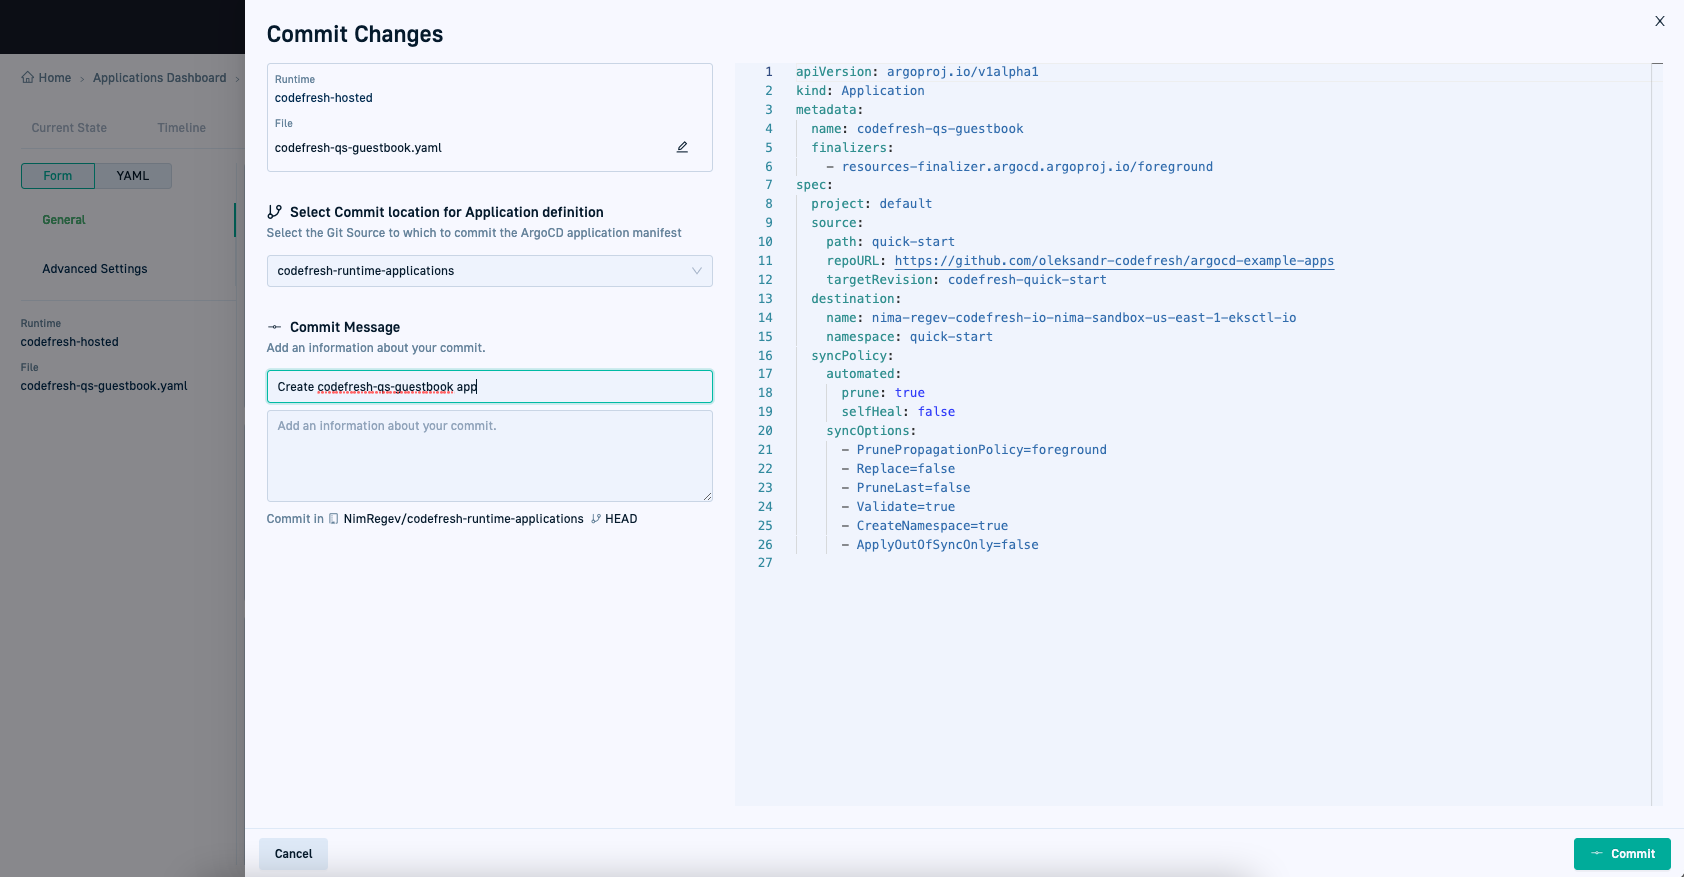
- Add a commit message and then select Commit at the bottom-right of the panel.
You are directed to the GitOps Apps dashboard.
You may have to wait for a few seconds until the application is synced to the cluster.
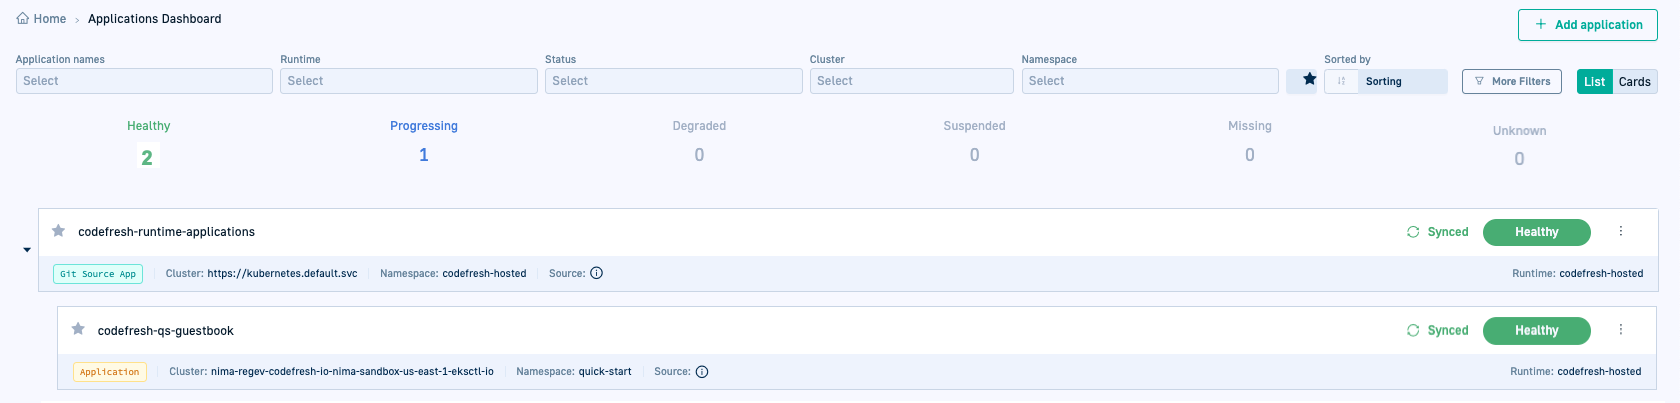
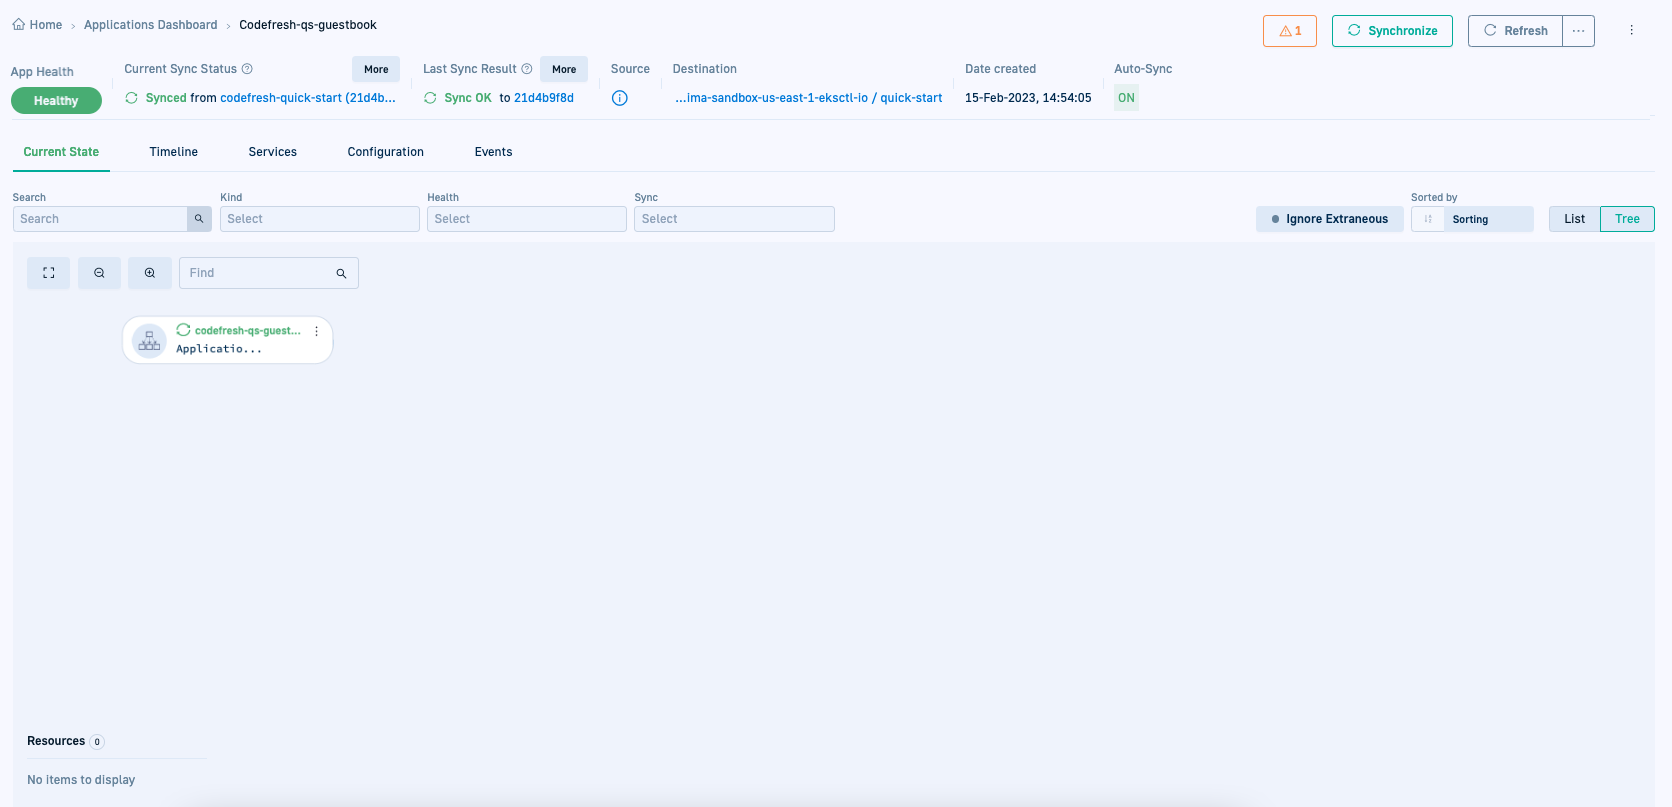
- Select the application. The Current State tab does not display any resources as we have not created any resources for the application.
In the next task, you will create and commit resources for the codefresh-guestbook application and deploy the application.
What to do next
Create and commit resources for codefresh-guestbook application